How to use KidBox
Everything you need to get the most out of KidBox — feature by feature, with app screenshots.
Have a question about how a feature works? Ask the AI Assistant directly inside the app — it knows KidBox in detail and can guide you step by step on anything.
Support handled by an AI agent. If something isn't working or you need help, the built-in support agent tries to resolve the issue in real time. If the situation requires human intervention, it guides you step by step to send an email to the KidBox team — whether it's a malfunction, a request for new features or a service not available.
Automatic malfunction reports. To help us improve the app, KidBox can send anonymous reports in case of errors or abnormal behaviour — only with your explicit authorisation. You can enable or disable this option at any time from Profile → Settings → Privacy → Diagnostic reports.
First login
From registration to your first configured family — it only takes a few minutes. You can sign in with Google, Apple, Facebook or email.
Search for "KidBox" or use the direct link on the main page. The app is free — some advanced features require a Pro or Max plan.
On the login screen you can choose between Google, Apple, Facebook or email + password. If you use "Sign in with Apple" your email address stays private.
On first login a series of introductory screens shows you what you can do with KidBox: chat, documents, health and expenses all in one place.
You can create a new family and invite your partner (or other relatives) via link or code, or enter a code received from someone to join their family.
Add your name, photo and basic information. You can do this now or skip it and return later from Profile → Settings.
To invite your partner, go to Profile → Family → Invite member. They will receive a notification with a direct link to join your family.
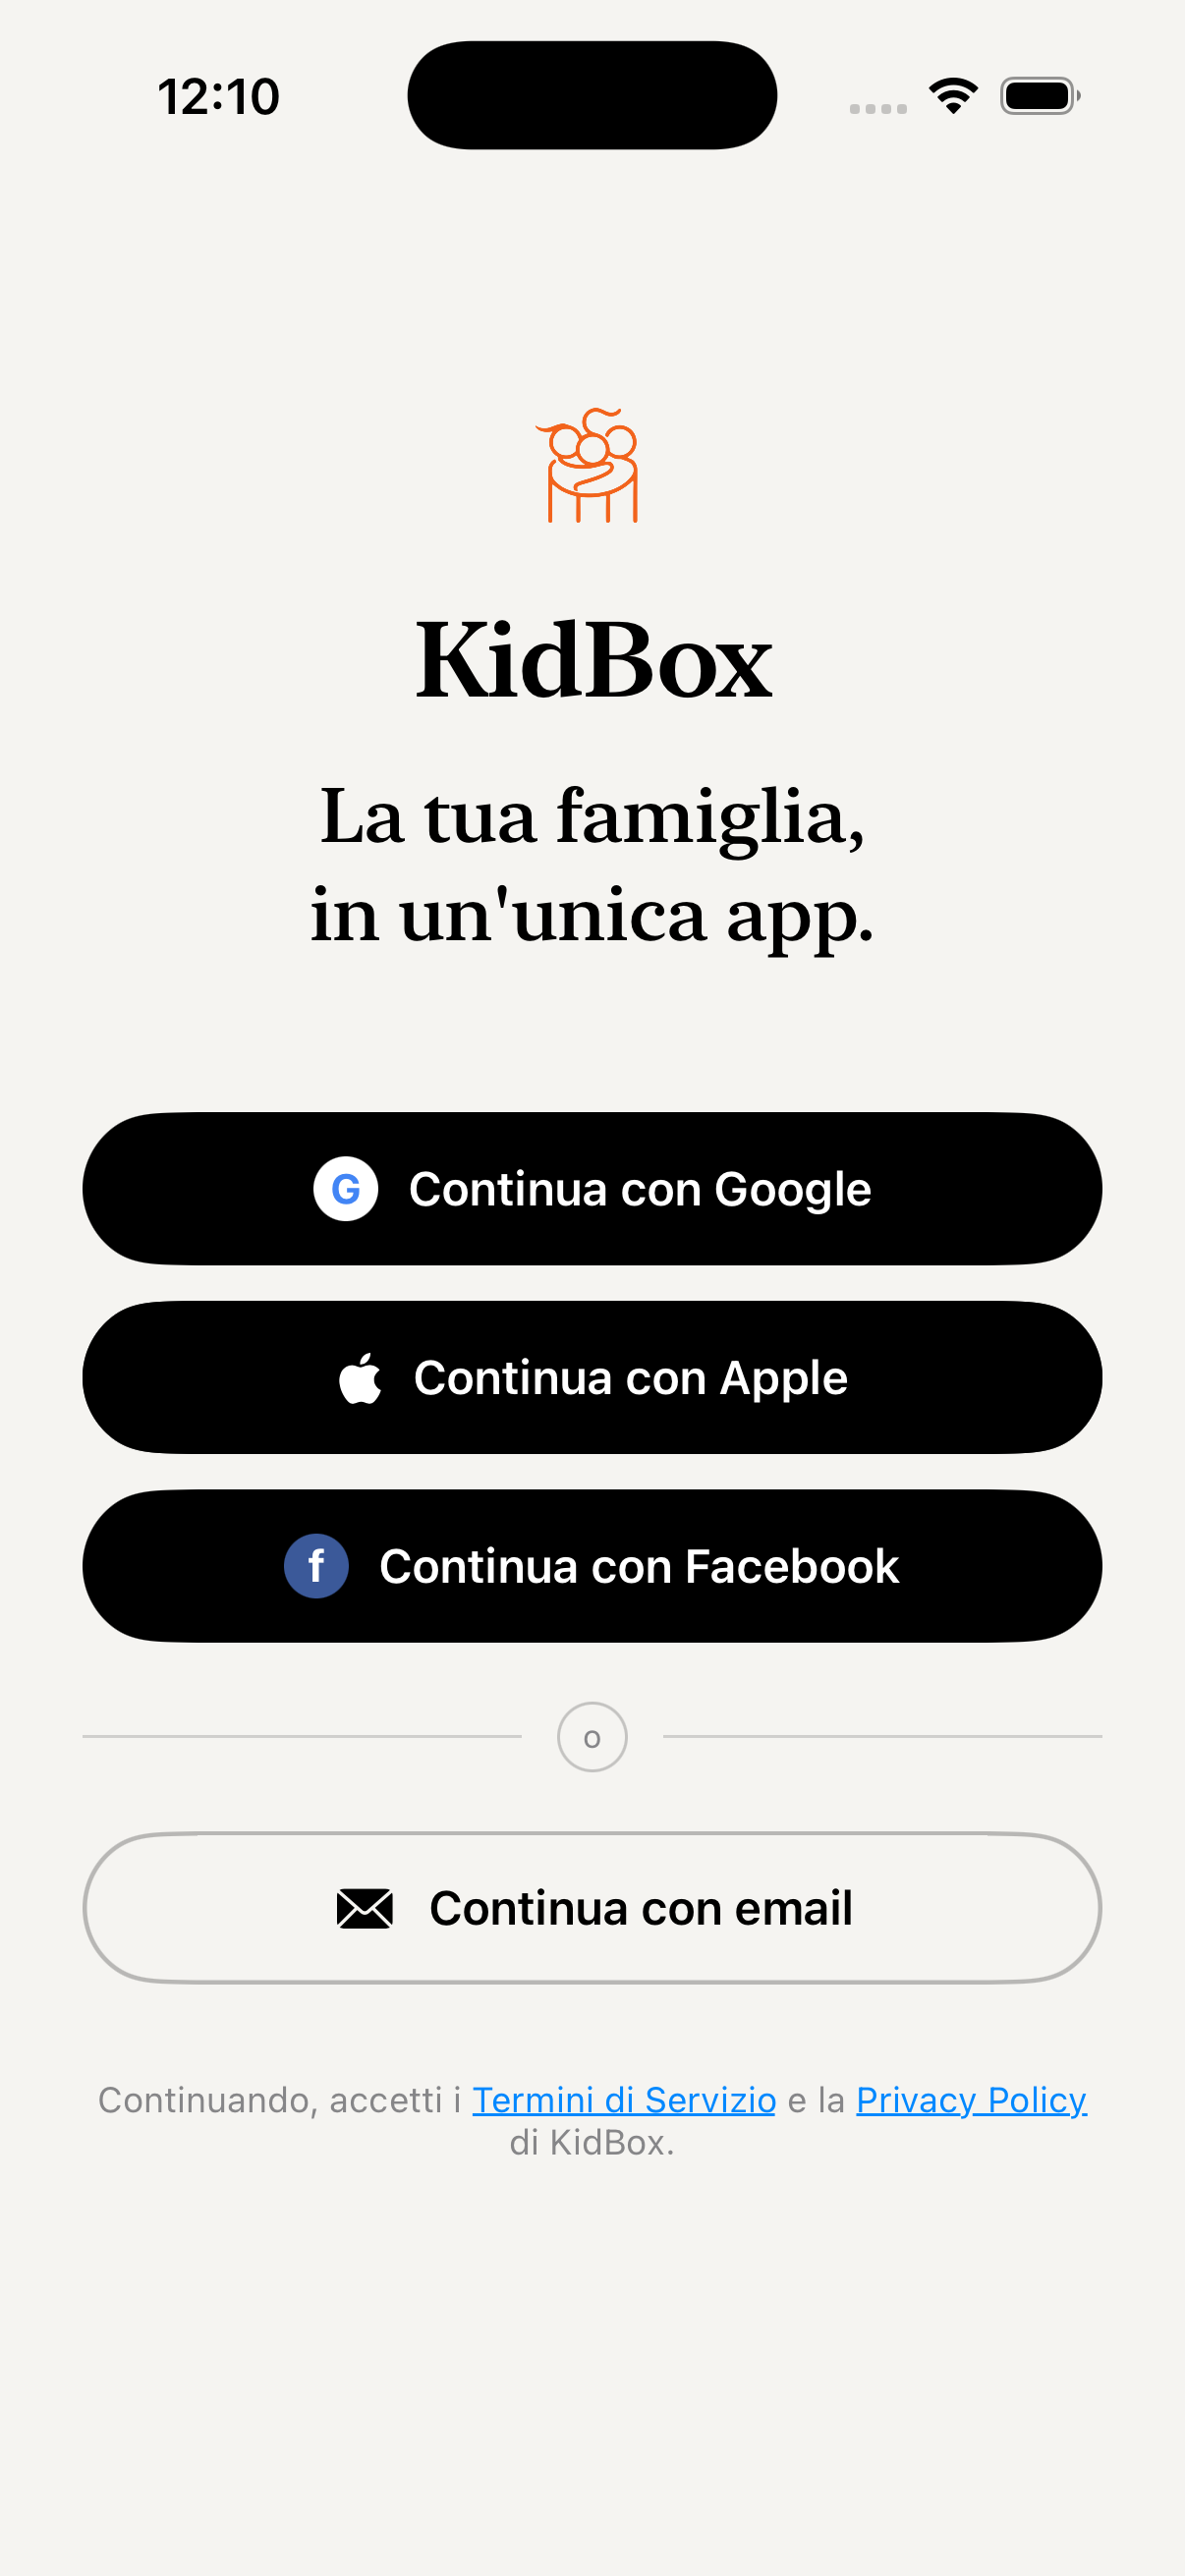
Sign in with Google, Apple, Facebook or email
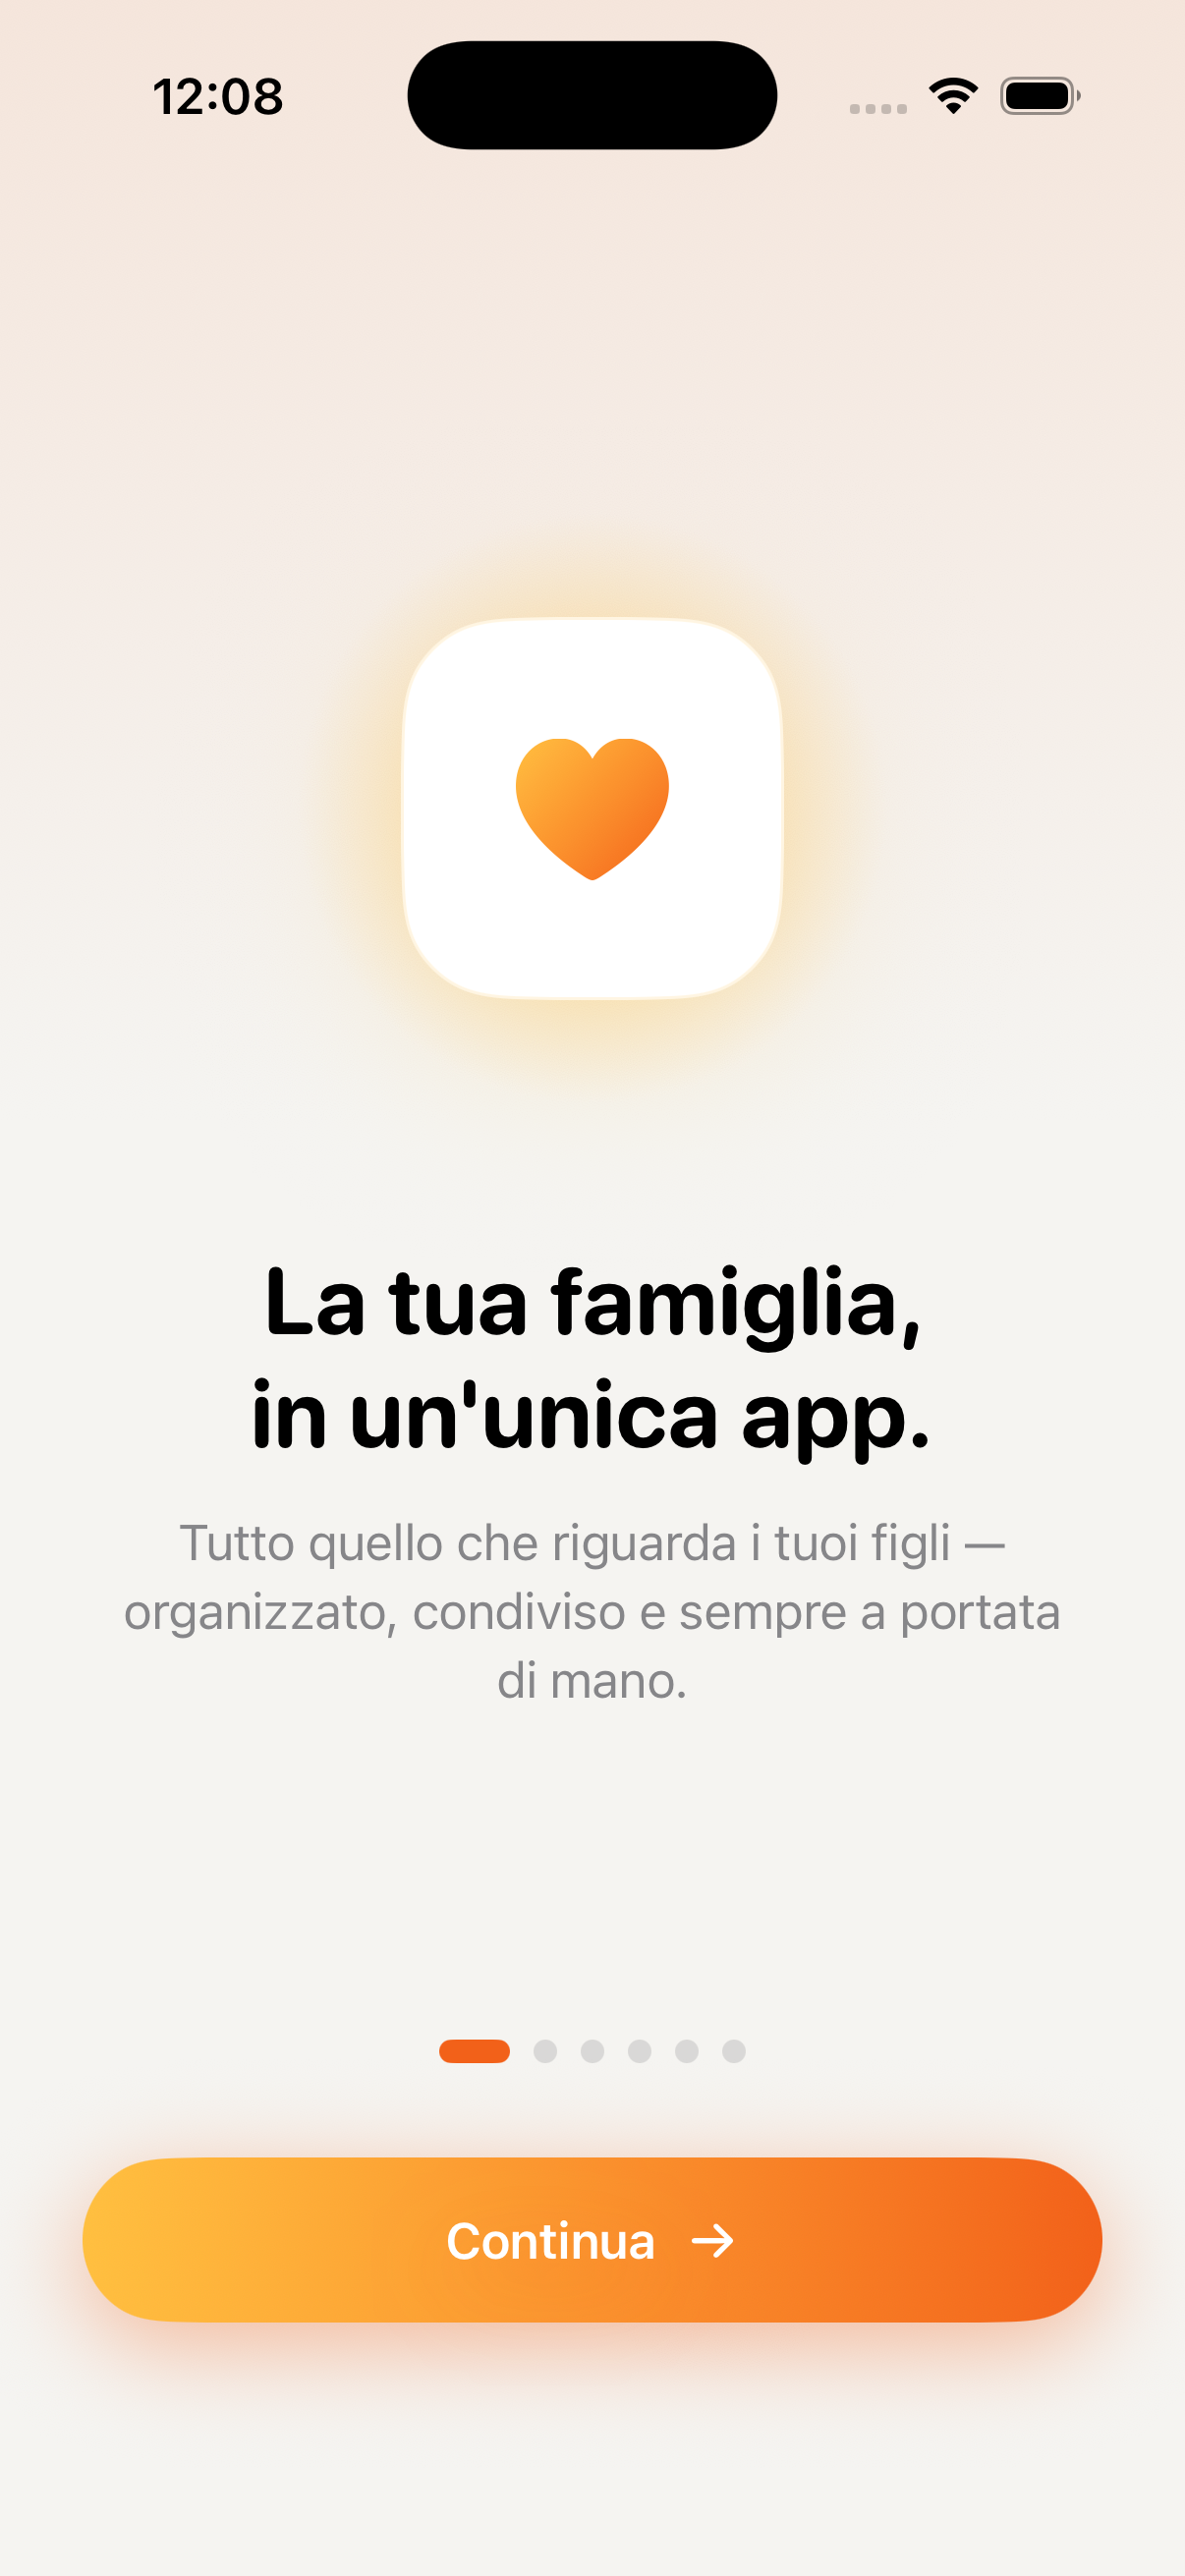
Your family, in one app
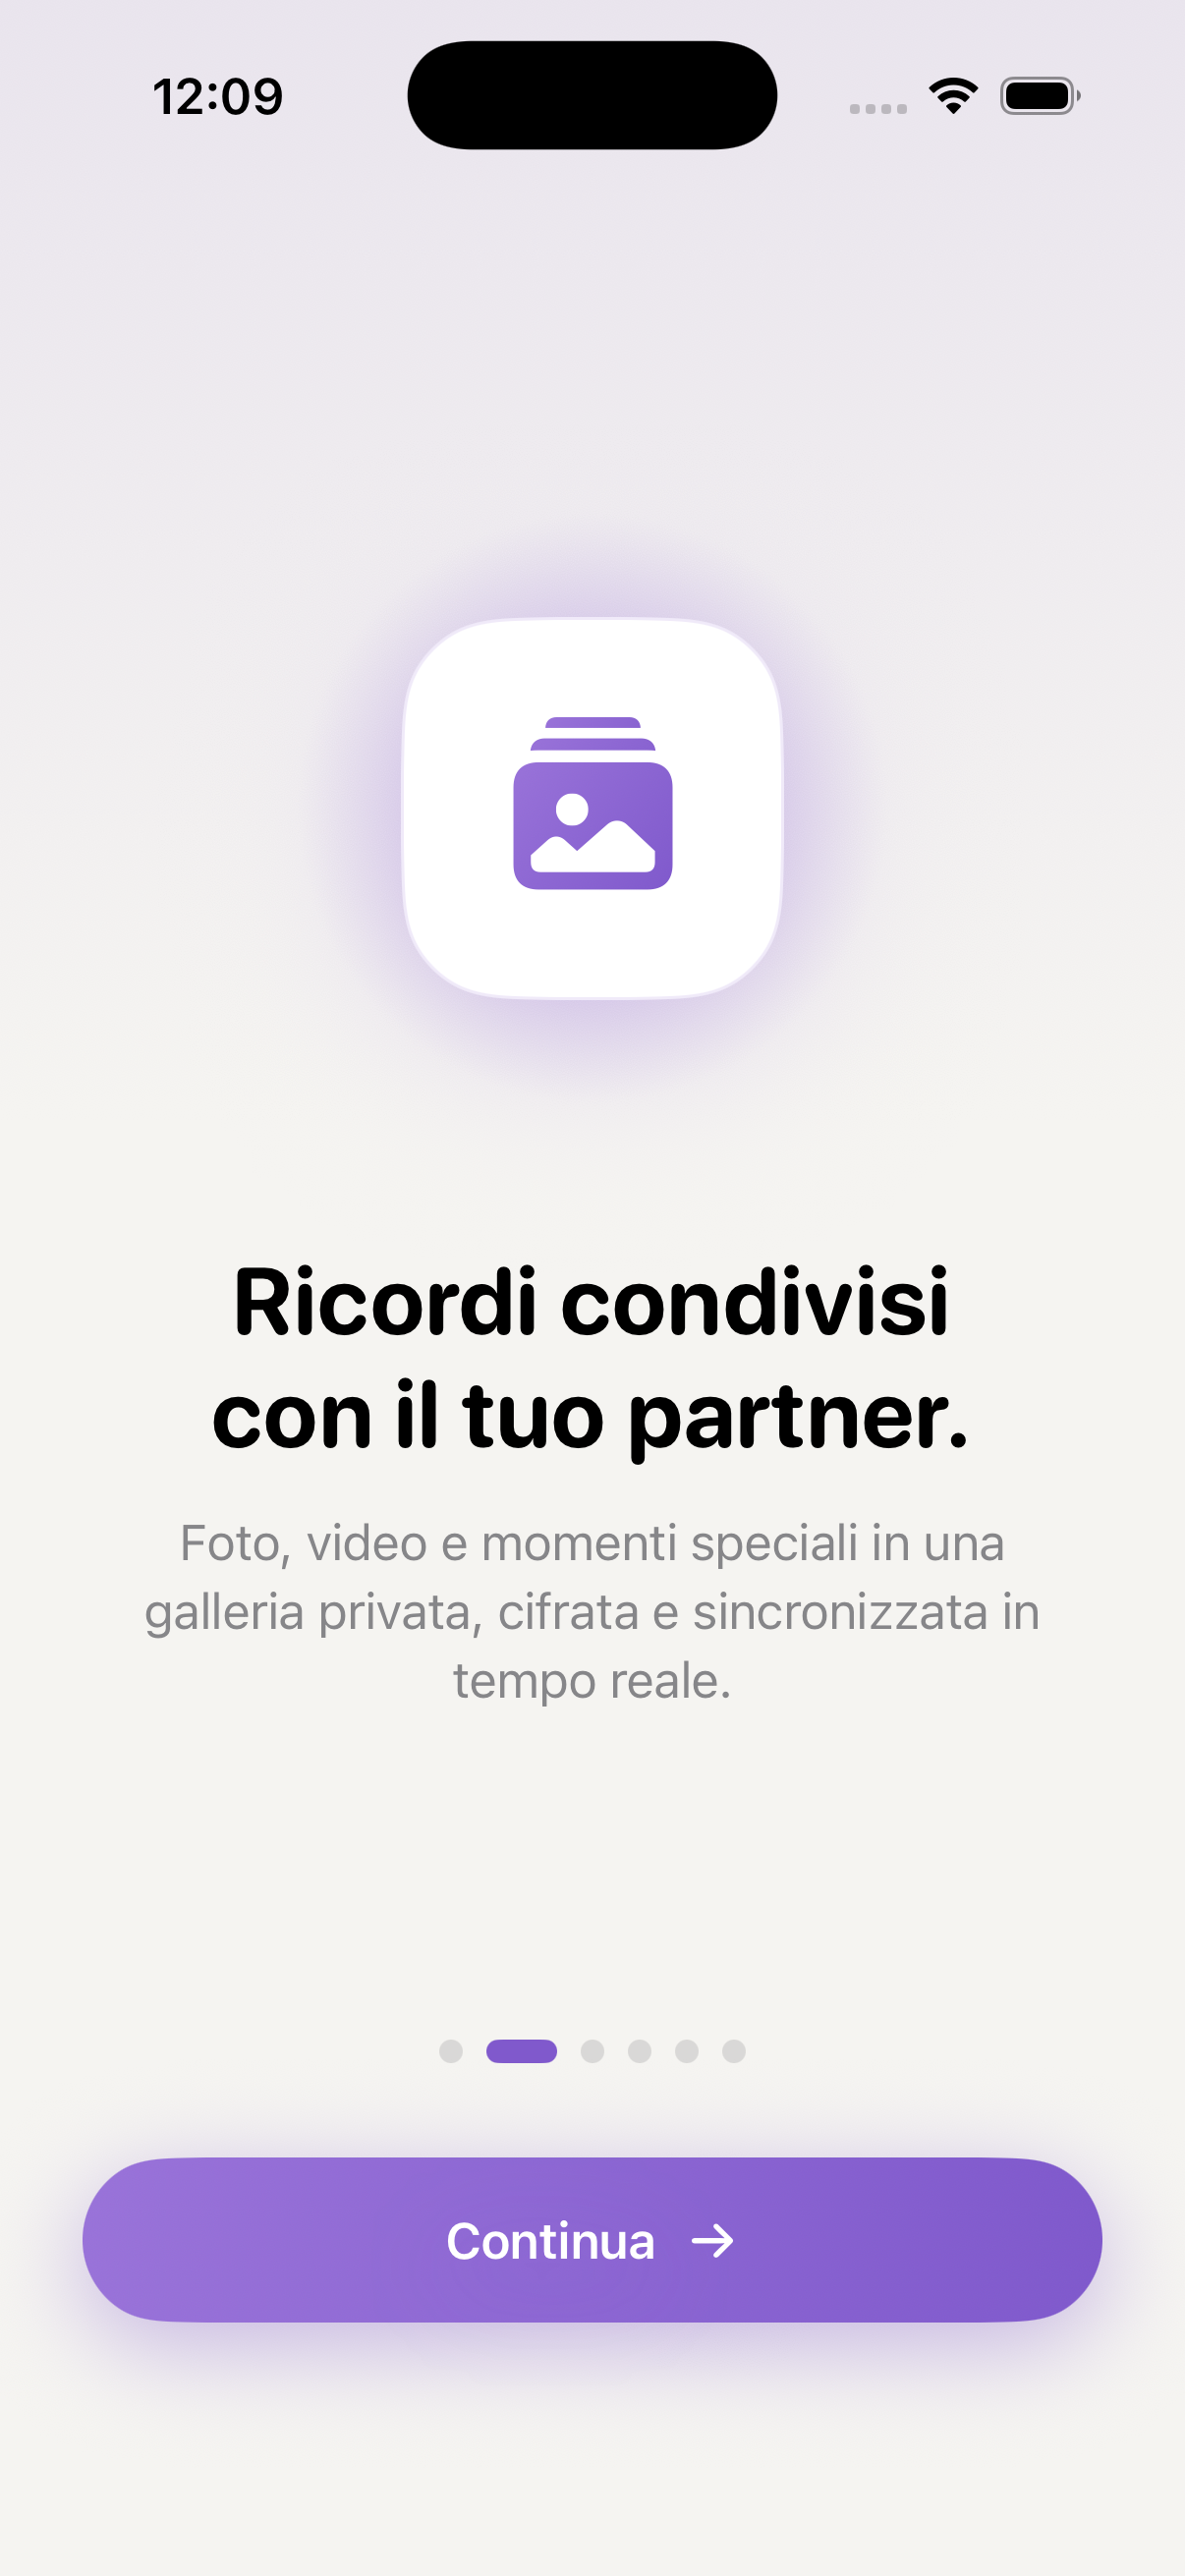
Shared memories with your partner
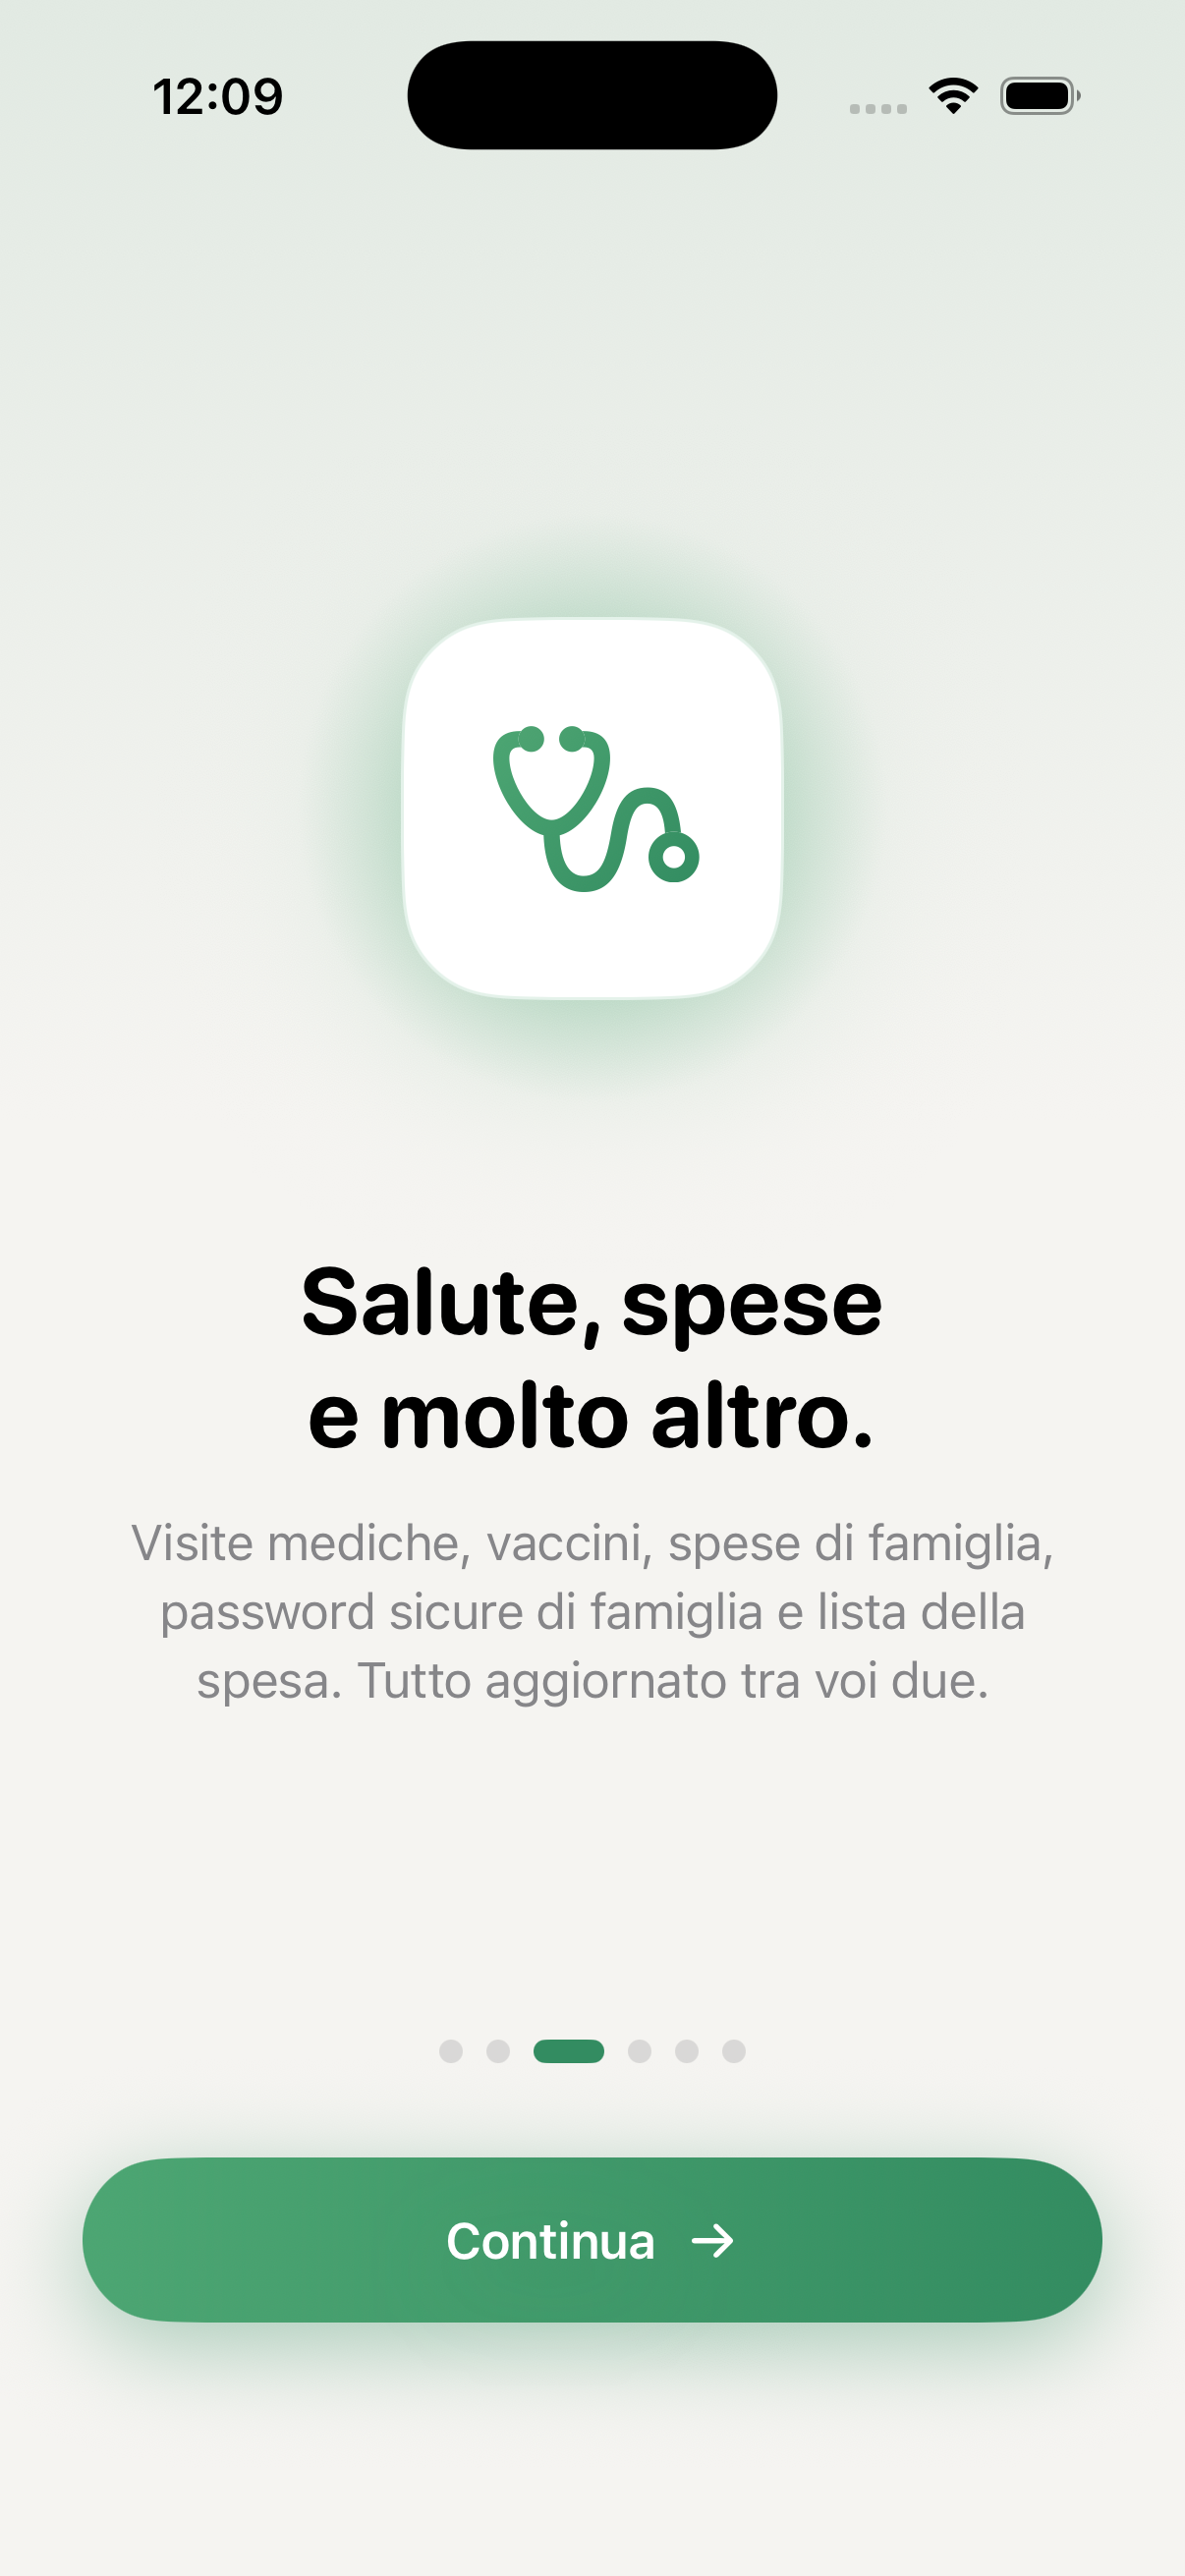
Health, expenses and much more
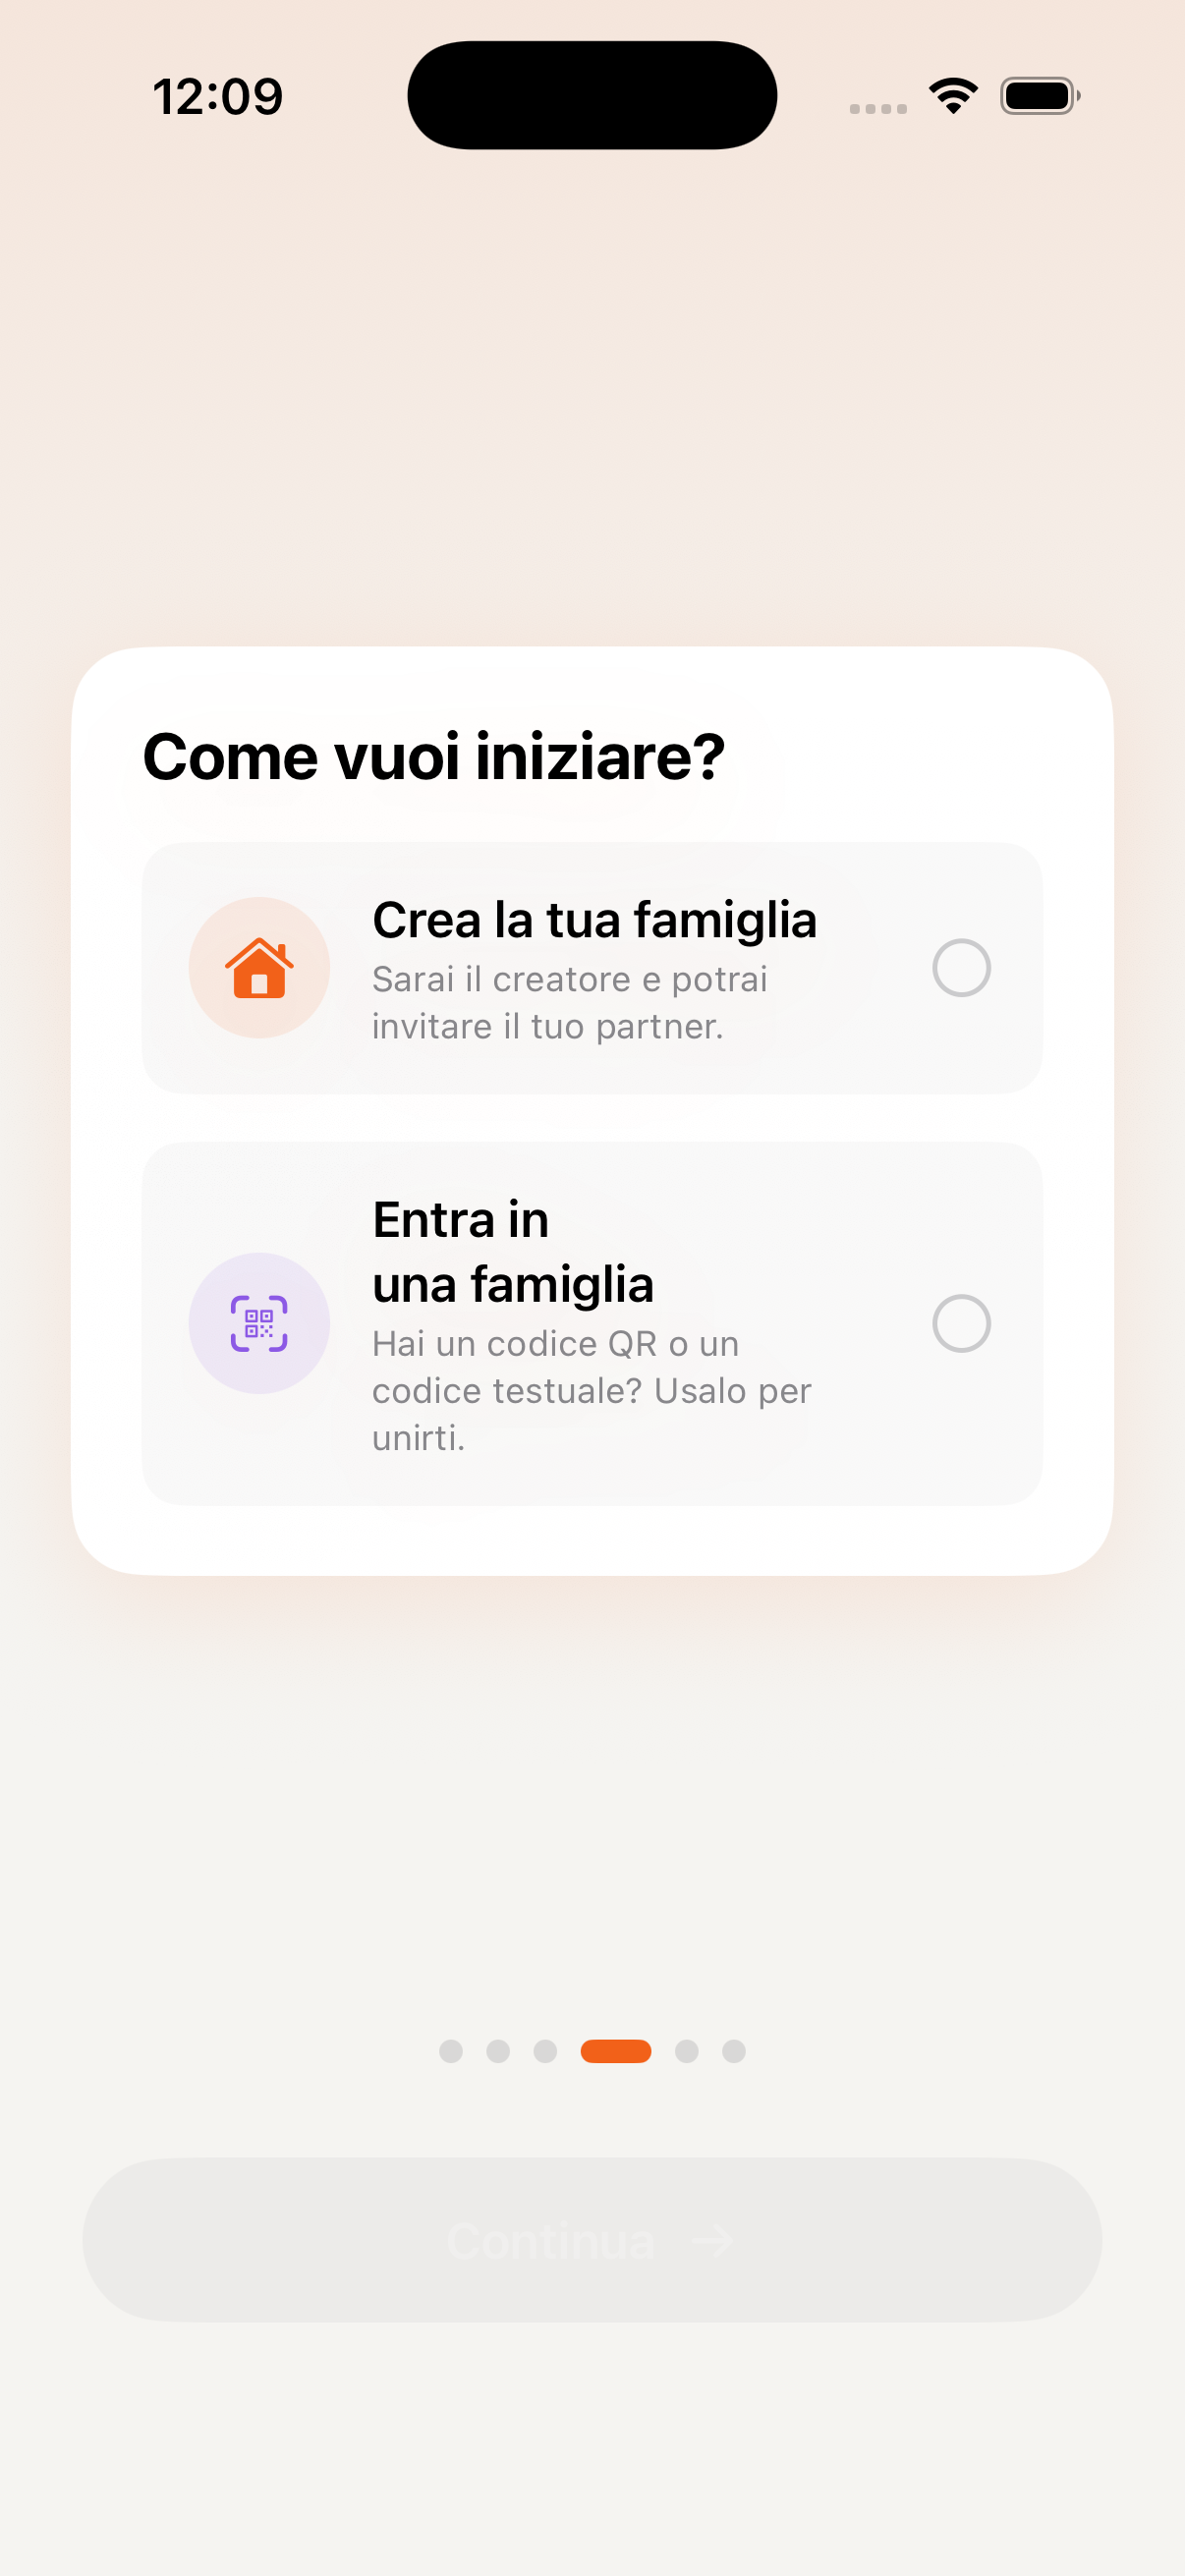
Create or join a family

Set up your profile
Home & Dashboard
The main KidBox screen is your control centre: a quick overview of everything that matters for the family today — events, reminders, health and AI agent notifications.
When you open the app you immediately see today's events, upcoming to-dos and any updates from family members. Everything in a single scroll, without having to open section by section.
Every card on the home screen is tappable and takes you directly to the corresponding section. Tap an event card to open the calendar, a health card for the child's profile details, and so on.
If La Mente Proattiva has detected something important — an upcoming deadline, a vaccine due, a reminder — you'll find it highlighted on the home screen with a dedicated orange card.
Use the bottom bar to move between the main sections: Home, Chat, AI, Health, and the "More" menu to access Calendar, Todo, Expenses, Wallet, Documents and Passwords.
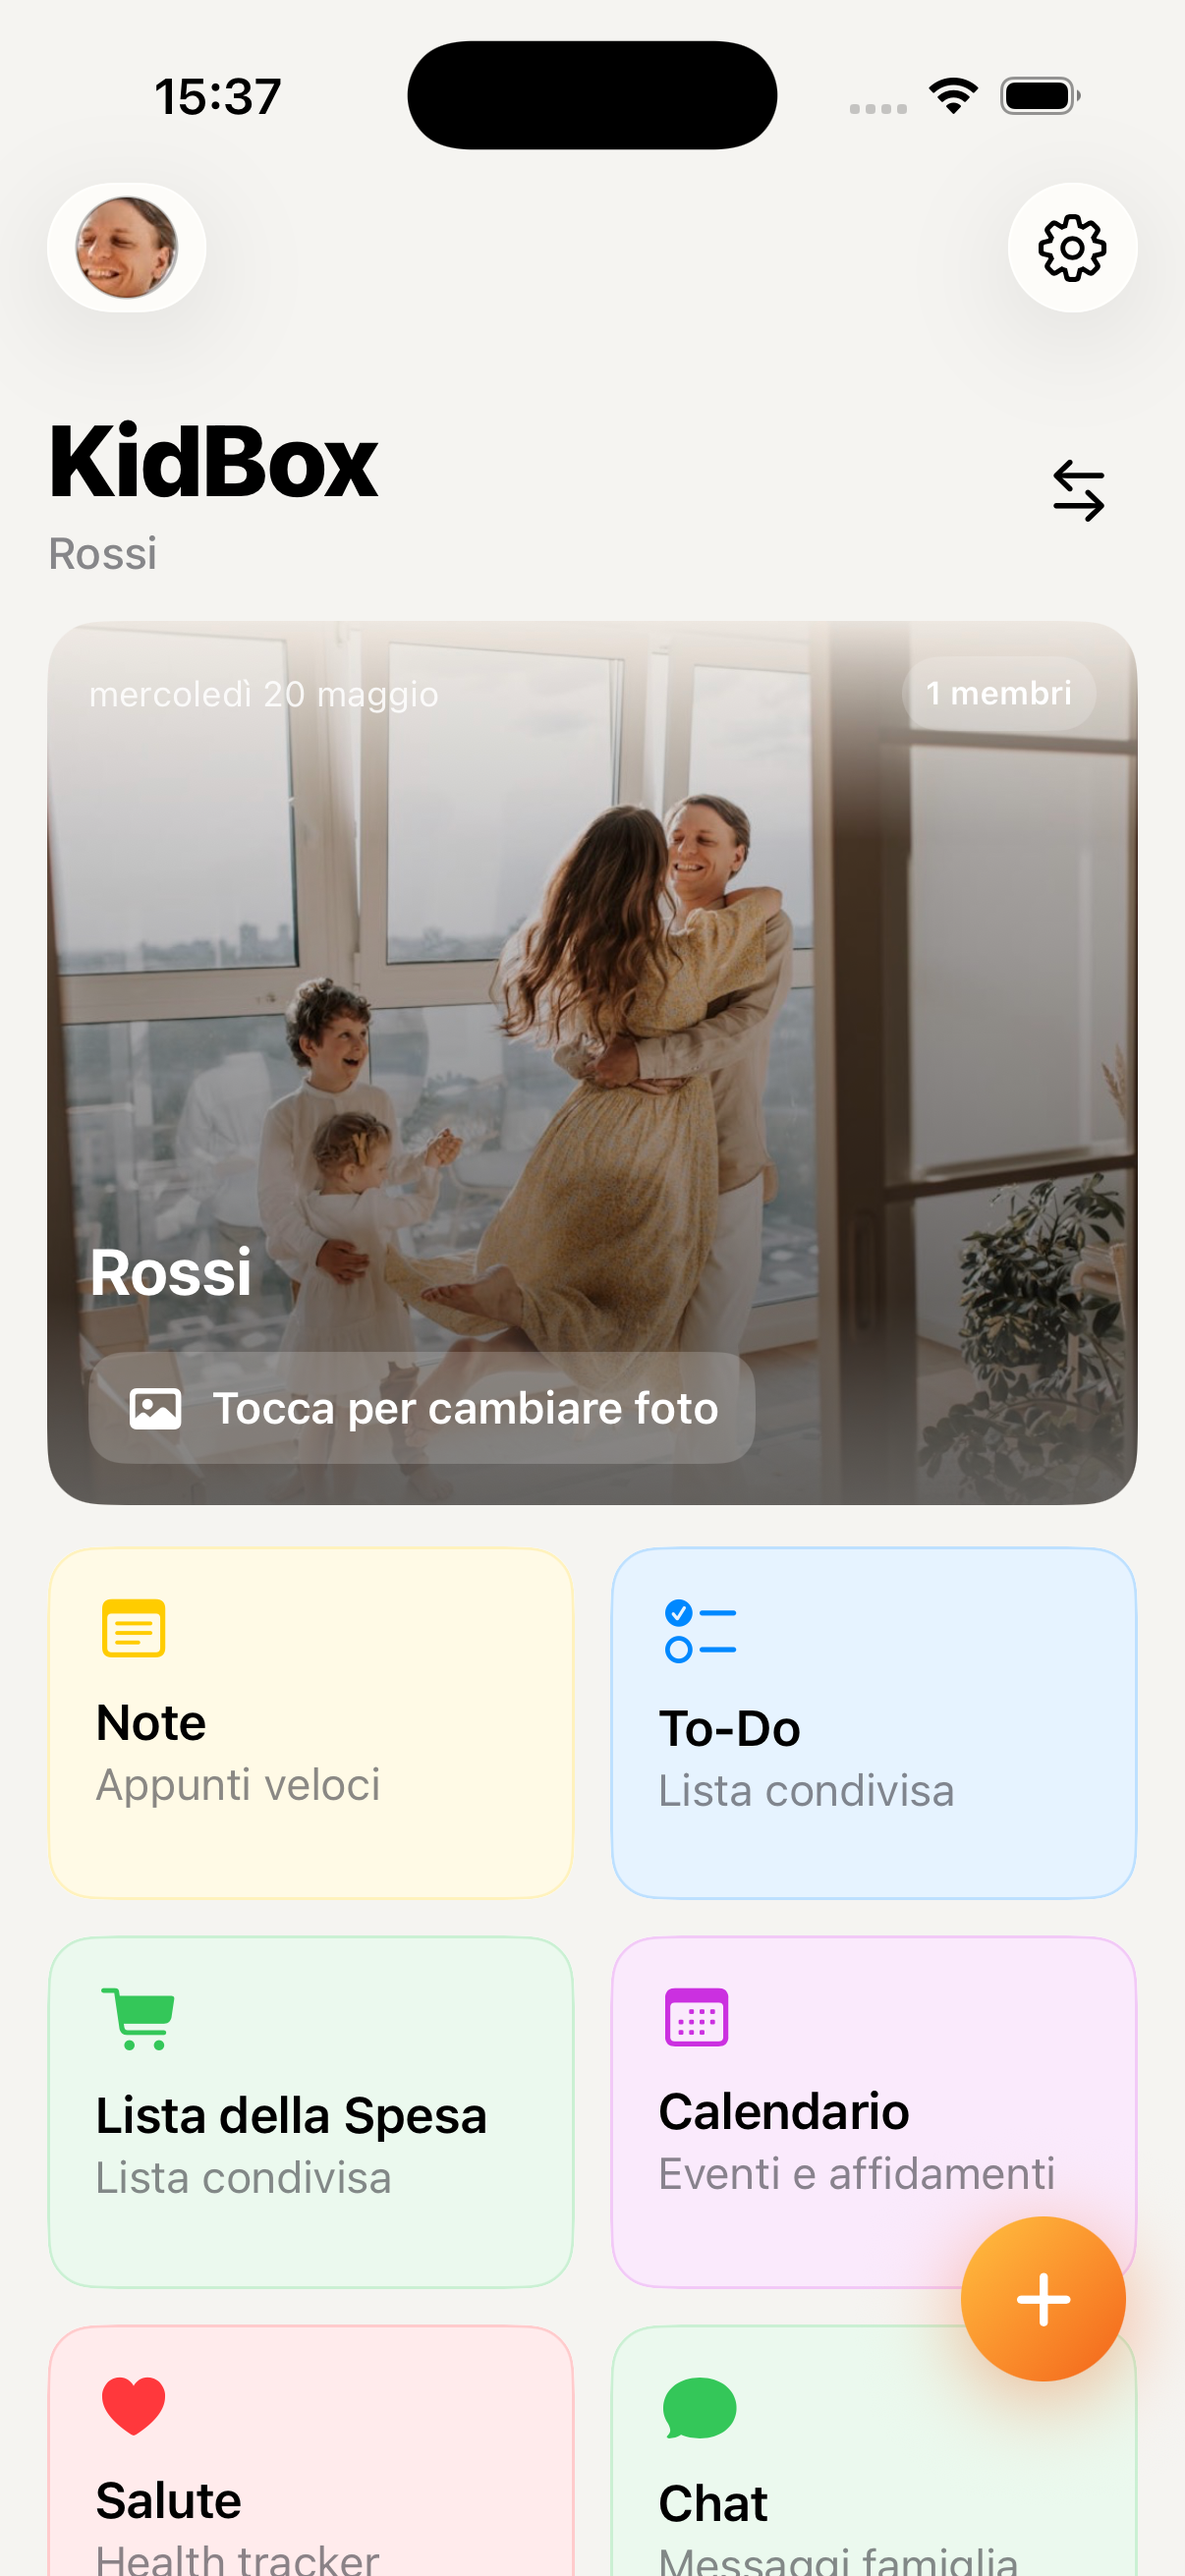
Main dashboard with today's overview
Interactive cards and family updates
Family chat
Encrypted private and group messages, visible only to your family members. You can share text, photos, documents and location.
Tap the 💬 icon in the bottom bar. You'll immediately find the family group chat and private conversations with each member.
Tap the desired chat, type in the field at the bottom and press Send. Messages arrive in real time with a push notification on all family members' devices.
Tap the + icon next to the text field to attach photos from the library, take a photo, send a document or share your real-time location.
Tap + at the top right to open a private chat with a specific family member or to create a new themed group.
Chat list
Conversations list
Group chat
Family group chat
Media sharing
Photo and file sharing
AI agents
KidBox has four AI agents who know your family: L'Assistente di Famiglia, Il Consulente di Salute, Il Pianificatore di Viaggi and La Mente Proattiva.
Tap the 🧠 icon in the bottom bar. You'll find the four available agents — each specialises in a different area of family life.
Write in natural language, as you would in a message. For example: "Which vaccines does Sofia still need?" or "Create a shopping list for the weekend" or "Plan a weekend in Rome for 4 people".
The agents don't just answer — they can create calendar events, add to-dos, record a medical visit or fill in a note. Every action is shown before it's carried out.
La Mente Proattiva sends you a summary every morning of the day's commitments, upcoming deadlines and personalised reminders for the whole family.
The AI agents remember previous conversations and learn your family's habits over time. The more you use them, the more accurate they become.
Family assistant
L'Assistente di Famiglia
AI chat
Conversation with the AI
Automatic actions
Actions carried out by the AI
Morning briefing
Morning briefing
Health & Paediatrics
Track medical visits, tests, vaccines, treatments and reports for every family member. The AI helps you interpret data in plain language.
Tap the 🩺 icon in the bottom bar. You'll find an overview with the health profiles of every family member — children and adults shown separately.
Tap + New visit, select the family member, enter date, specialist, diagnosis and notes. You can attach the report as a PDF or photo.
In the Vaccines section you'll find the vaccination schedule showing vaccines already done and those still due. For medications you can set reminders for administration.
Tap the Ask the AI button to receive plain-language explanations of tests or to find out whether the report values are within normal range. The AI has access to the family's medical history to provide context.
AI responses are informational and do not replace the advice of a doctor. For any clinical concern always consult your paediatrician or GP.
Health home
Health overview
Medical visits
Medical visits
Vaccines
Vaccine record
AI health advisor
AI health advisor
Calendar
All family commitments in a single shared calendar, synchronized in real time across all devices. Each member has their own colour, so at a glance you know whose event it is.
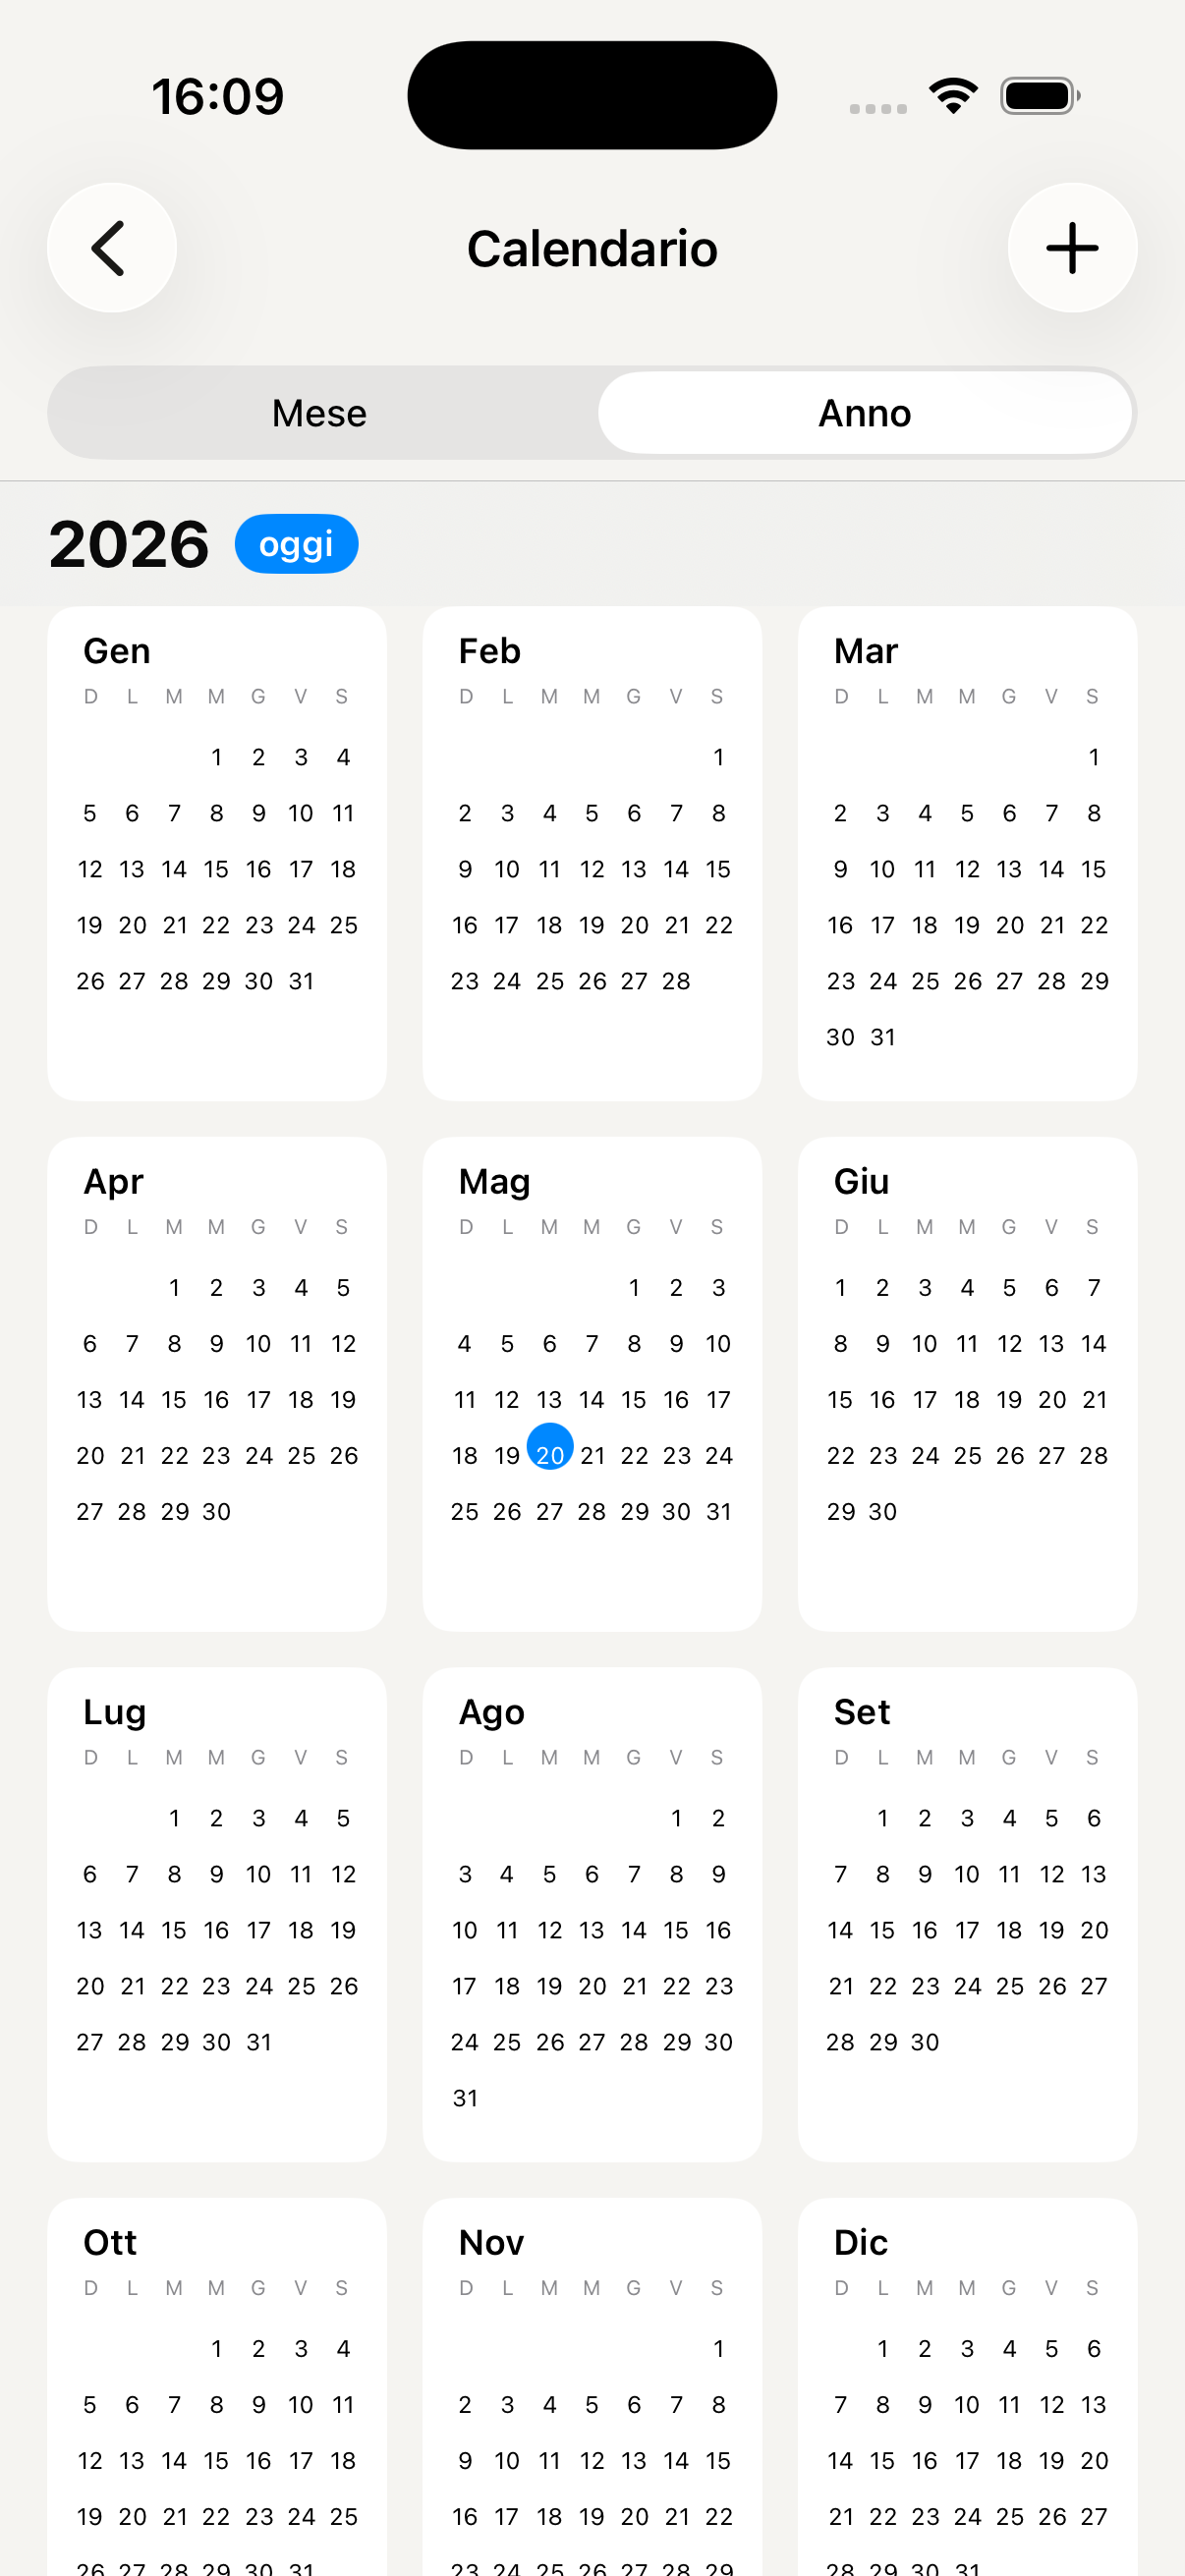
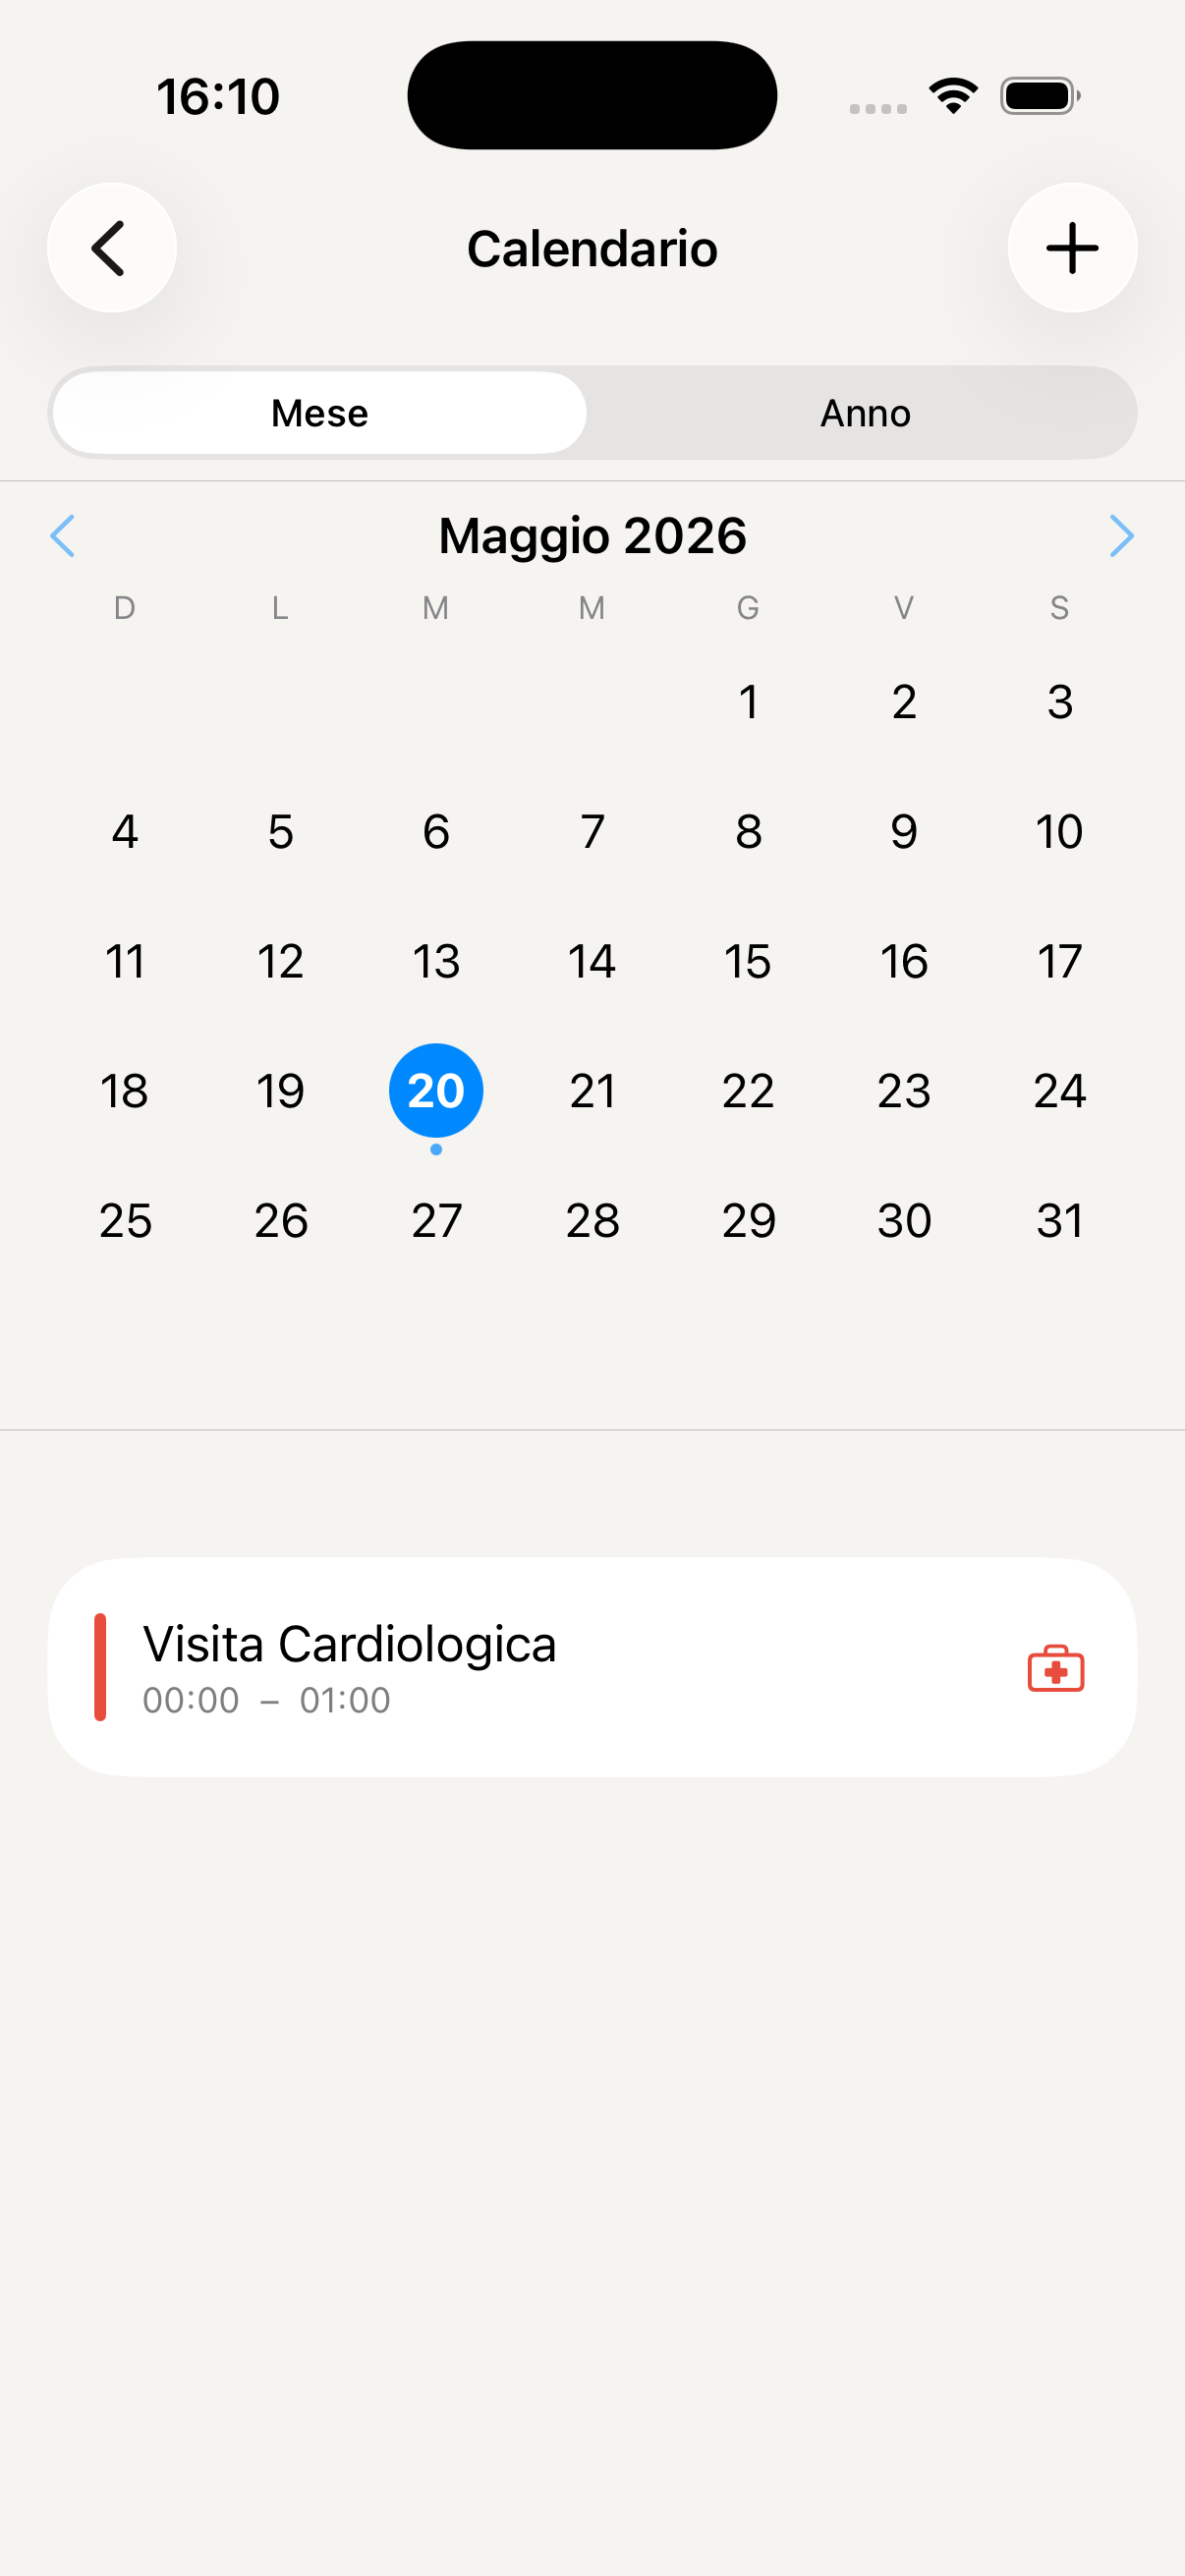
Access the Calendar from the "More" menu in the bottom bar. The default view is monthly — days with events are marked with a coloured dot for each family member involved.
You can switch from the monthly to the weekly or daily view by tapping the buttons at the top. The daily view shows the precise times of all the day's commitments in a timeline.
Tap + at the top right or long-press on a day. Enter the title, date, start and end time, location and an optional description. Select which family members to include in the event — they will receive a notification.
For each event you can add one or more reminders (e.g. 1 day before, 2 hours before, 15 minutes before). If the event repeats — weekly training, monthly meeting — activate the recurrence and KidBox will manage it automatically.
Tap an event to open the detail, then tap Edit to change the time, participants or other details. For recurring events you can choose whether to modify only the selected one or all future occurrences.
In L'Assistente di Famiglia you can say "Add a dentist appointment for Sofia on Friday at 4:30 pm" or "What do I have on this week?" — the AI creates, reads and organises events for you.
Events created in the Health section (medical visits, vaccines) automatically appear in the calendar with a dedicated 🩺 icon — everything is connected.
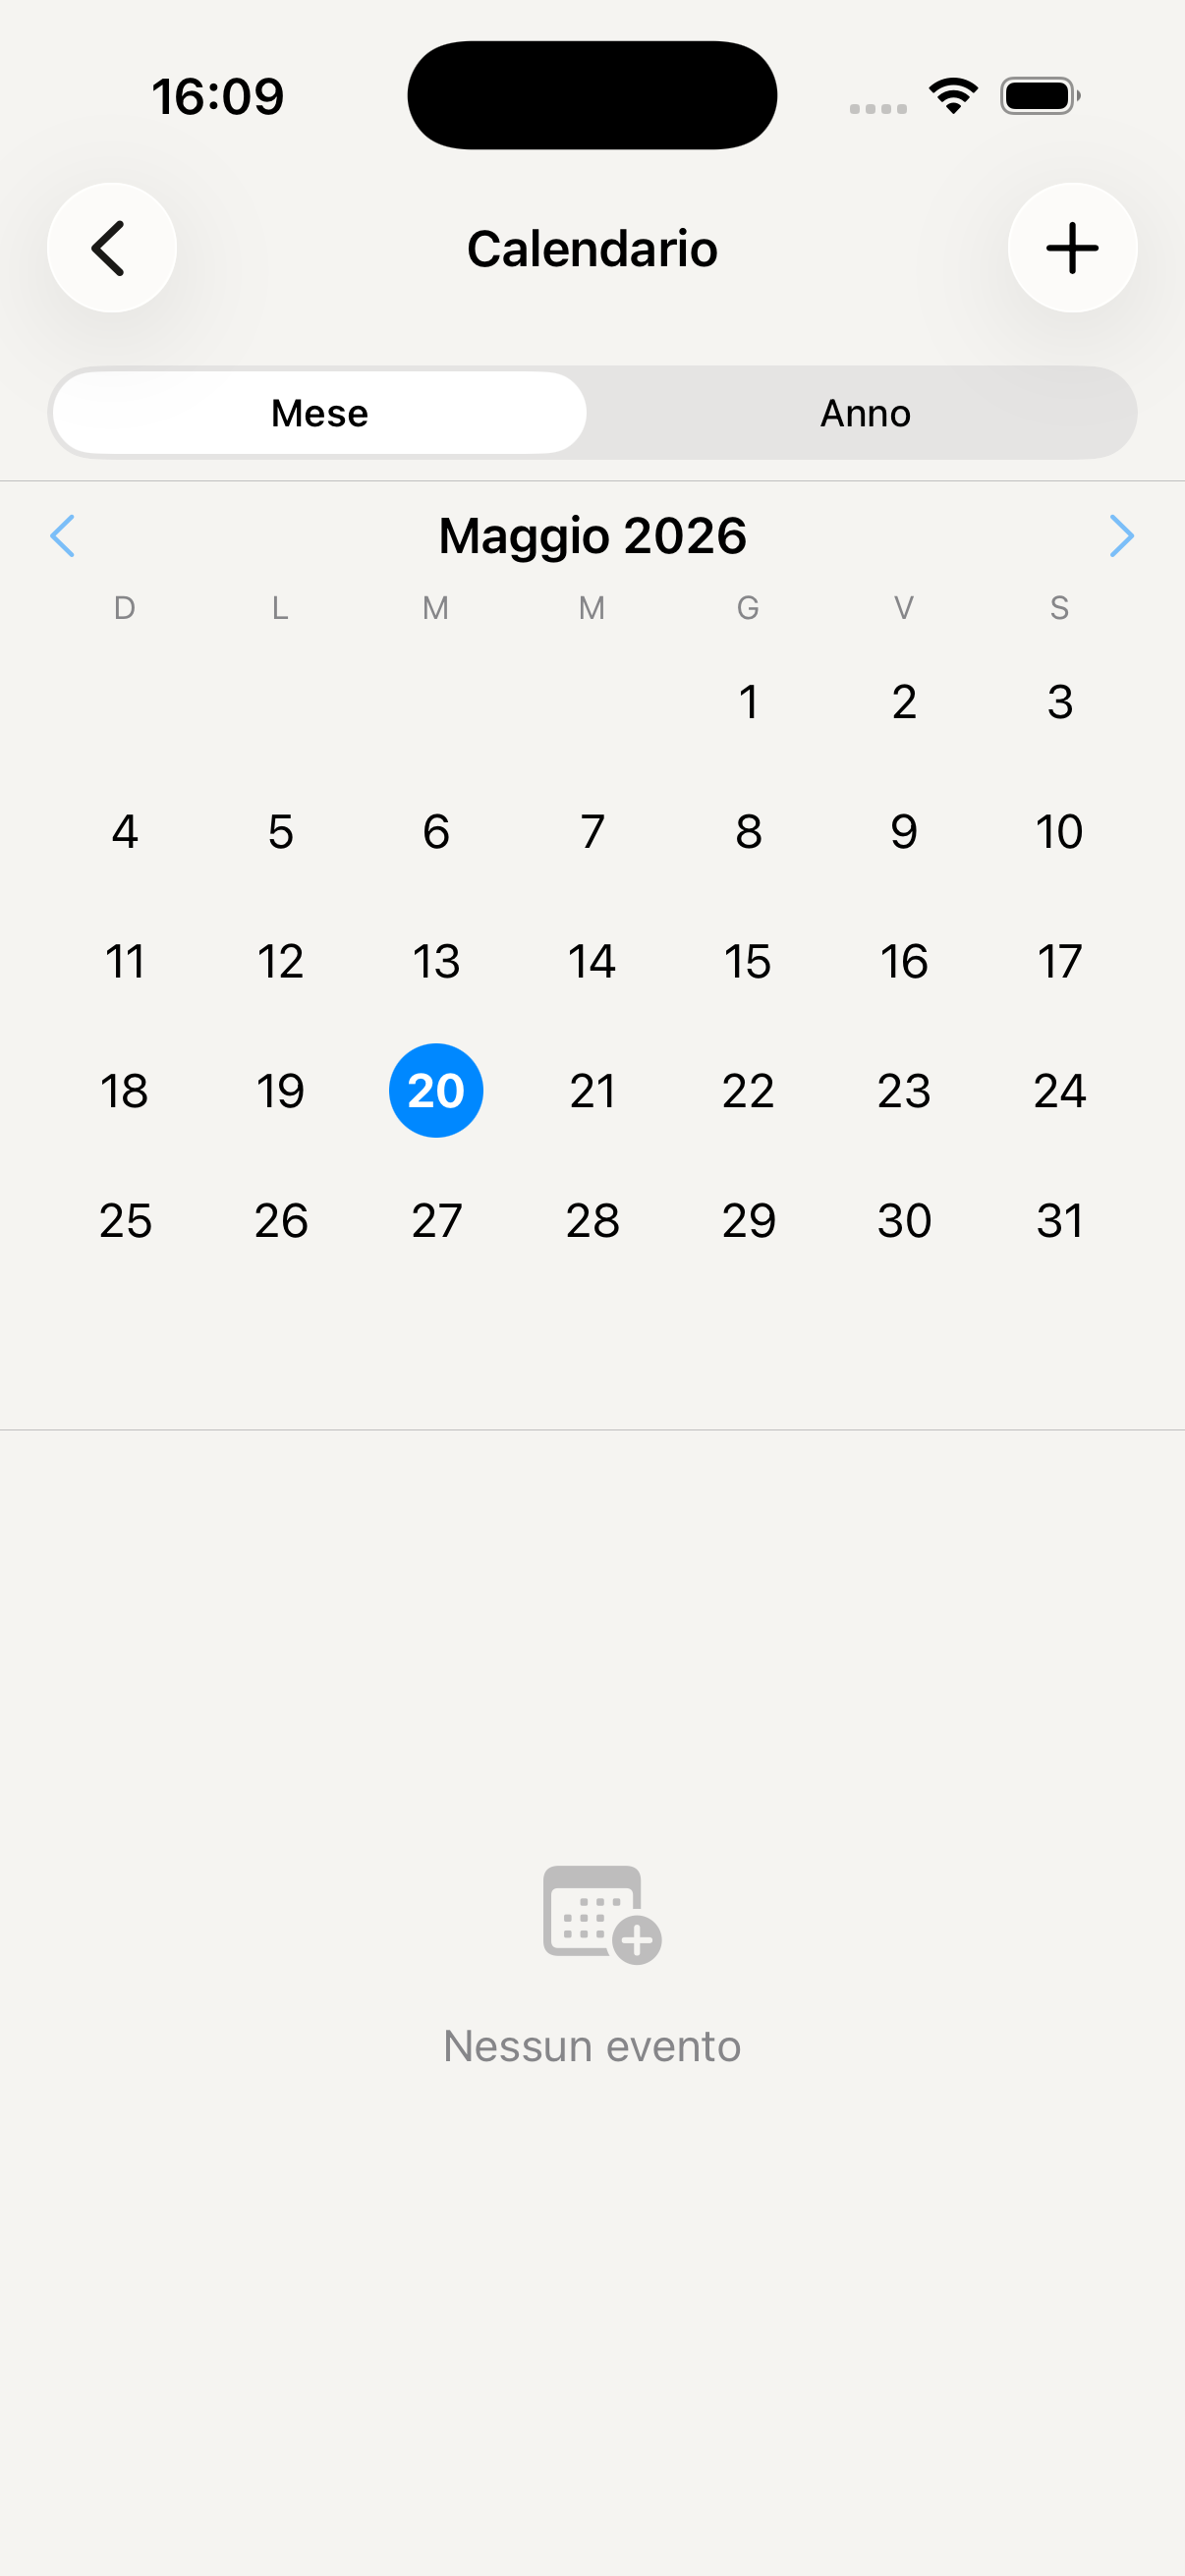
Monthly view with family events
Weekly view with timeline
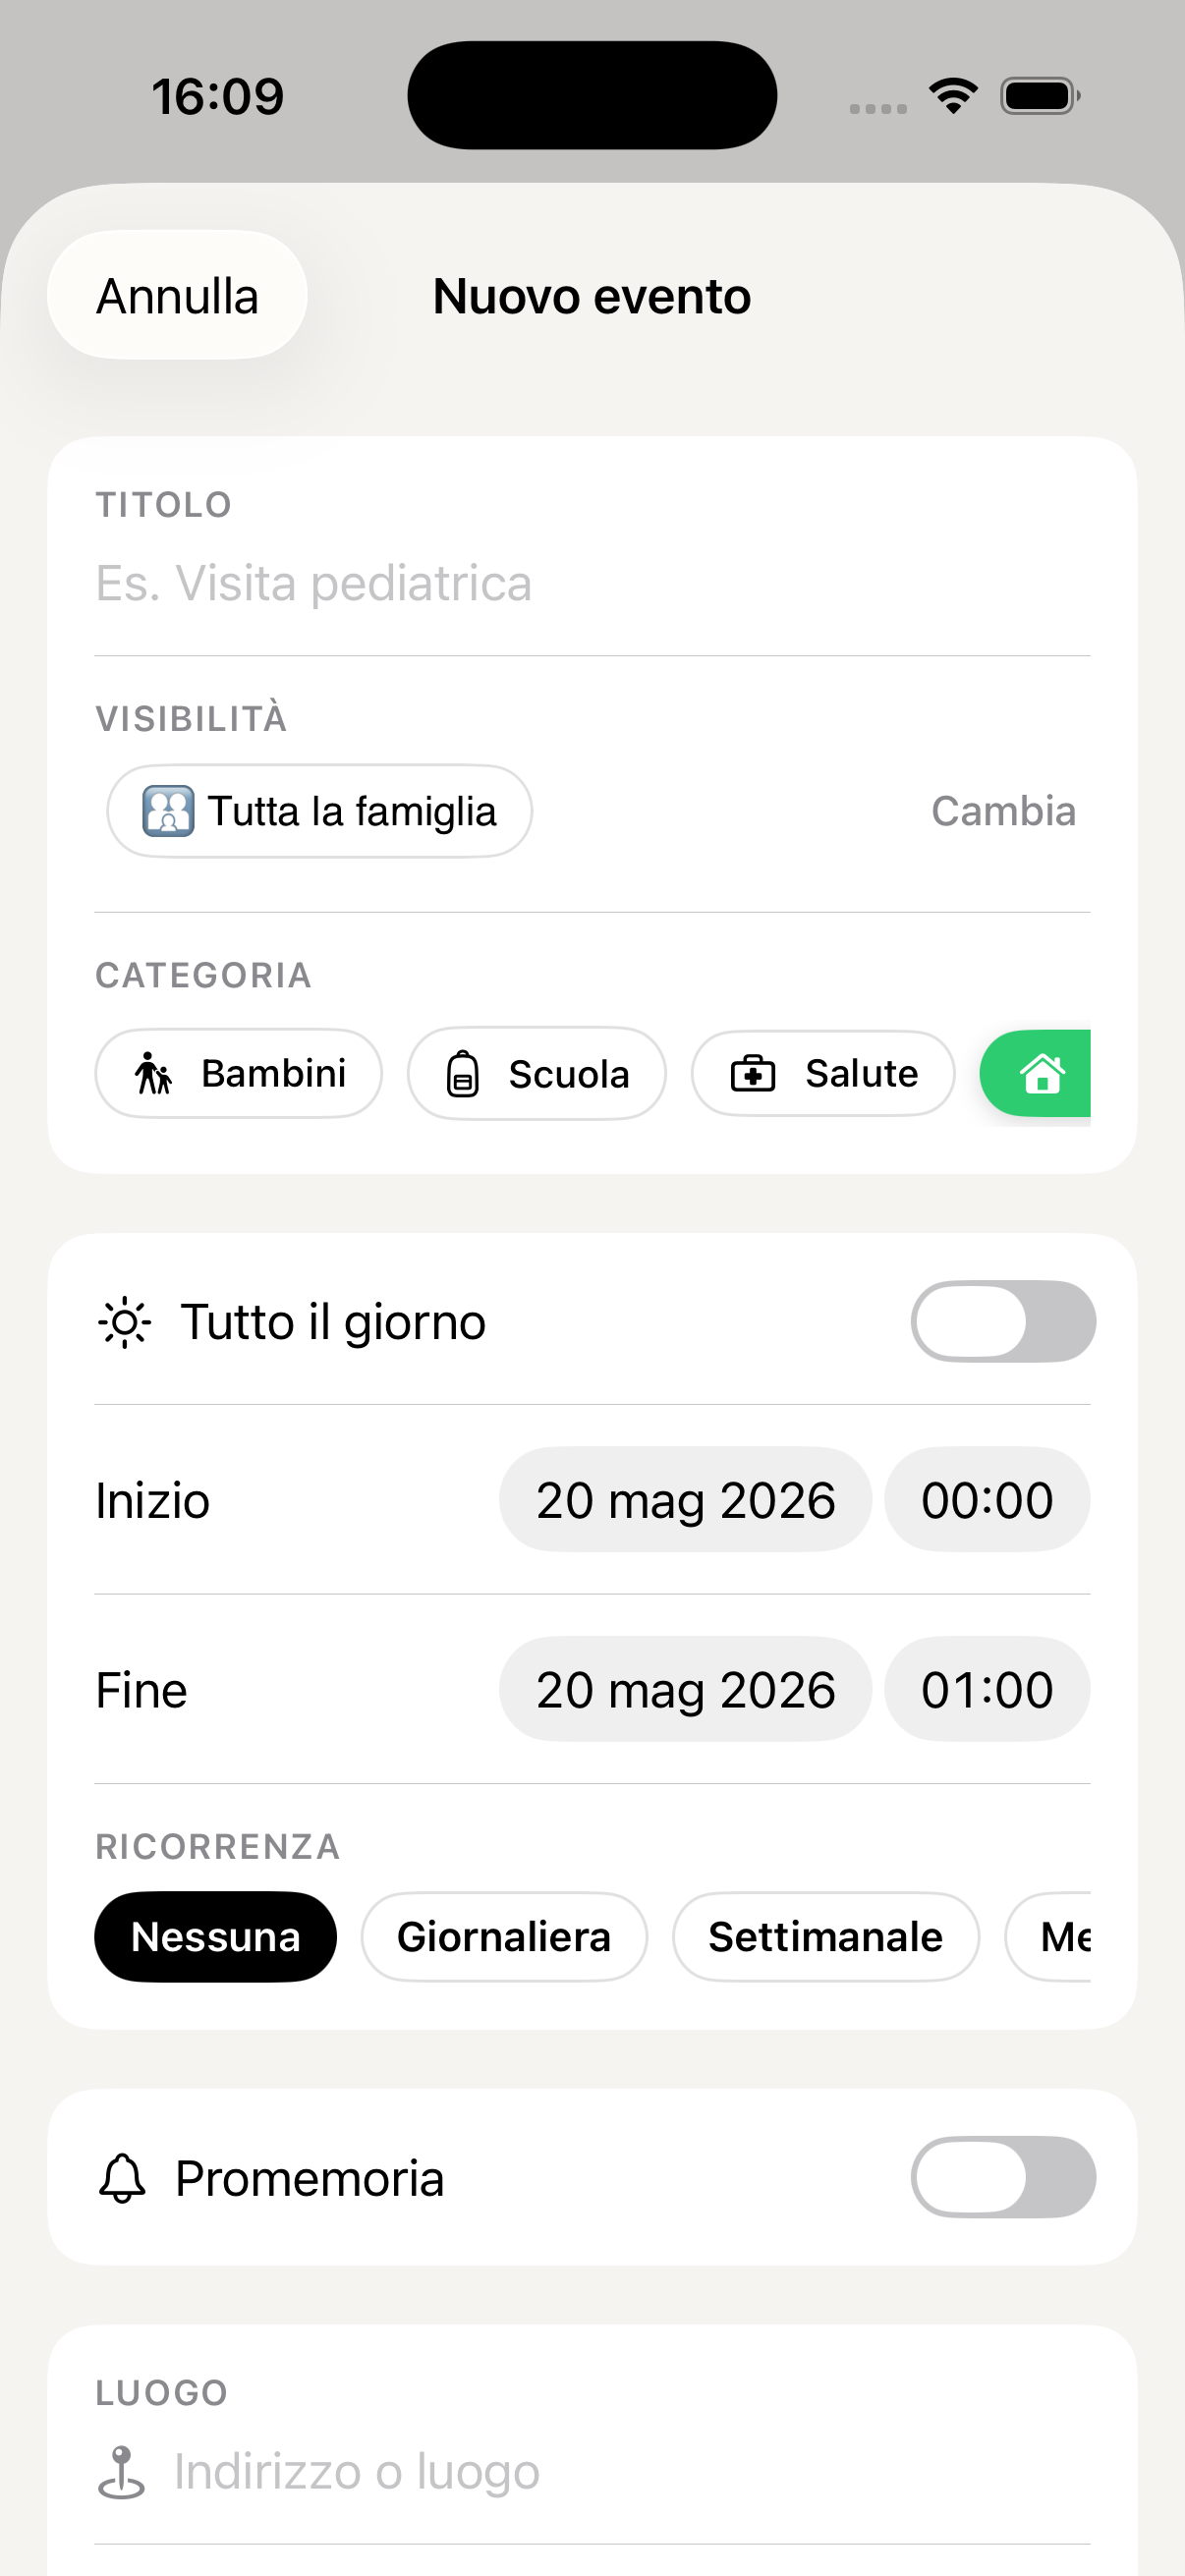
Create new event
Event detail and edit
Reminders and recurring events
Todo & Routines
Shared to-do lists and daily routines for the whole family. Each task can be assigned to a specific member, with a deadline and reminder — and the AI can create and manage them for you on simple request.
Access Todo from the "More" menu in the bottom bar. You'll find the active lists divided by category: personal tasks, shared family tasks and the shopping list.
Tap + New list, assign a name and choose an identifying colour or emoji. You can create separate themed lists: "Shopping", "DIY", "Kids' school", "Household chores".
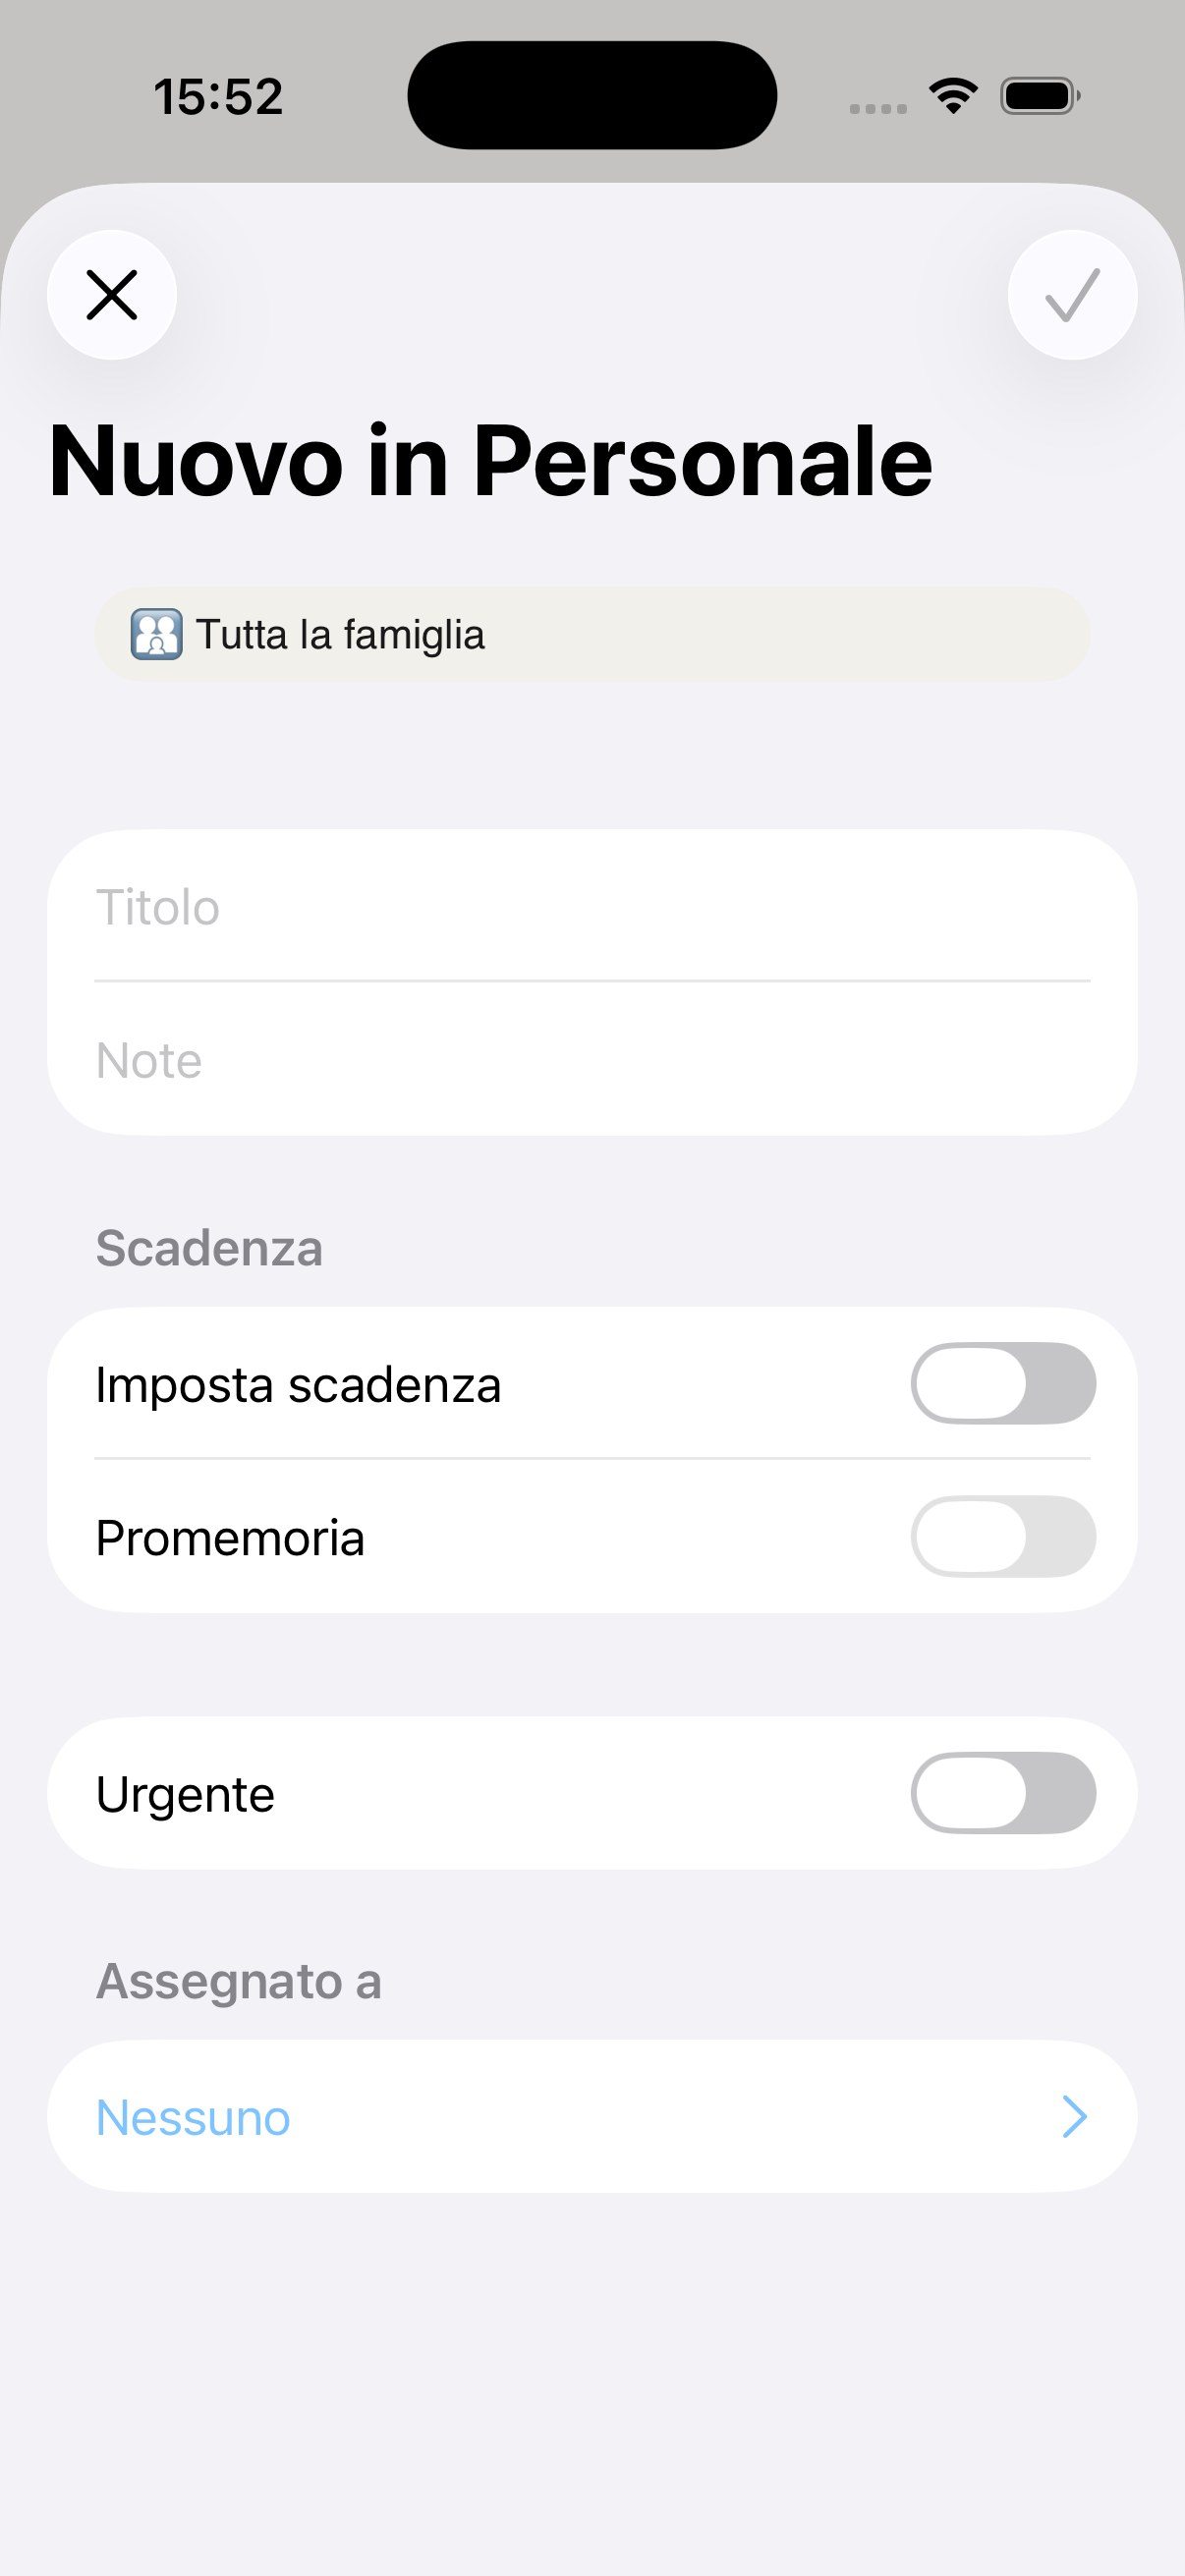
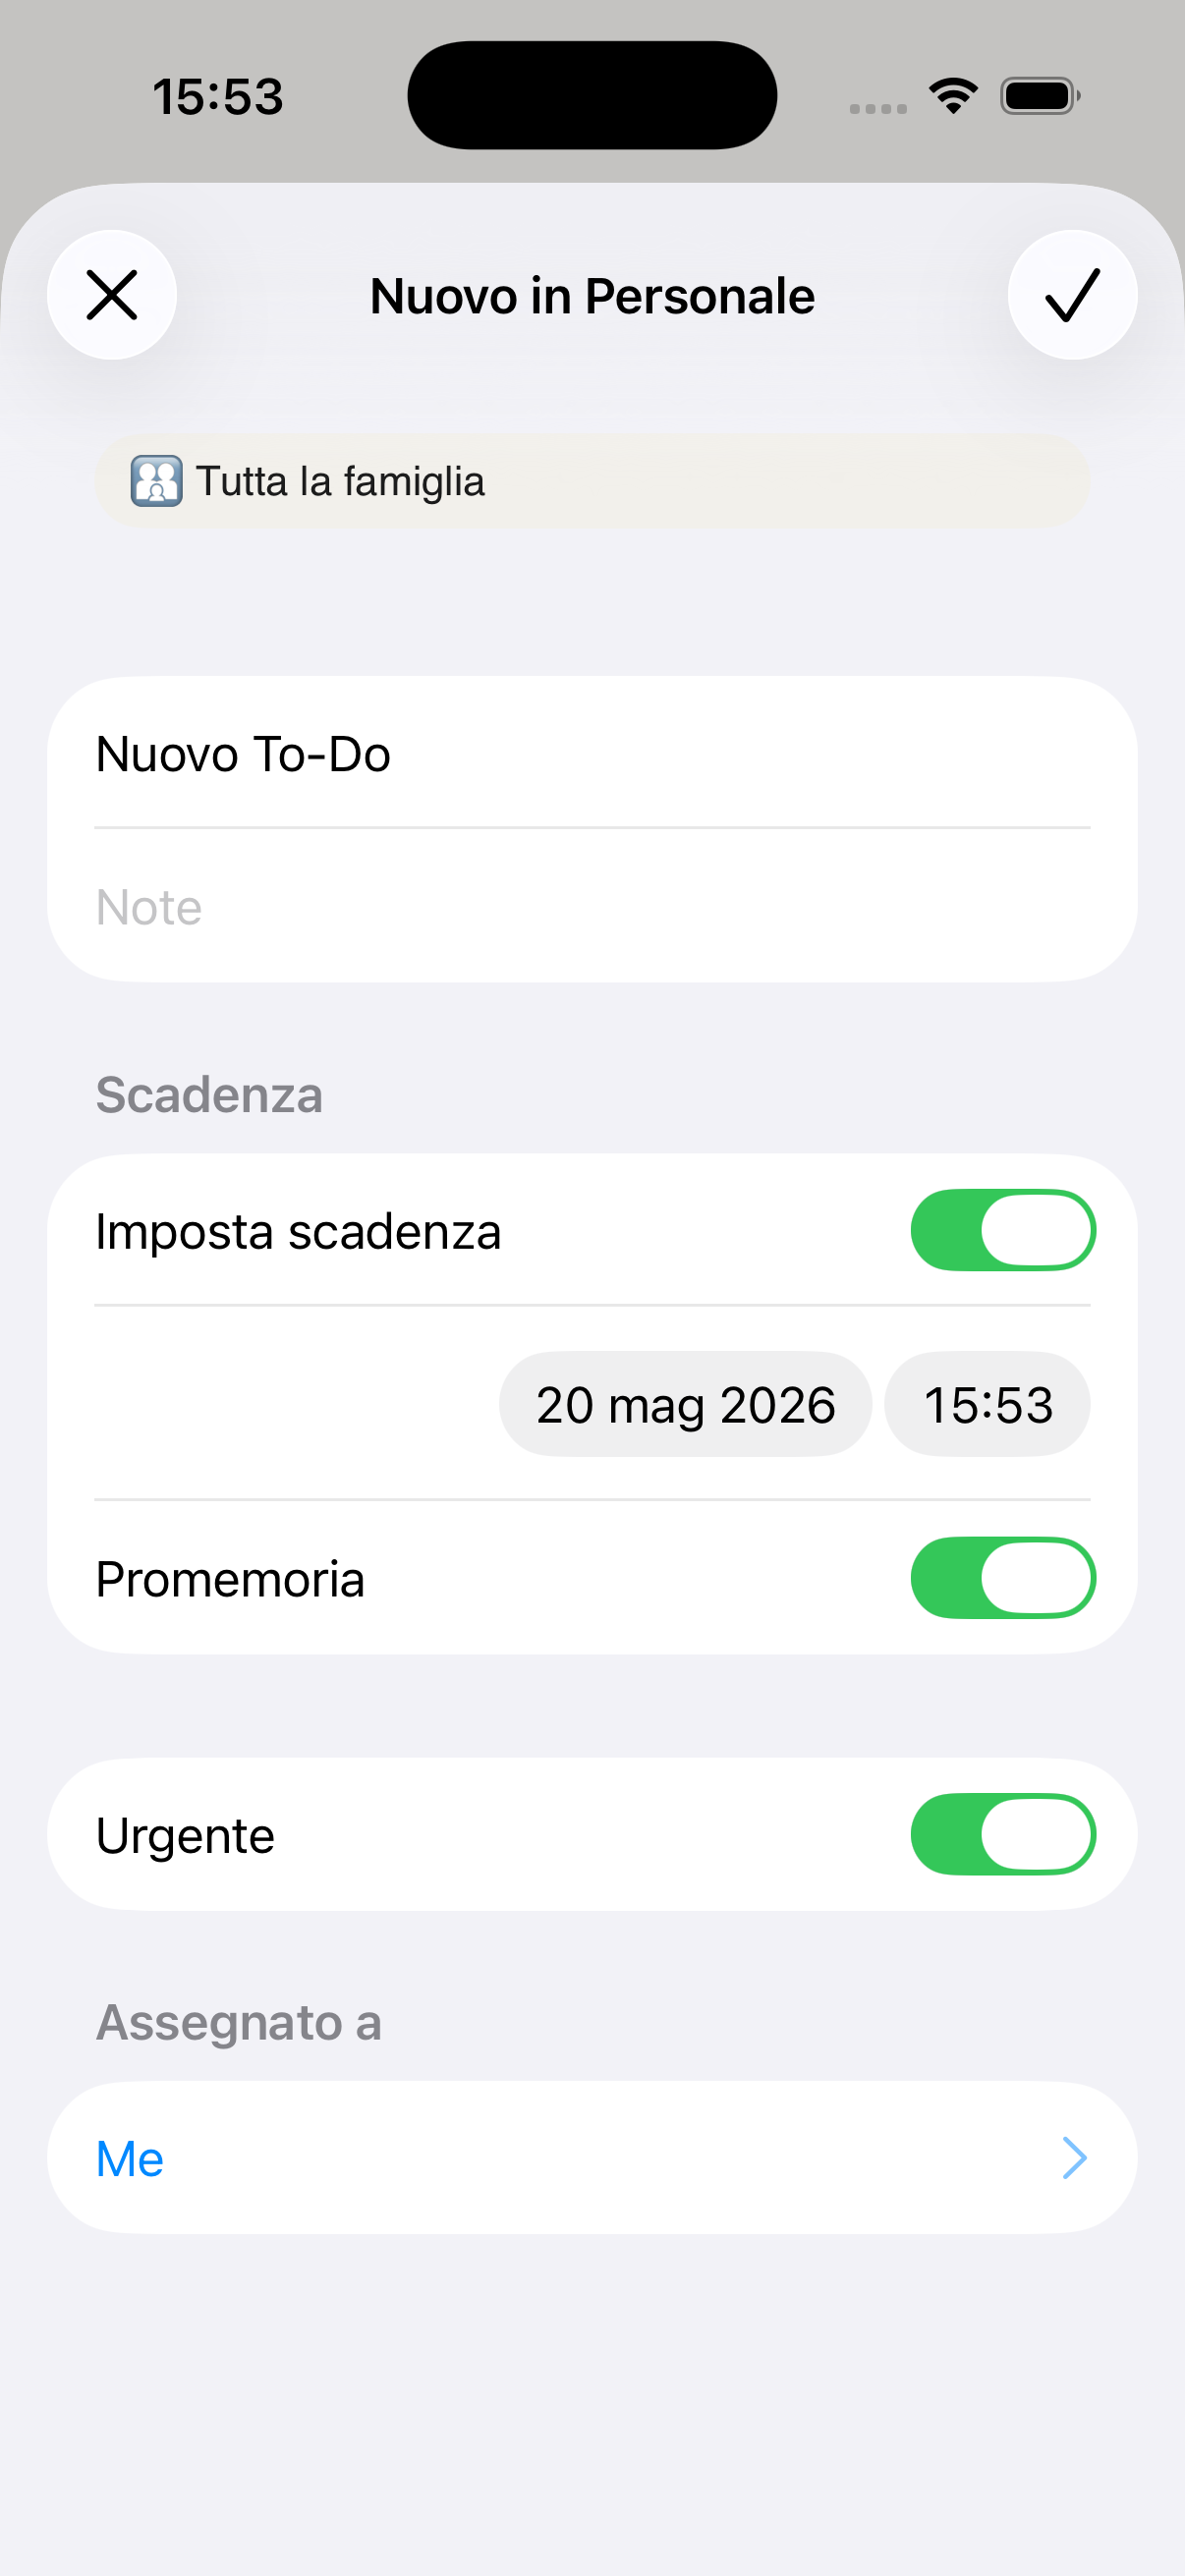
Tap + inside a list, write the task and optionally assign it to a family member, add a deadline and a reminder. The person assigned receives a push notification.
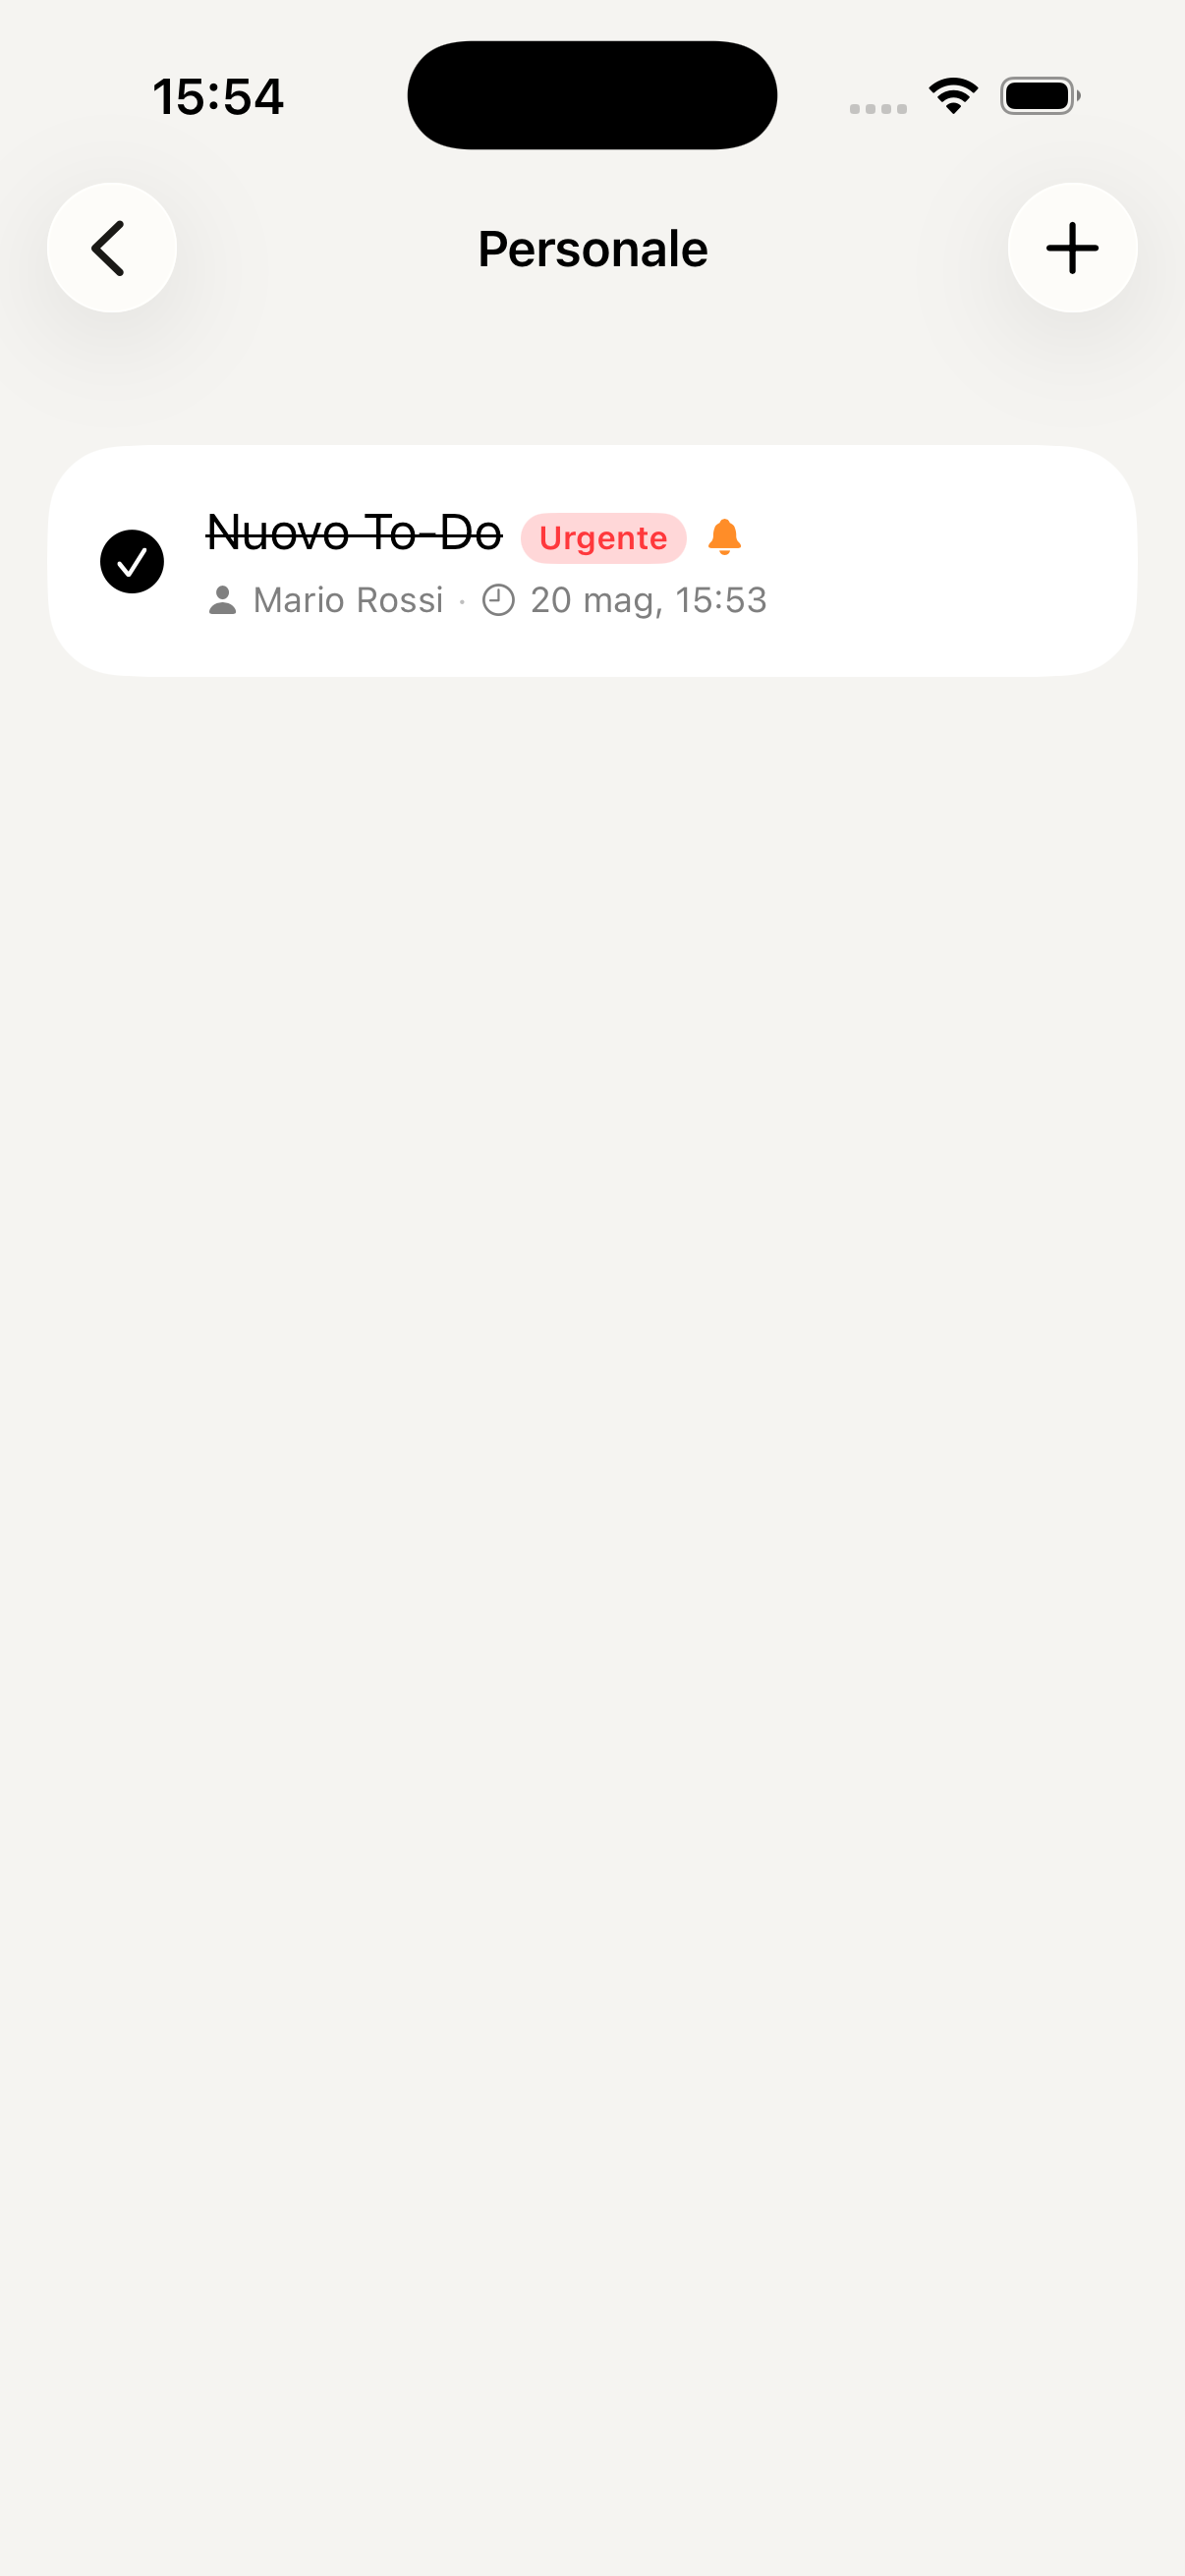
Tap the circle to the left of each task to mark it as completed — it disappears from the active list but stays in the archive. Long-press a task to edit, move or delete it.
Routines are sequences of tasks that repeat every day (e.g. "Kids' morning routine": breakfast → school bag → teeth → leave). Create the routine, add the steps in the correct order and activate it — every morning it will reset automatically to start again.
The shopping list is shared in real time with the whole family. If your partner adds an item while you're already at the supermarket, you see it appear instantly. Tick items off as you put them in the trolley.
Tell the AI: "Add milk, bread and eggs to the shopping list" or "Create an evening routine for the kids with bath, pyjamas and story" — the AI does it in a second without you having to open the section.
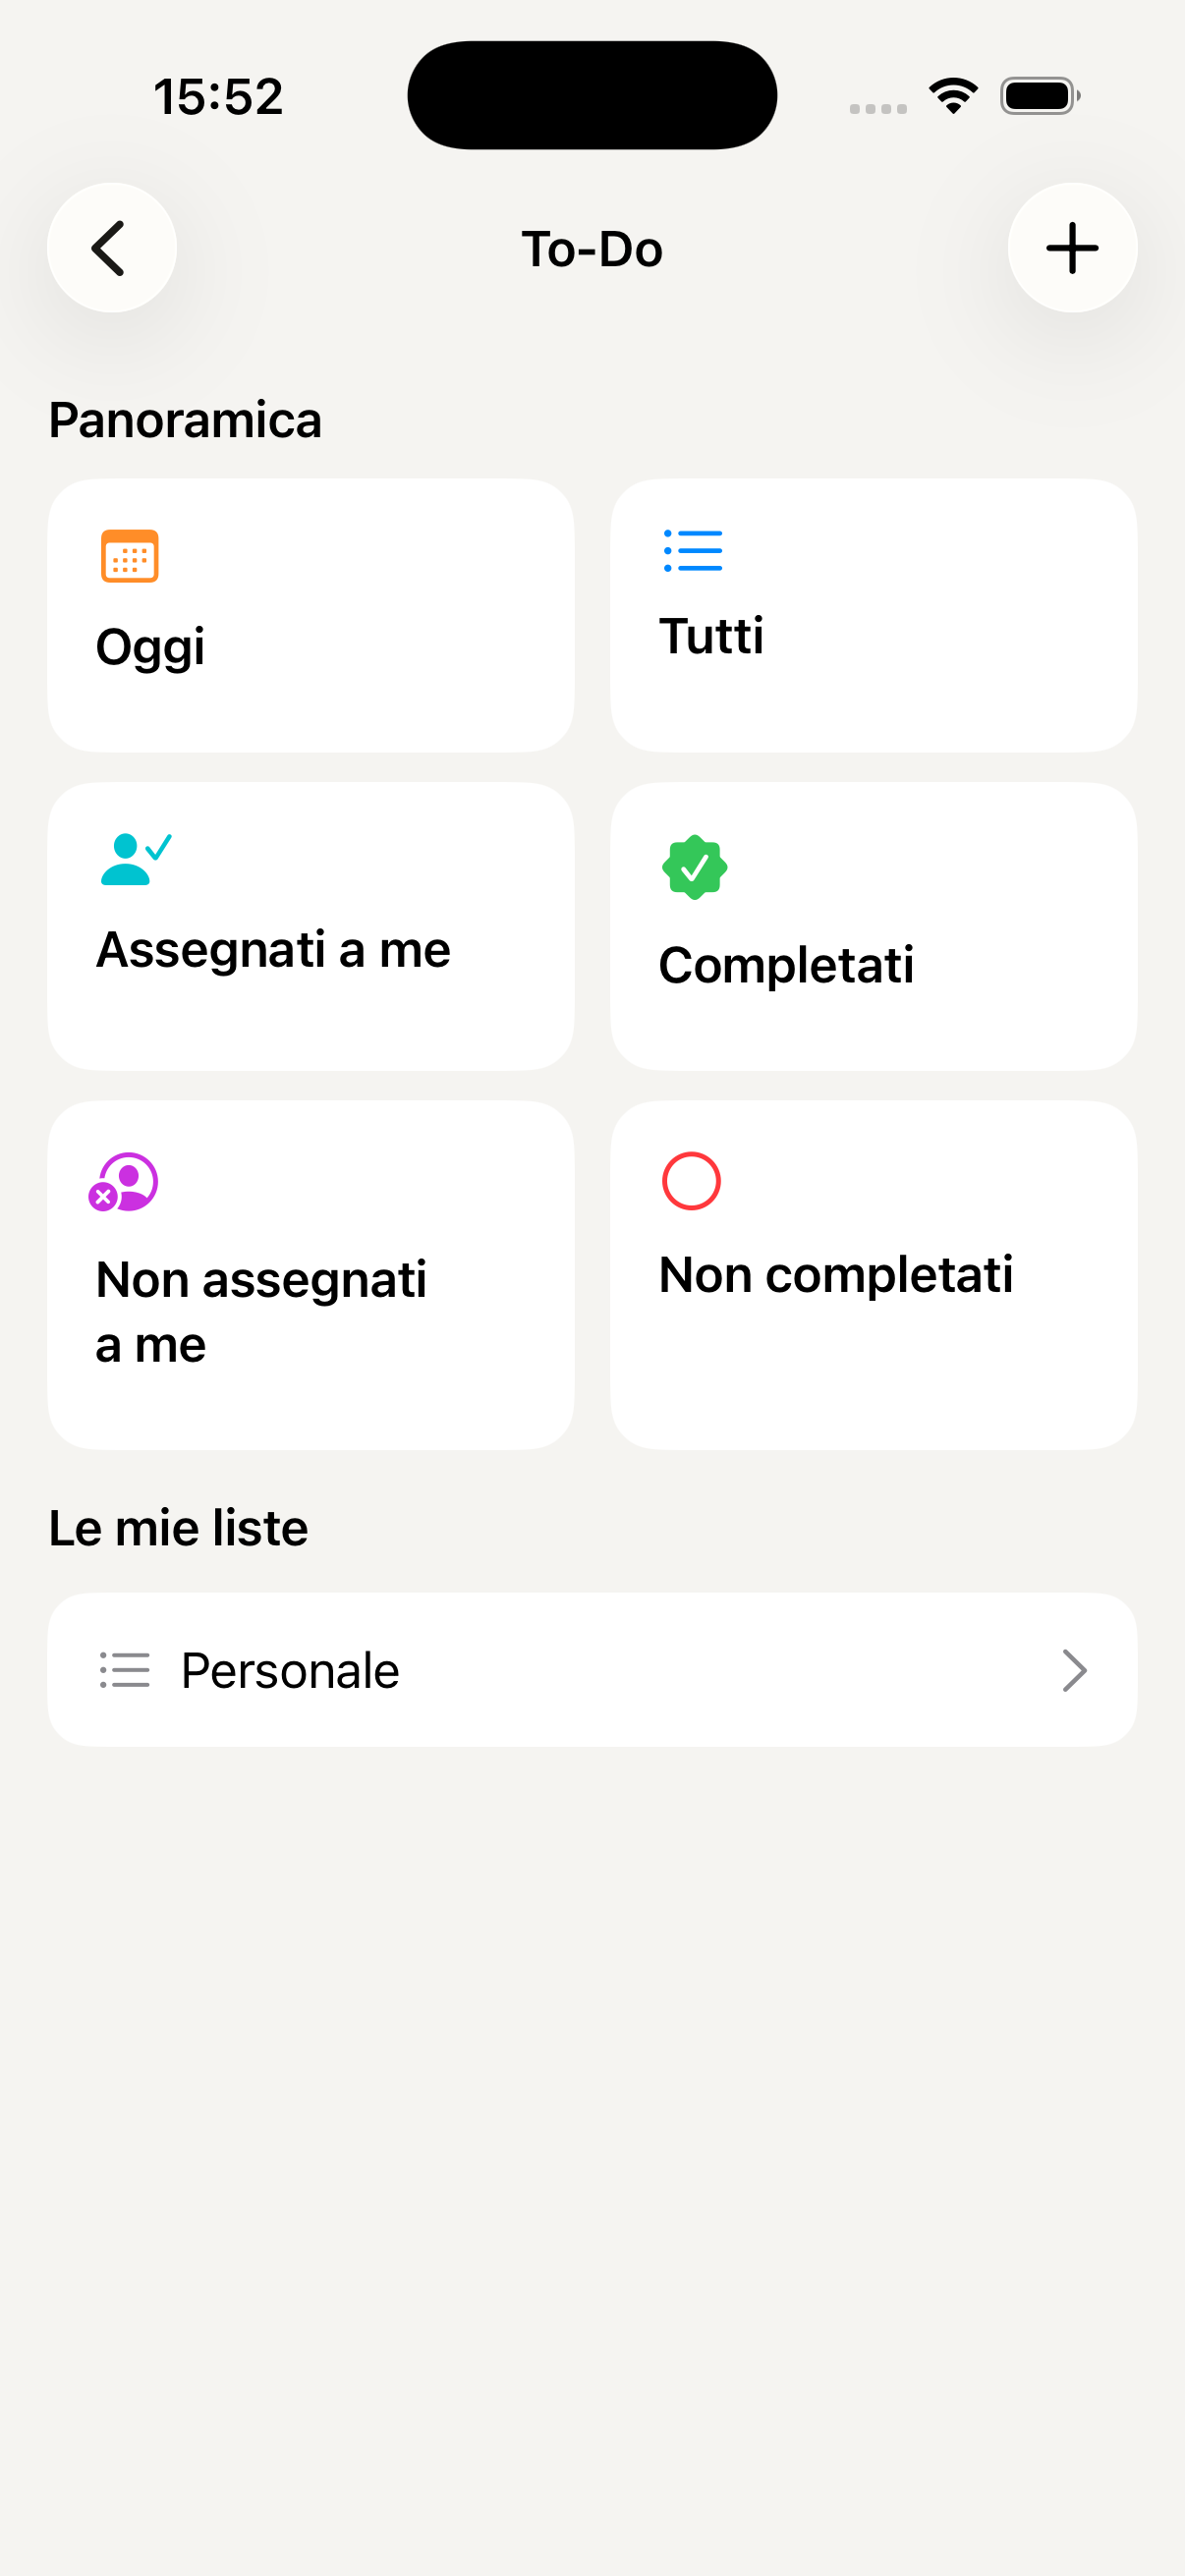
Main Todo list
Task list detail
Add new task
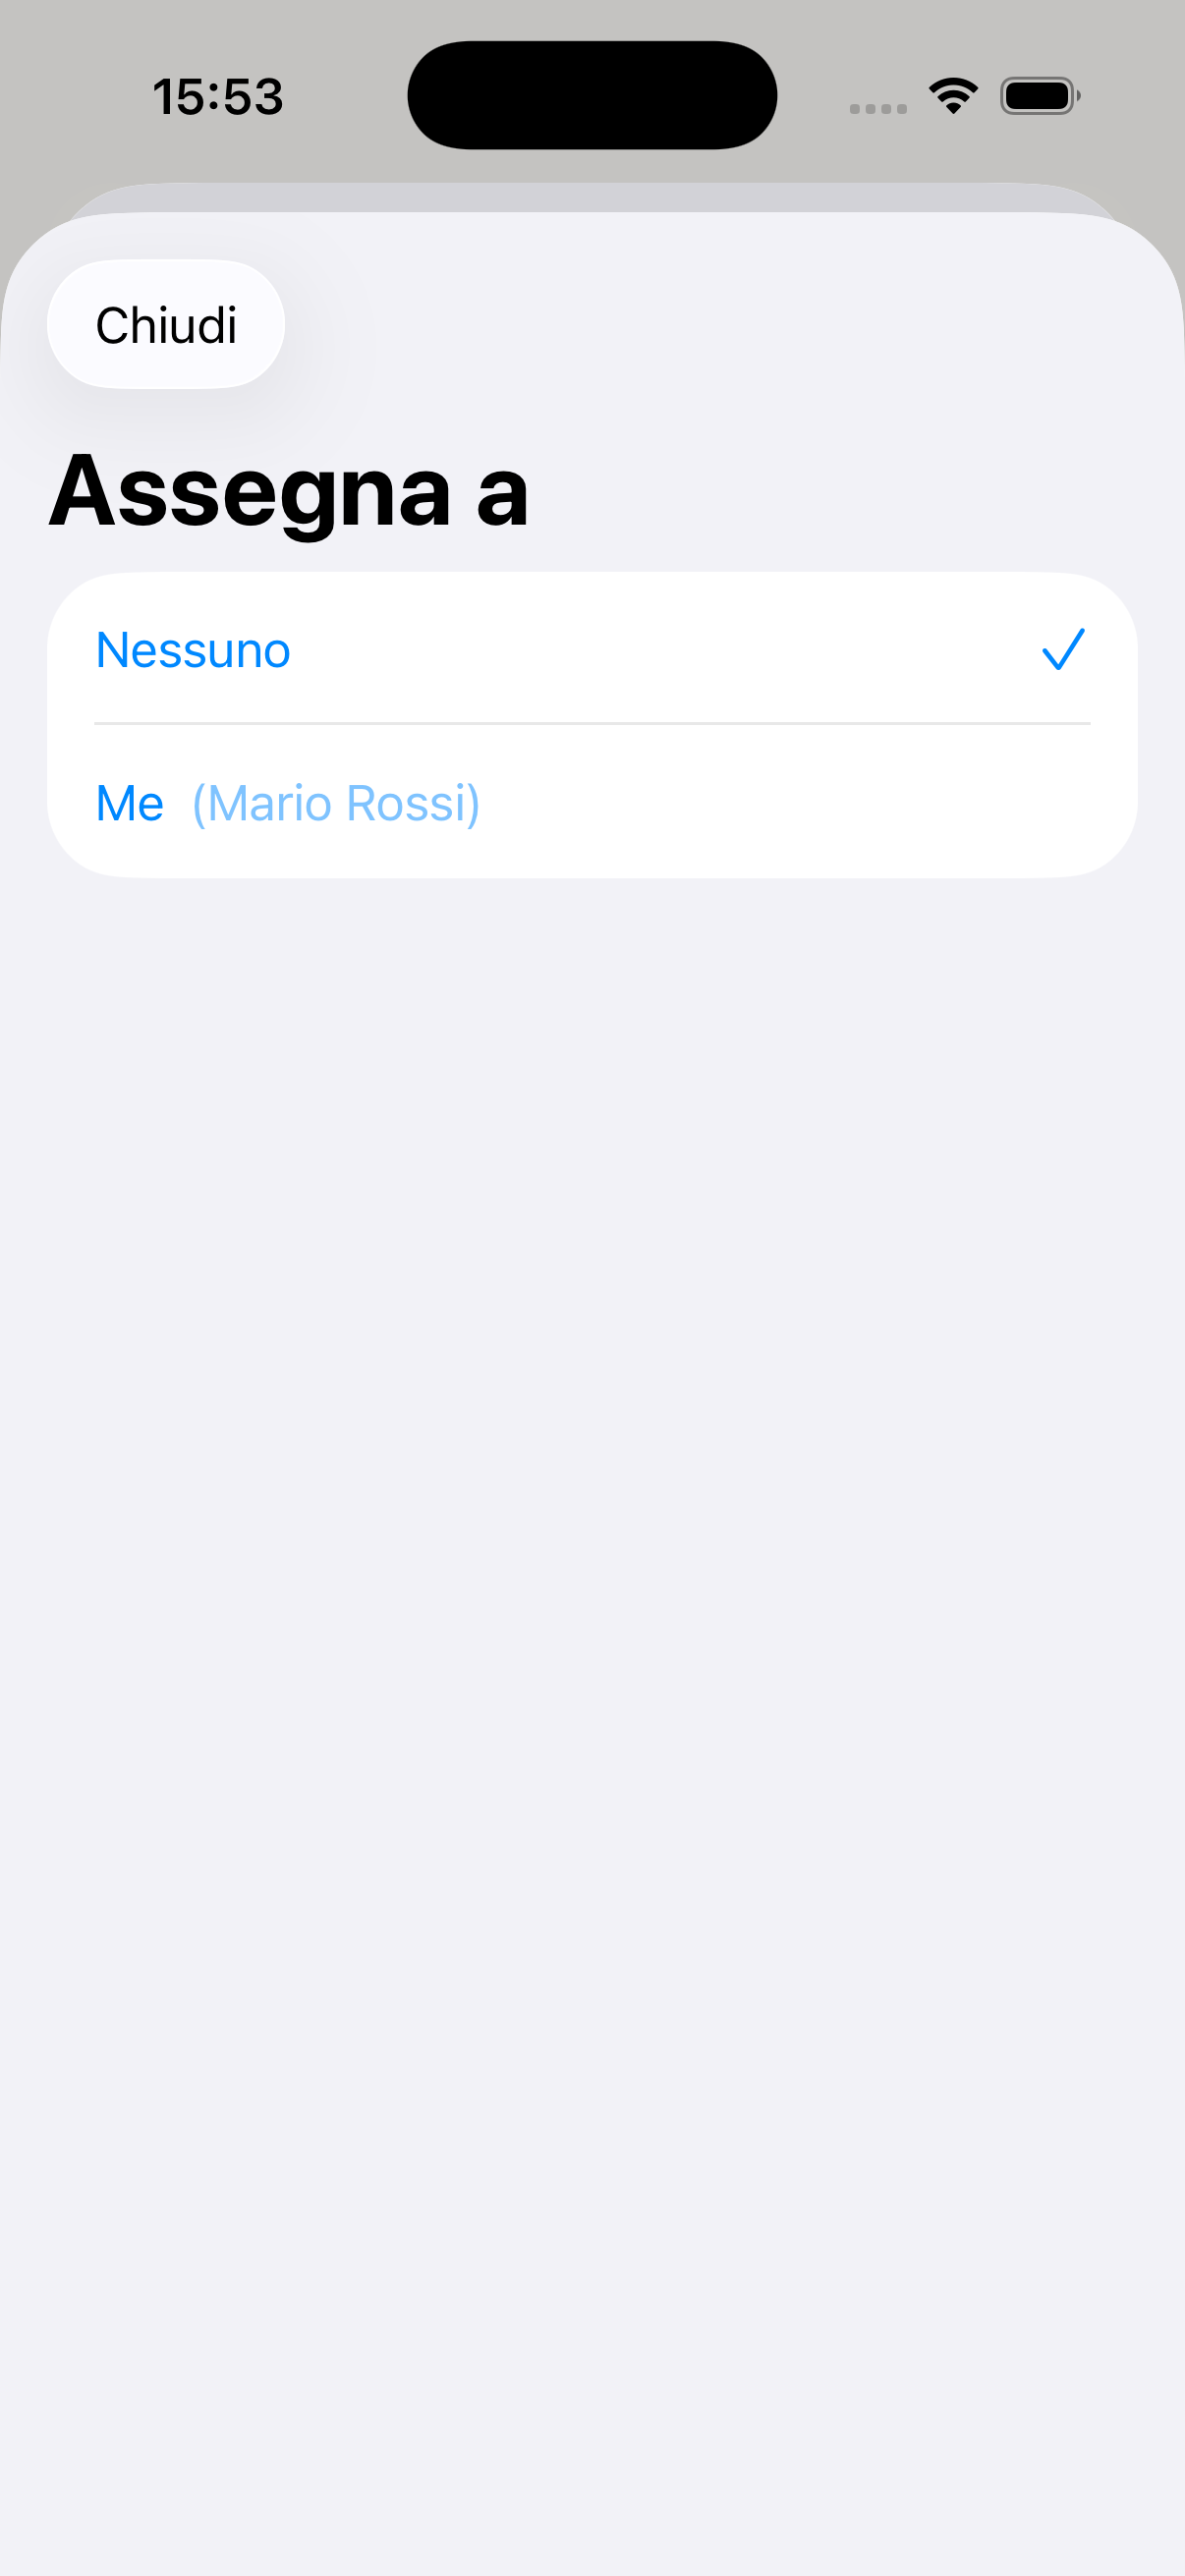
Assign to a family member
Daily routines management

Morning routine steps
Shared shopping list
Expenses
Track all family expenses, broken down by category and by member. Analyse monthly trends, monitor the budget and ask the AI to give you a financial overview of the family.
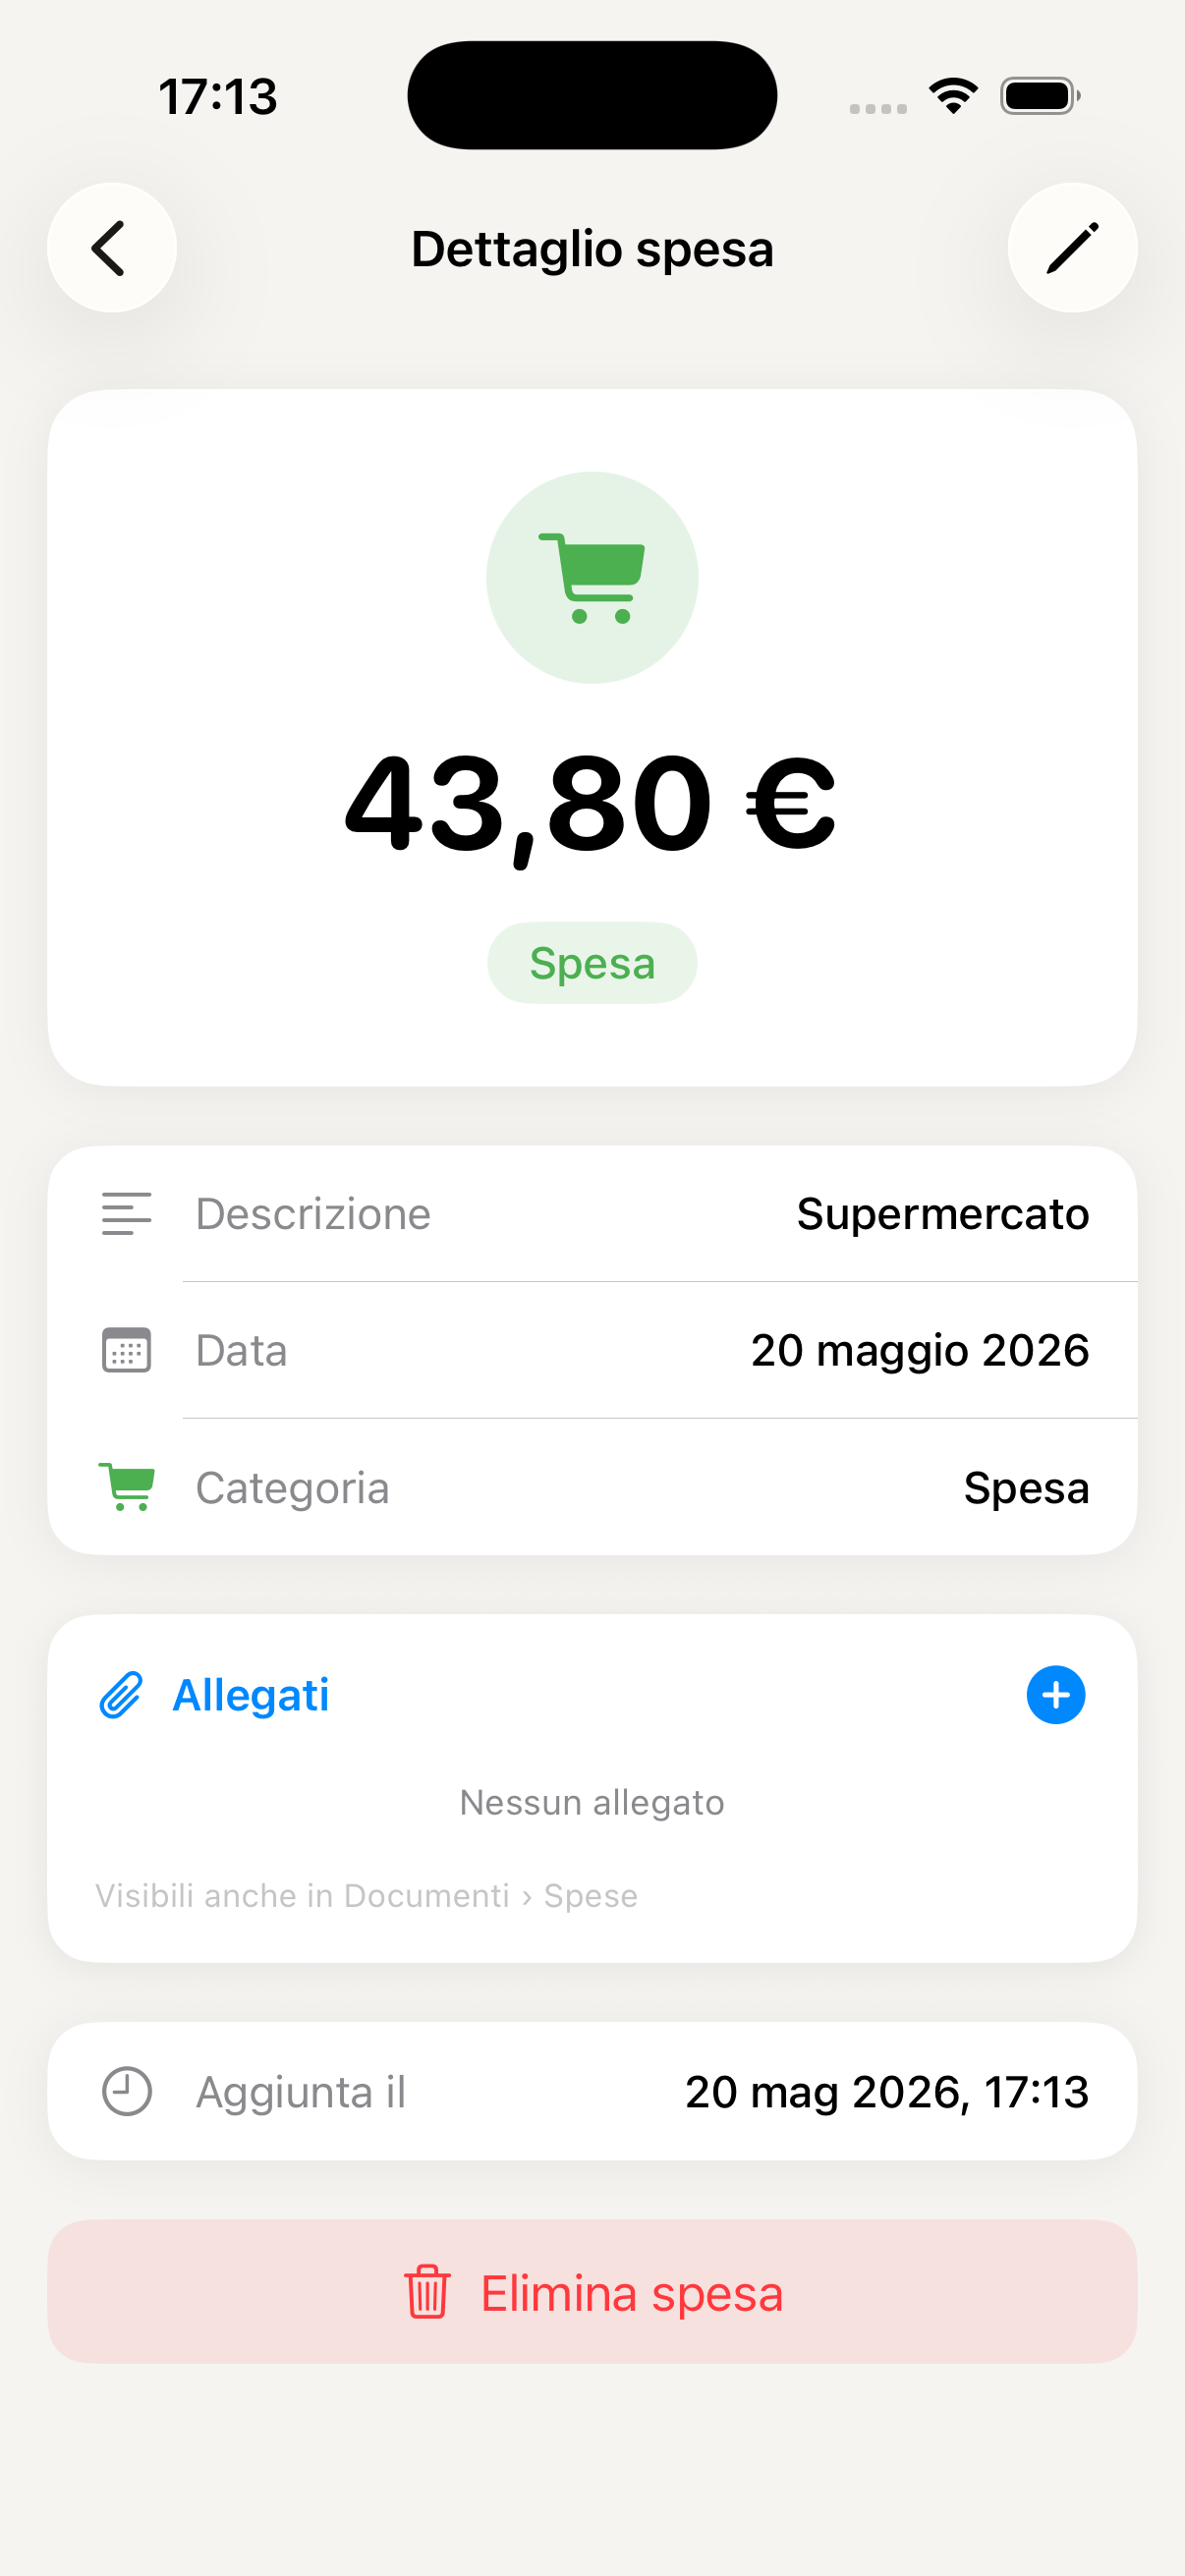
Access Expenses from the "More" menu in the bottom bar. You'll immediately see the current month's summary: total spent, breakdown by category and each family member's contribution.
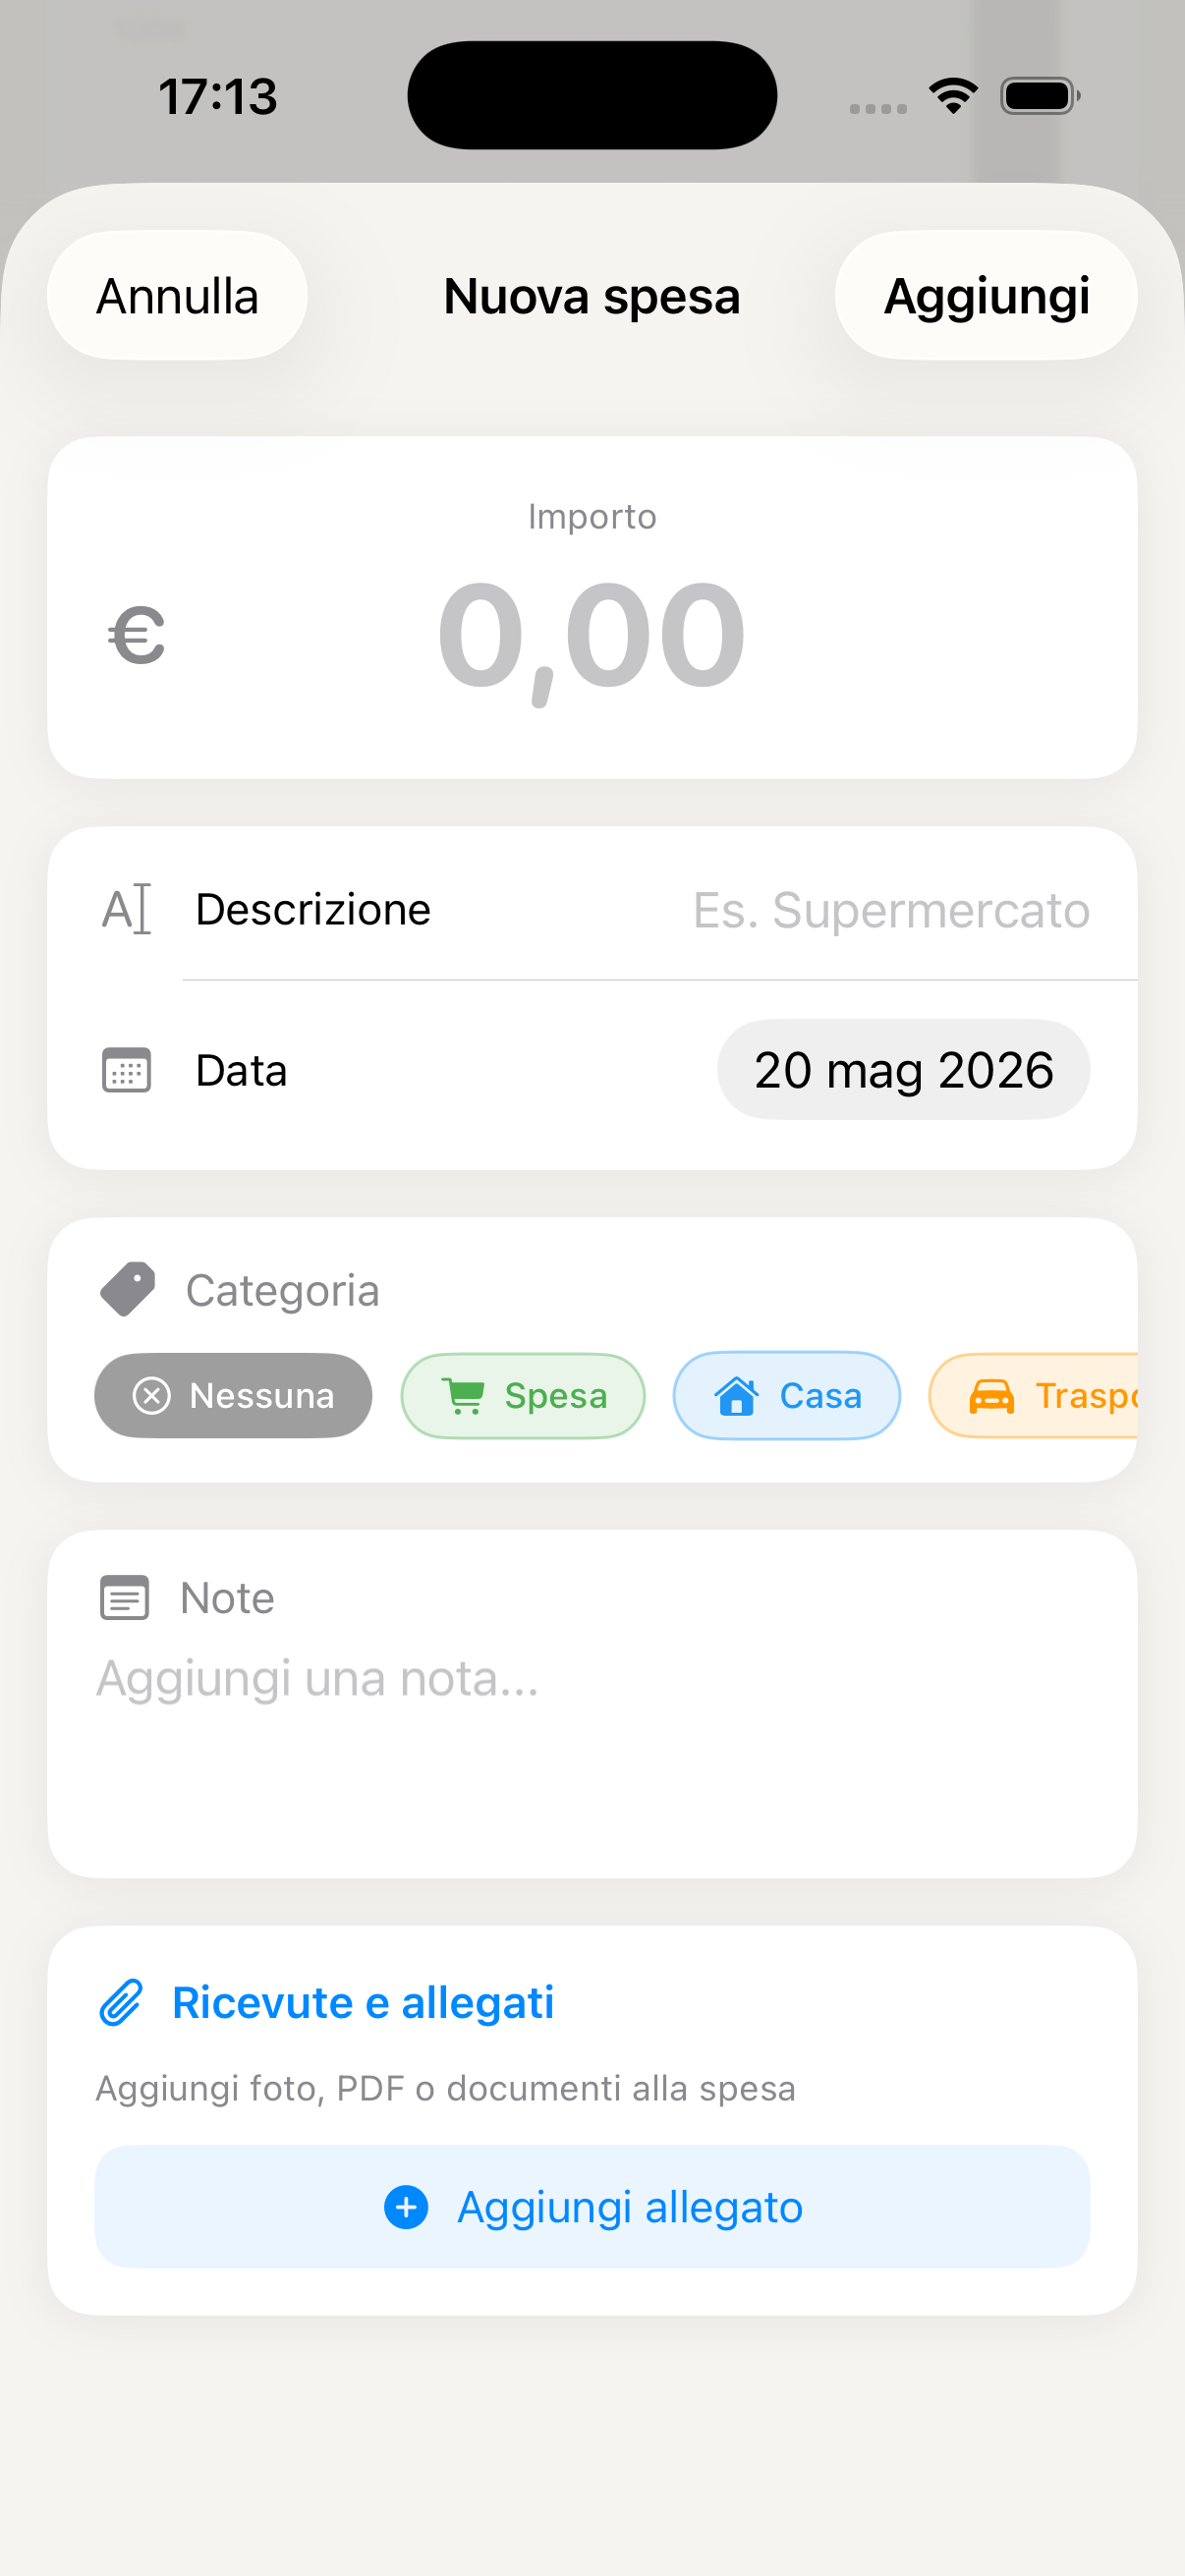
Tap + at the top right, enter the amount and choose the category — Groceries, Health, Education, Home, Transport, Leisure and others. Add a descriptive note and, if you like, photograph the receipt as an attachment to keep everything documented.
Each expense can be attributed to a specific family member. This allows you to understand who is spending what and have a clear picture of individual spending versus the family total.
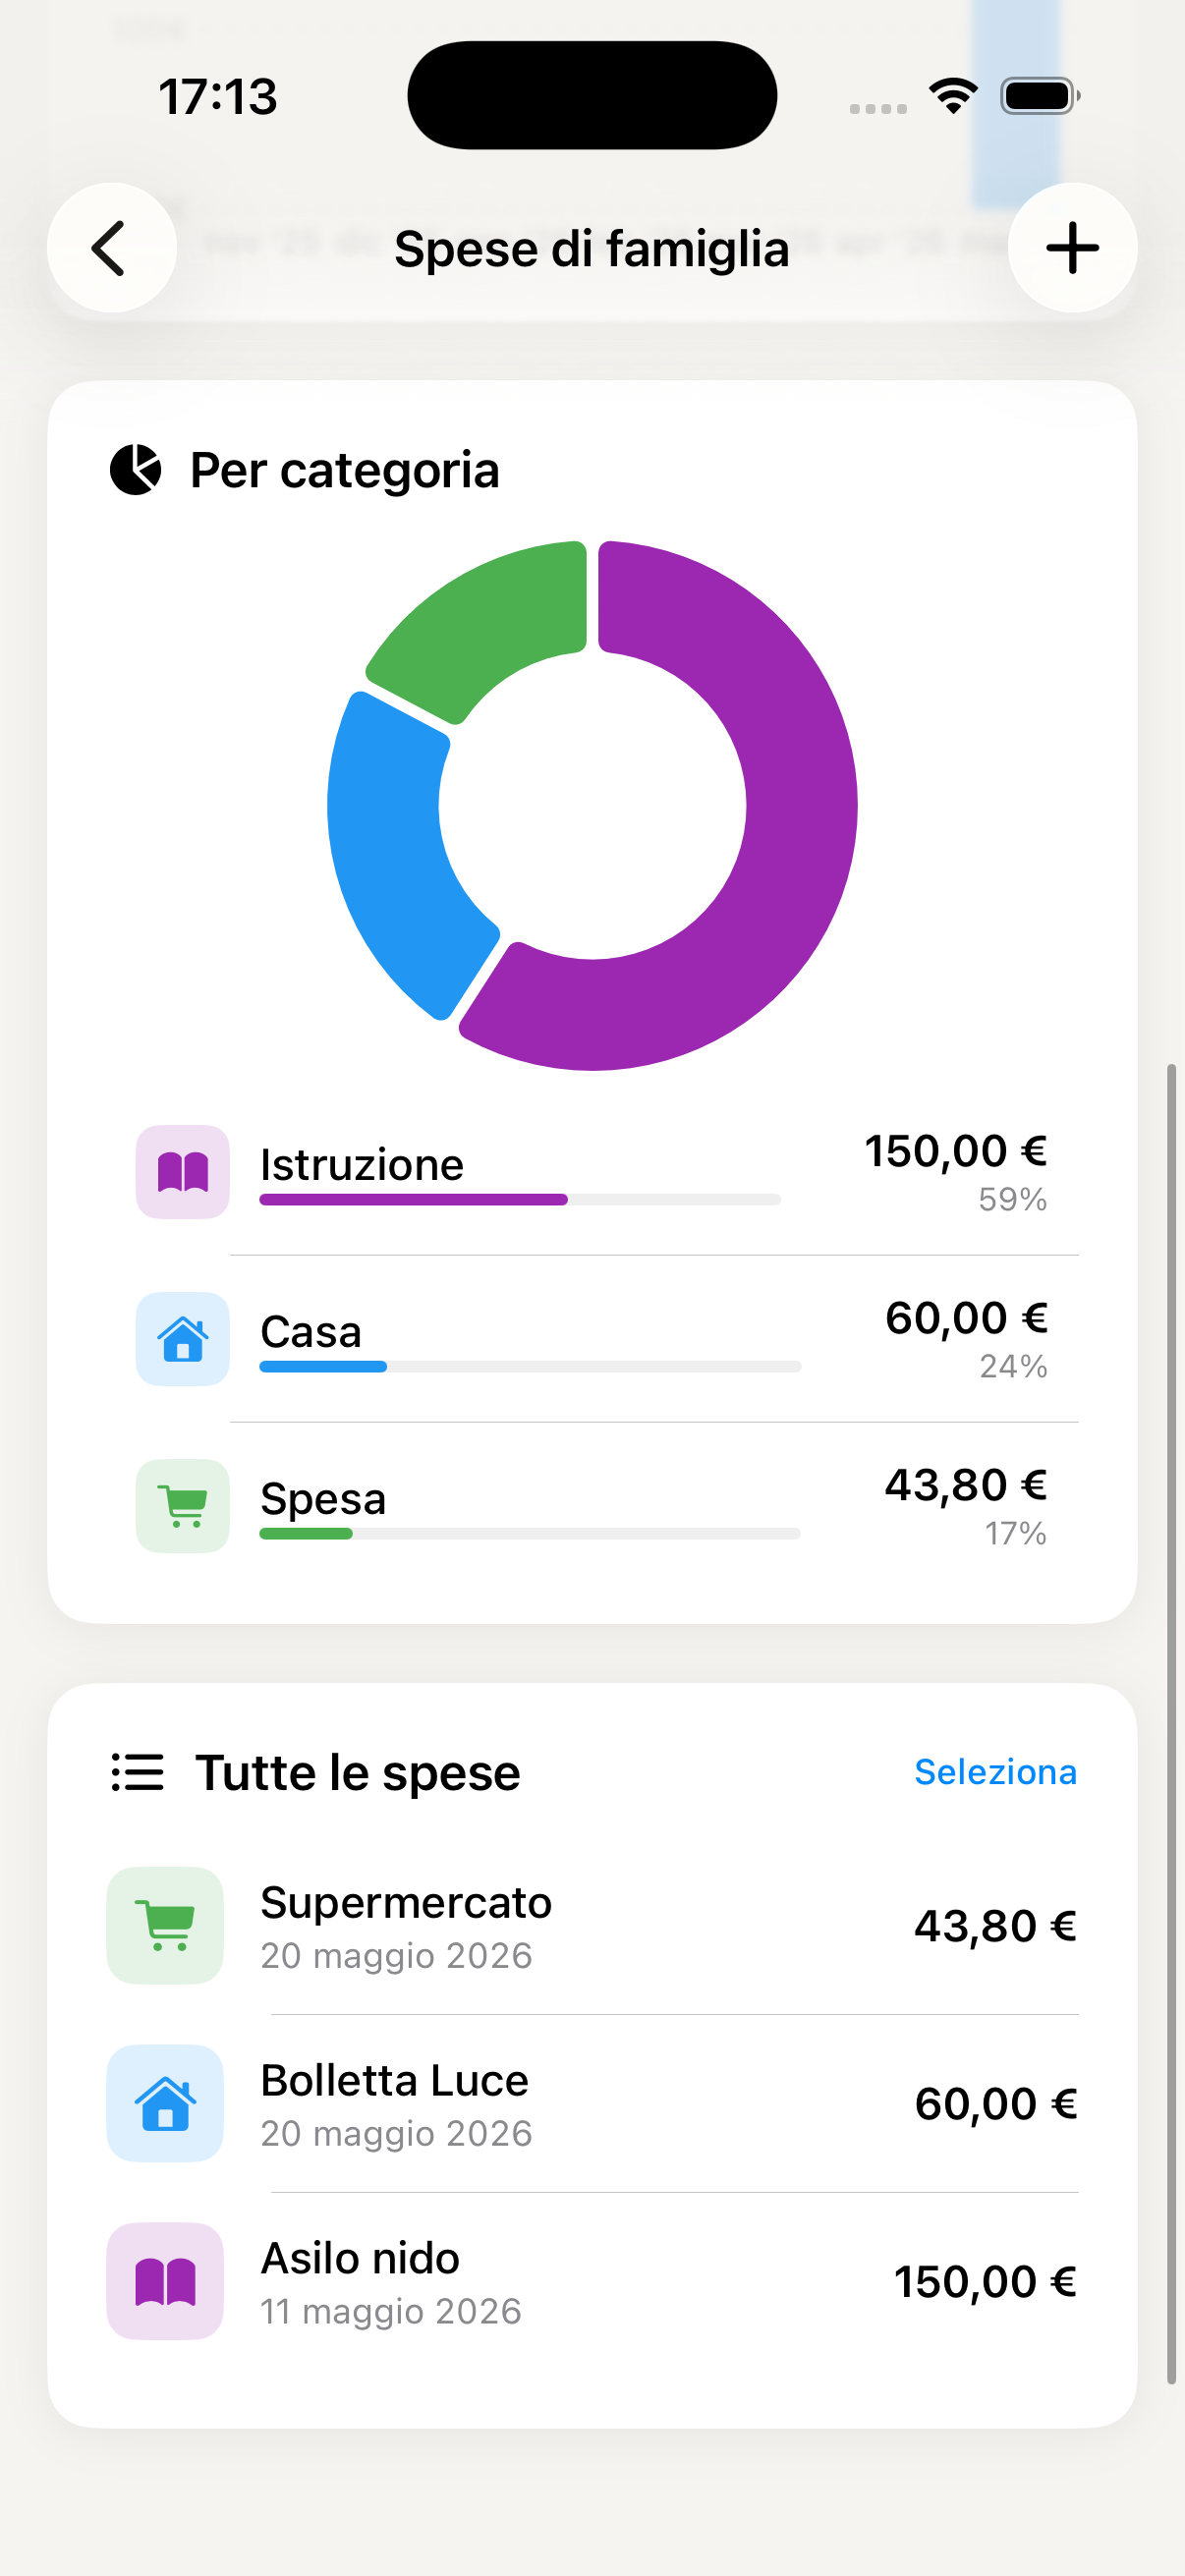
Scroll down in the main screen to see the charts by category and the month-on-month trend. You can navigate between previous months to compare periods and identify where the family spends most.
L'Assistente di Famiglia has access to your real spending data and can answer questions like "How much did we spend in May?", "Which category do we spend most on?" or "Compare April and May spending" — in seconds, without any calculations.
You can also record an expense directly from the AI: "I just spent €45 at the supermarket" — the assistant categorises it and saves it automatically in the Expenses section.
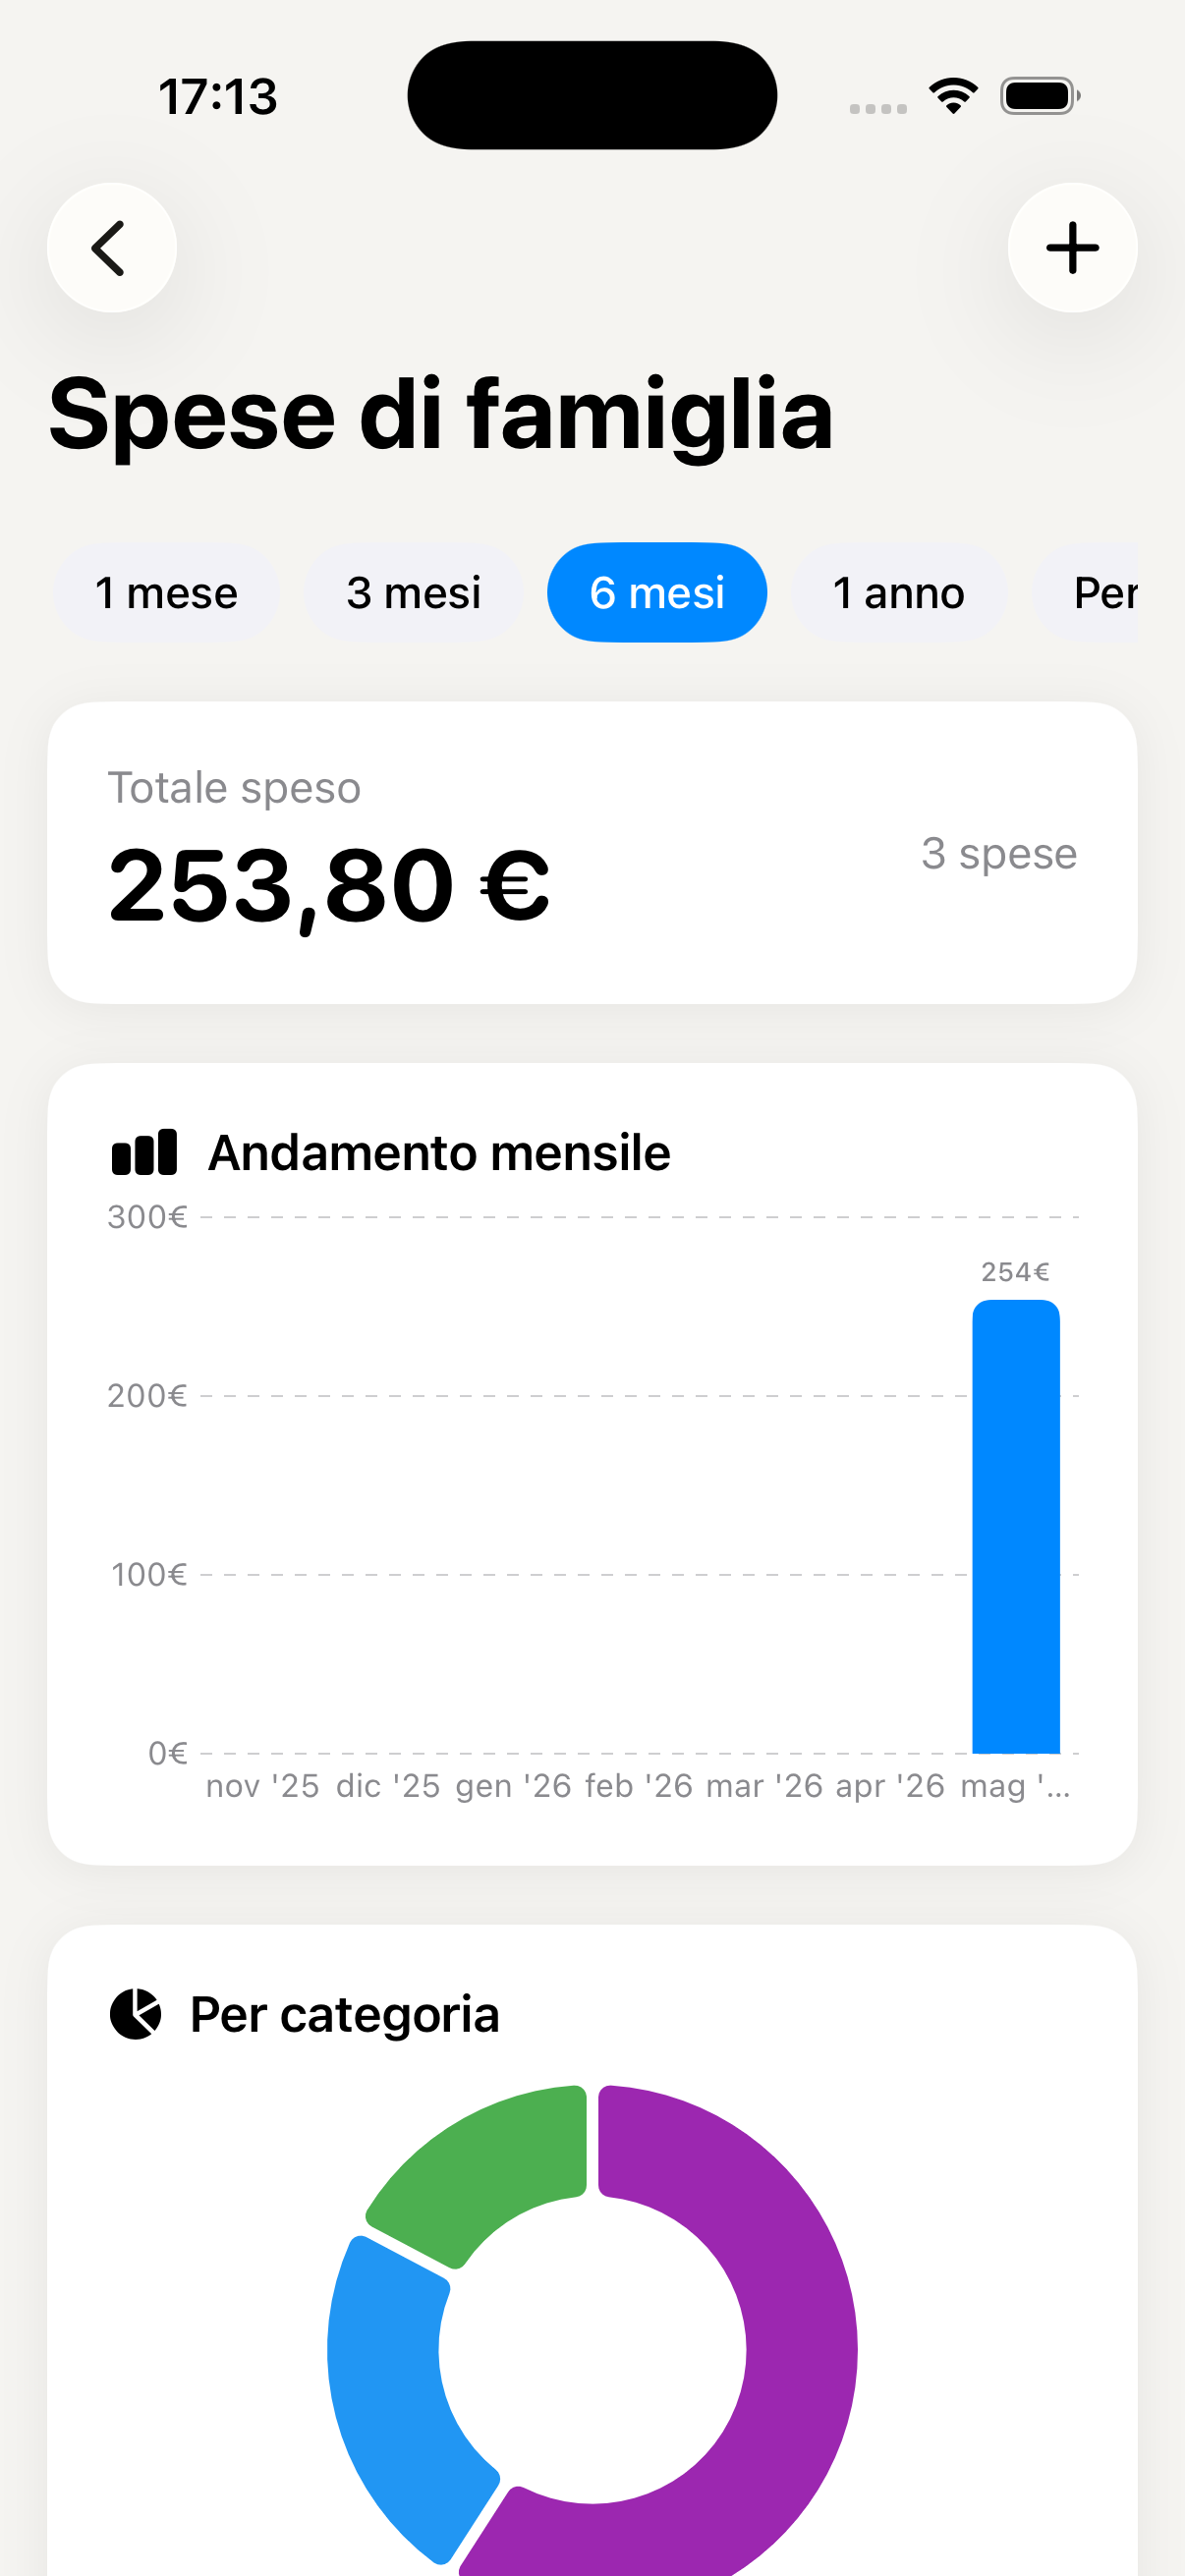
Monthly expenses overview
Add new expense
Expenses broken down by category
Statistics and monthly trends
Wallet
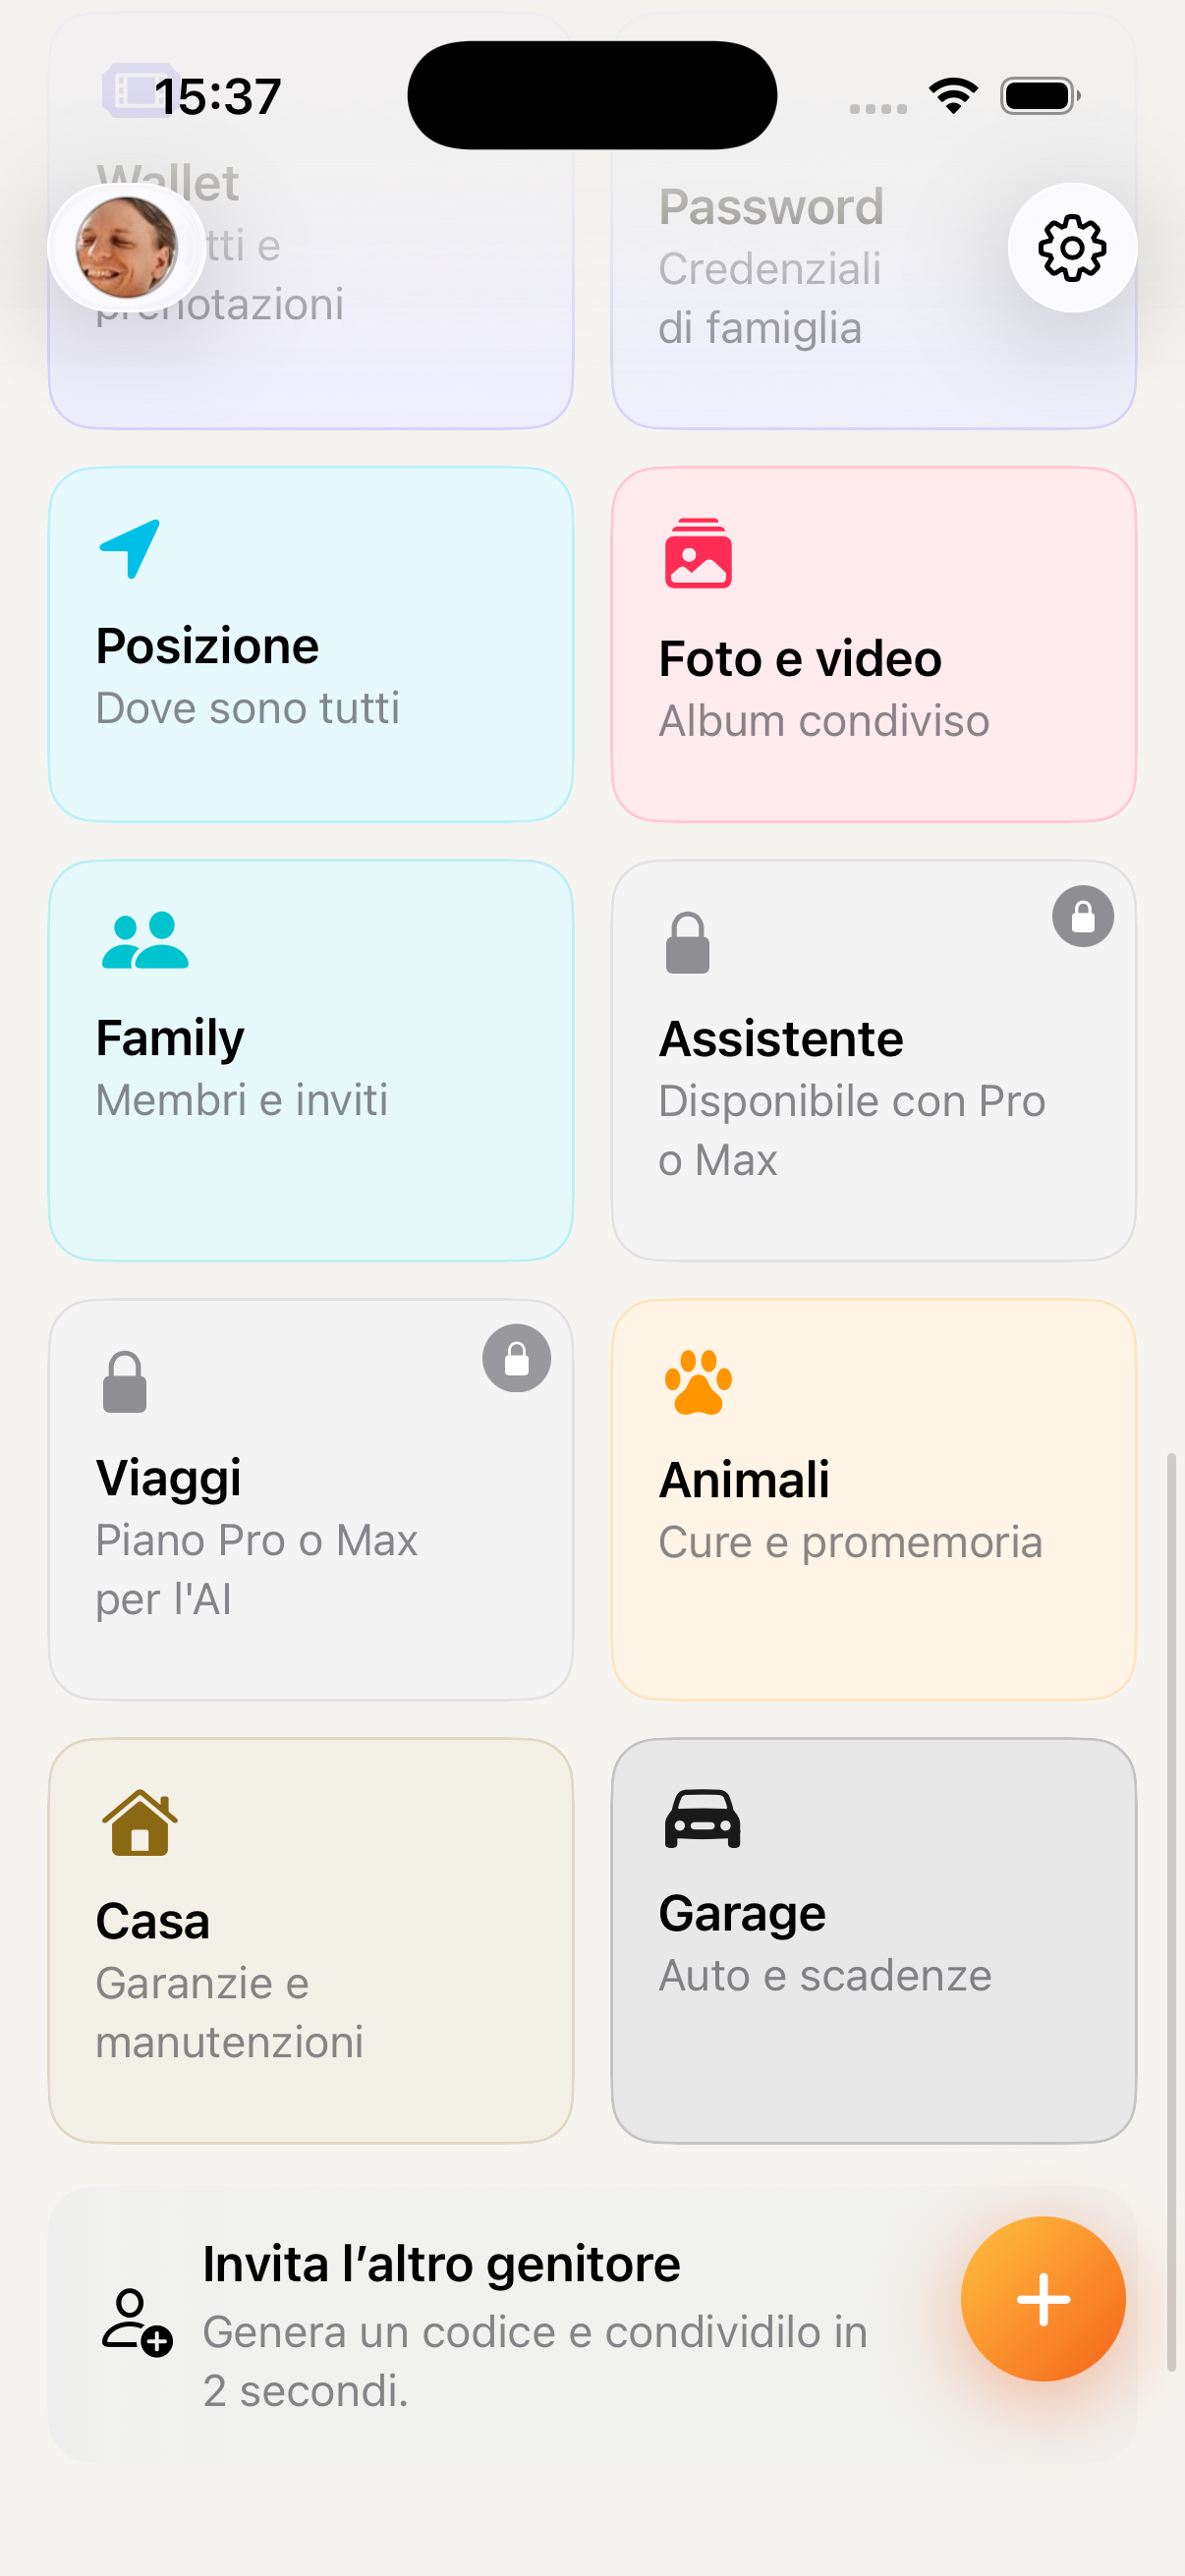
Loyalty cards, tickets, subscriptions and coupons — all in one place, shared with the family. No more physical cards left at home or tickets to hunt down in your emails.
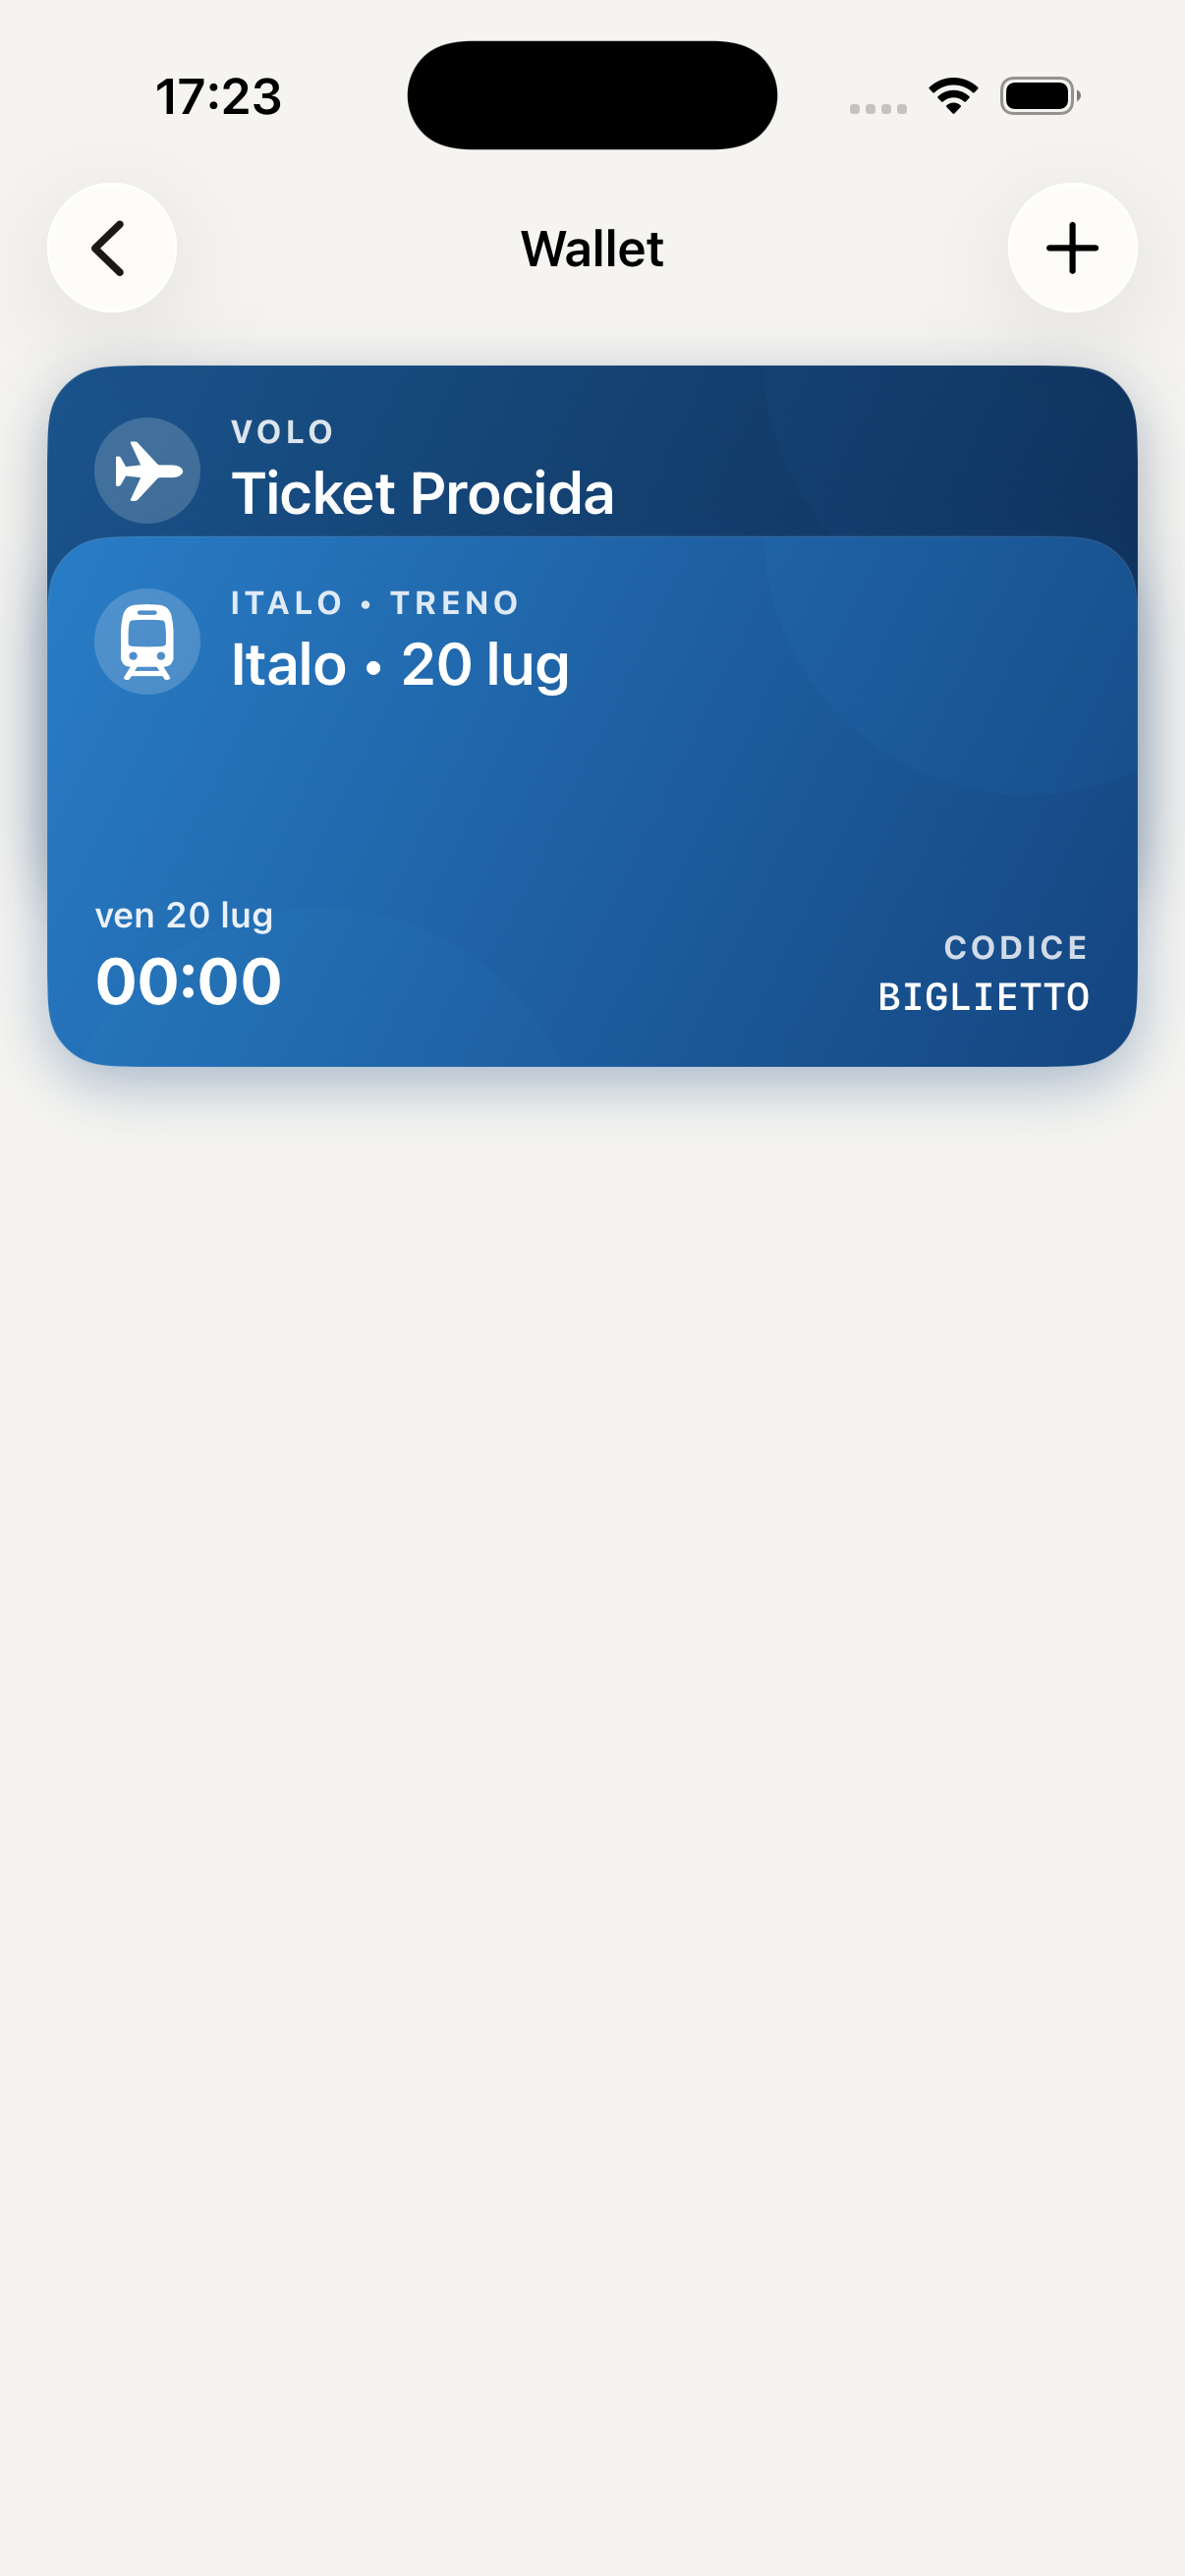
Access the Wallet from the "More" menu in the bottom bar. You'll find all saved cards and tickets, organised by category: Loyalty cards, Tickets, Subscriptions, Coupons.
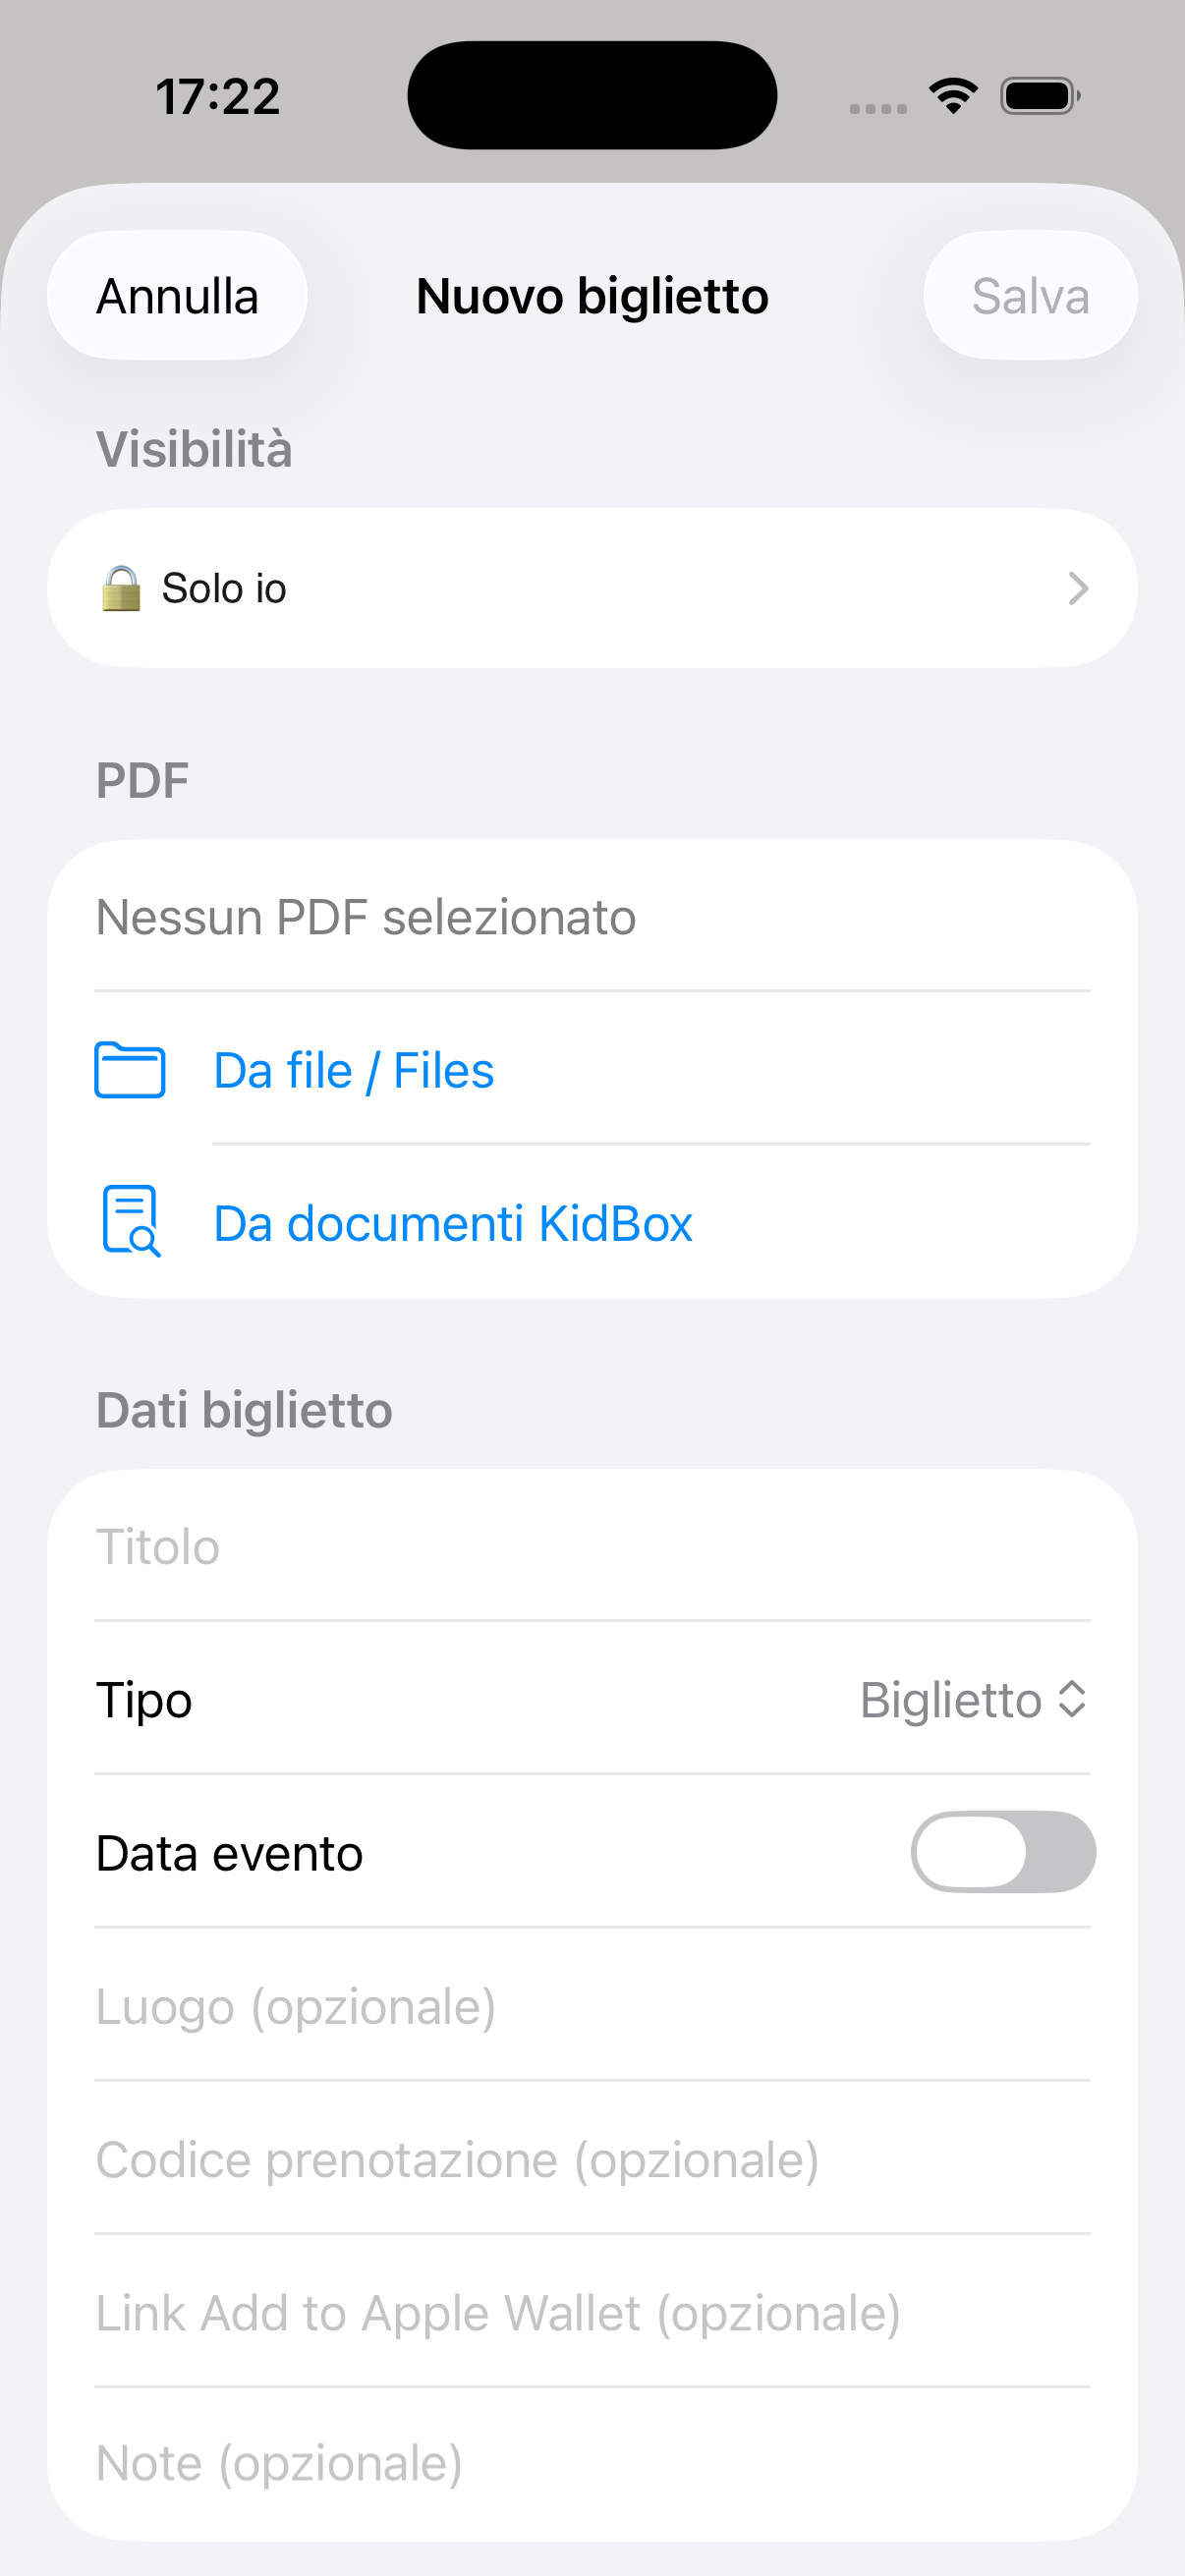
Tap + at the top right and choose the type of item to add. You can scan the barcode or QR code directly with the camera or enter the code manually. Assign a name and, if you like, an icon to recognise it instantly.
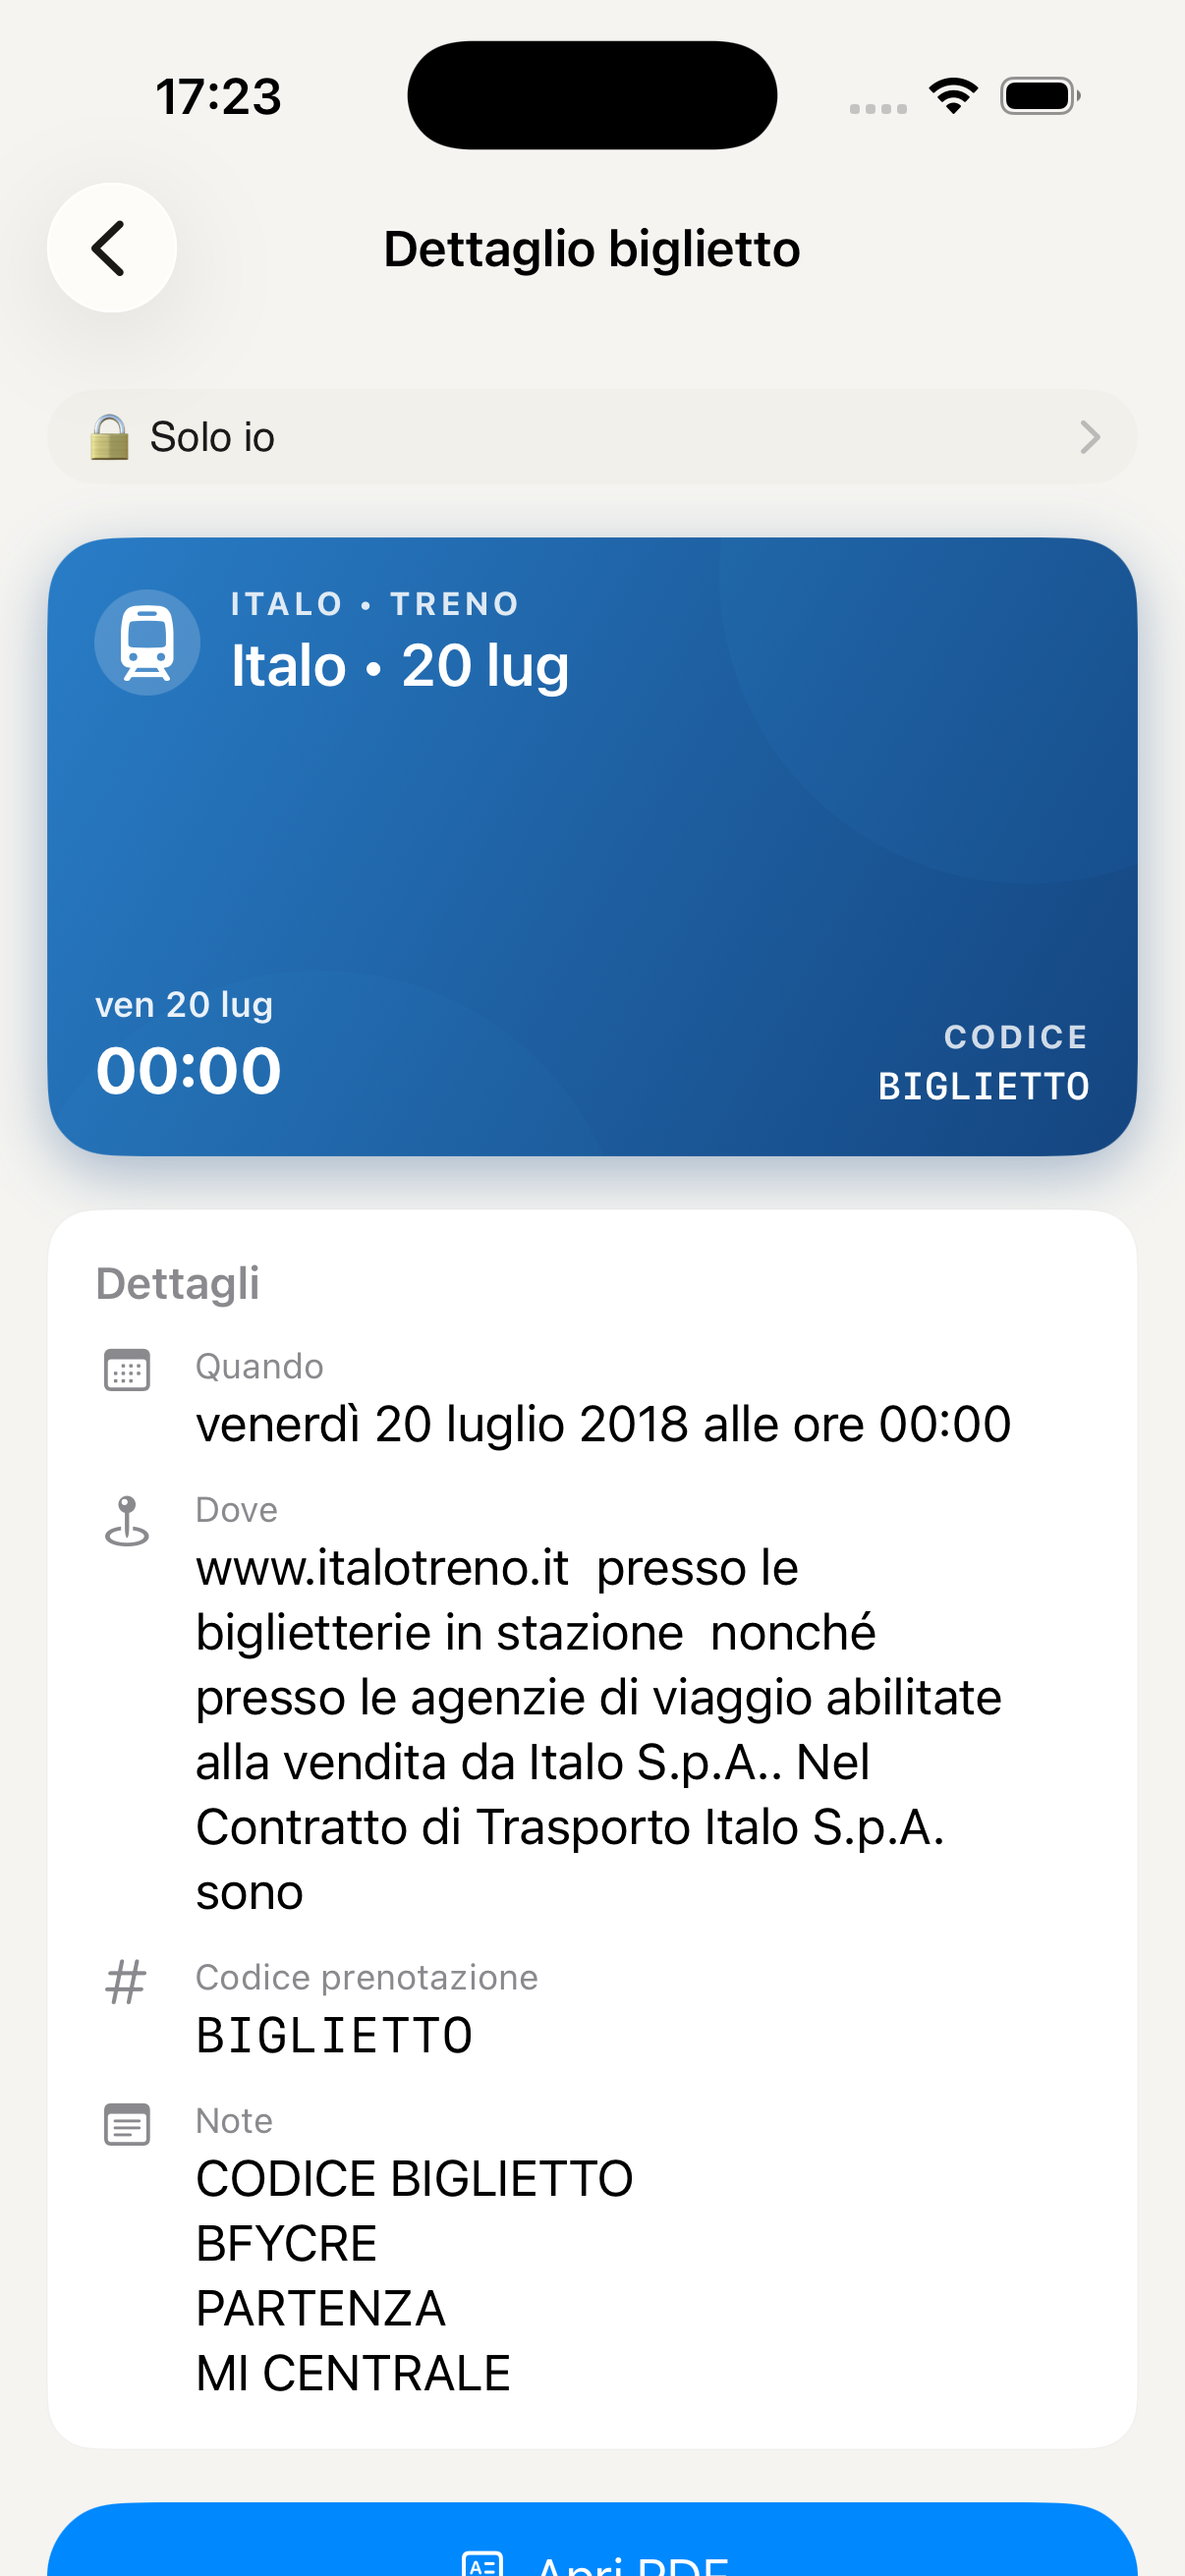
Tap the card or ticket to open the full-screen detail with the barcode or QR code clearly visible — ready to be scanned at the till. The screen stays active until you close the view.
Every Wallet item is automatically visible to all family members. So your partner can also show the loyalty card from their phone, or the kids can use the cinema ticket without you having to send it every time.
Long-press an item to edit it, move it to a different category or archive it when it's no longer needed — for example a ticket for an event that has already happened. Archived items remain accessible but don't appear in the main list.
Ideal for supermarket, gym and pharmacy loyalty cards, cinema membership cards, transport subscriptions and discount coupons. One Wallet for the whole family — nobody is ever without the right card at the wrong moment.
Wallet with family cards and tickets
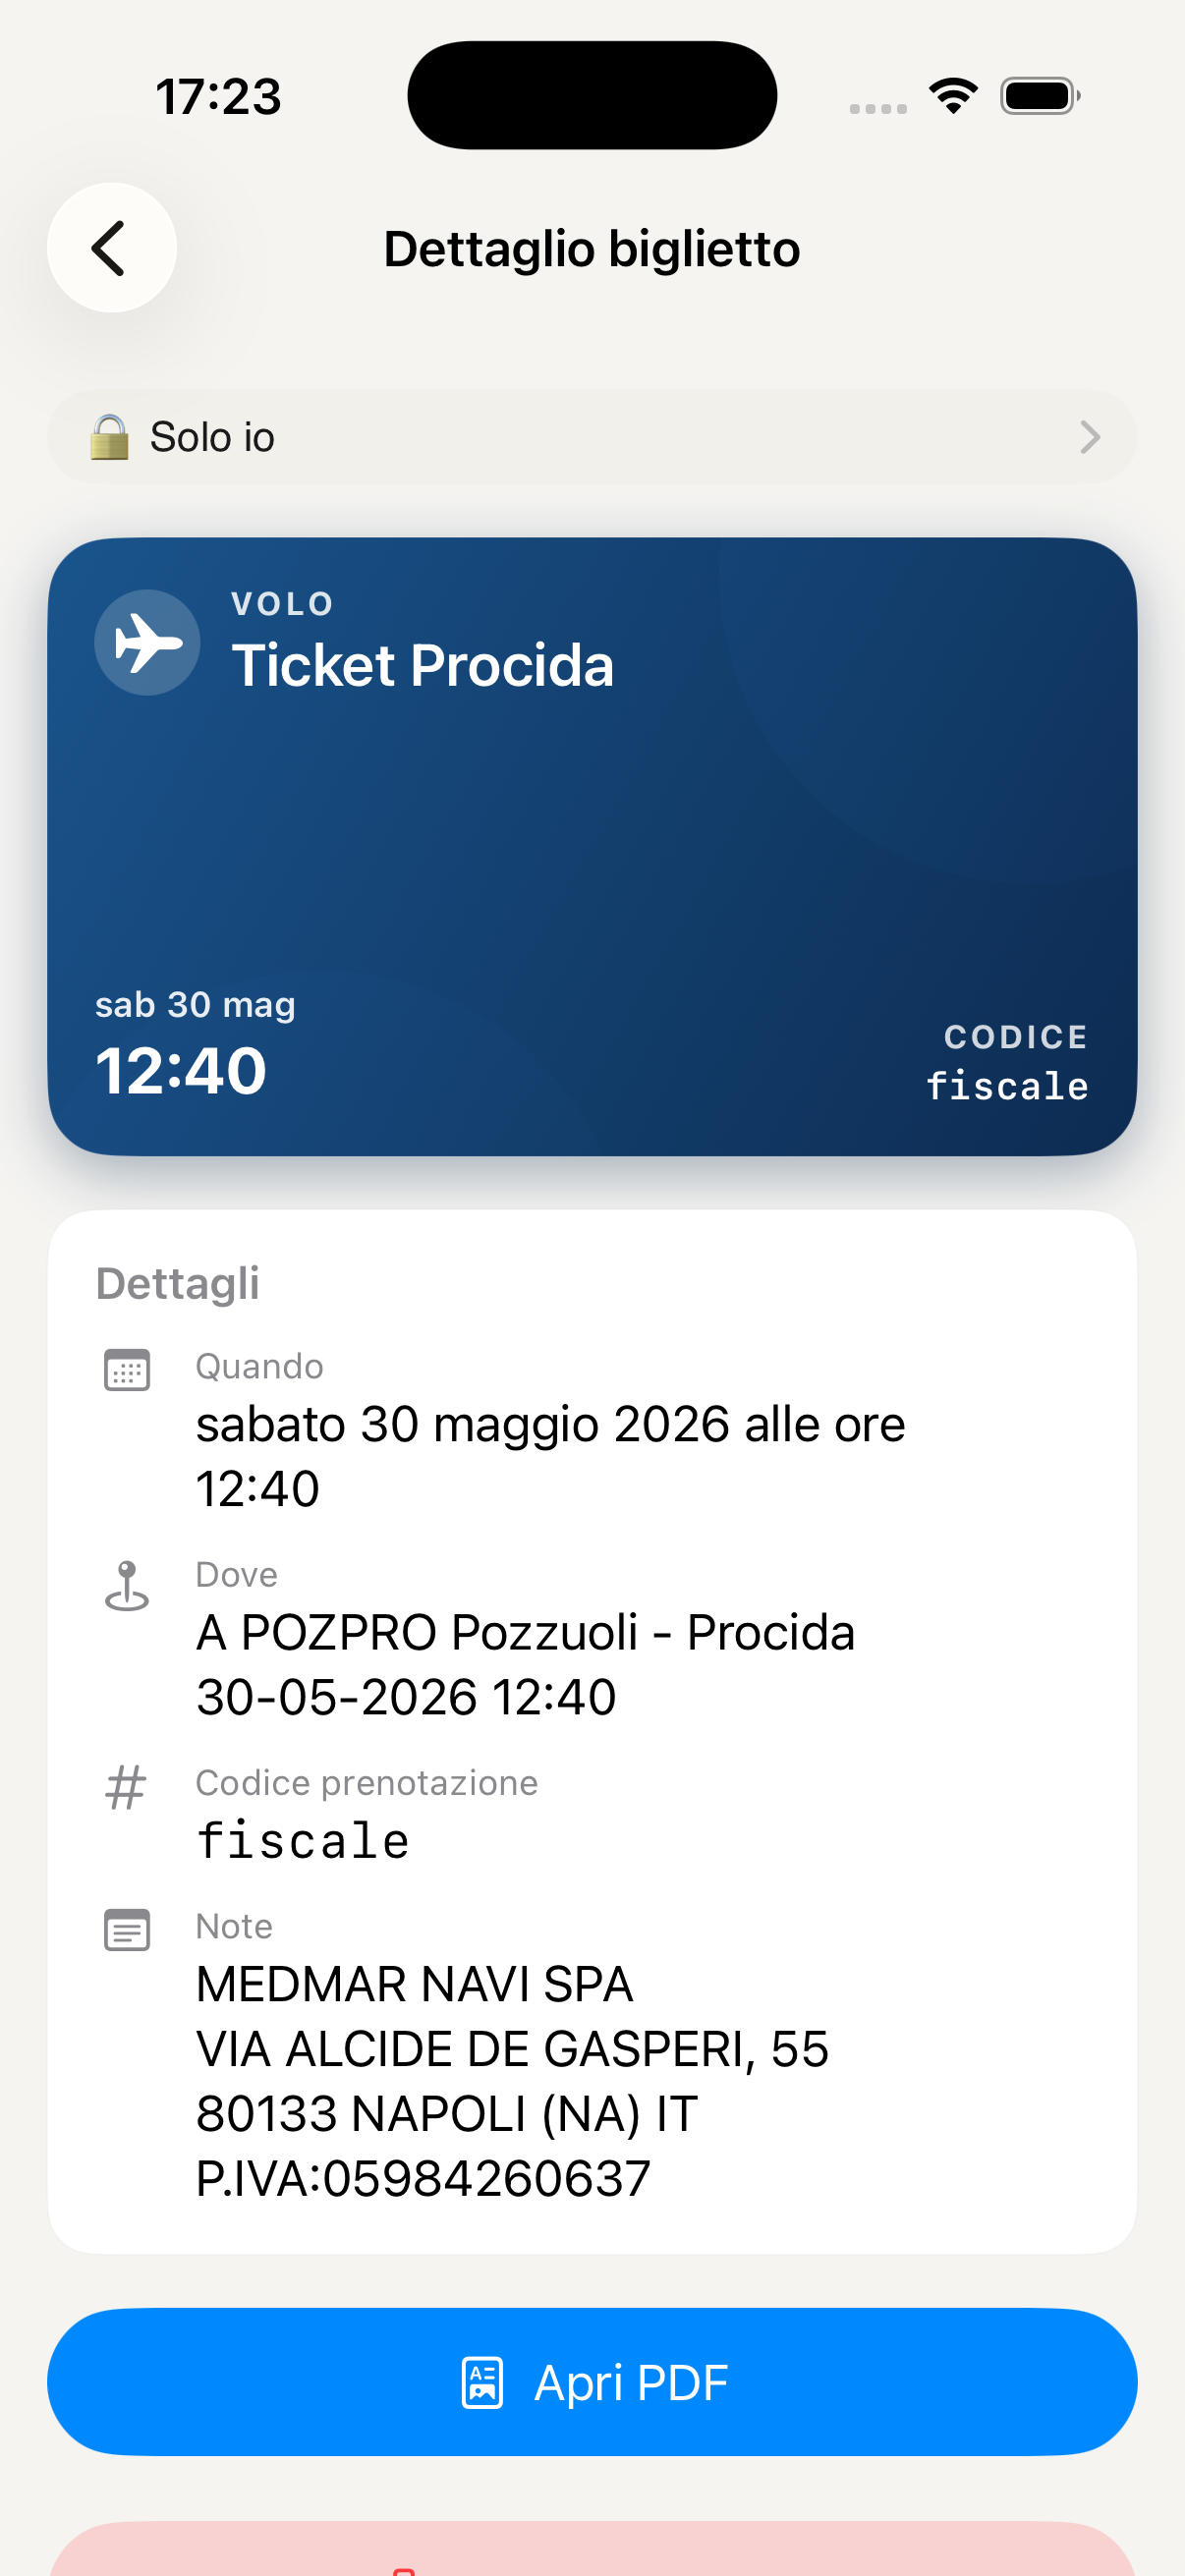
Card detail with barcode
Add card or ticket
Scan code with camera
Documents & Photos
Archive important documents securely and share them with whoever you choose — the whole family, only some members, or keep them private. Supports PDFs, images, Word, Excel and much more.
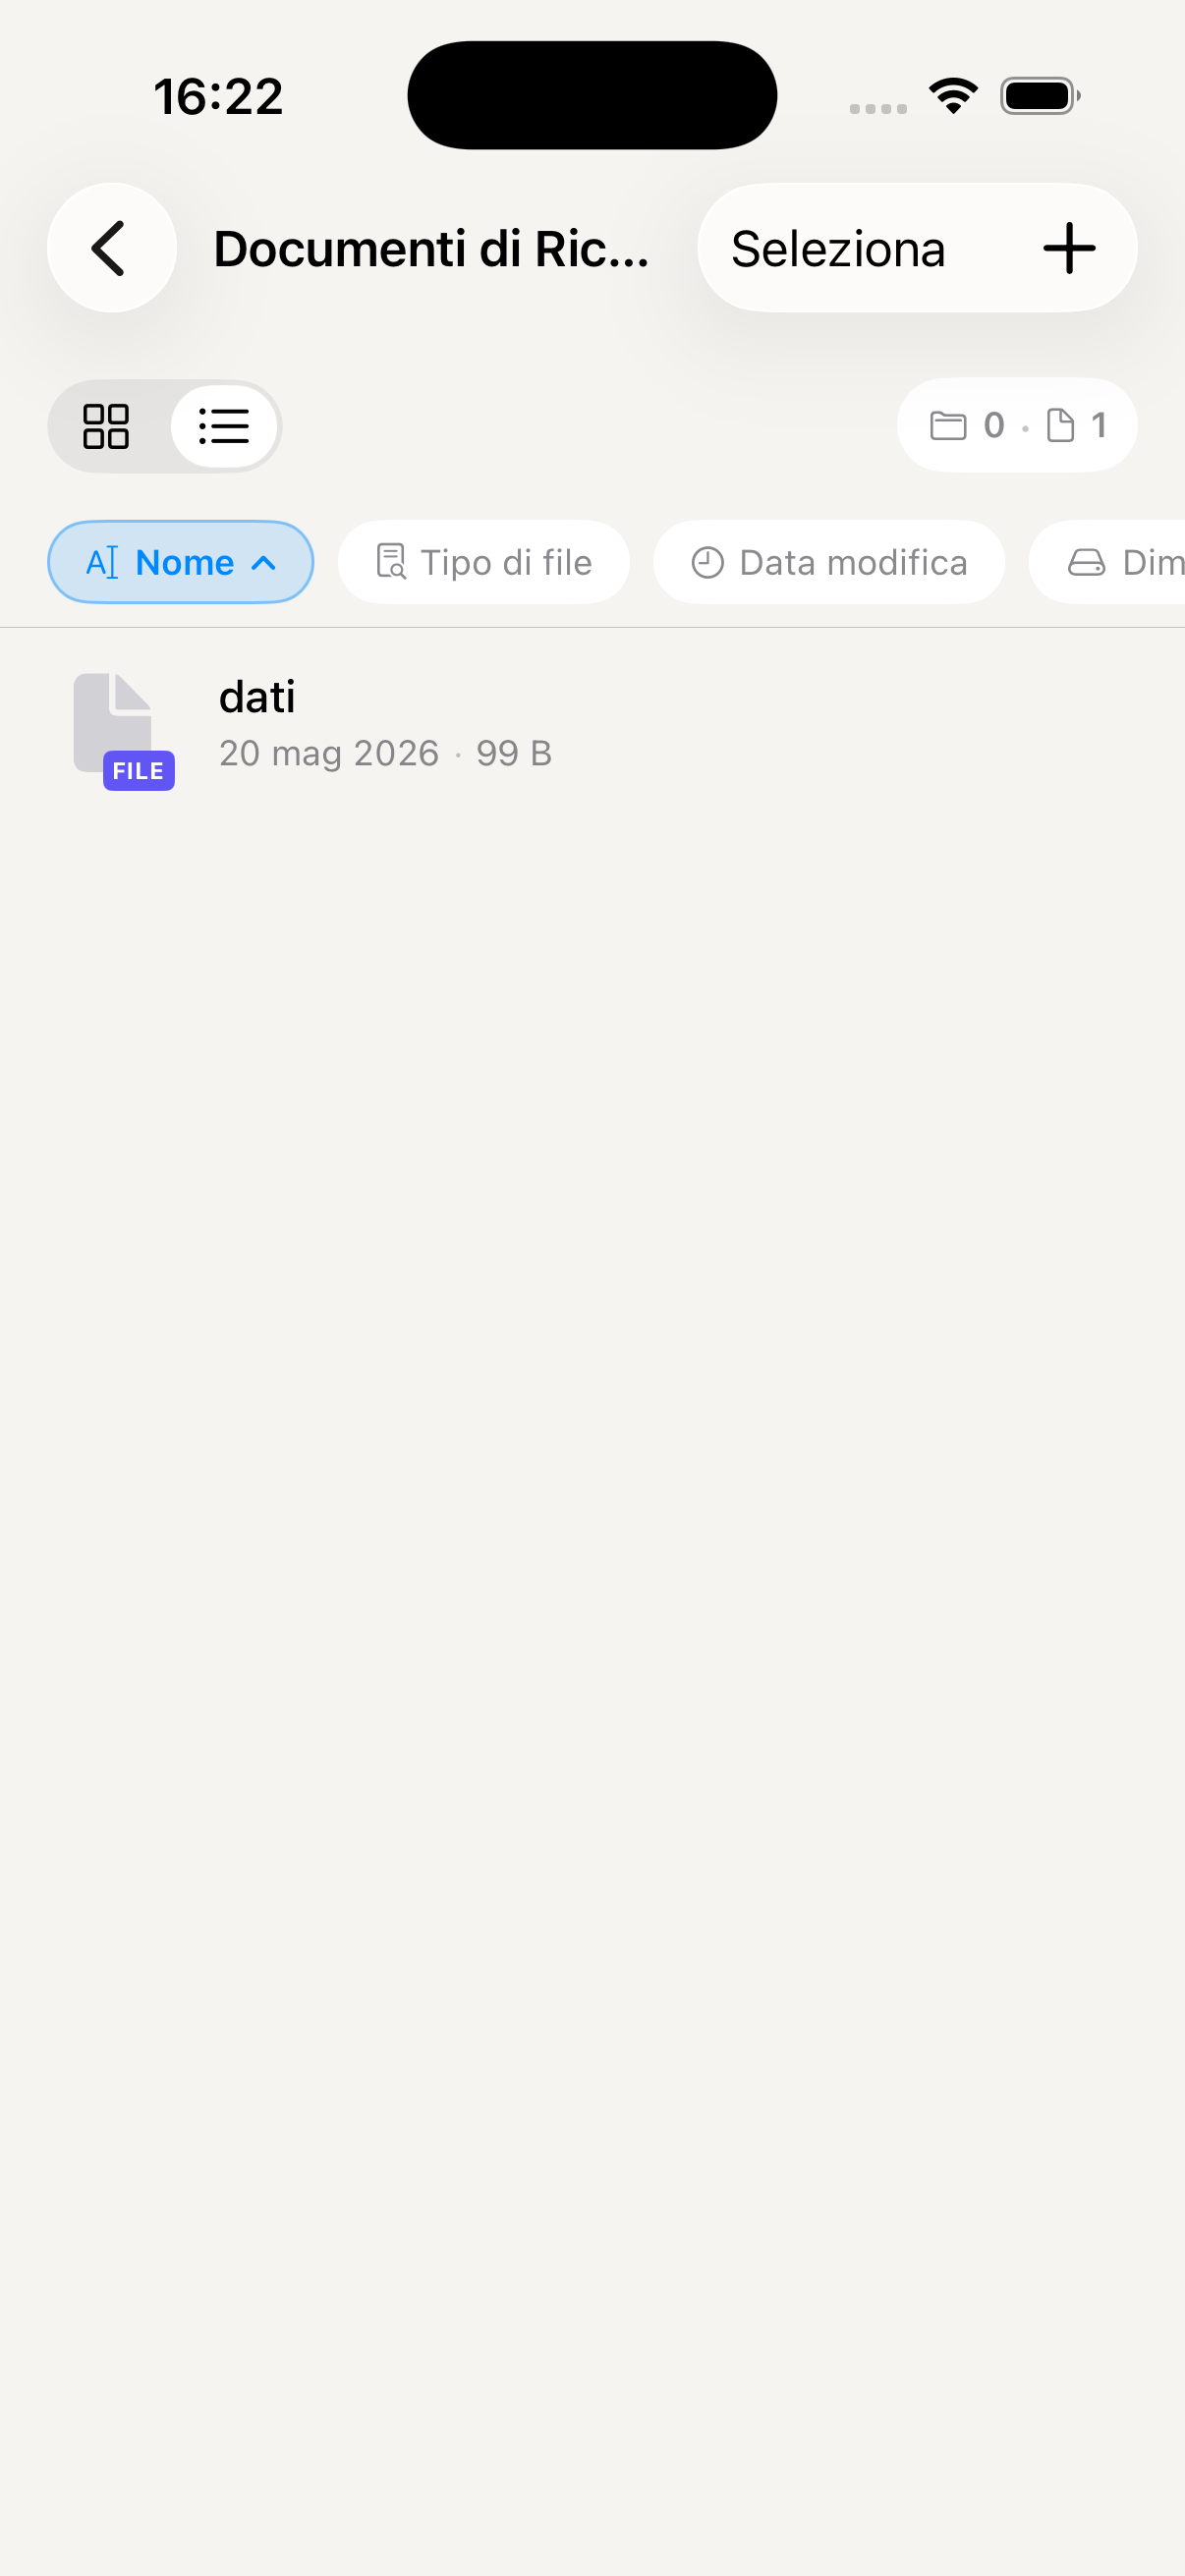
Access Documents from the "More" menu in the bottom bar. You'll find the archive organised in folders — you can create themed folders such as "School", "Insurance", "Passports", "Medical".
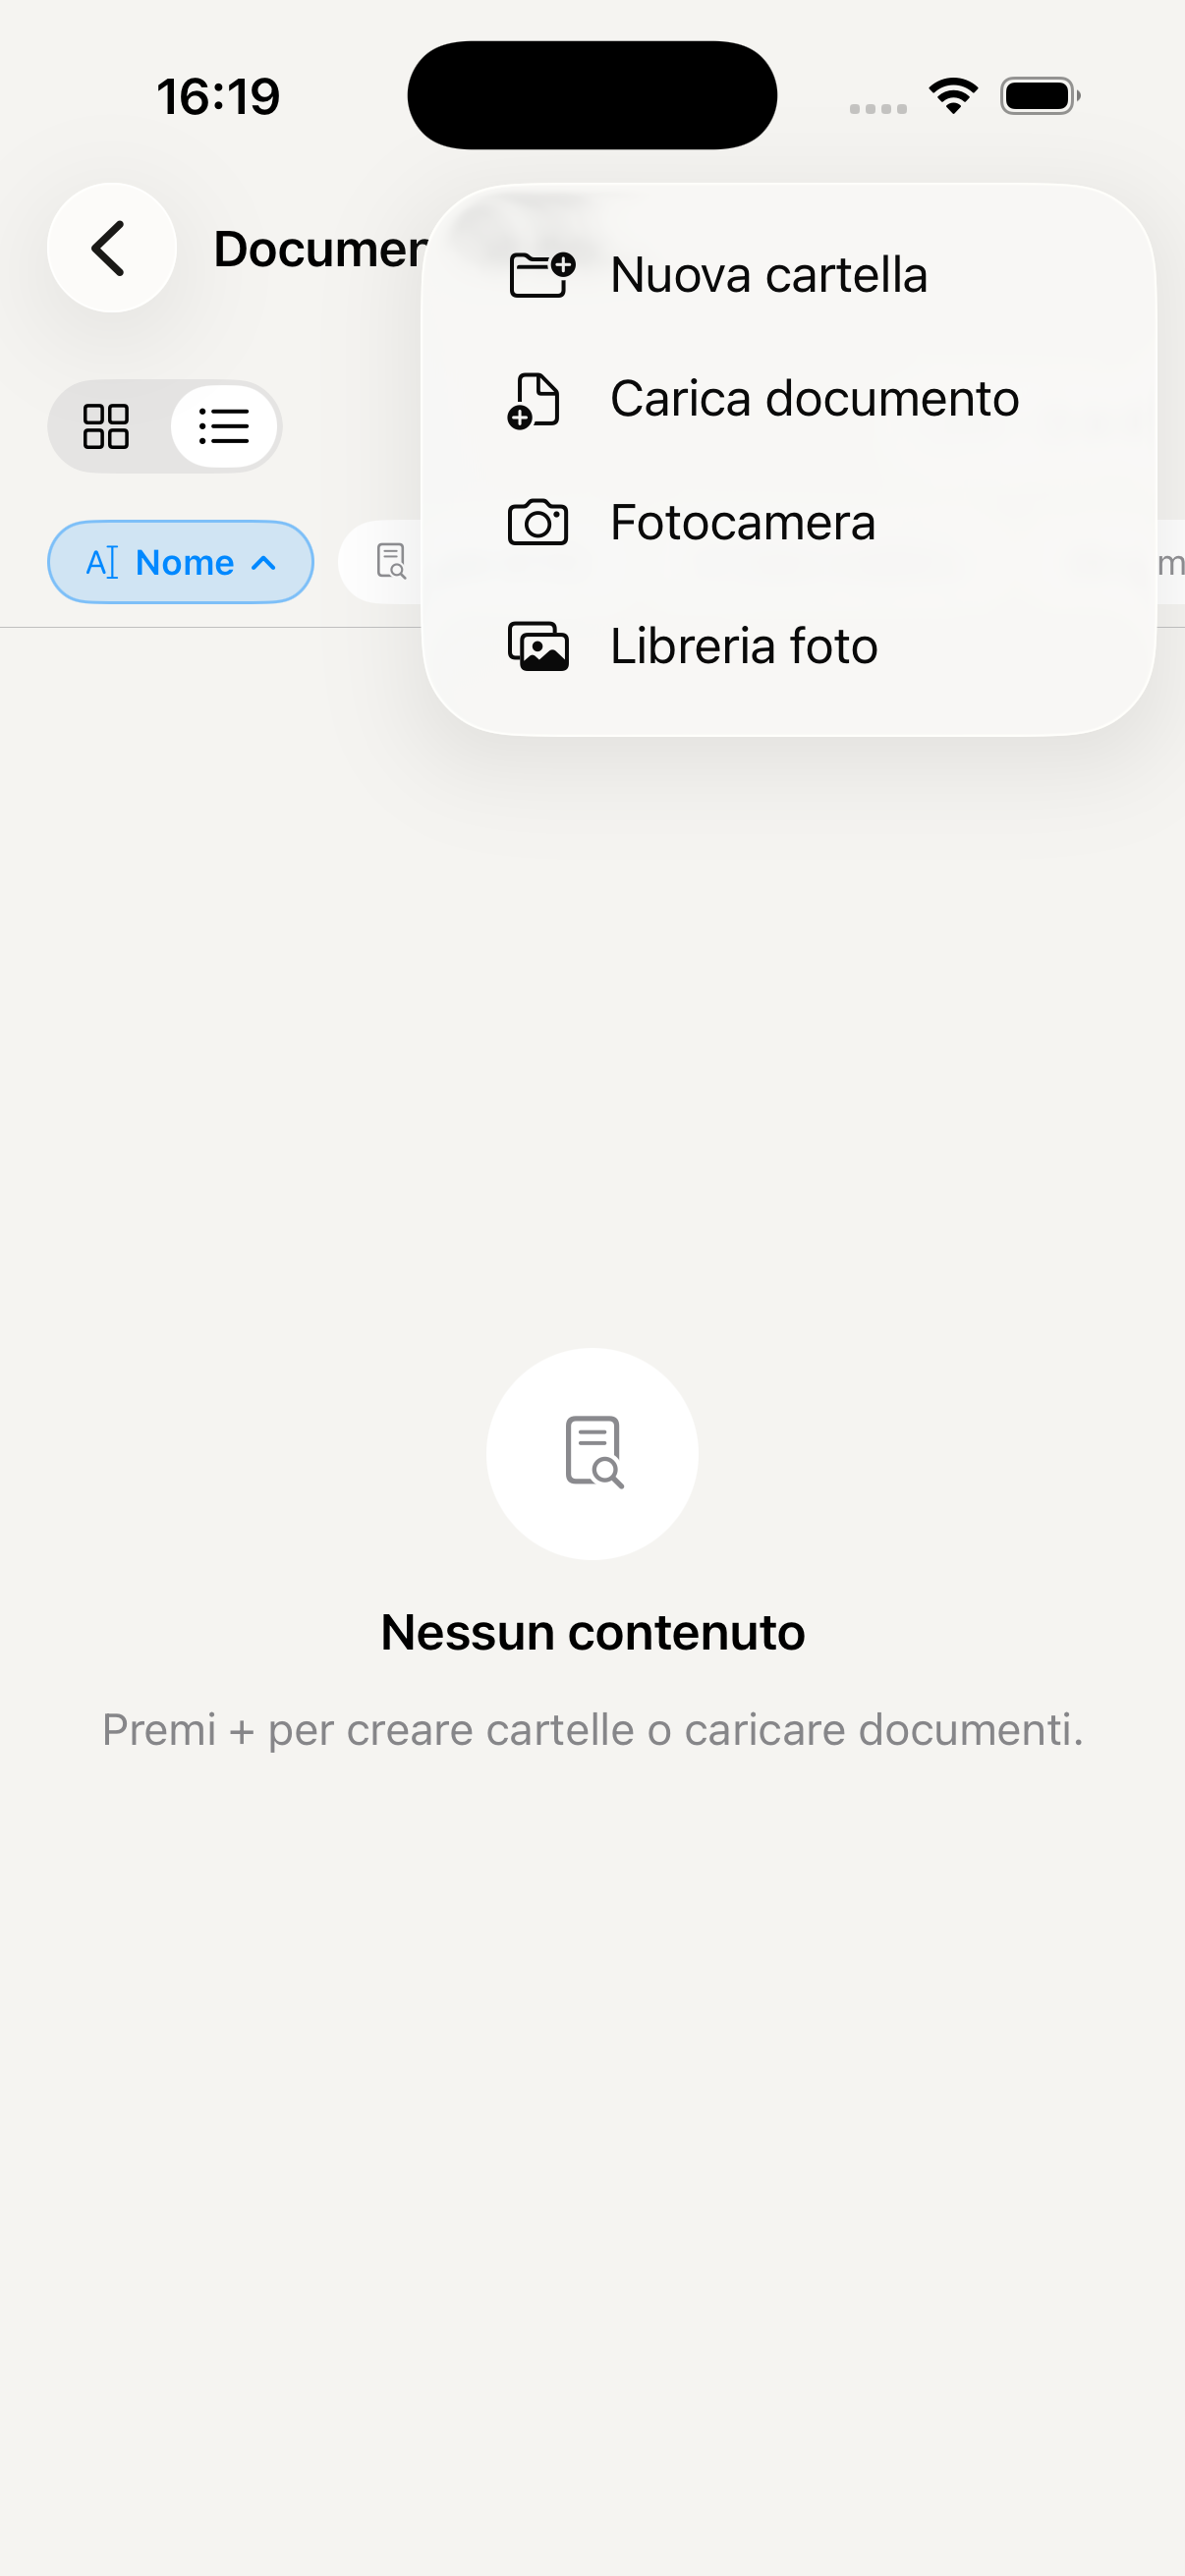
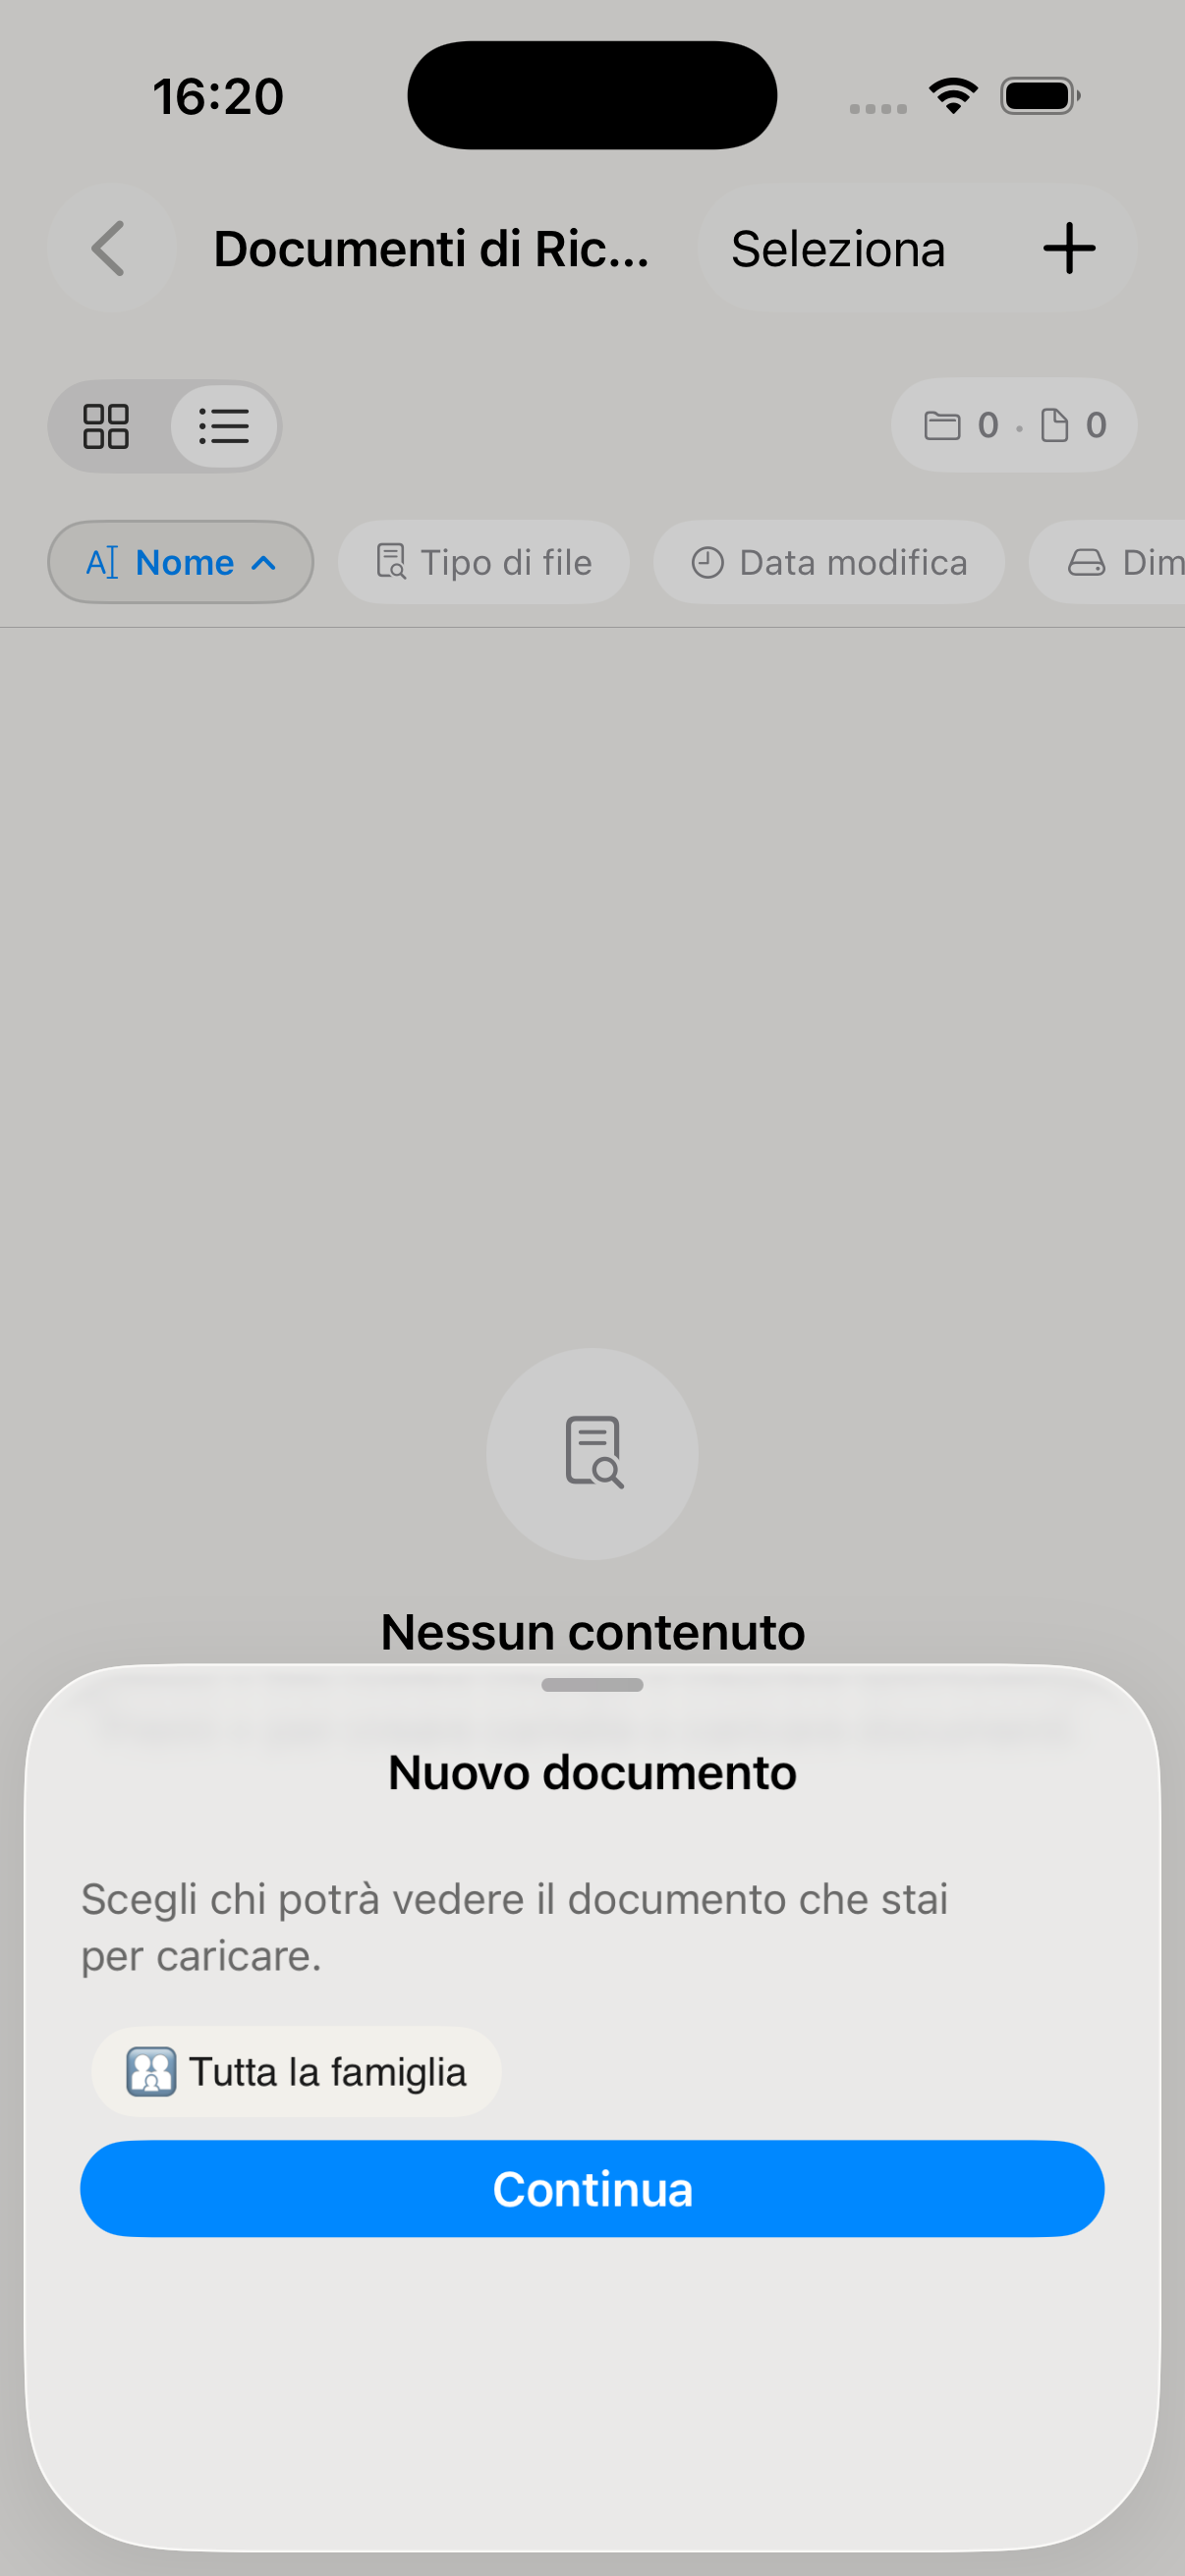
Tap + and choose the source: from the iPhone Files app, from the Photo Library, or take a photo directly with the camera to photograph a paper document. KidBox supports PDF, JPG, PNG, Word and Excel.
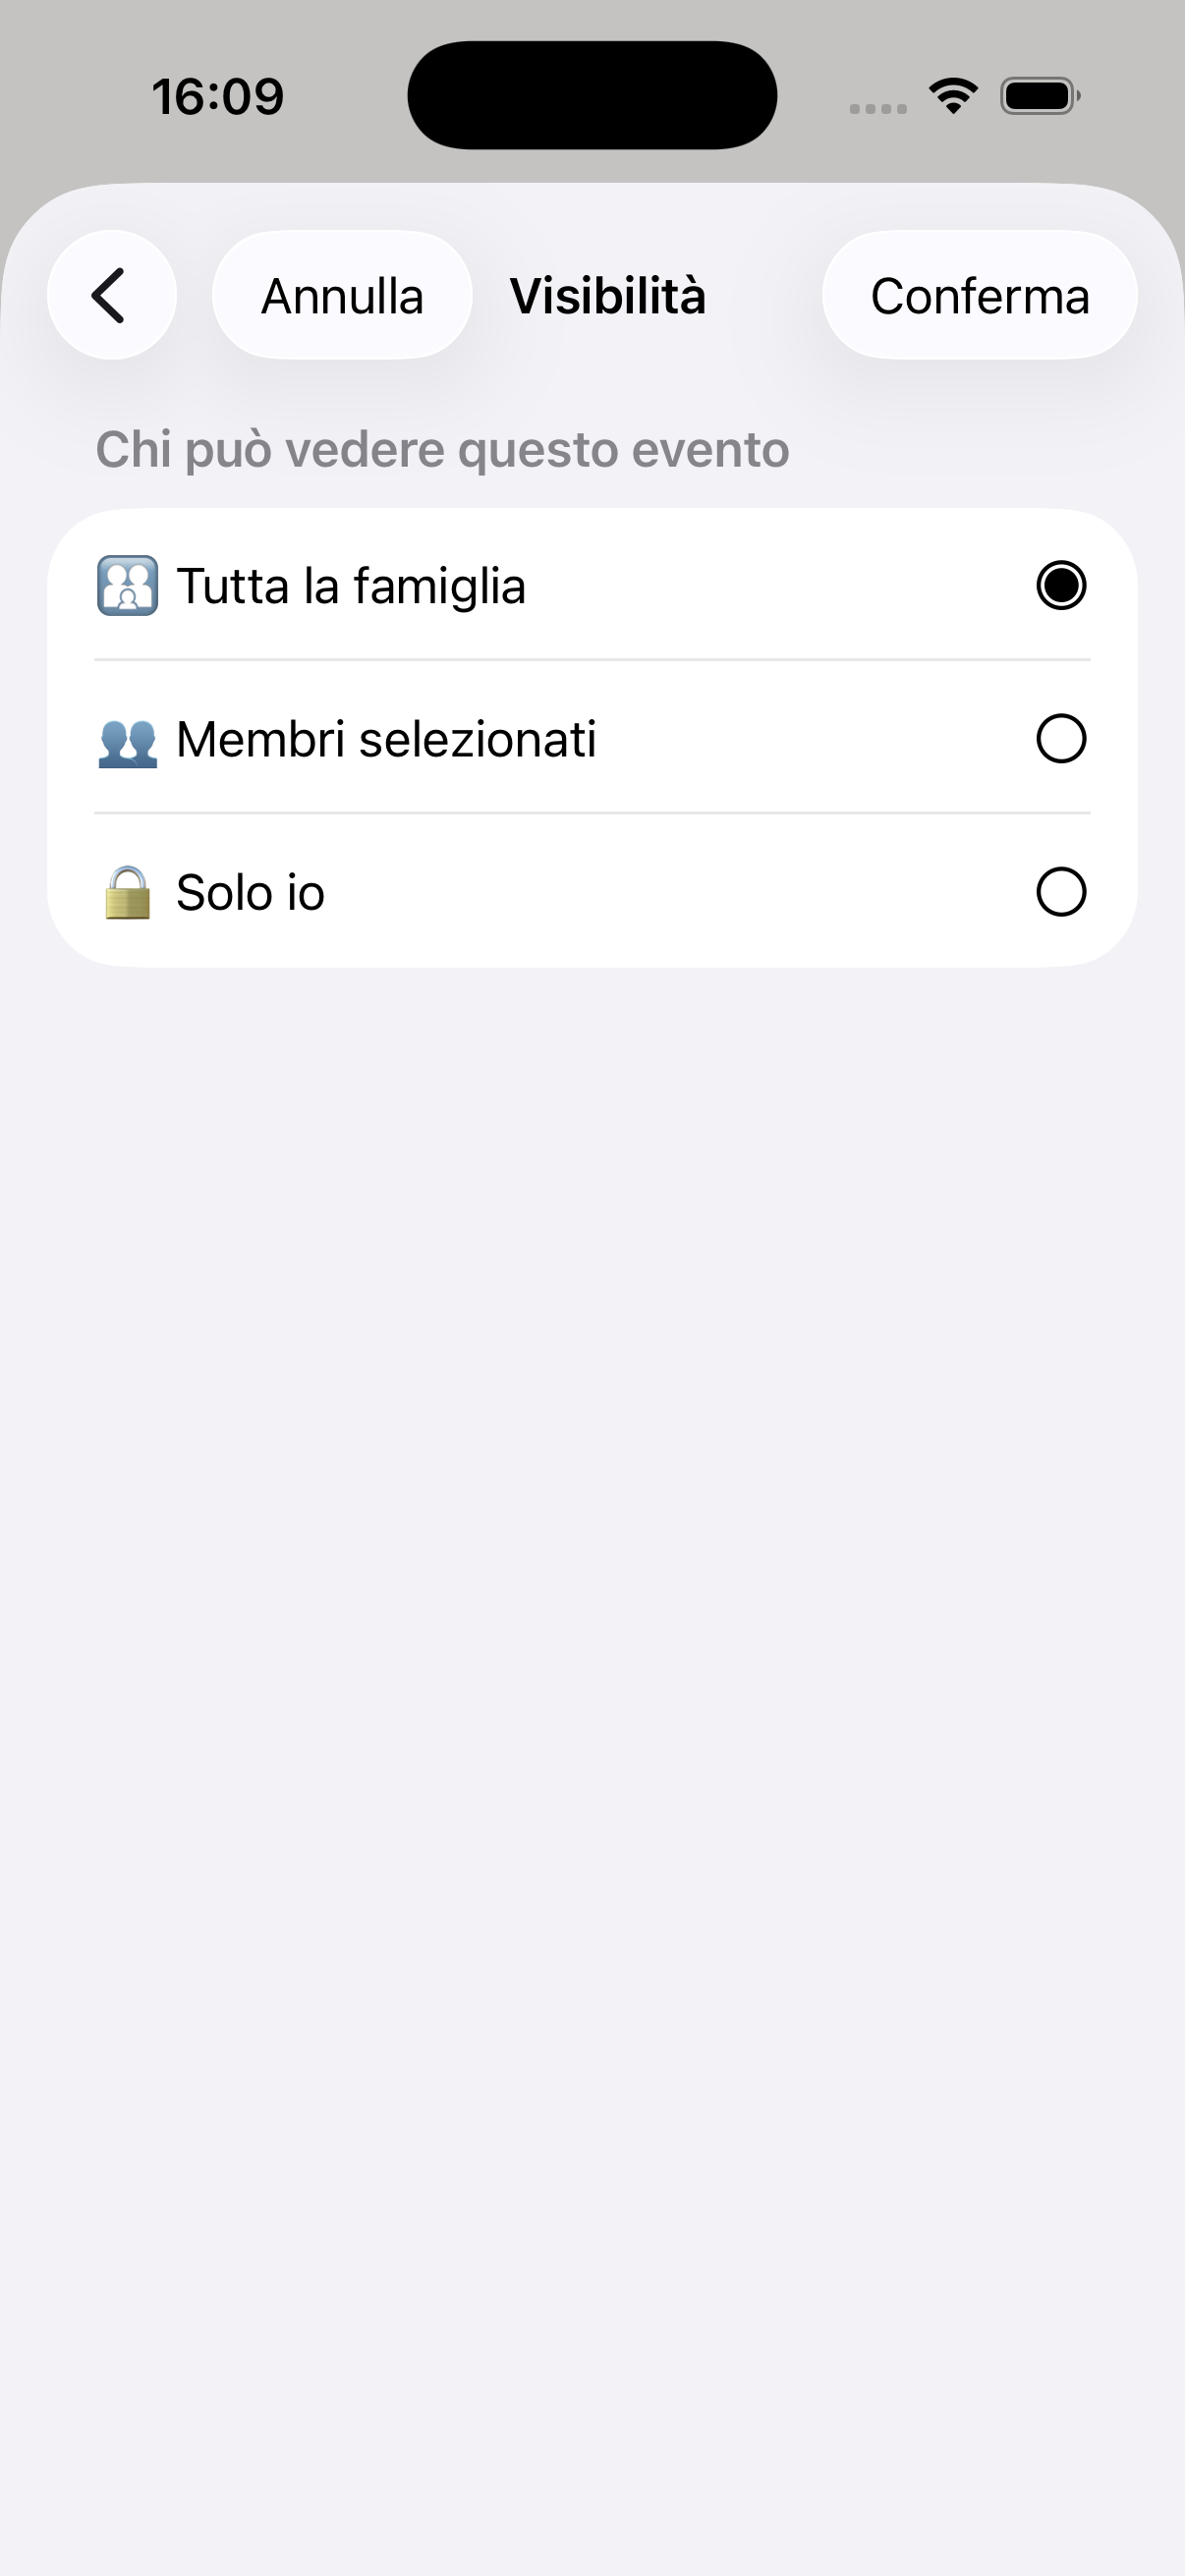
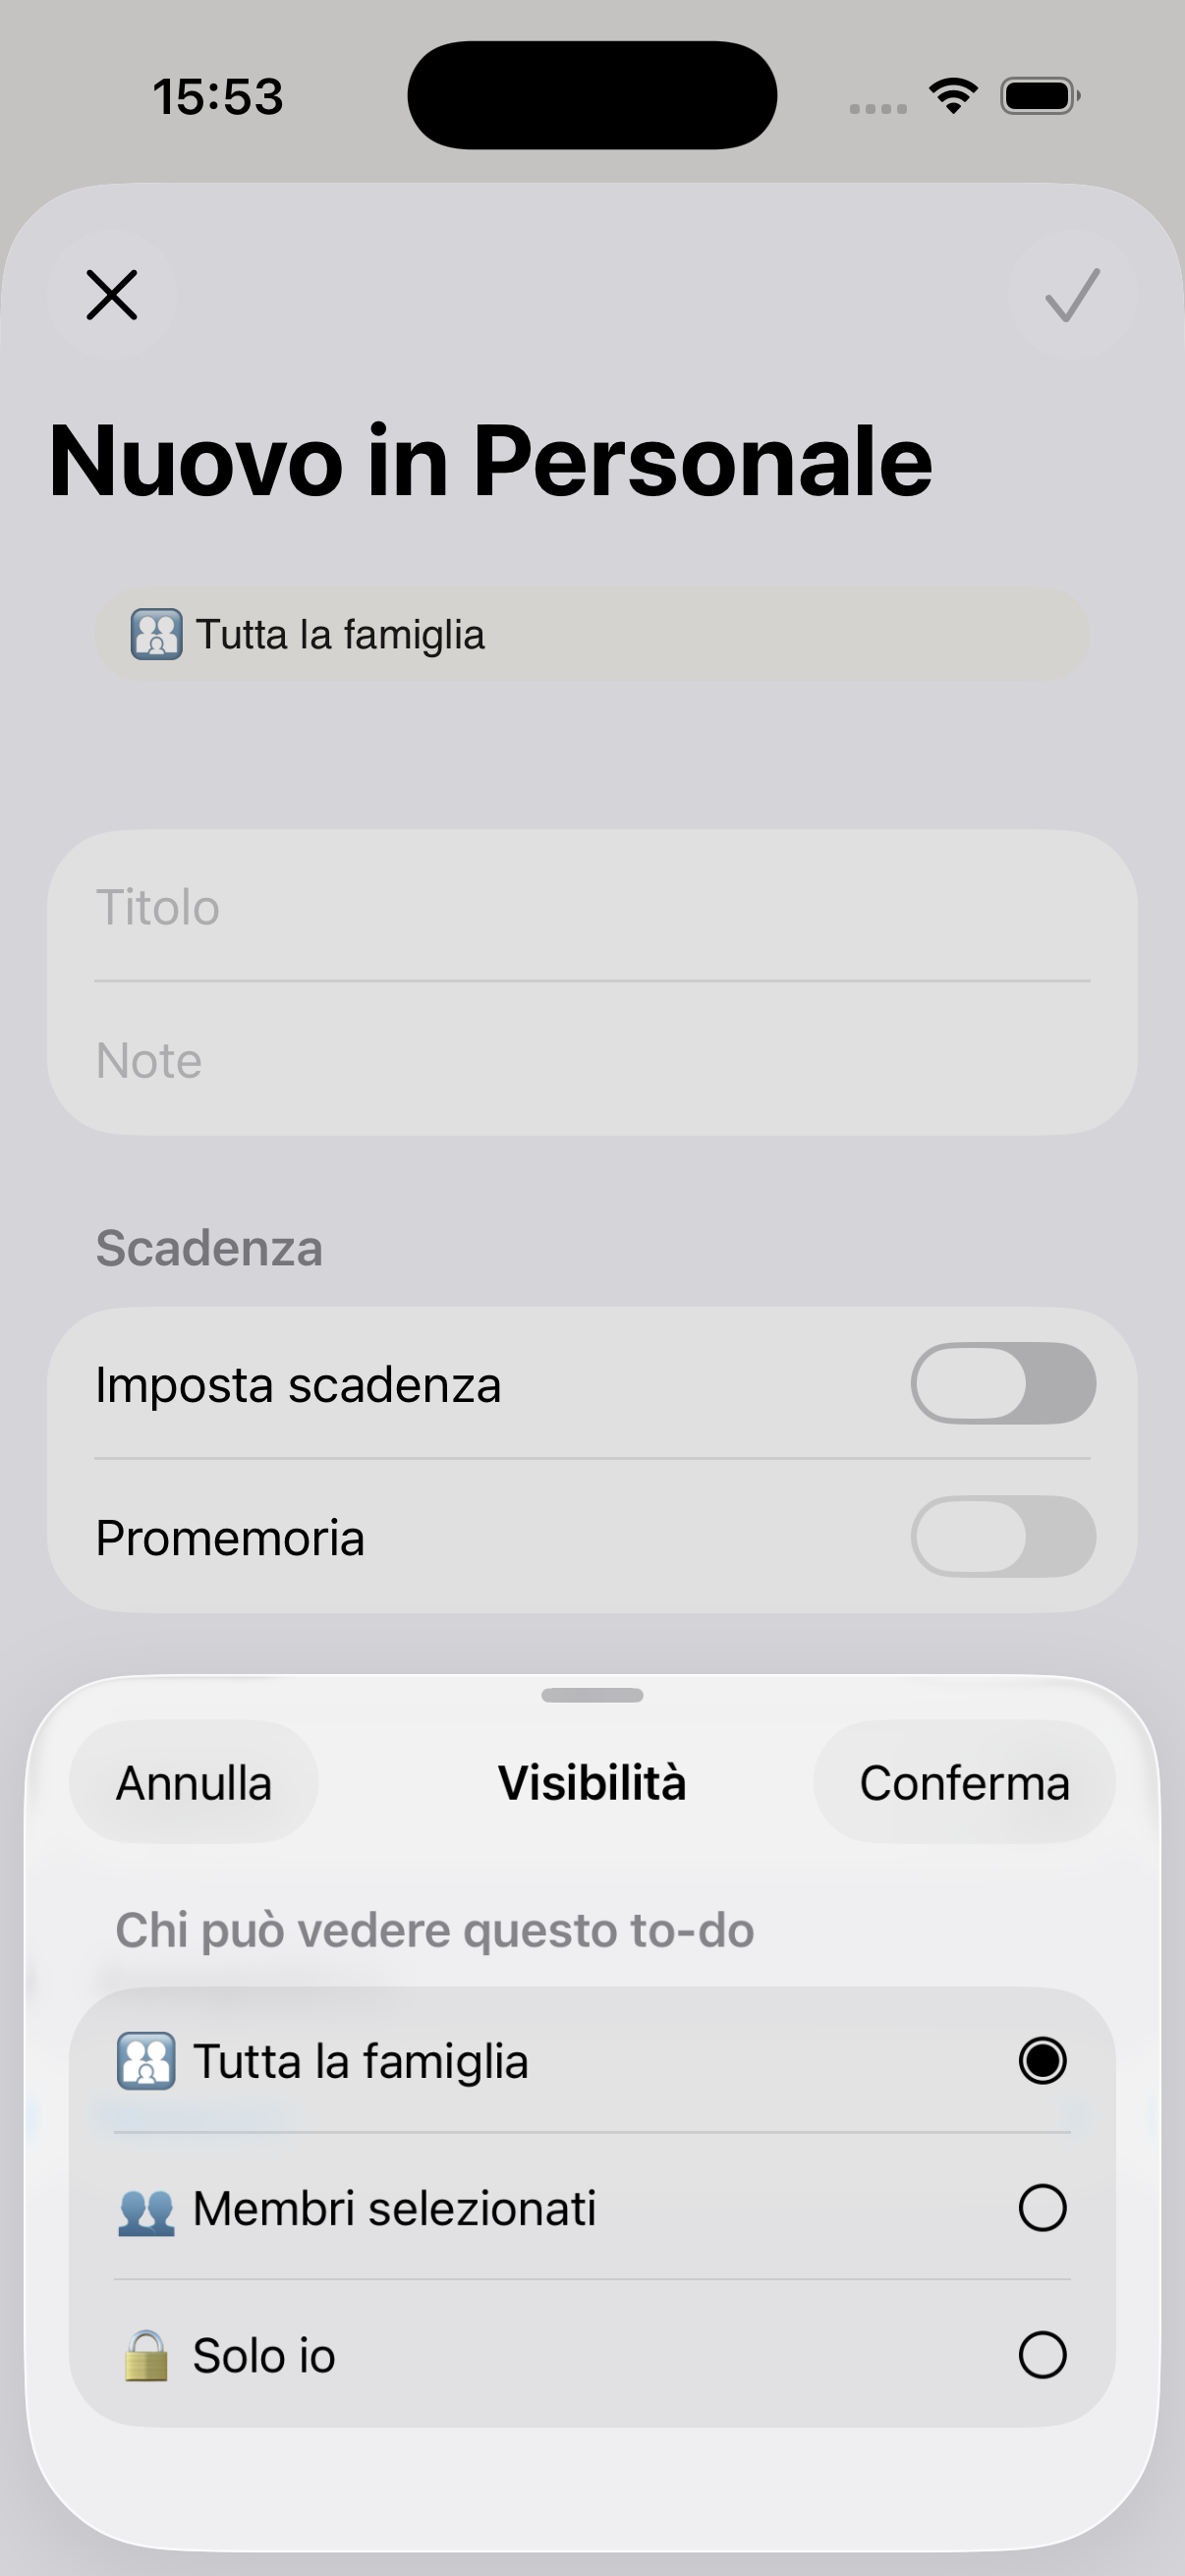
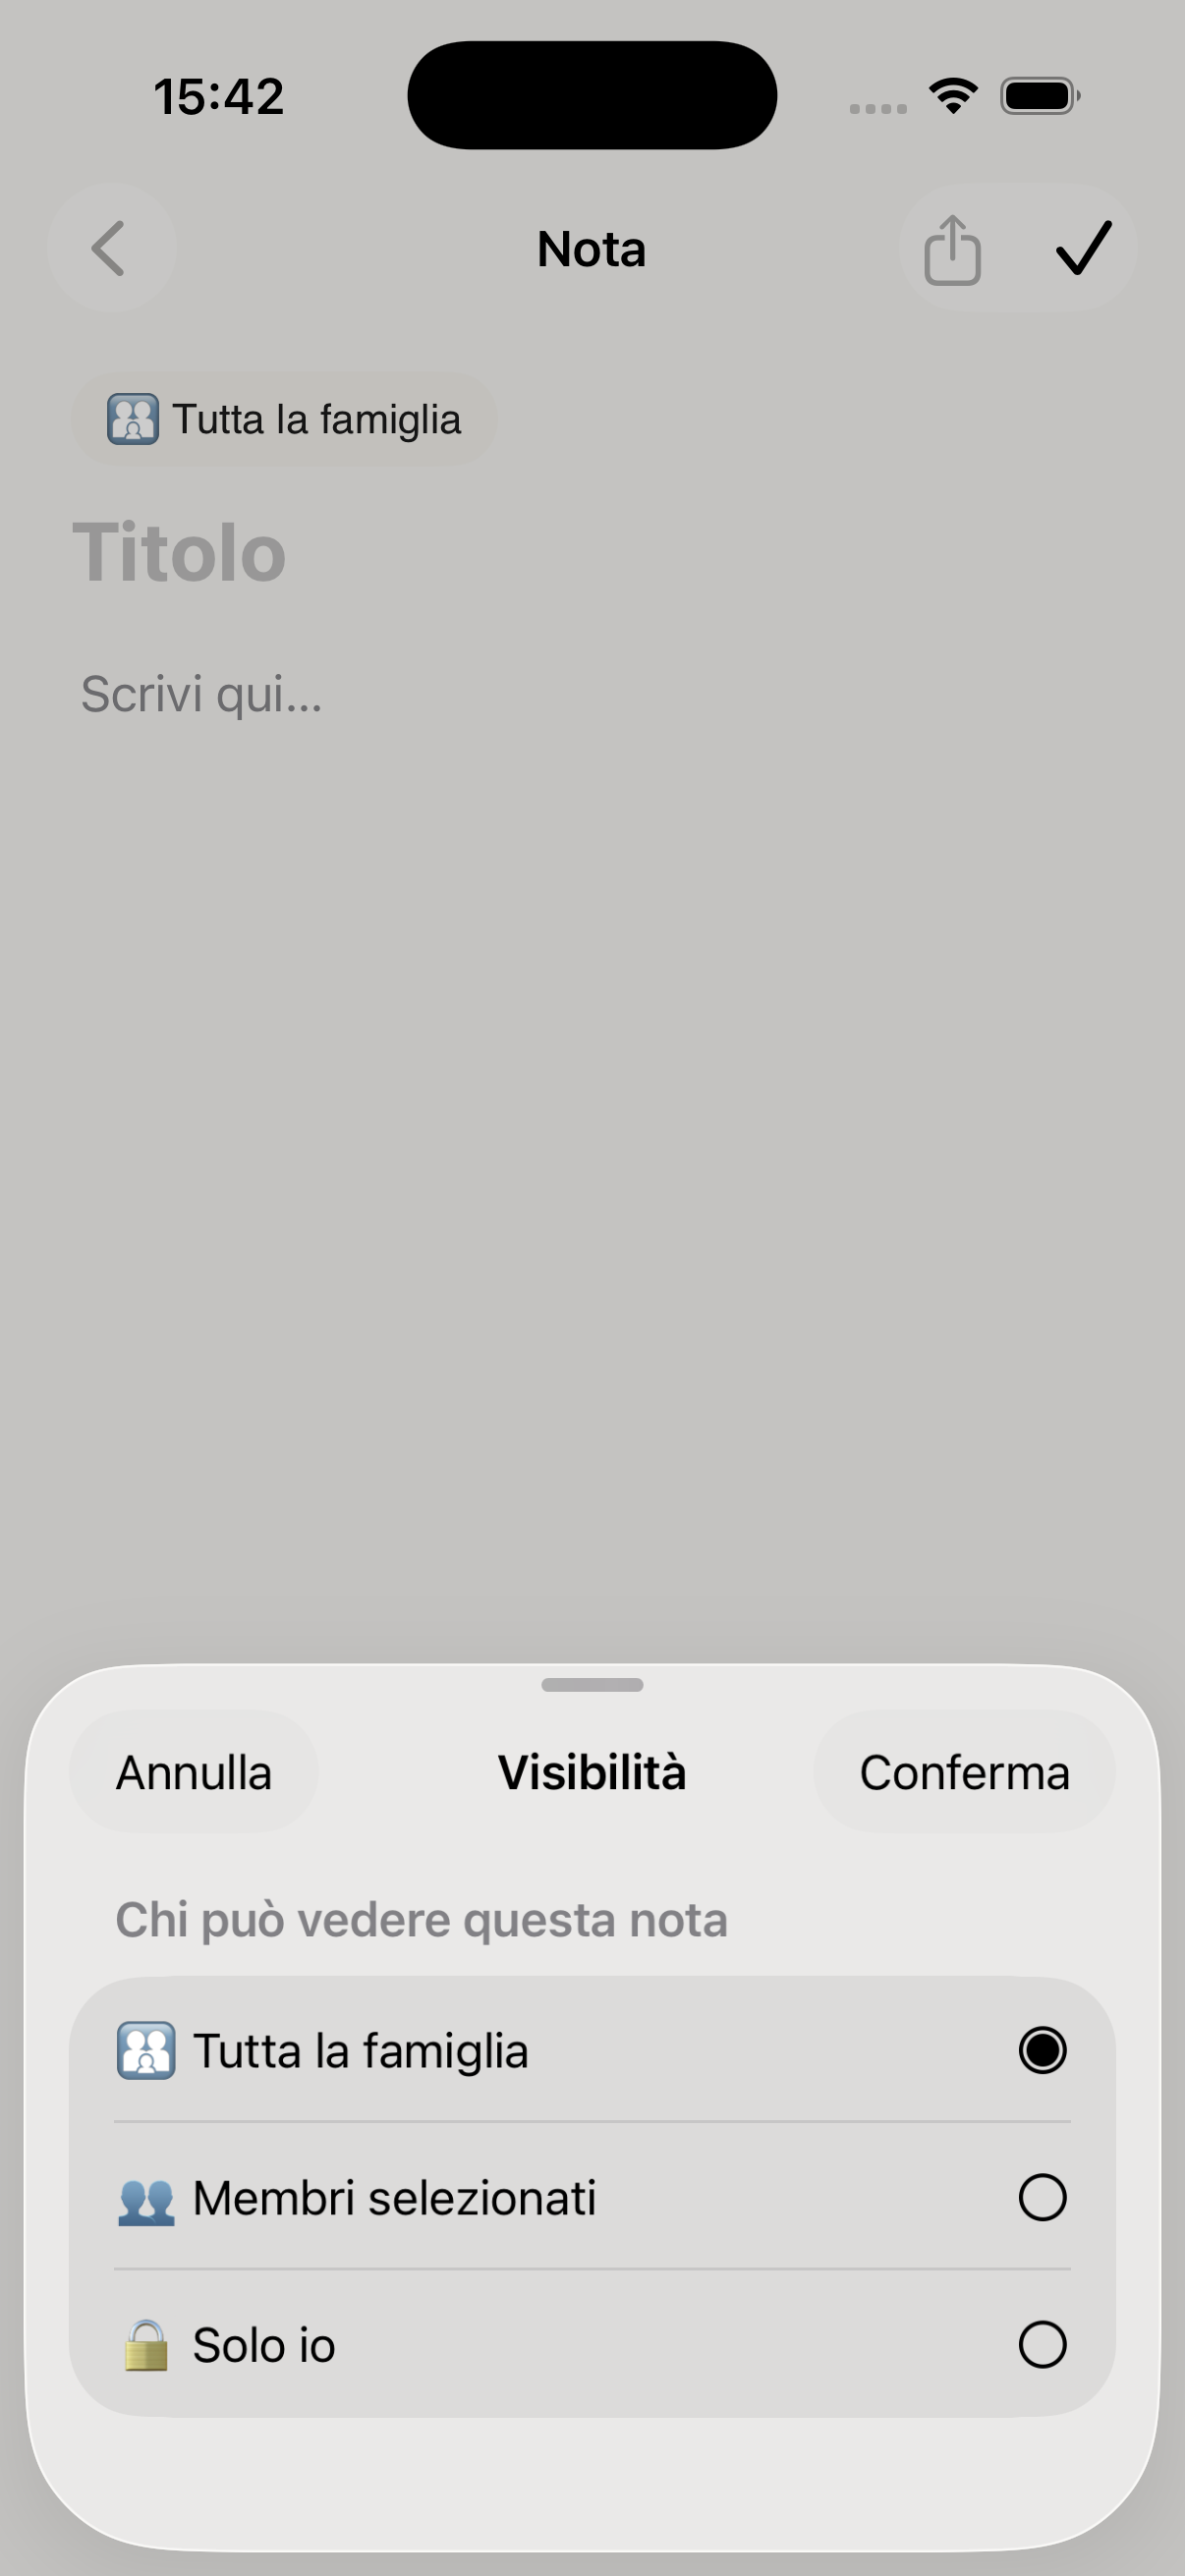
Each document has three visibility levels you can choose at upload time or change later:
🔒 Only me — visible only to you, other members cannot see it
👨👩👧 Family — shared with all members of your KidBox family
🔗 External link — generates a shareable link for anyone, even outside the app (e.g. doctor, teacher, grandparents)
Tap the document, select Share and activate Generate external link. You'll get a link you can send via WhatsApp, email or SMS — the recipient can open the document even without having KidBox installed.
Select two or more PDF documents by tapping Select at the top right, tick the files you want to merge in the desired order, then tap Merge PDF. KidBox generates a single combined PDF file that you can save or share immediately.
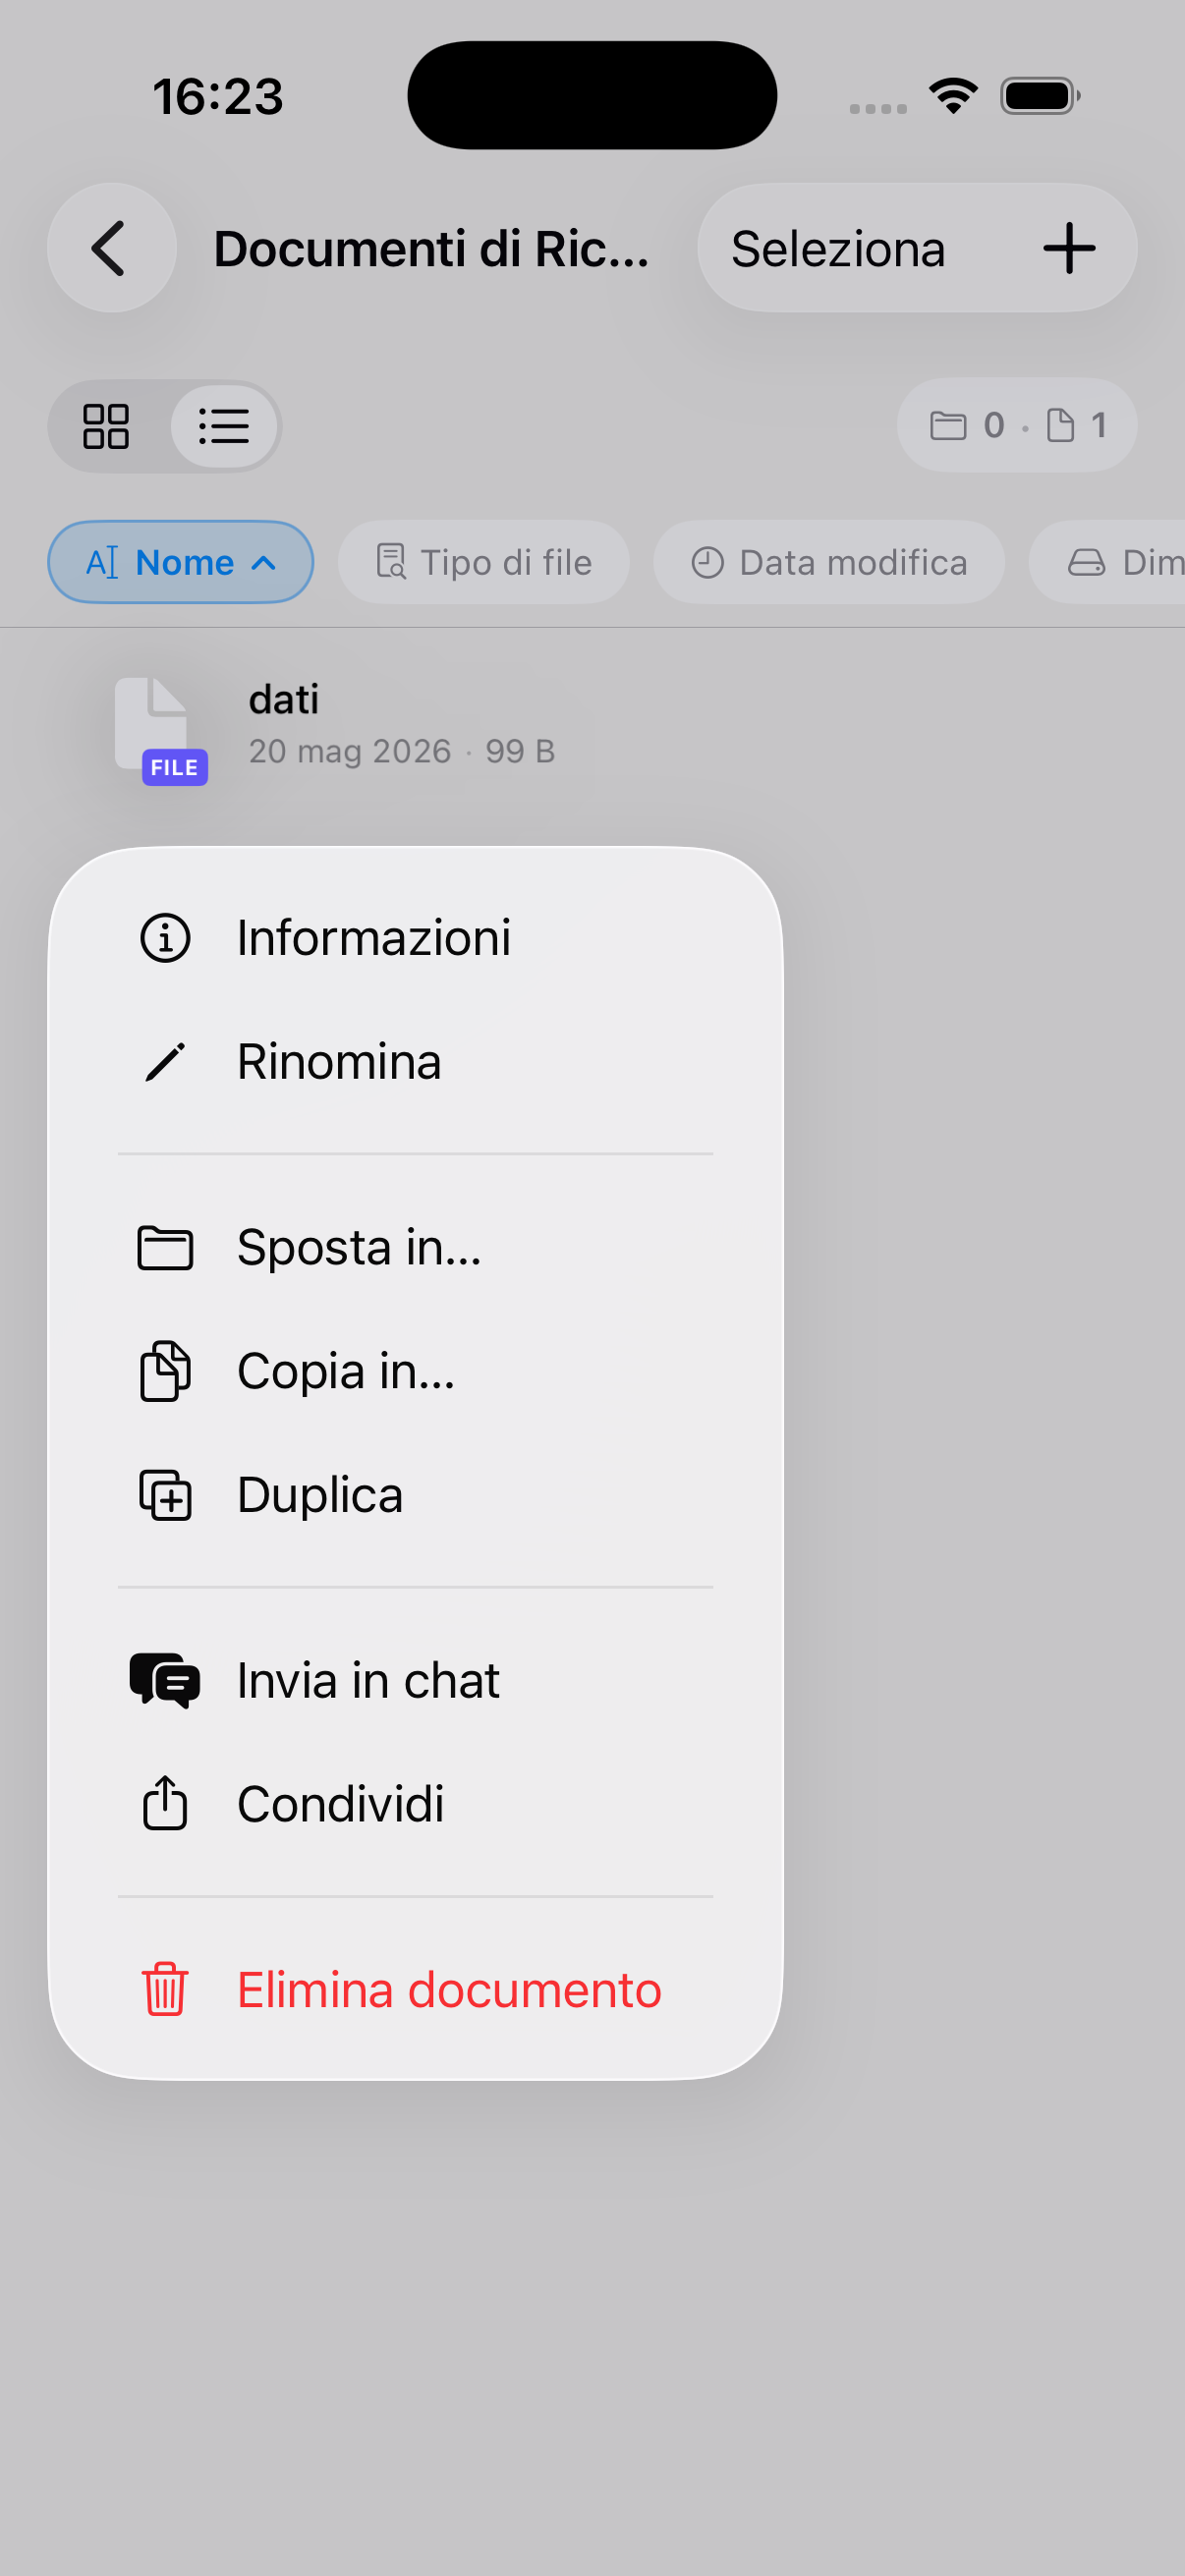
Tap any document to open the preview directly in the app. From there you can share it, download it to the device, rename it or move it to another folder.
Use the external link feature to send the medical report to the paediatrician or the school report to the grandparents — without them needing to download any app. The link can be deactivated at any time from the document card.
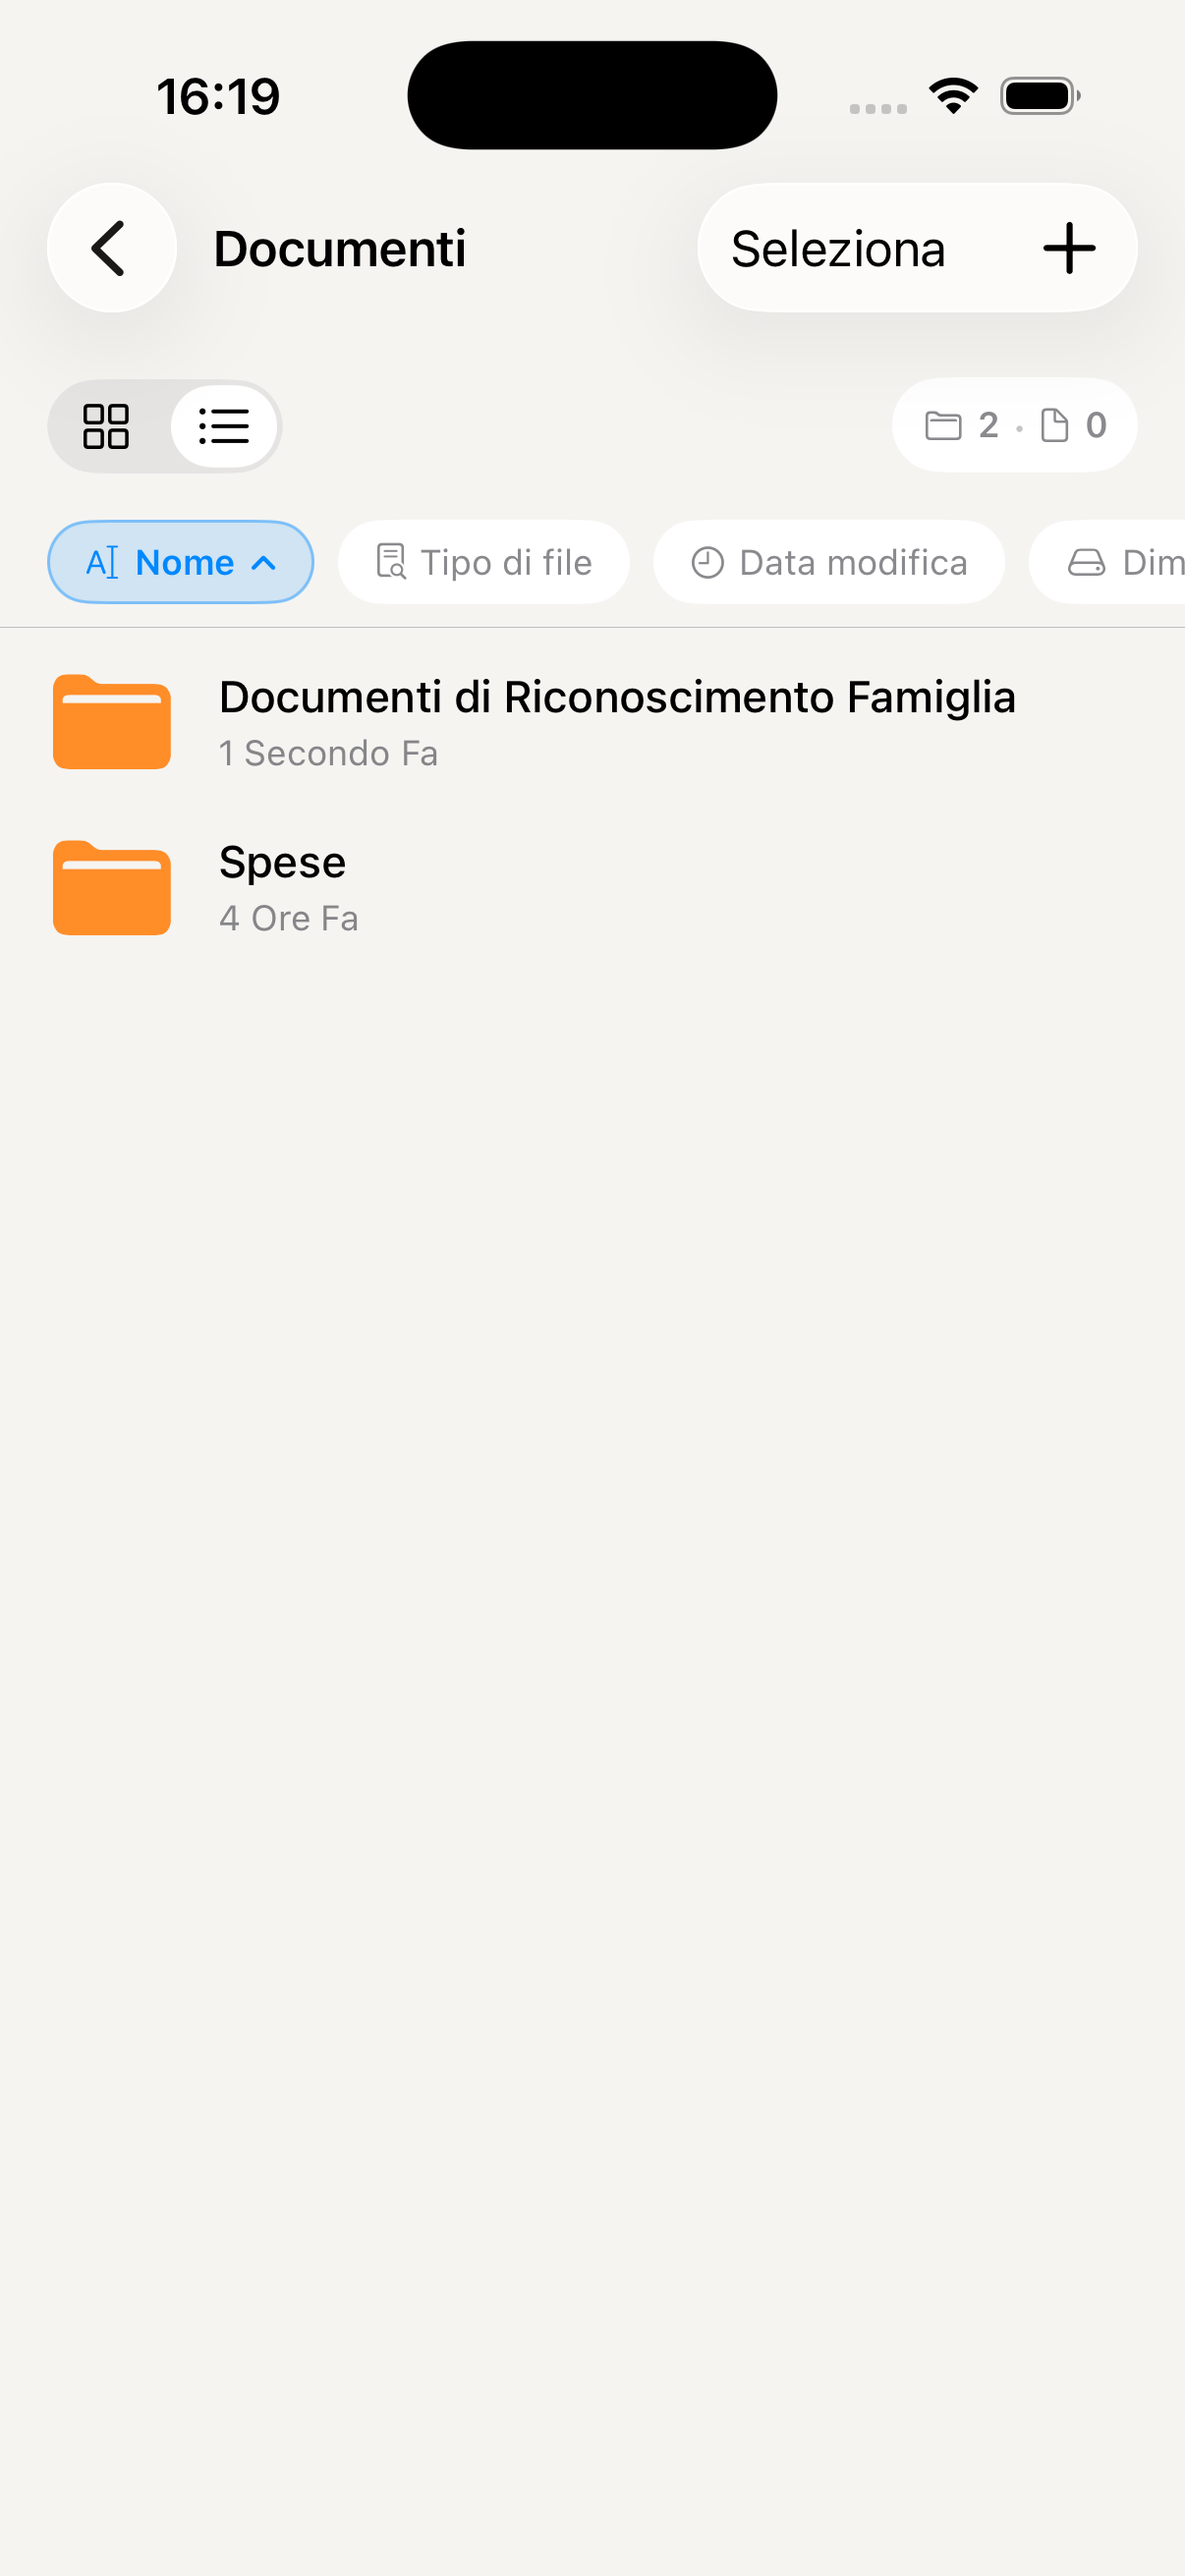
Document archive with folders
Documents in folder
Preview and document options
Visibility setting — private, family or external link
Generate external sharing link
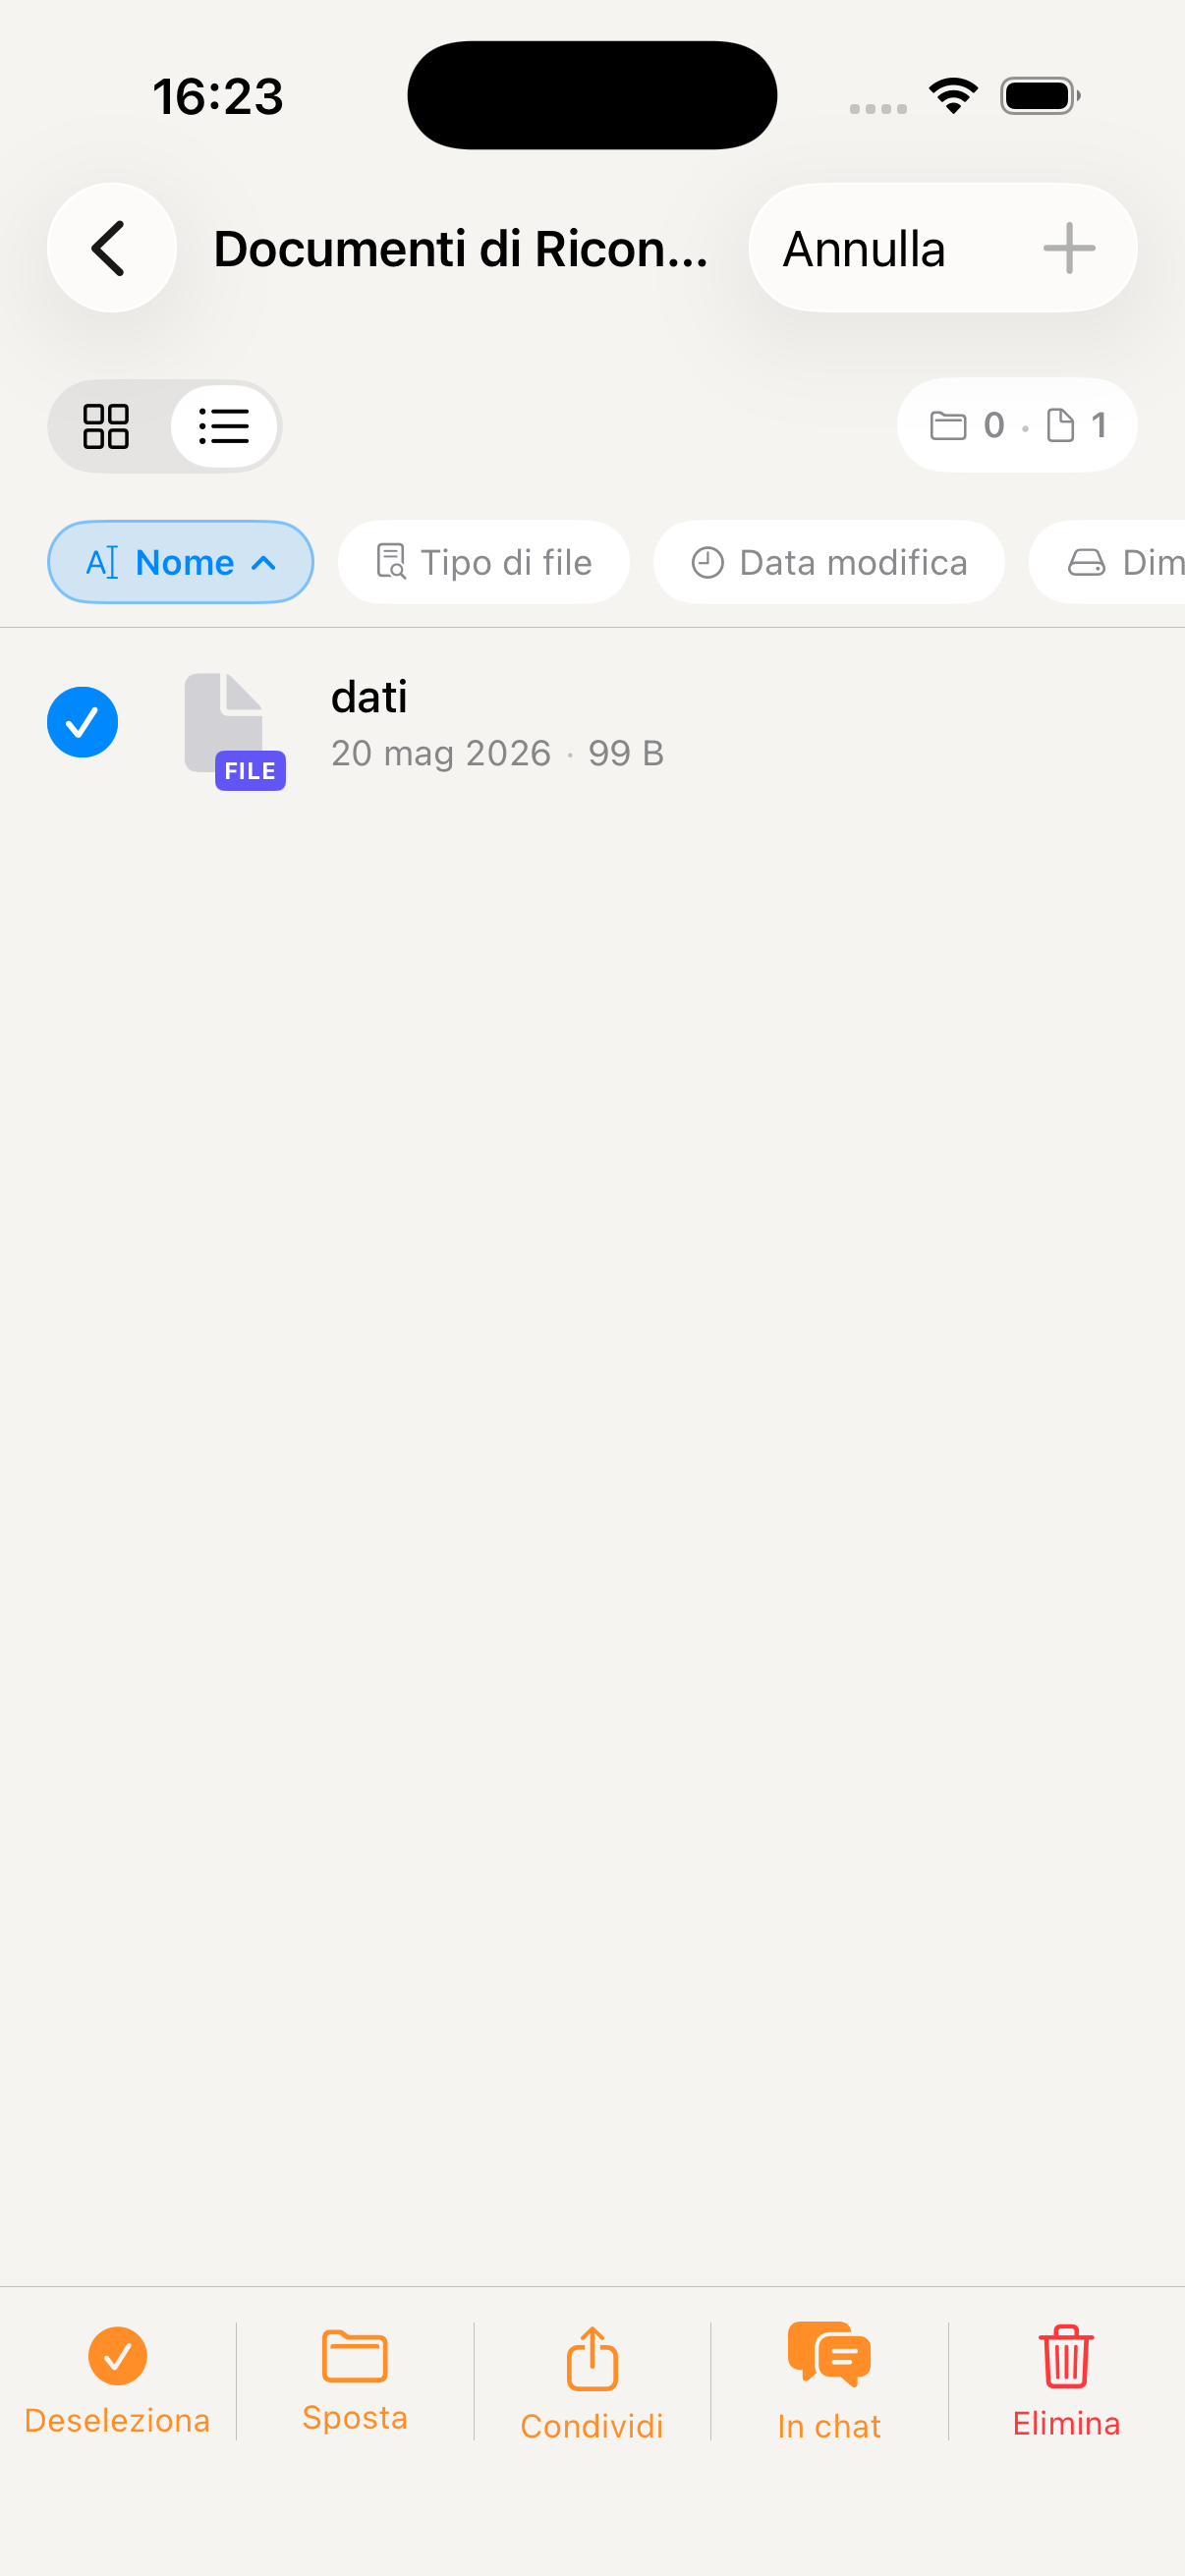
Select PDFs to merge
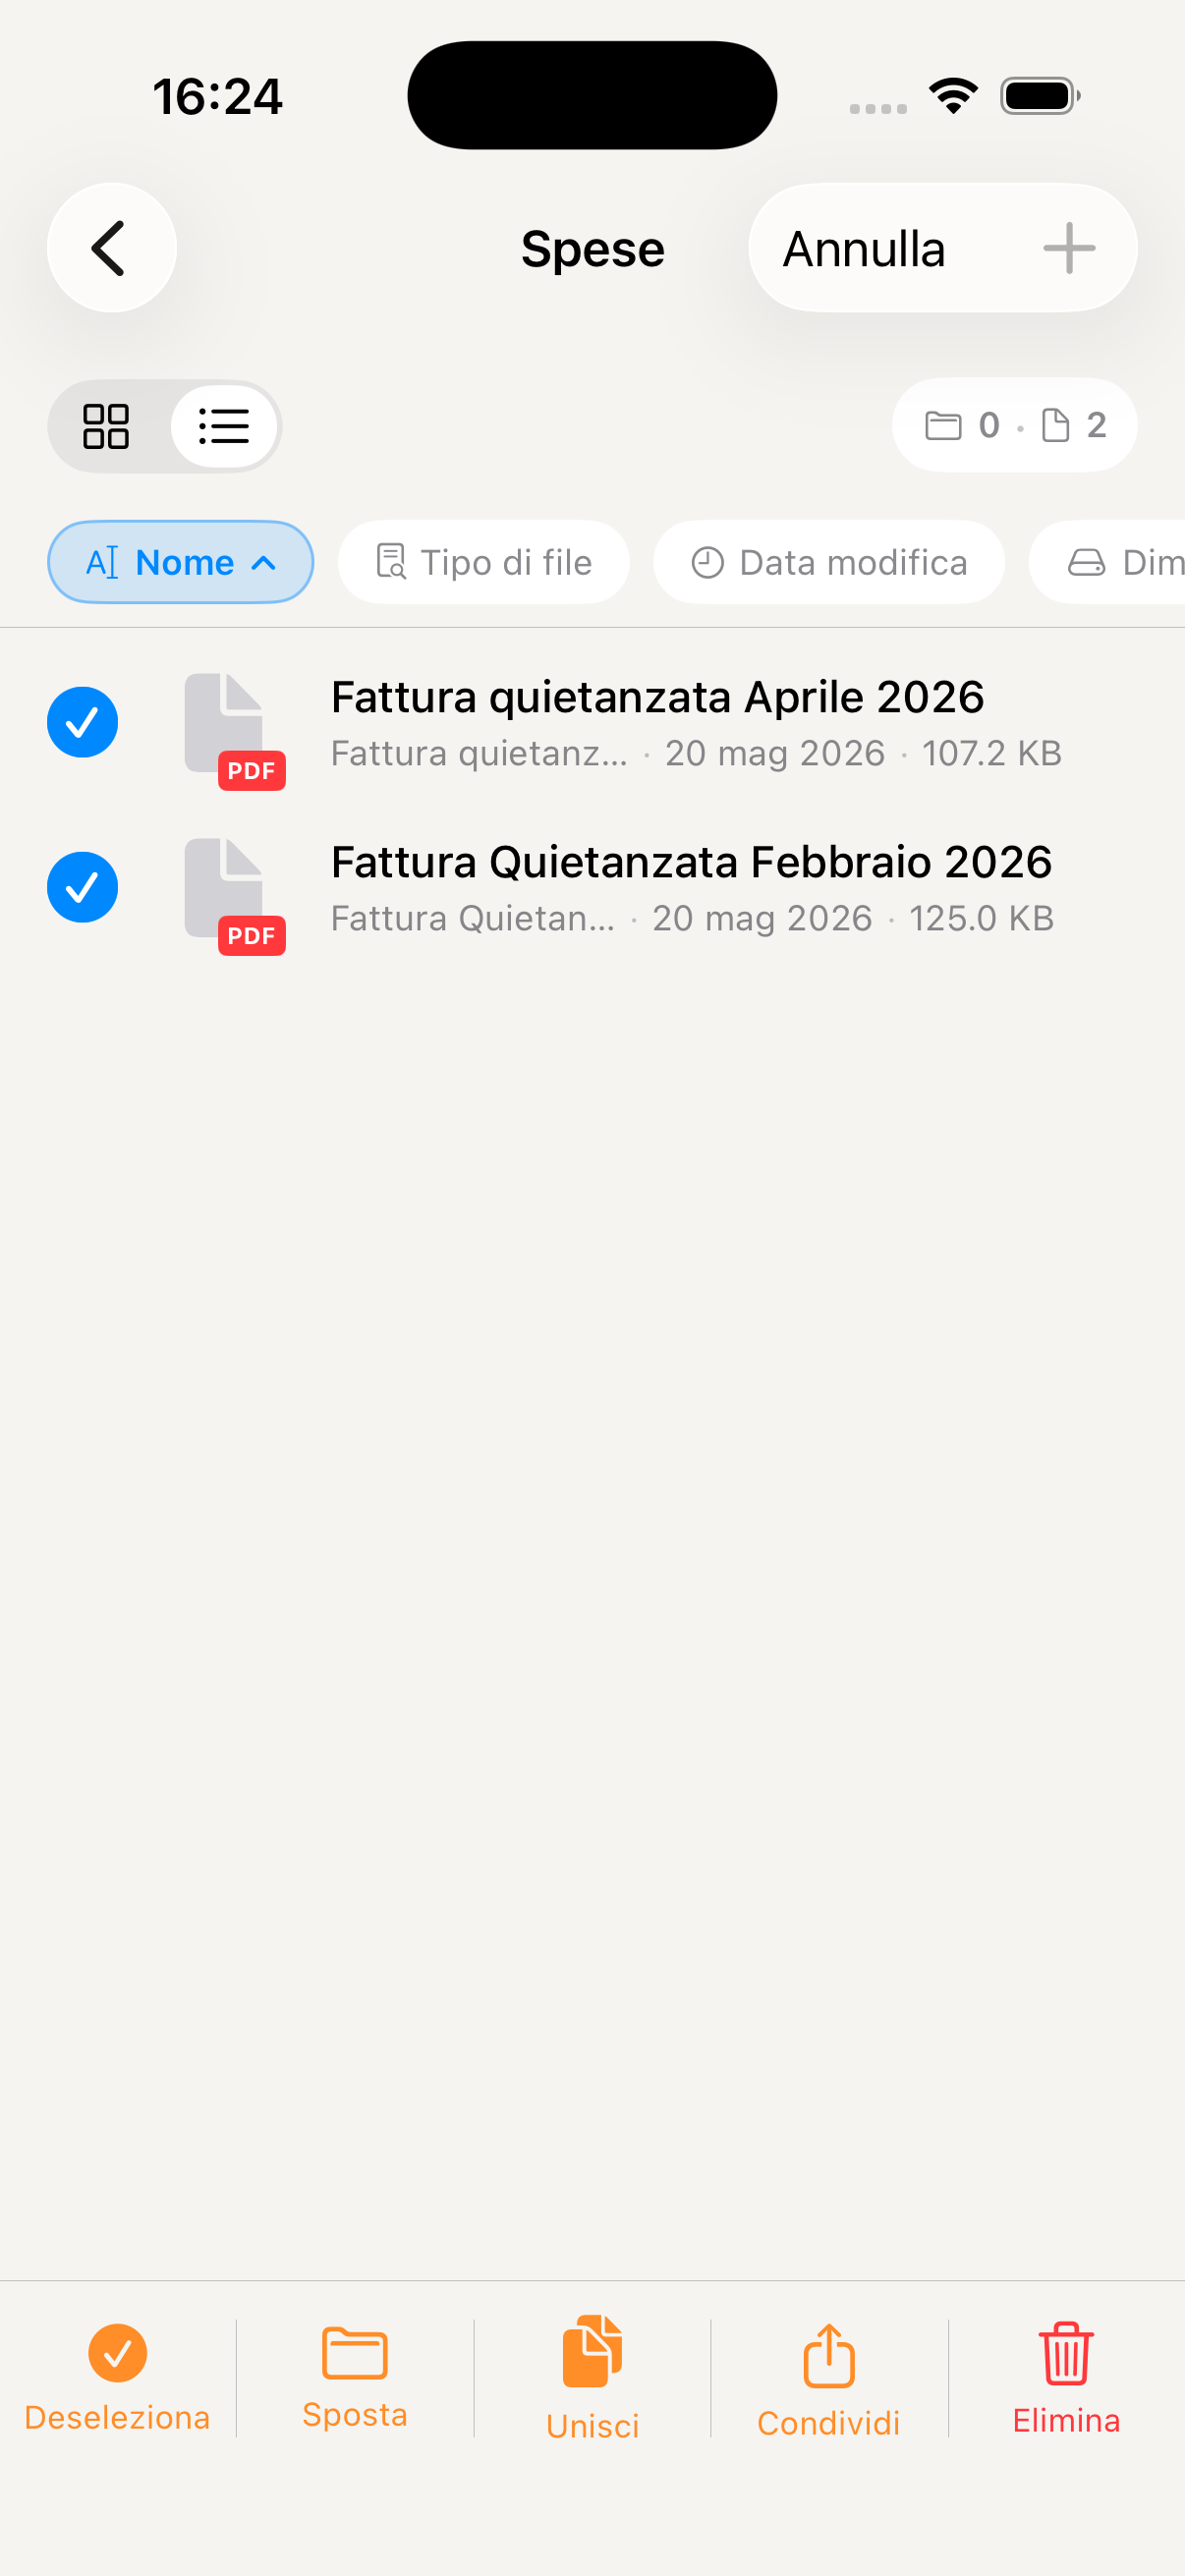
Merging multiple PDFs into one document
Photos & Videos
Photo and video albums shared with the whole family — your children's memories, holidays and special moments, all in one safe place always accessible to those you love.
Access Photos & Videos from the "More" menu in the bottom bar. You'll find all albums created by the family, ordered by date. Photos uploaded by any member are visible to everyone in real time.
Tap + New album, assign a name (e.g. "Summer 2026", "Matteo's first", "Family Christmas") and choose whether to make it visible to the whole family or keep it private. You can add a cover now or later.
Go into an album and tap + to add content from your iPhone Photo Library or take a photo directly with the camera. You can select multiple photos at once to upload them in bulk.
Tap a photo to open it full screen. Swipe sideways to browse the album. From the detail view you can save the photo to your iPhone, share it via other channels or delete it from the album.
All family members can add photos to any shared album. If your partner takes a photo at the school play, you'll find it in the album as soon as they upload it — without waiting for them to send it on WhatsApp.
Create an album "[Child's name] growing up" and add a photo every month — you'll have a visual diary of their growth always available and shared with grandparents and distant relatives.
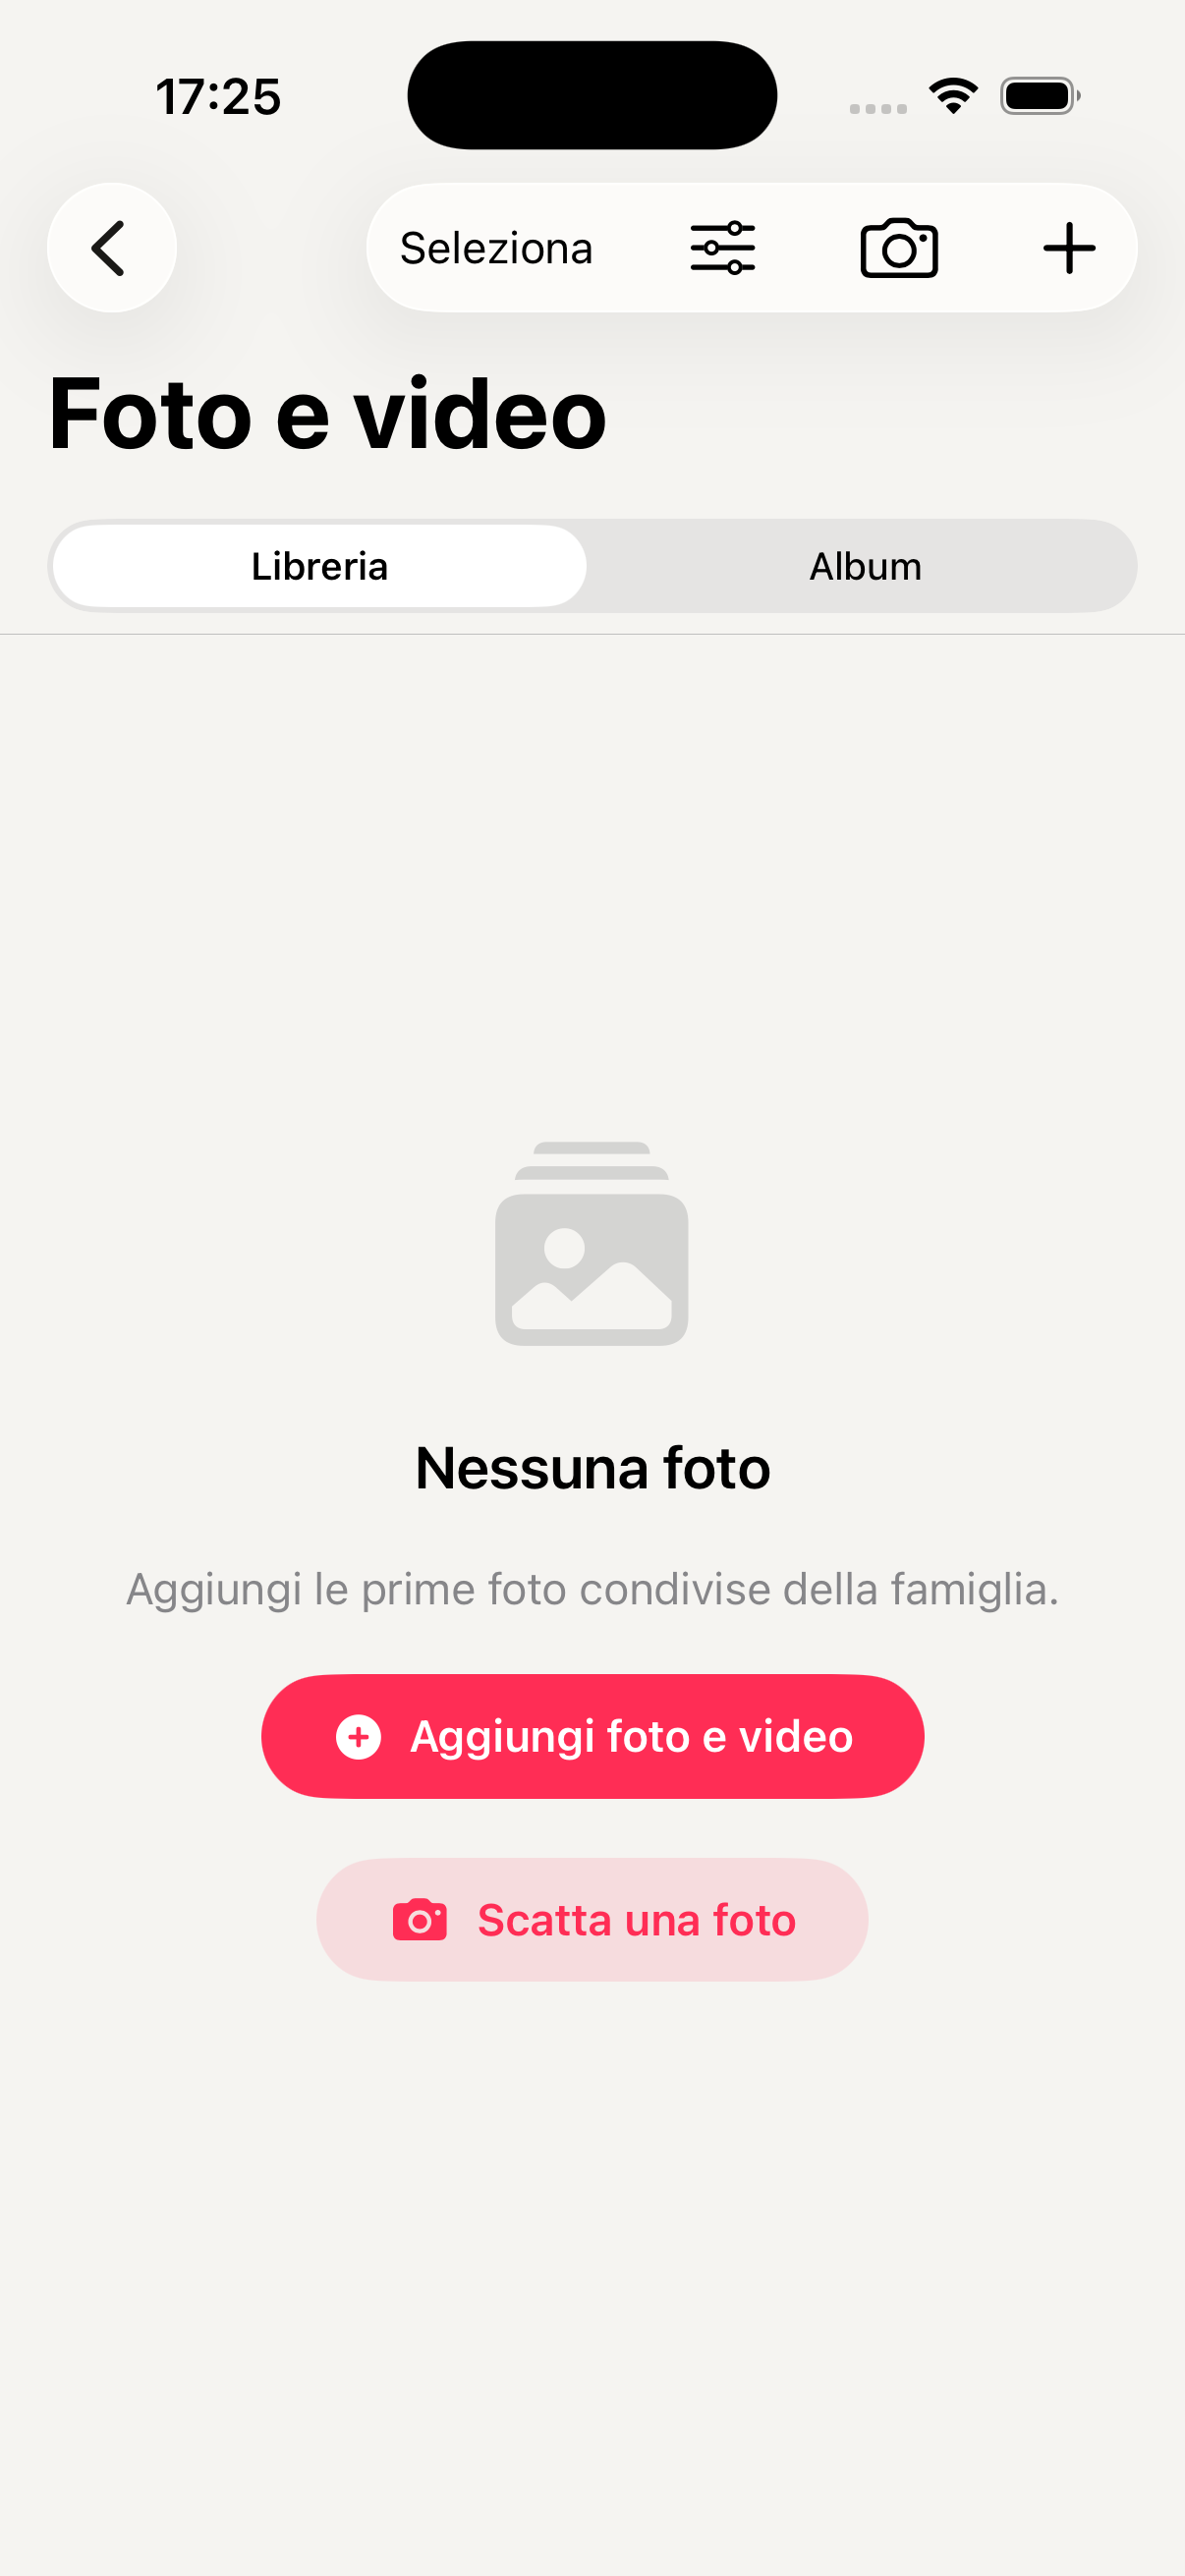
Family photo albums

Photos in the shared album

Full-screen photo view
Passwords
A secure password manager built into the app, shared with the family. End-to-end encryption, autofill in Safari, a password generator and automatic checking of compromised credentials.
Access Passwords from the "More" menu in the bottom bar. Access is protected by Face ID or Touch ID — nobody can see the passwords without your biometrics, not even other family members on the same account.
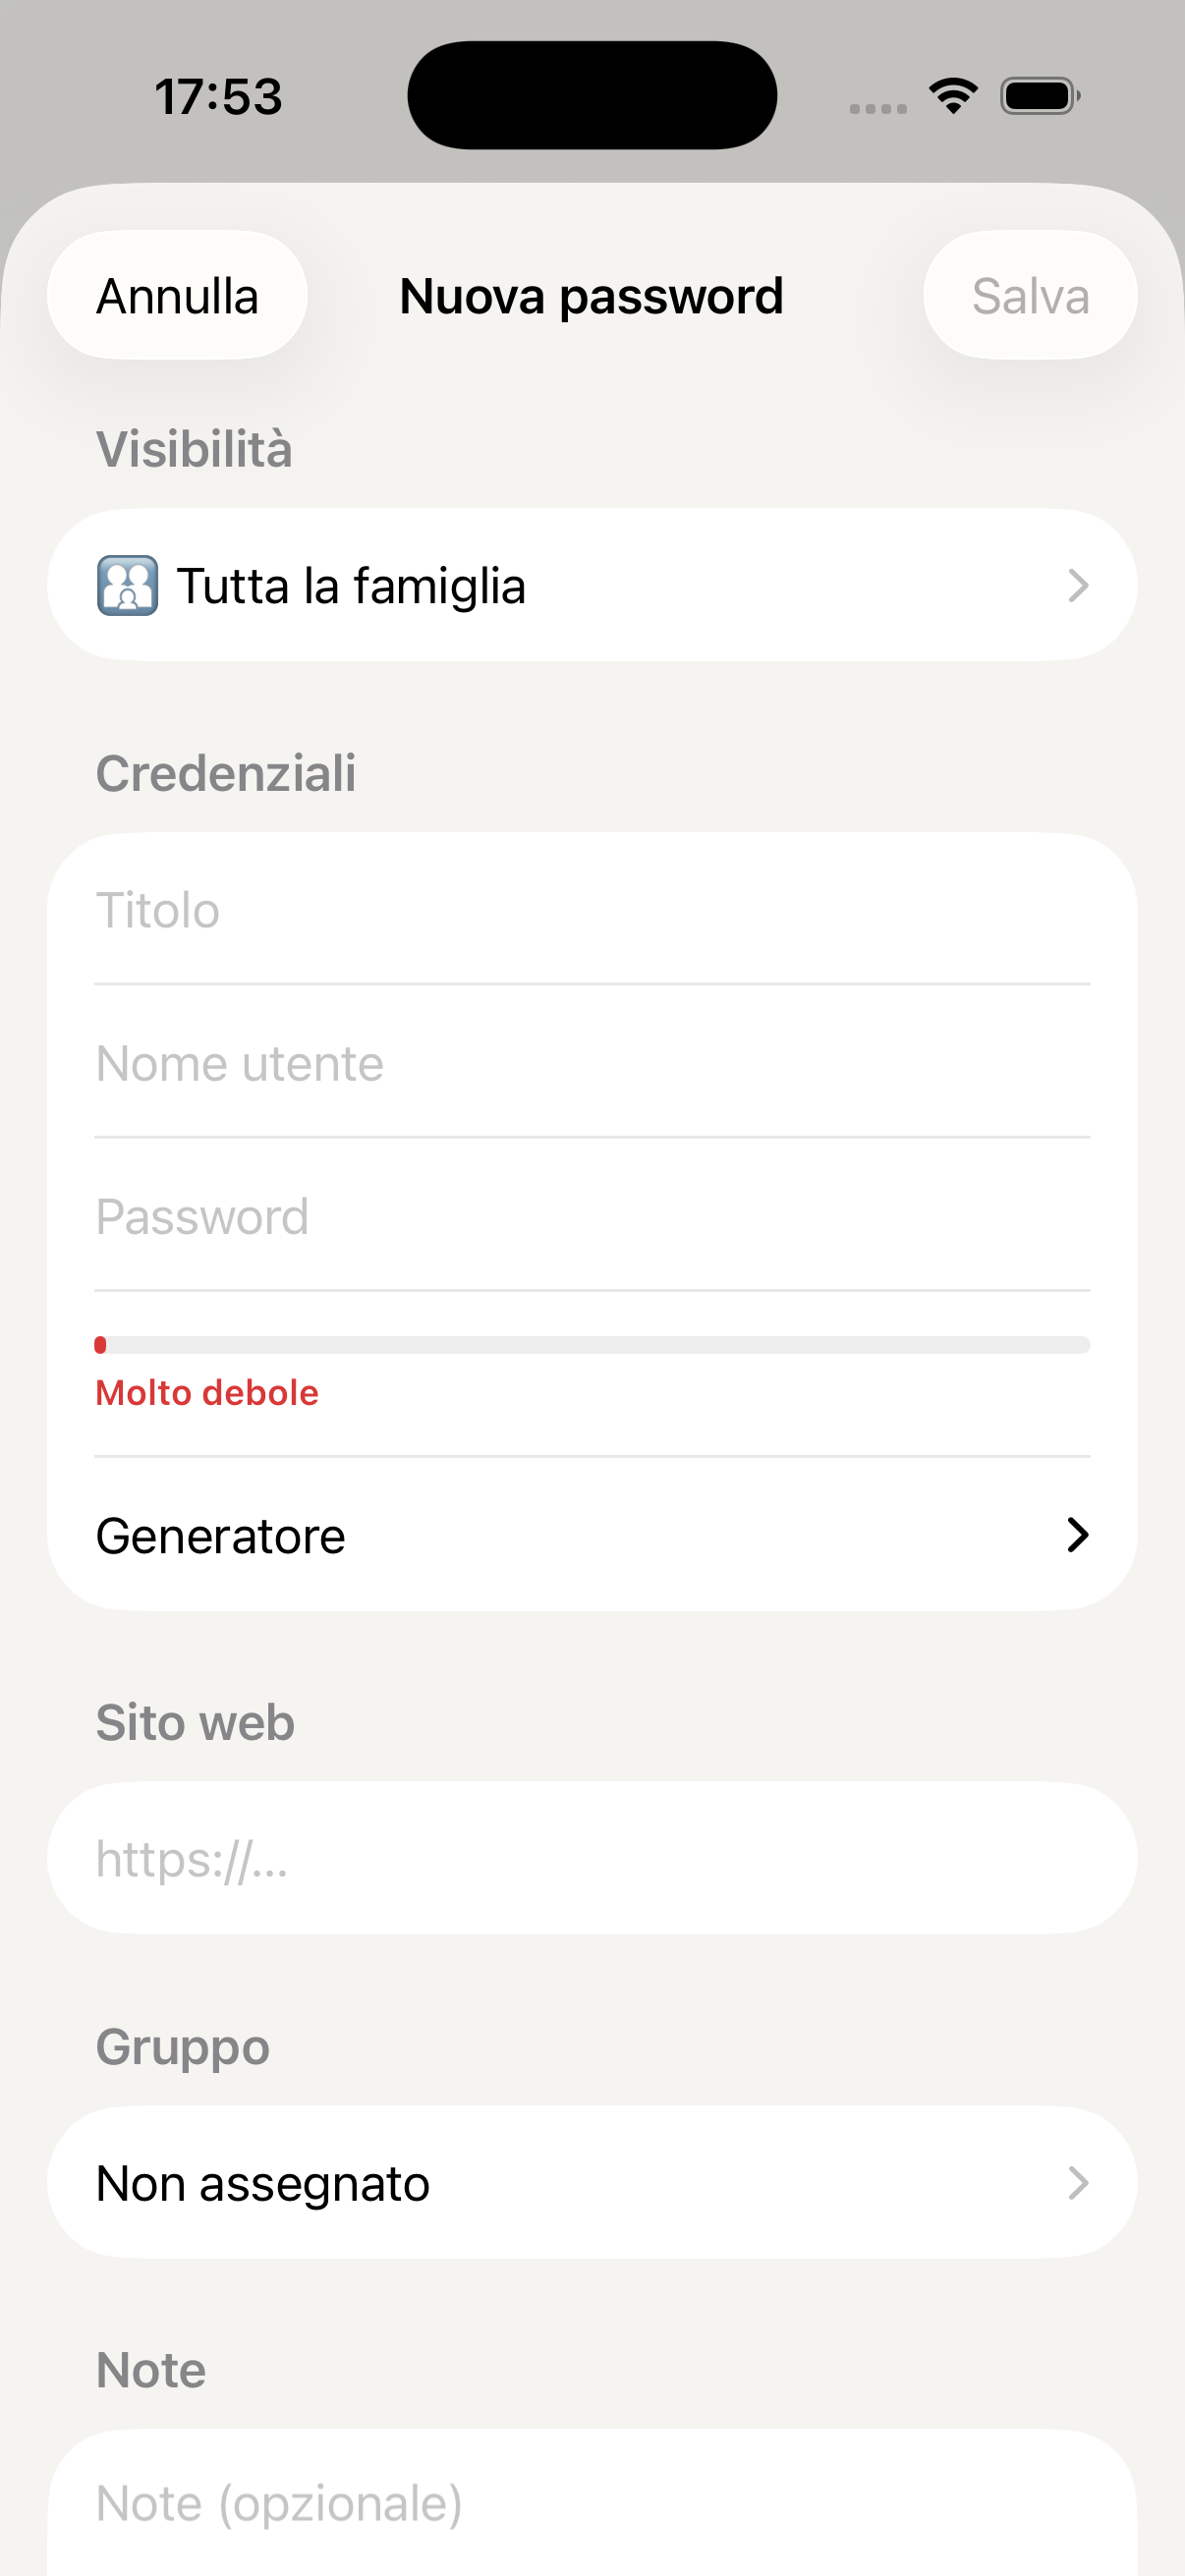
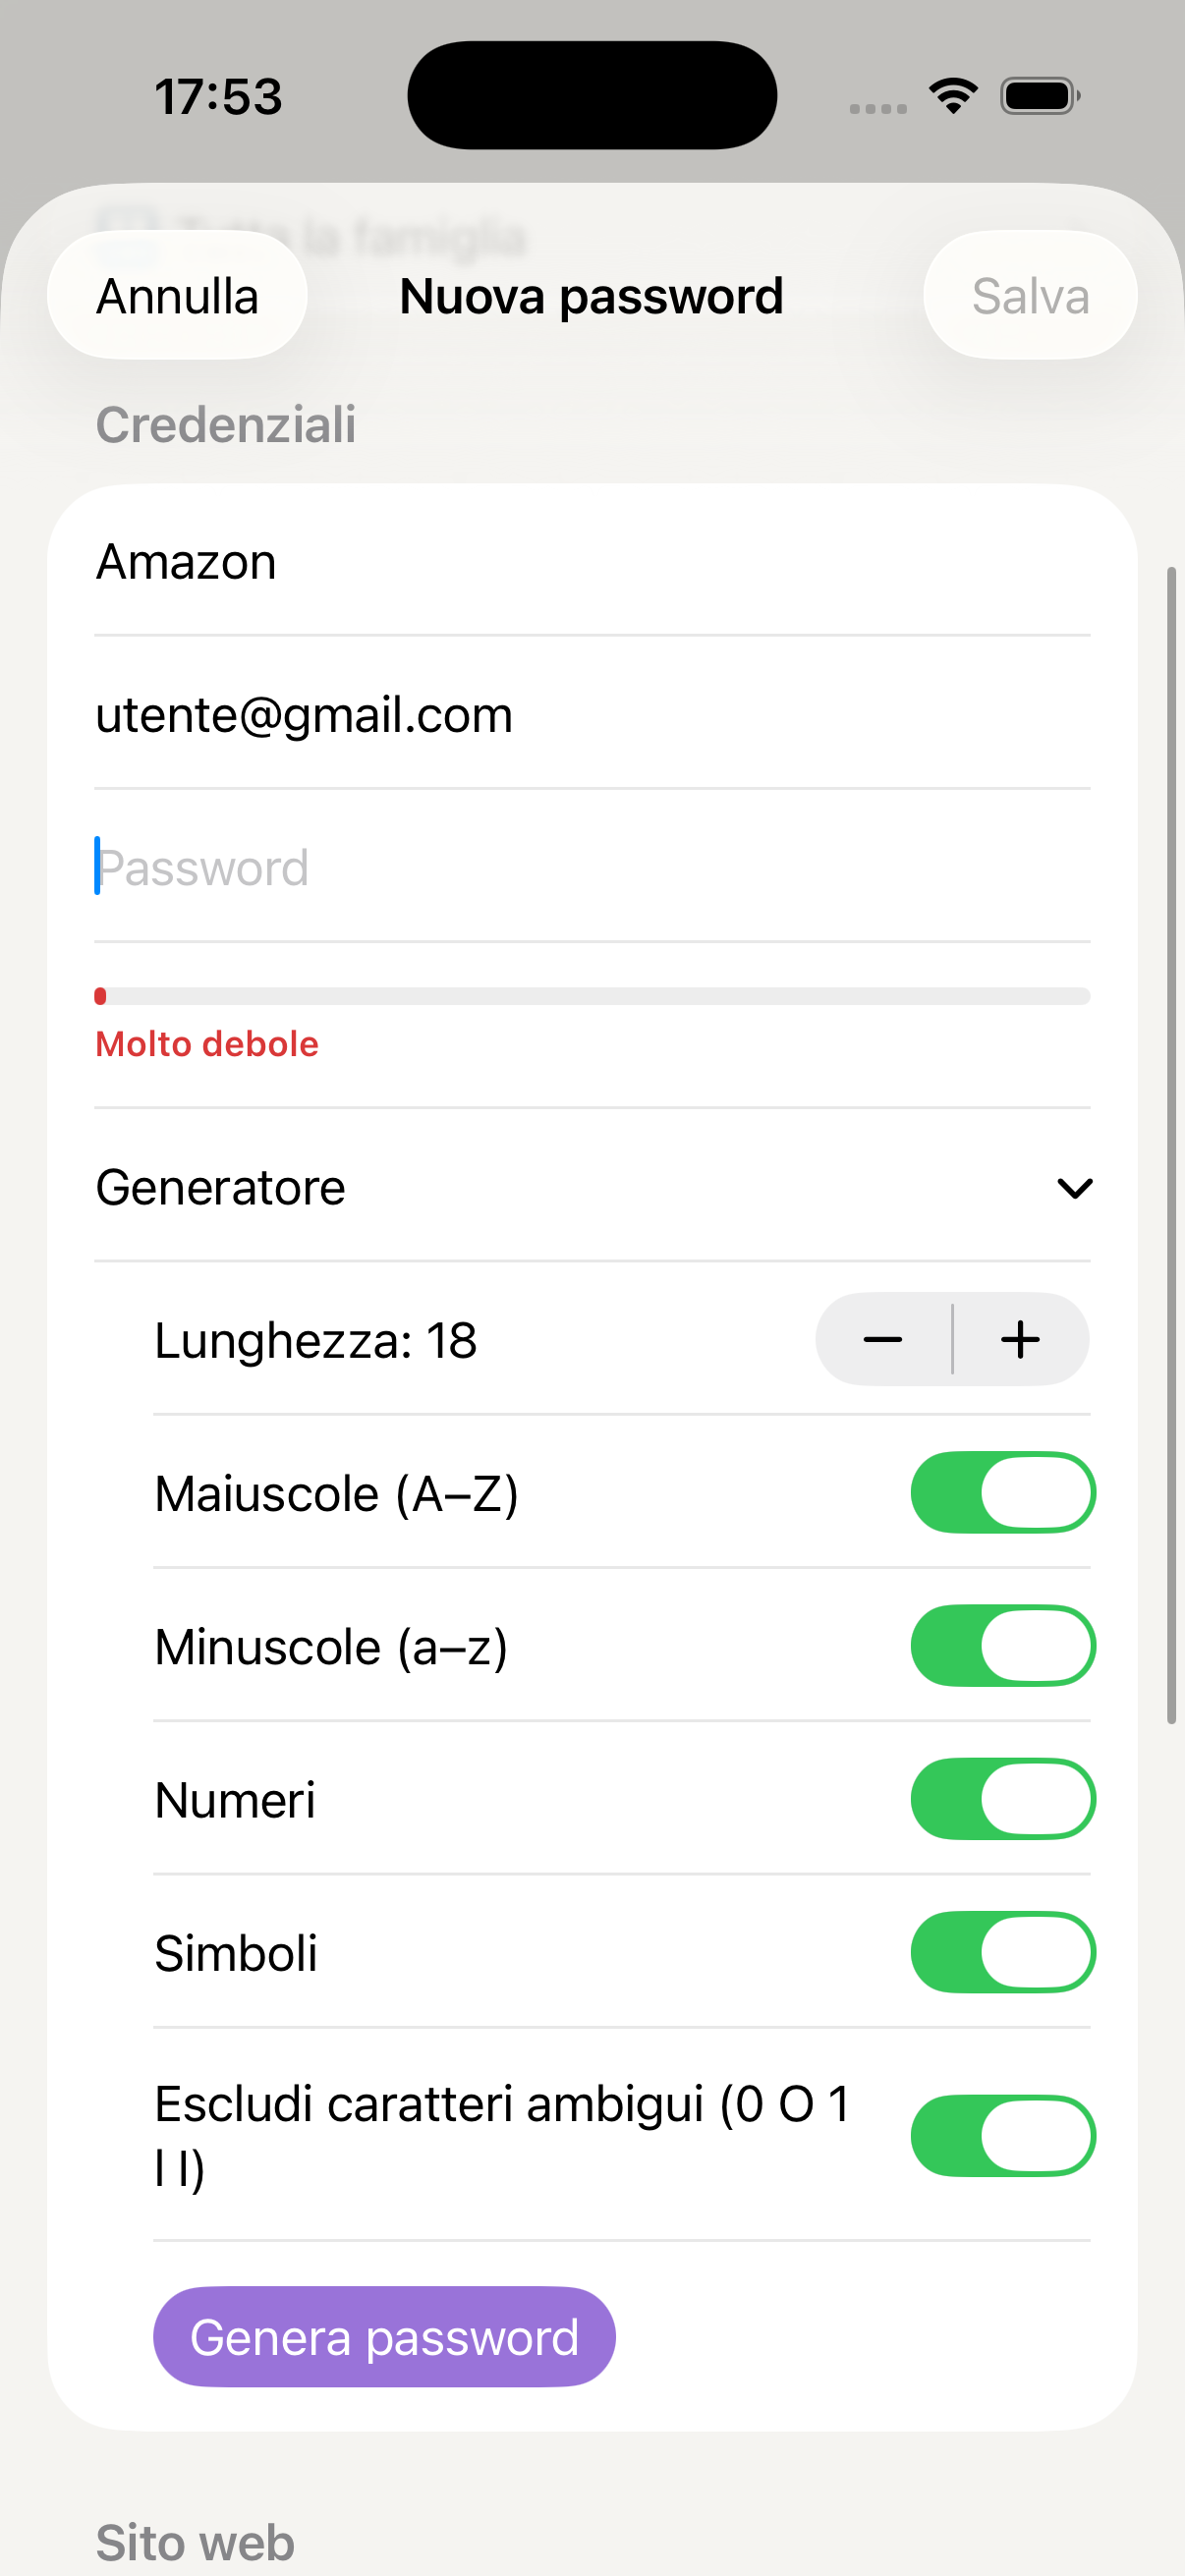
Tap + at the top right and fill in: site or service name, URL, username and password. You can also add additional notes (e.g. security questions, associated PINs). Passwords are encrypted locally before being synchronised — KidBox cannot read them.
In the password field tap Generate to get a random secure password. You can customise length, use of symbols, numbers and uppercase letters. The generated password is saved directly without having to type it.
Go to iPhone Settings → General → Passwords → Password Options and select KidBox. From that moment Safari and apps will automatically suggest the saved credentials with a tap, without opening KidBox.
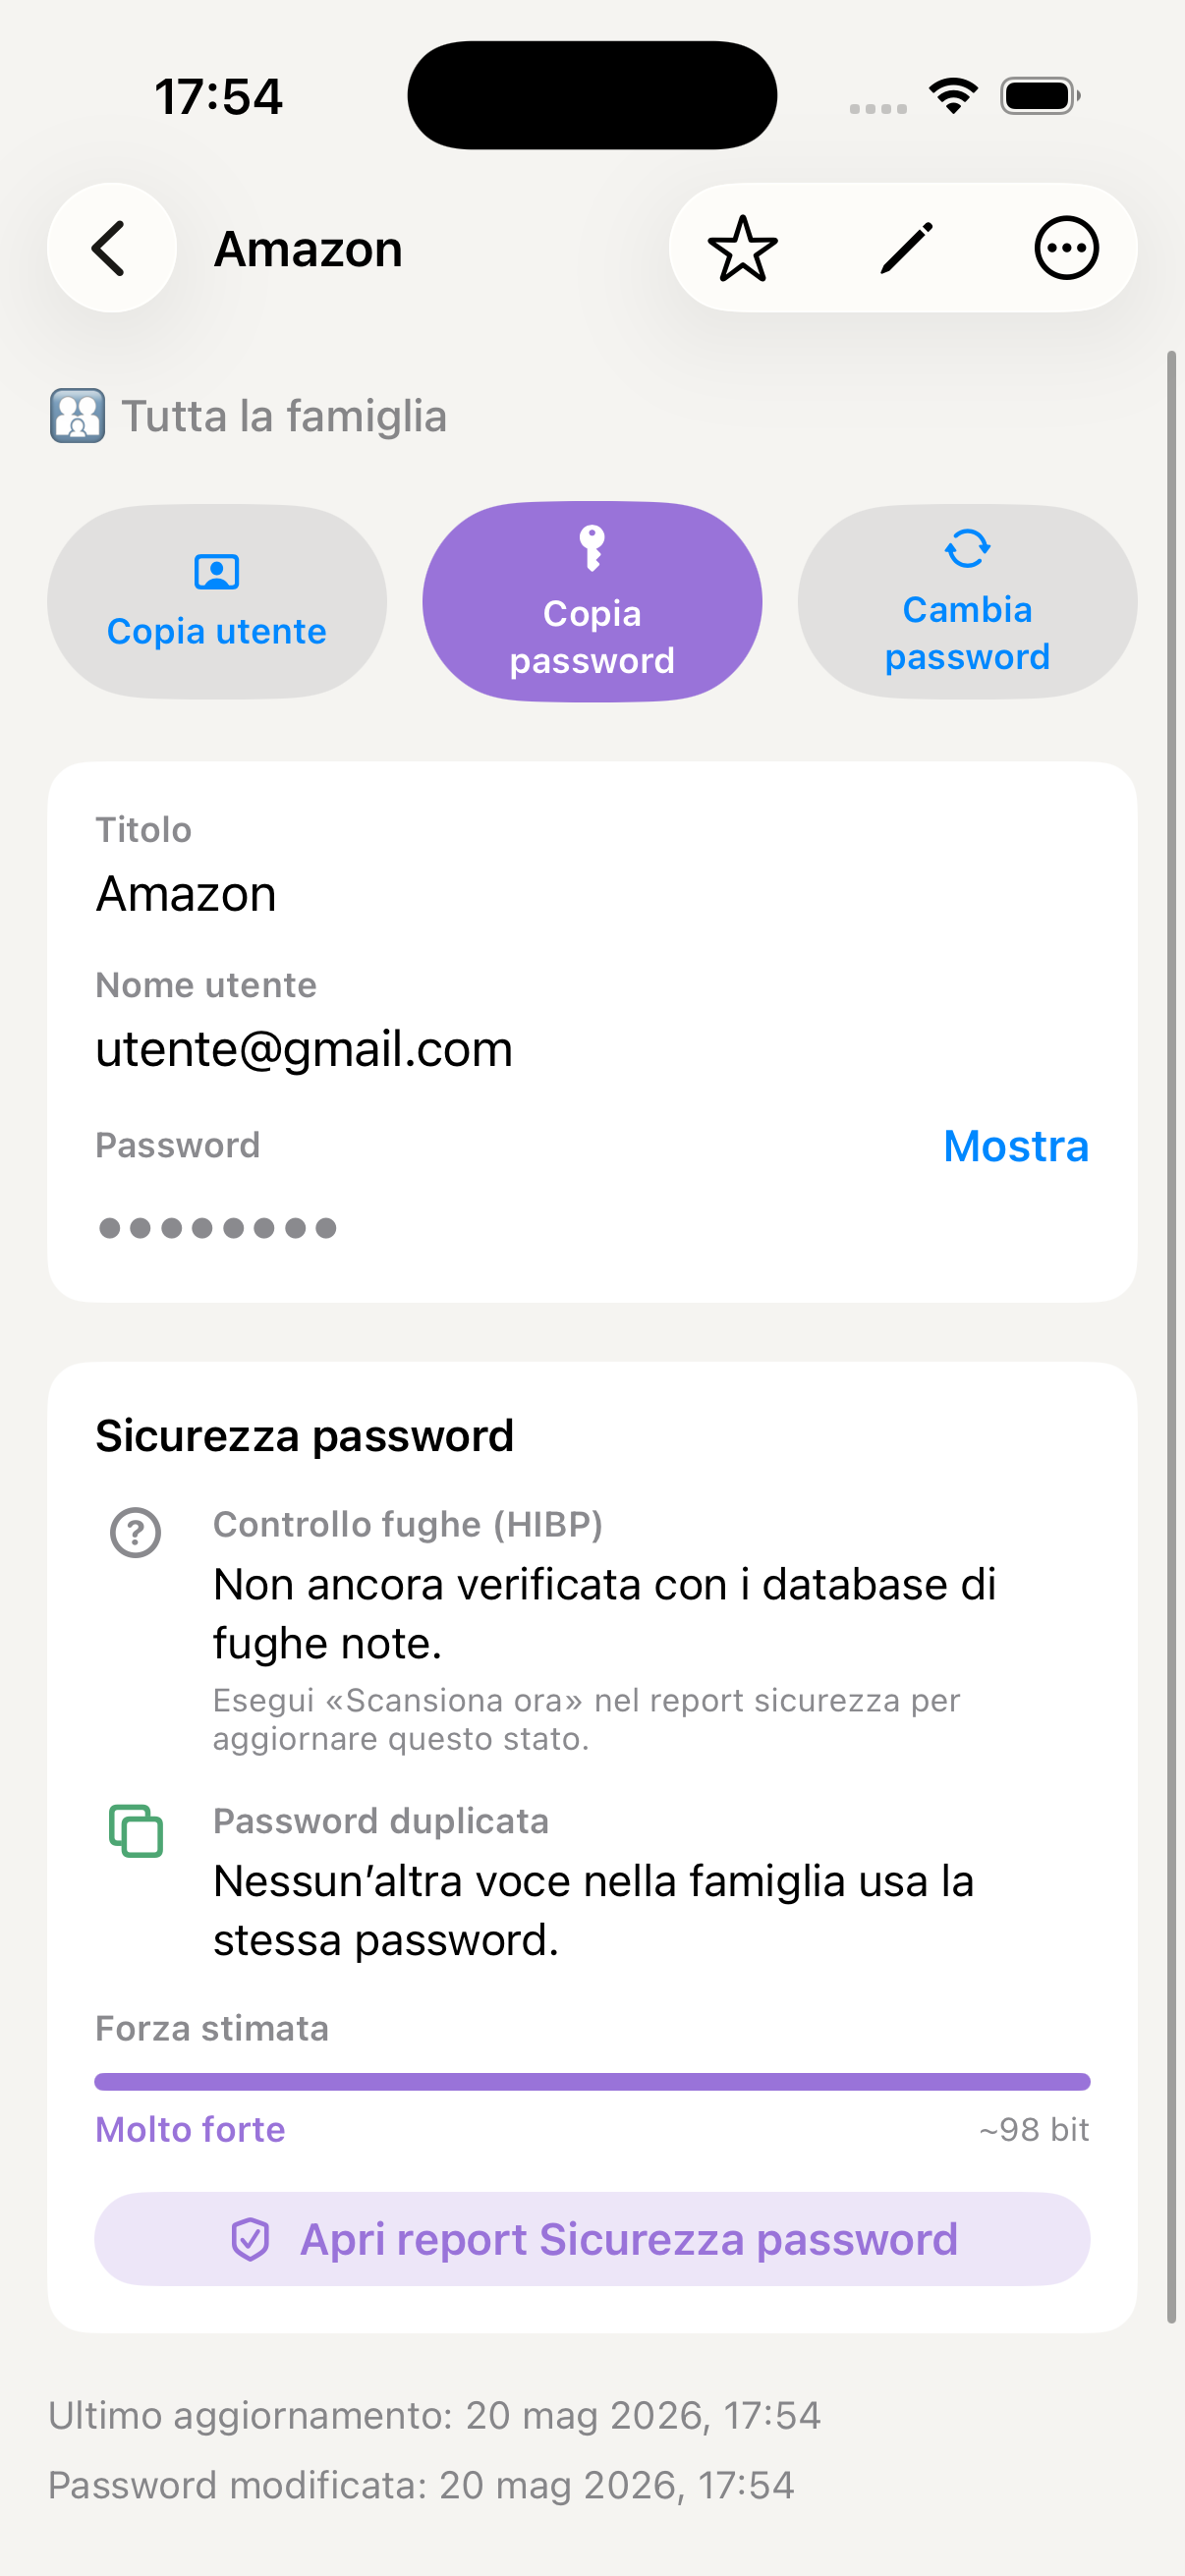
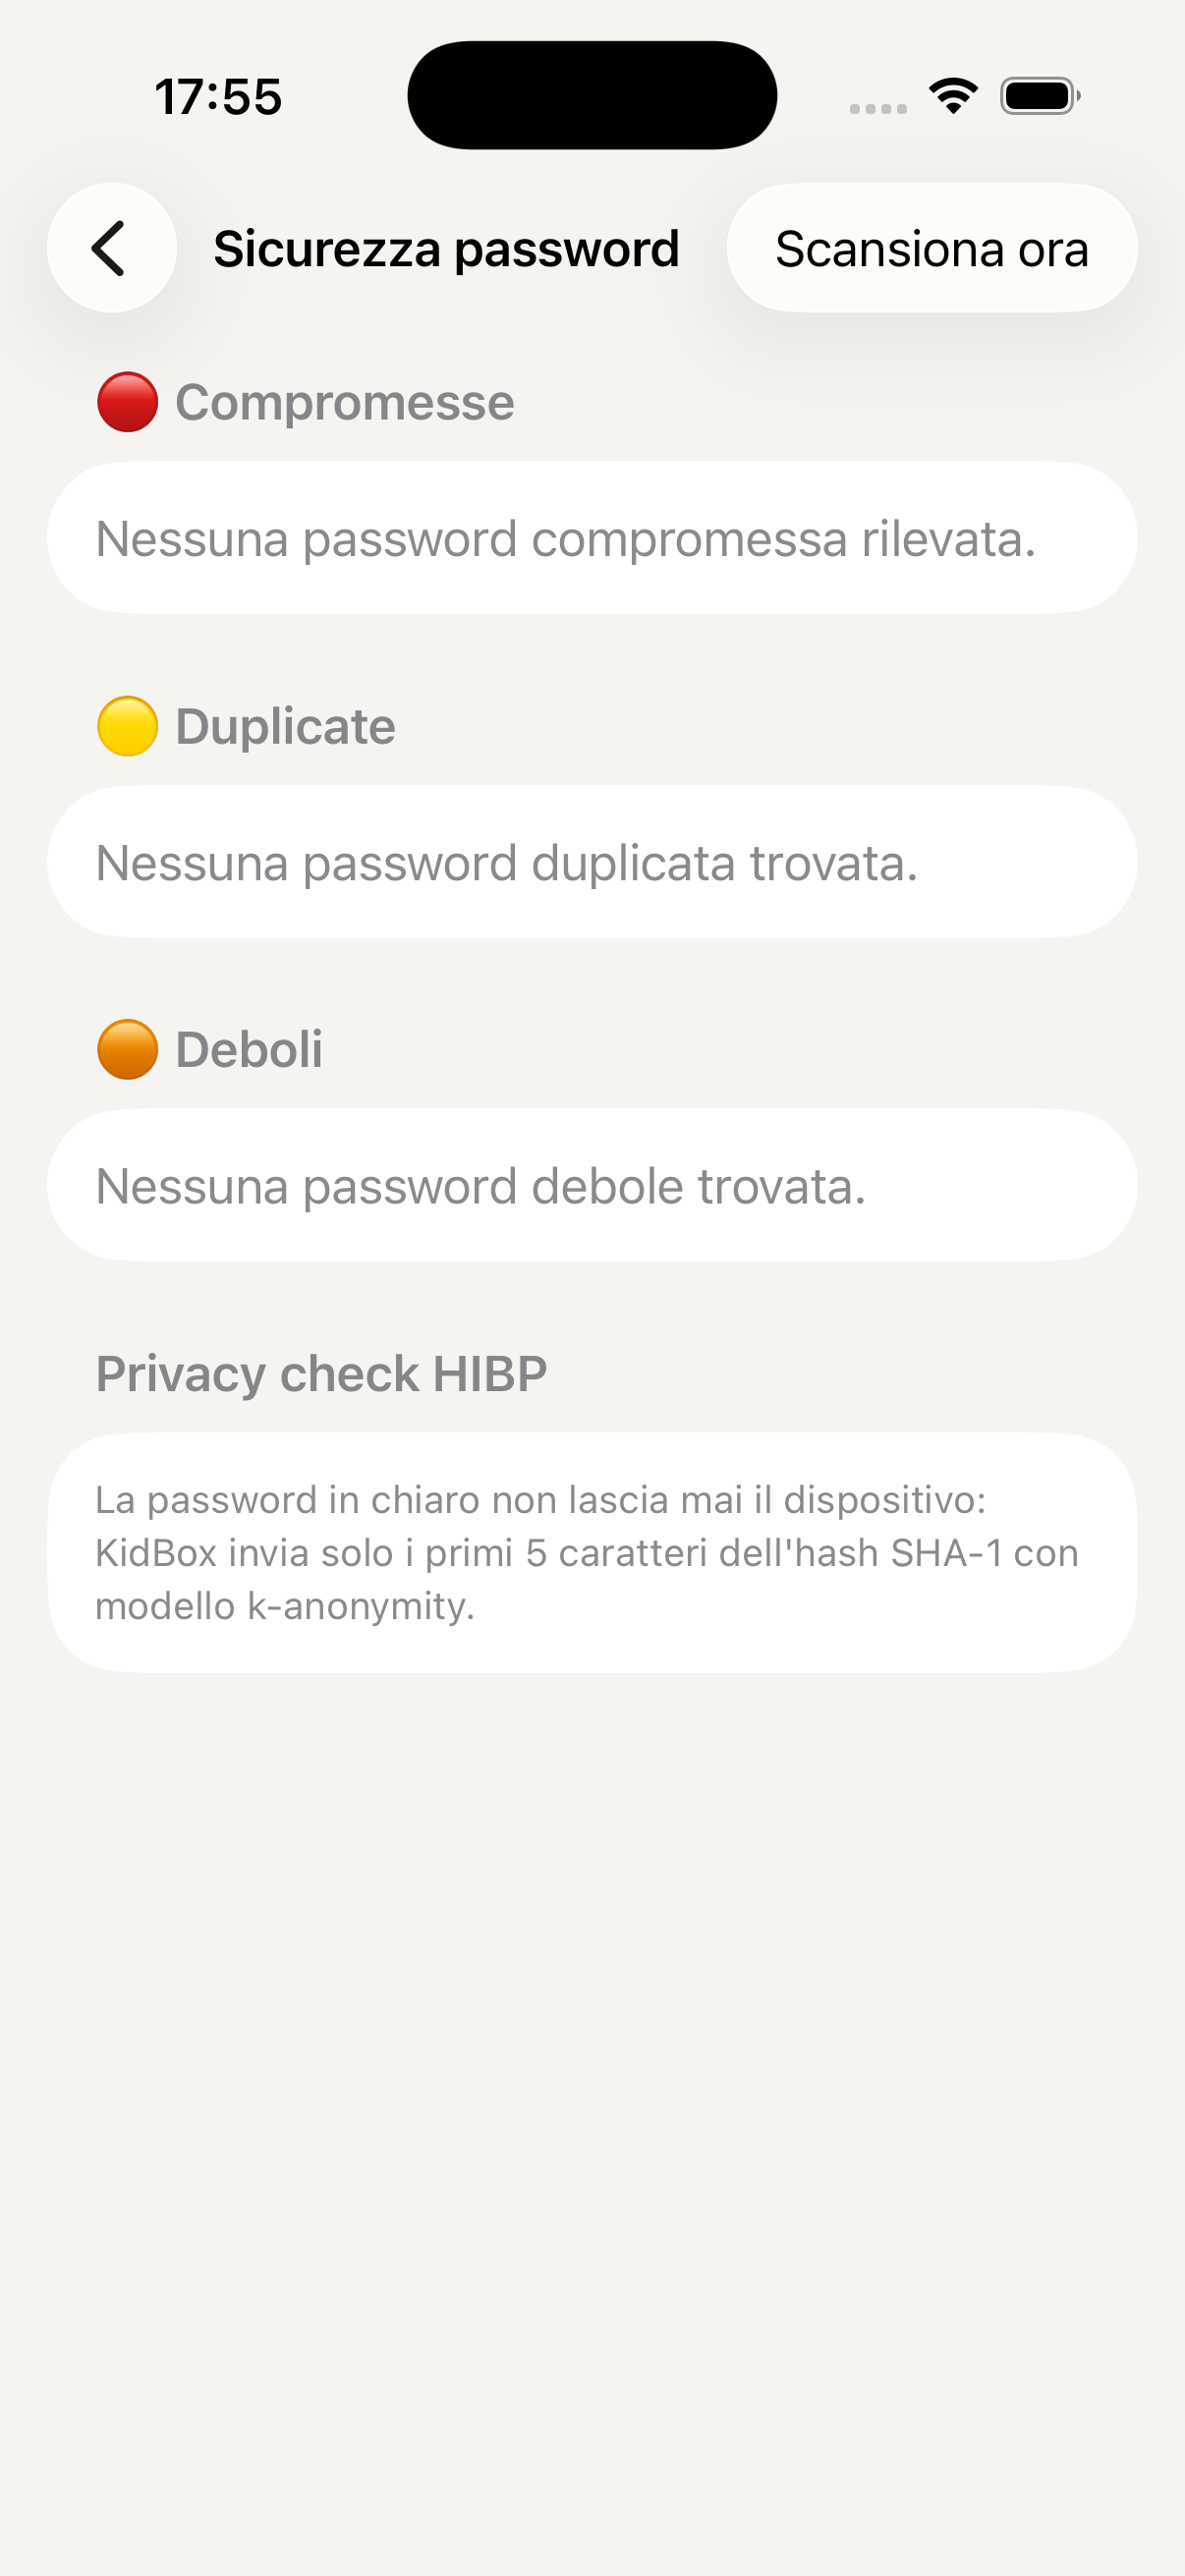
KidBox automatically checks your passwords against public security breach databases (Have I Been Pwned and similar). Compromised passwords appear with a red warning — tap it to see which accounts are at risk and update the credentials immediately.
Passwords marked as "shared" are visible to all family members (always protected by Face ID on their device). Ideal for streaming accounts, home WiFi, shared family services.
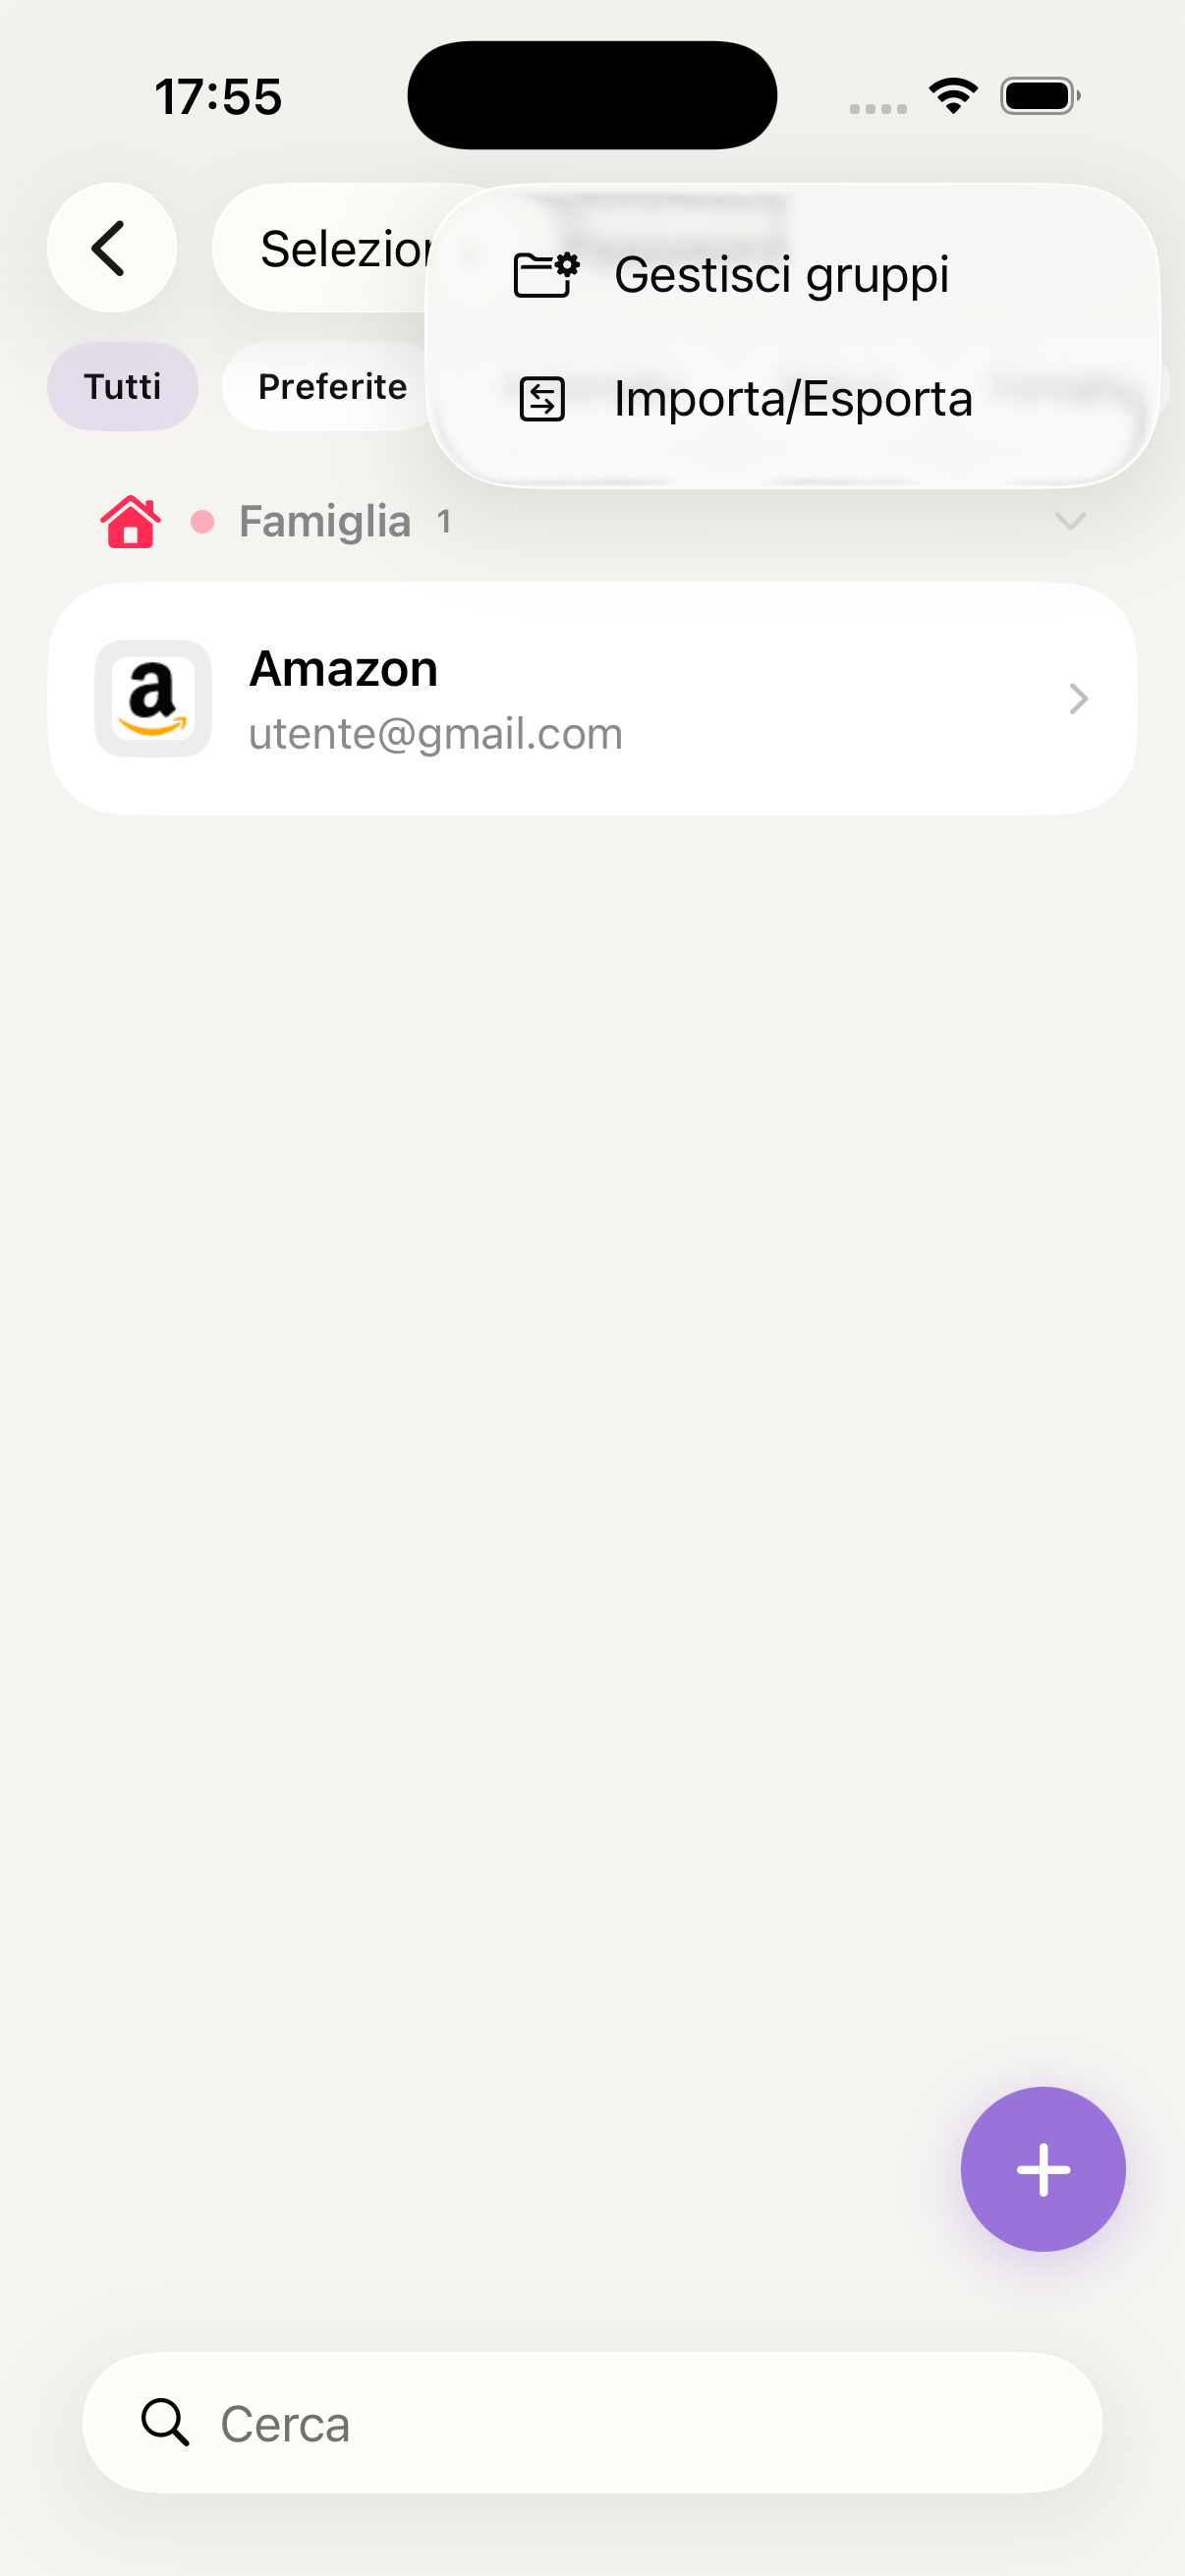
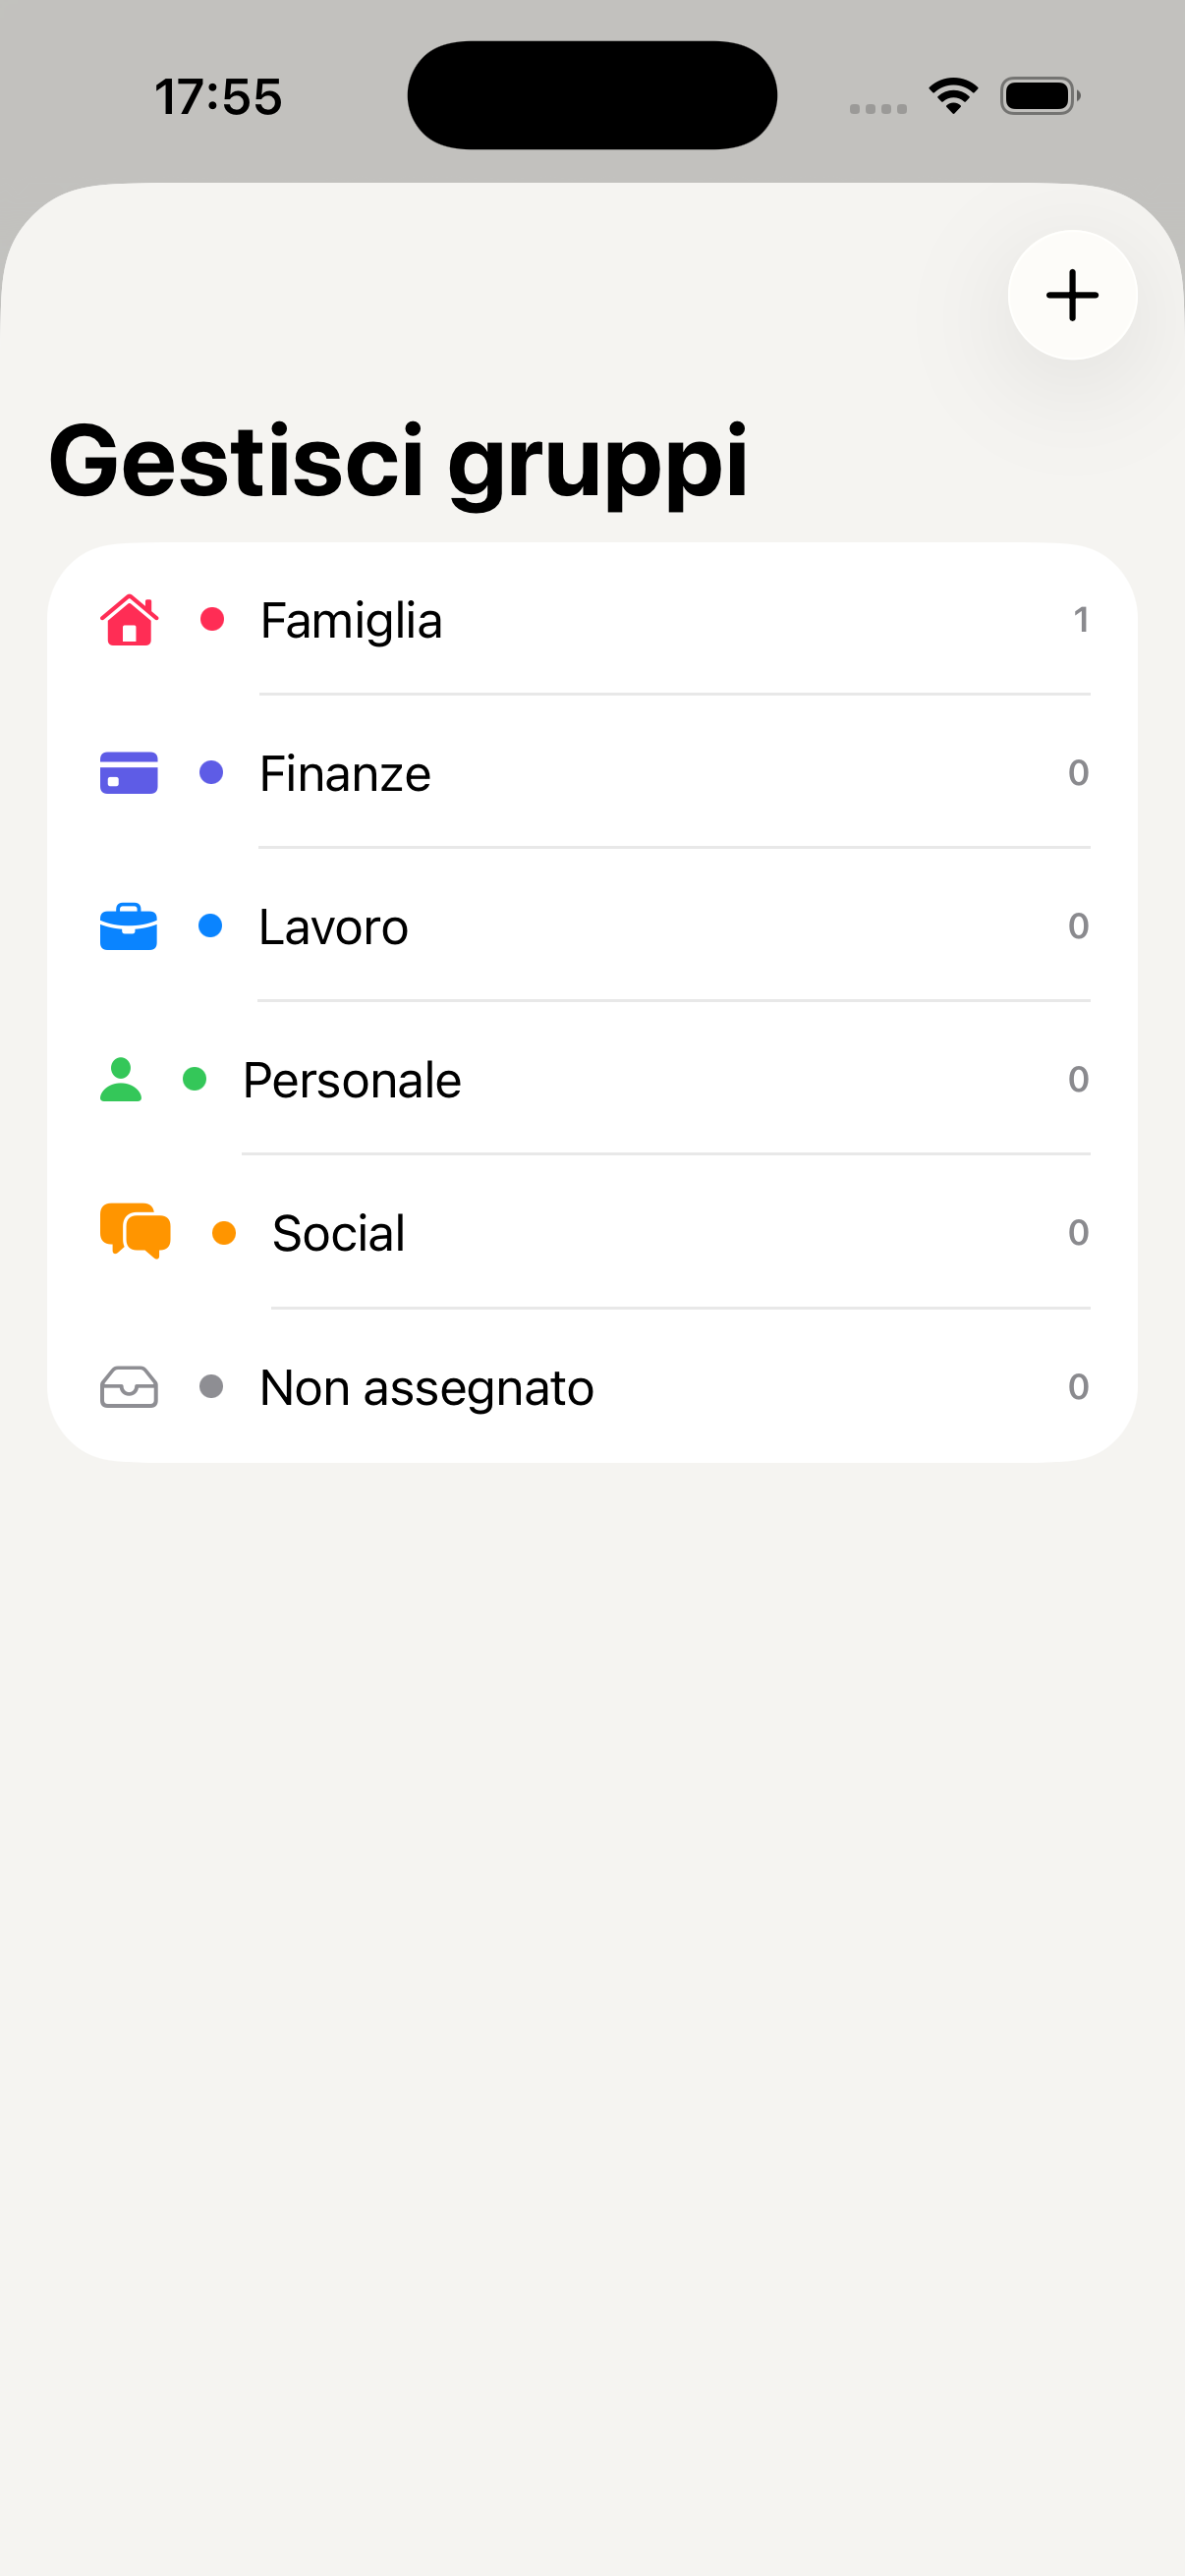
Use the search bar at the top to find any credential in a second. You can also organise passwords into categories (Work, Home, Streaming, Banking) to find everything more easily.
Passwords are encrypted with end-to-end encryption directly on the device before synchronisation. Not even KidBox or its servers can access your credentials in plain text.
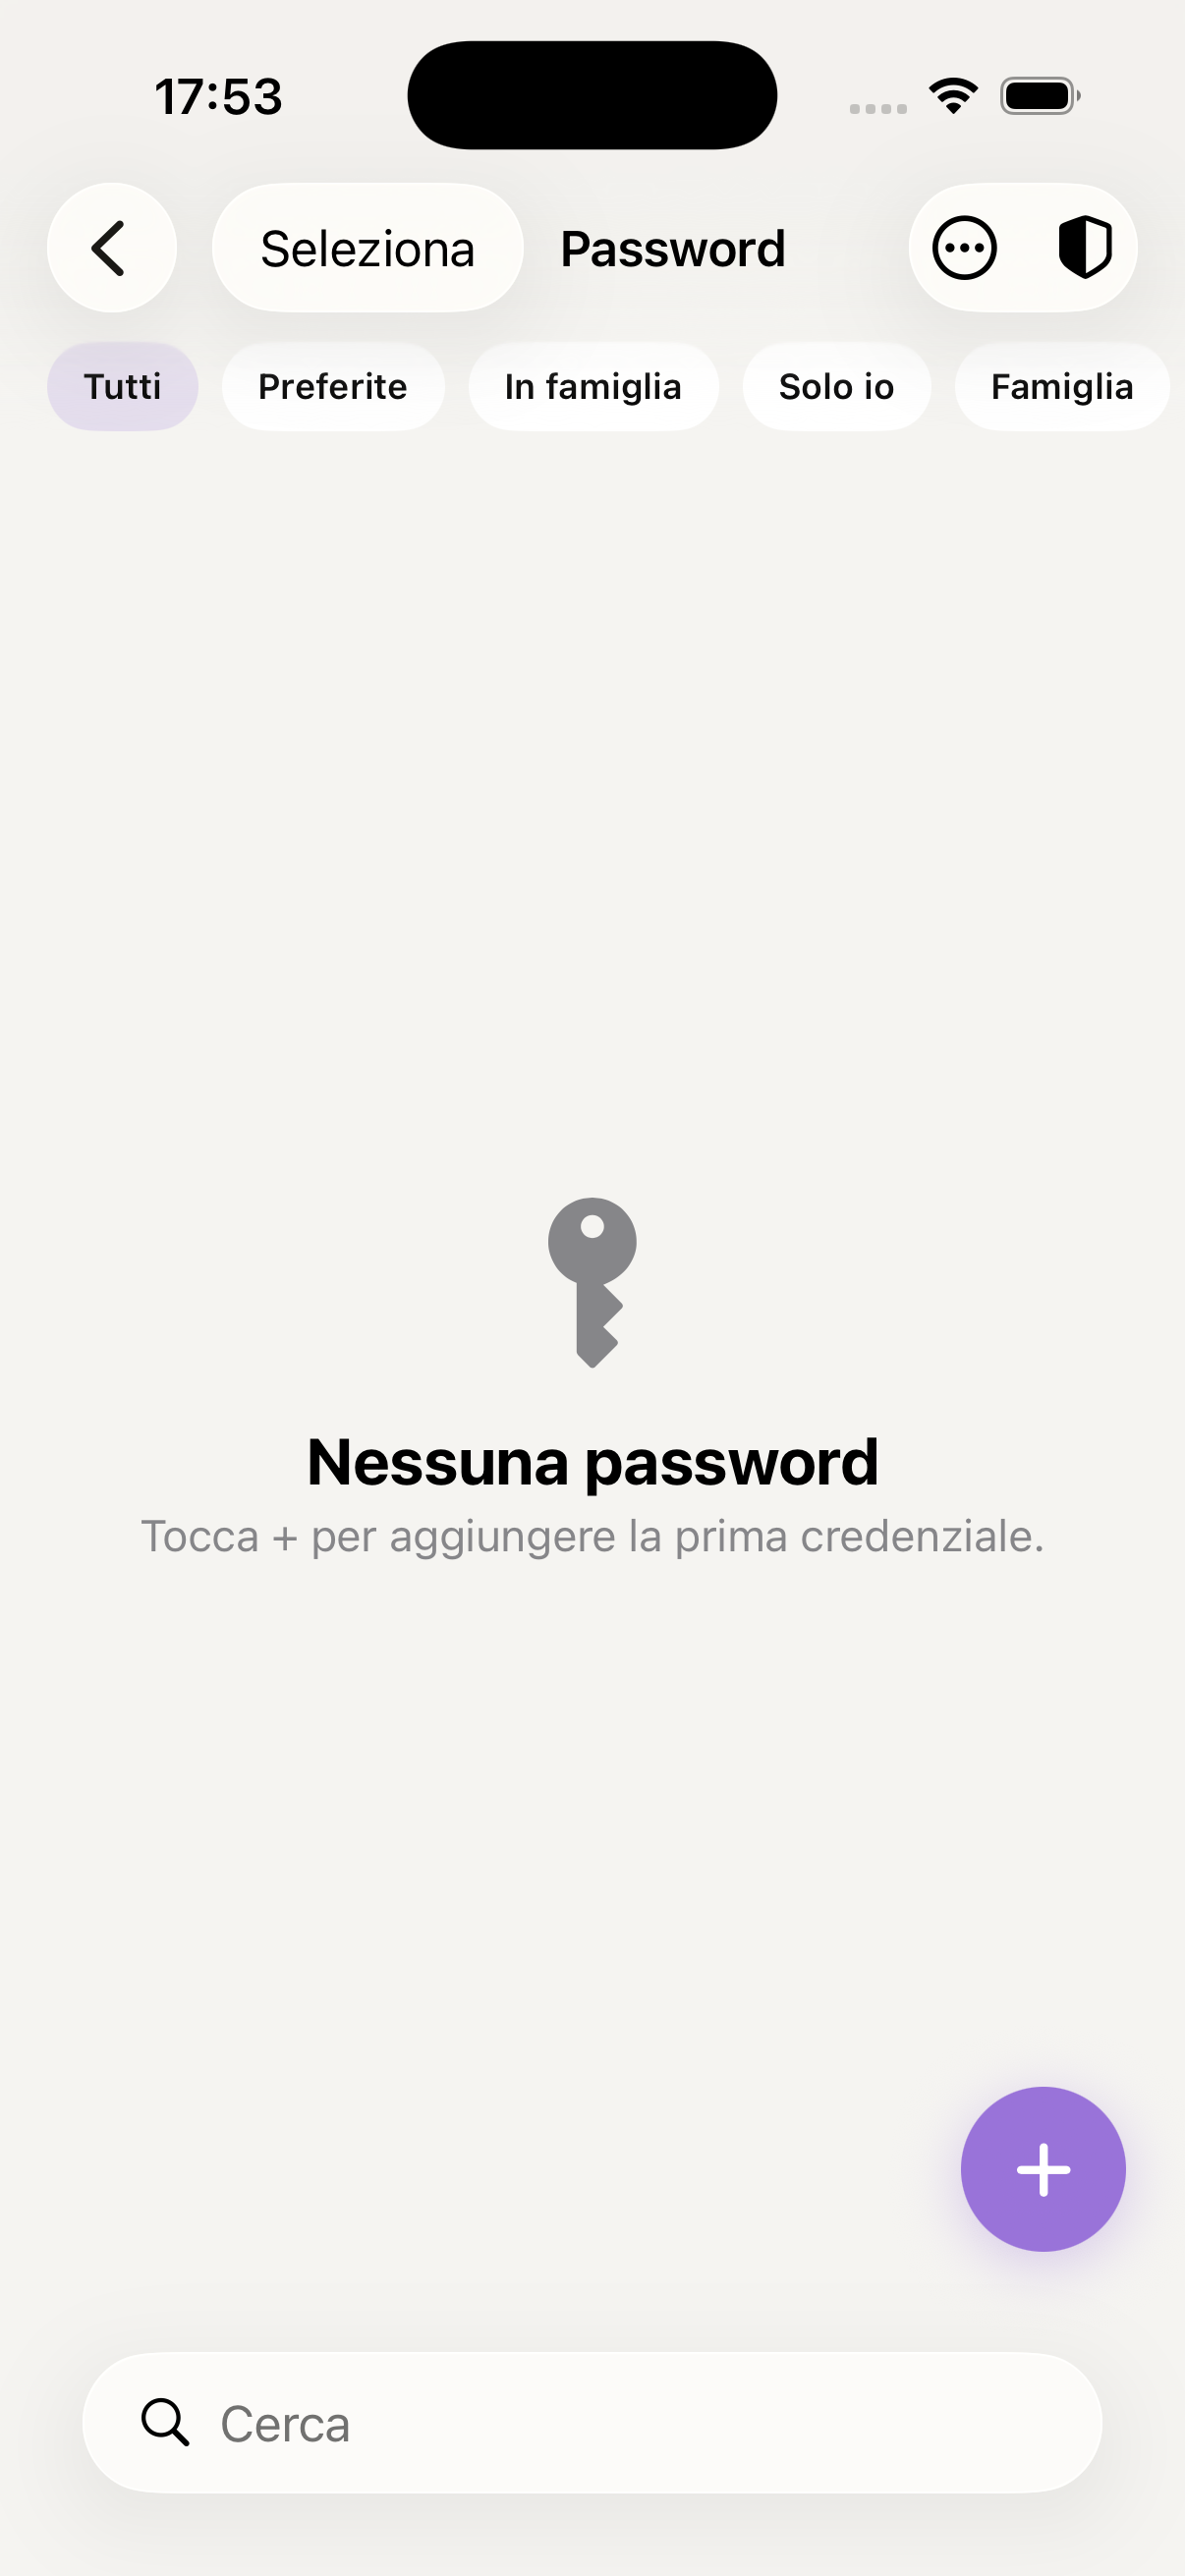
Saved password list
Credential detail
Add new password
Secure password generator

Check for compromised passwords
Autofill in Safari and apps
Passwords shared with the family
Organisation by categories
Shopping list
KidBox's shopping list is shared in real time with the whole family. Anyone can add items from home while you're already at the supermarket — everything synchronised instantly.
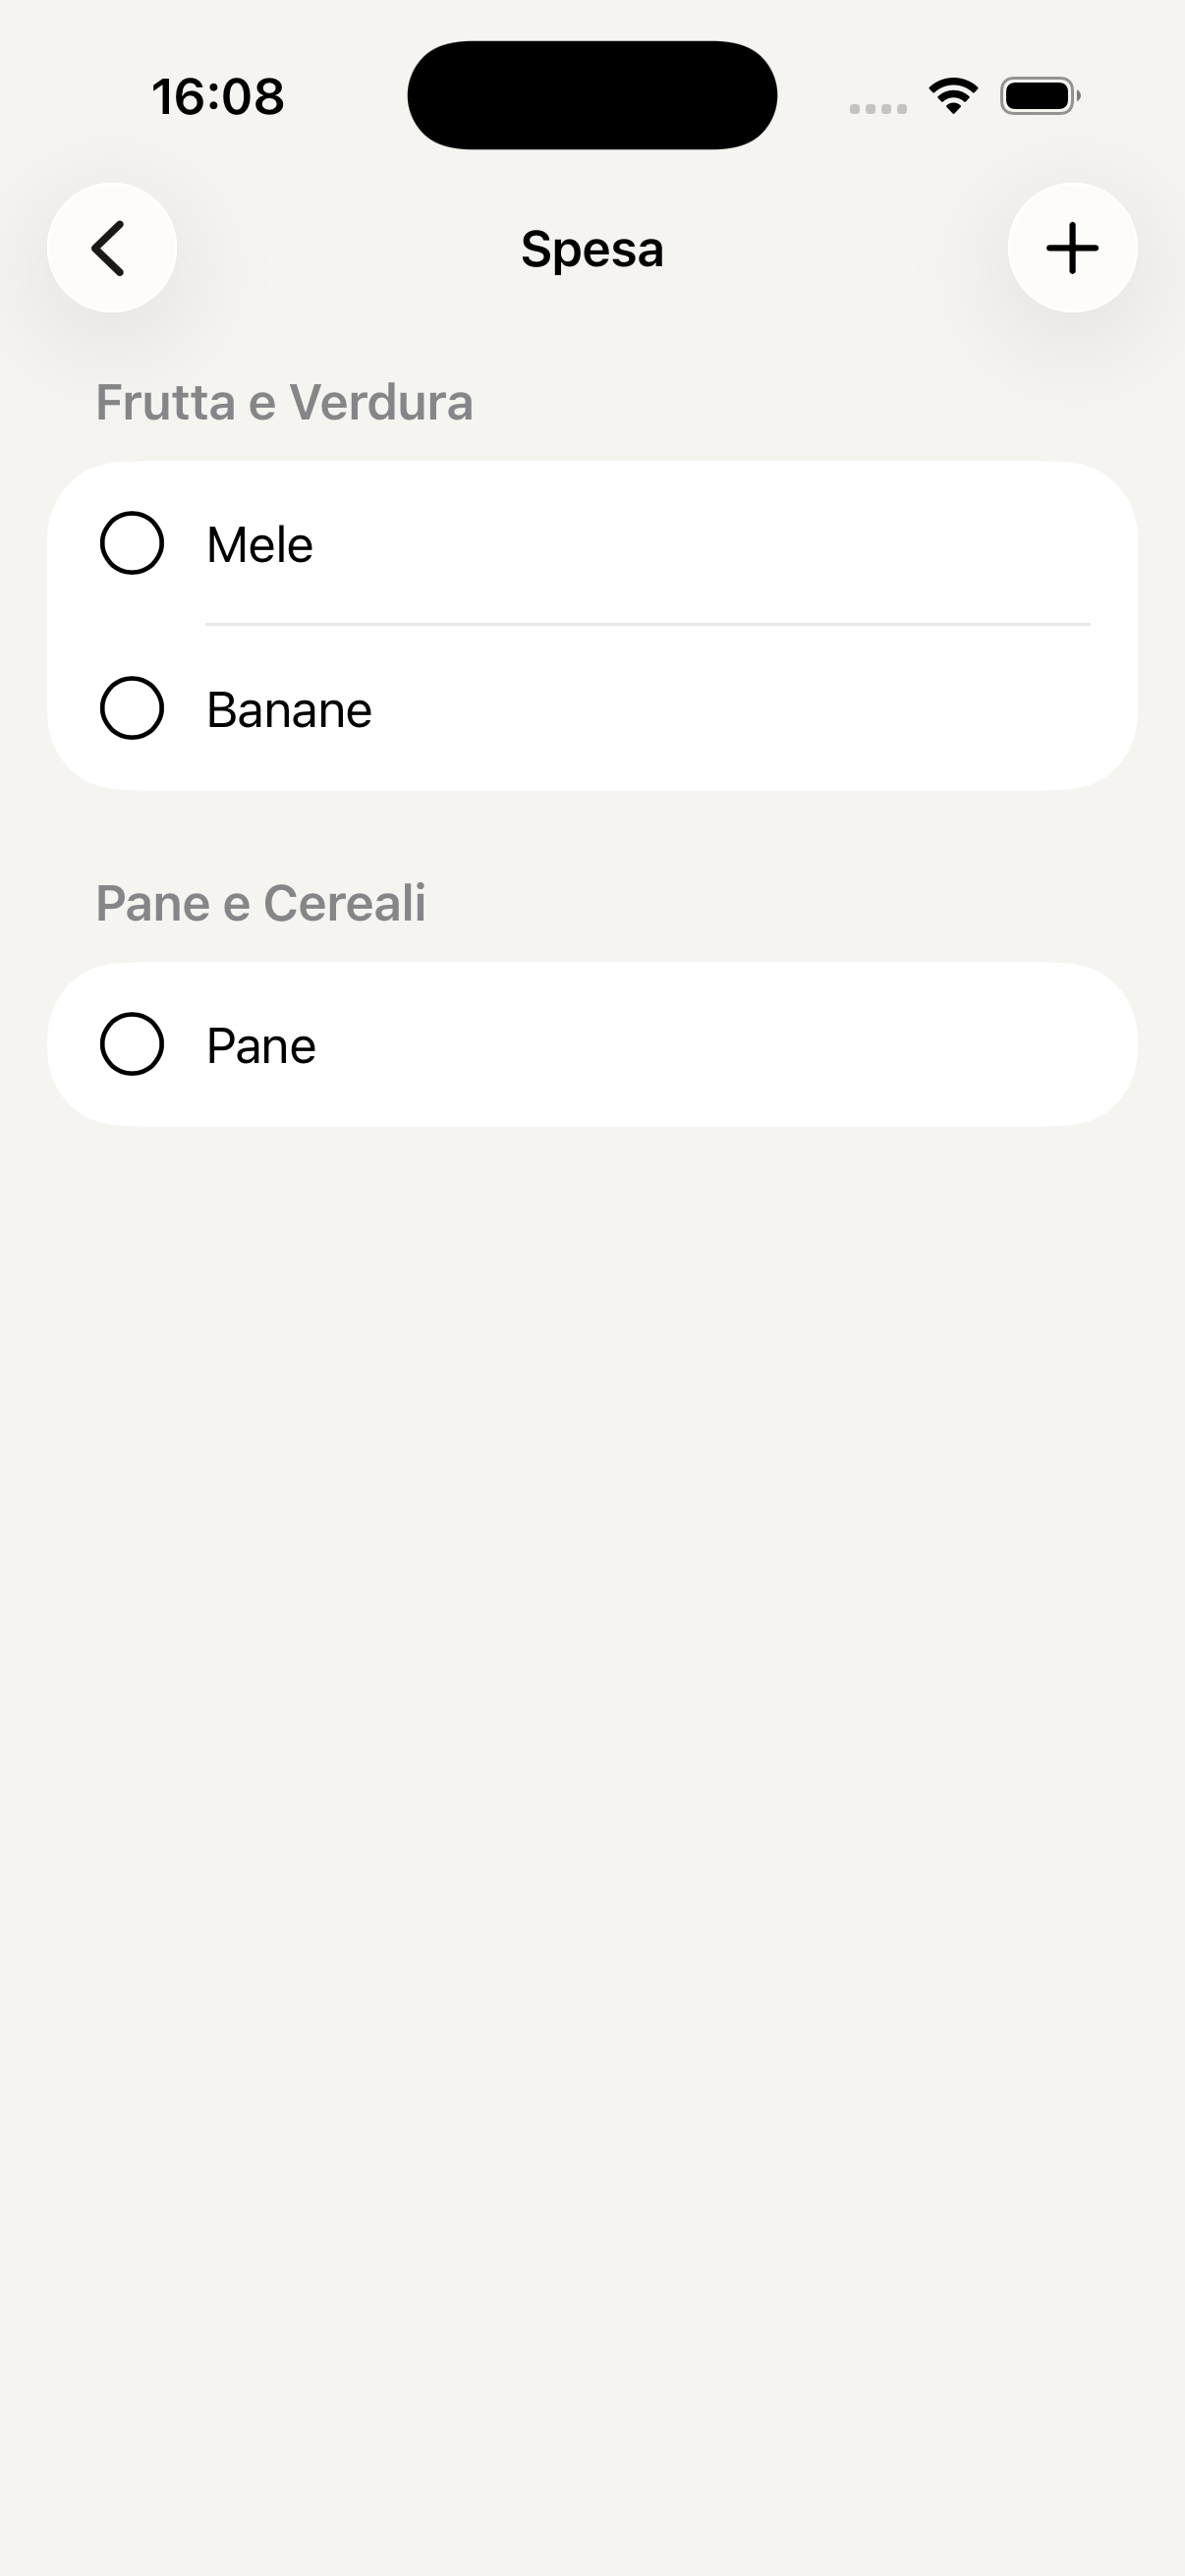
Access Todo from the "More" menu and select the Shopping list. You'll find all items to buy added by family members, organised by category.
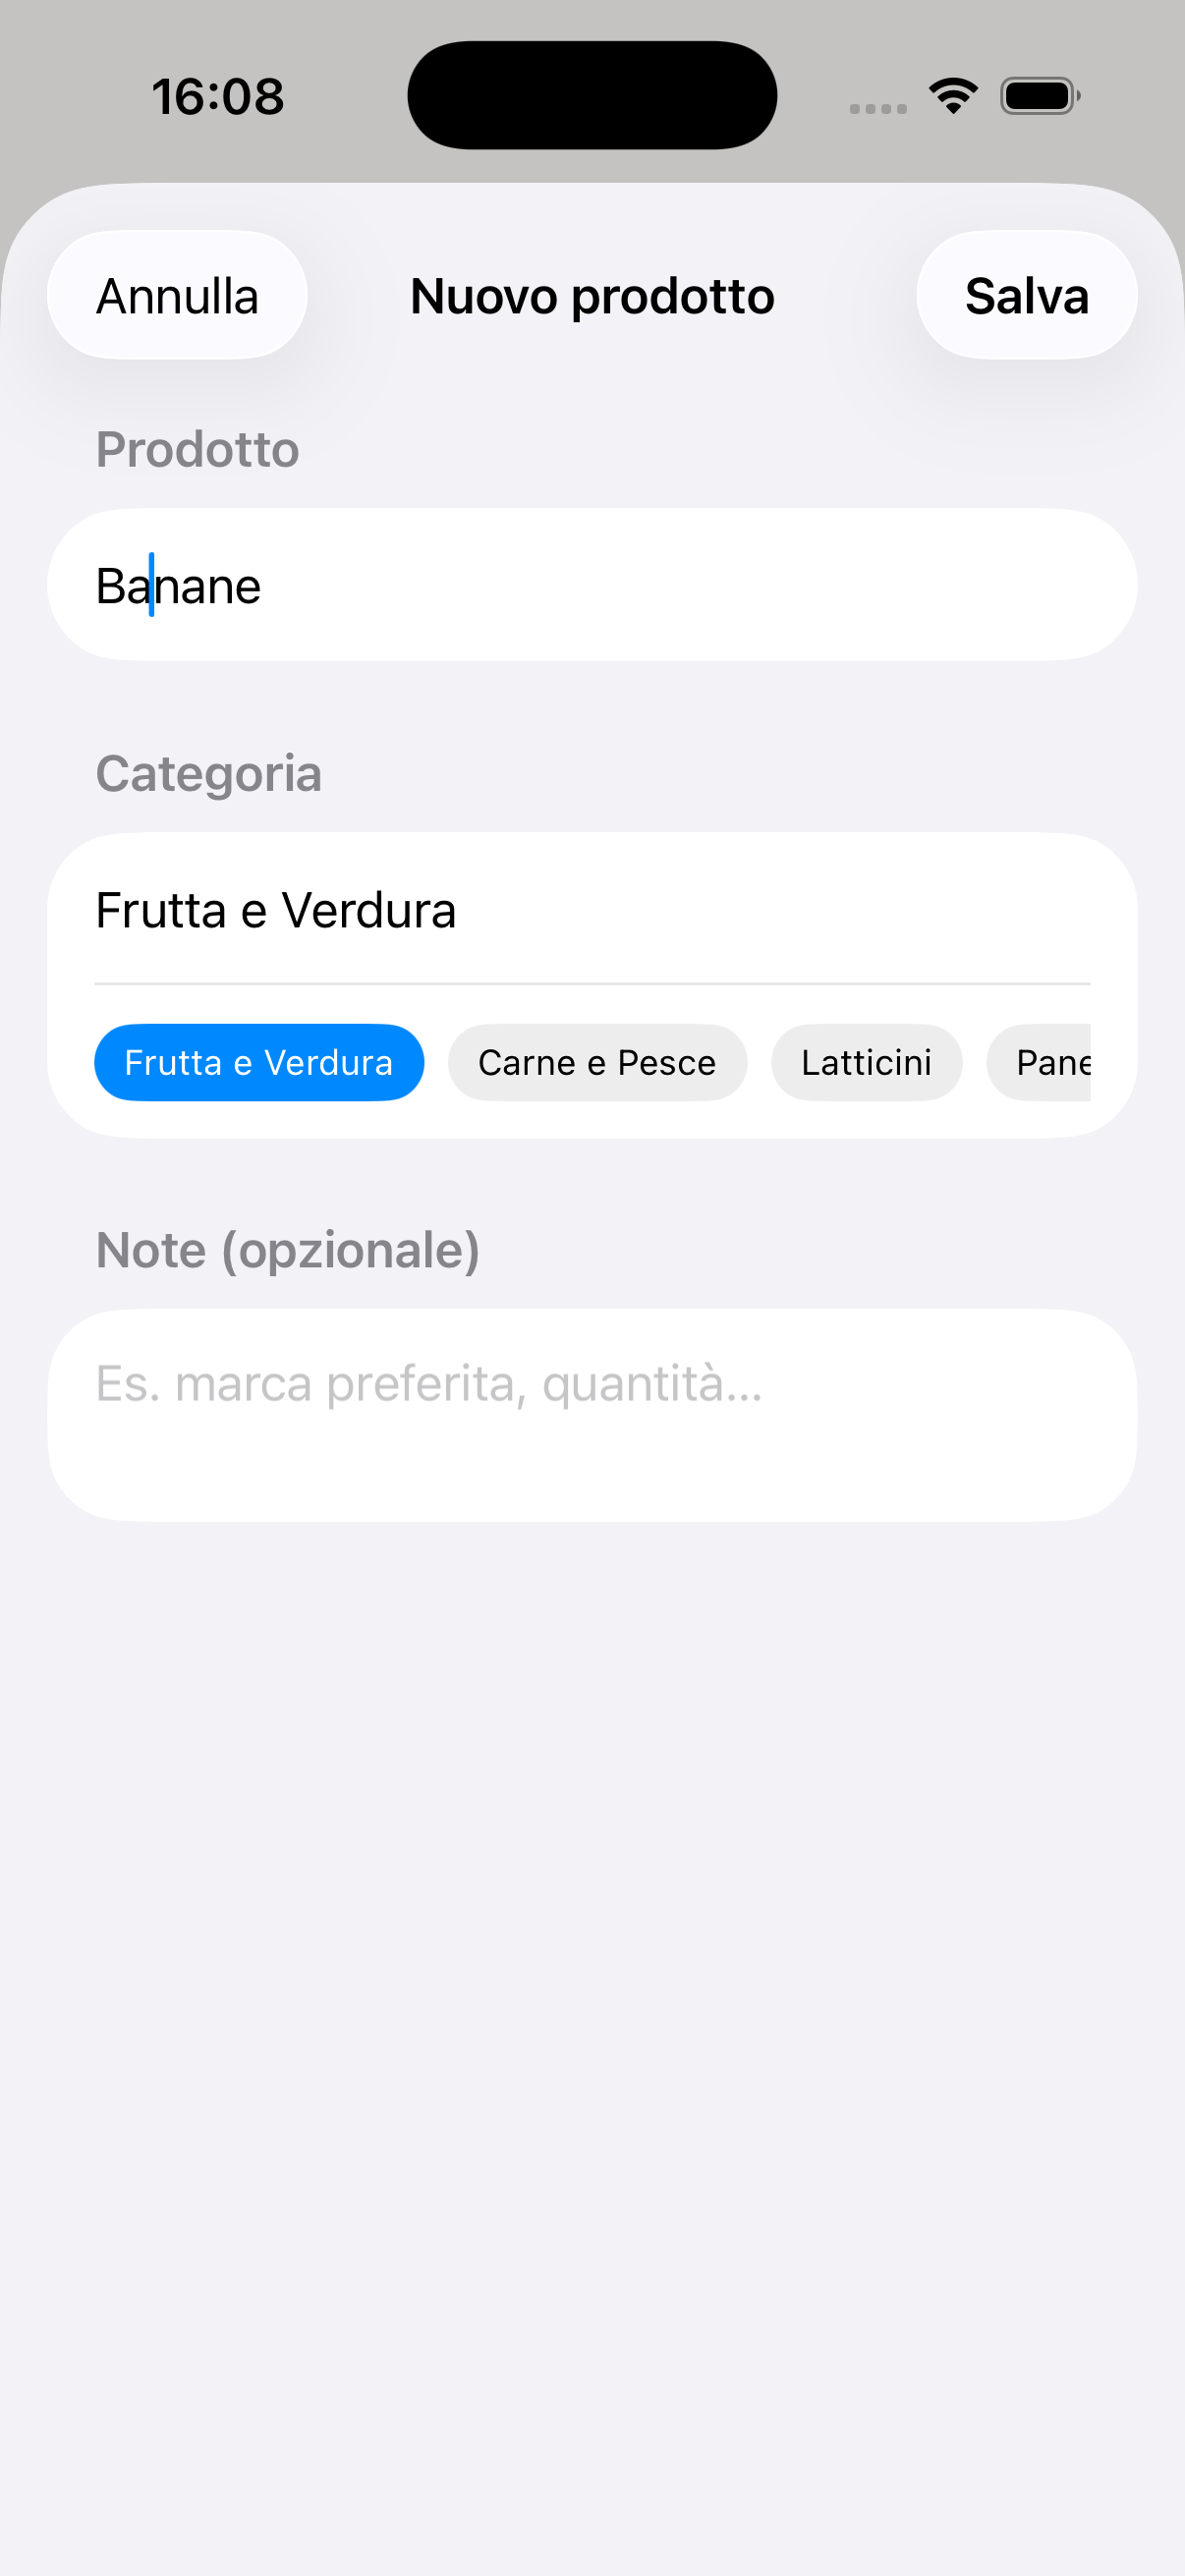
Tap + and write the product name. You can add a note (e.g. "specific brand") and the quantity. The item appears immediately in everyone's list.
Tap the circle next to each item while shopping — it gets crossed out and moved to the bottom of the list. If there are two of you at the supermarket, you can split the aisles and tick items simultaneously.
Once shopping is done, tap Clear completed to remove all ticked items and start fresh for next time.
In L'Assistente di Famiglia you can say "Add the ingredients for a lasagne for 6 people to the shopping list" or "Put what's missing for breakfast on the shopping list" — the AI adds everything automatically.
Keep the list open on your phone while you shop — it updates in real time if your partner adds something from home. No more phone calls to remember what's missing.
Real-time shared shopping list
Add item to list
Notes
Notes shared with the whole family — ideas, reminders, recipes, instructions. Notes are always synchronised and visible to all members in real time.
Access Notes from the "More" menu in the bottom bar. You'll find the list of all family notes, ordered by most recently modified.
Tap + at the top right, enter a title and start writing. You can format text with bold, italics, bullet lists and headings to better organise the content.
Notes are visible to all family members by default. If you want a private note, you can set it as personal at creation time.
In L'Assistente di Famiglia you can say "Create a note with instructions for Sofia's paediatrician" or "Summarise the note about the summer holiday" — the AI writes or reworks it for you.
Notes are ideal for recurring instructions: emergency numbers, medication doses, school contacts. Written once, always available for the whole family.
Family notes list
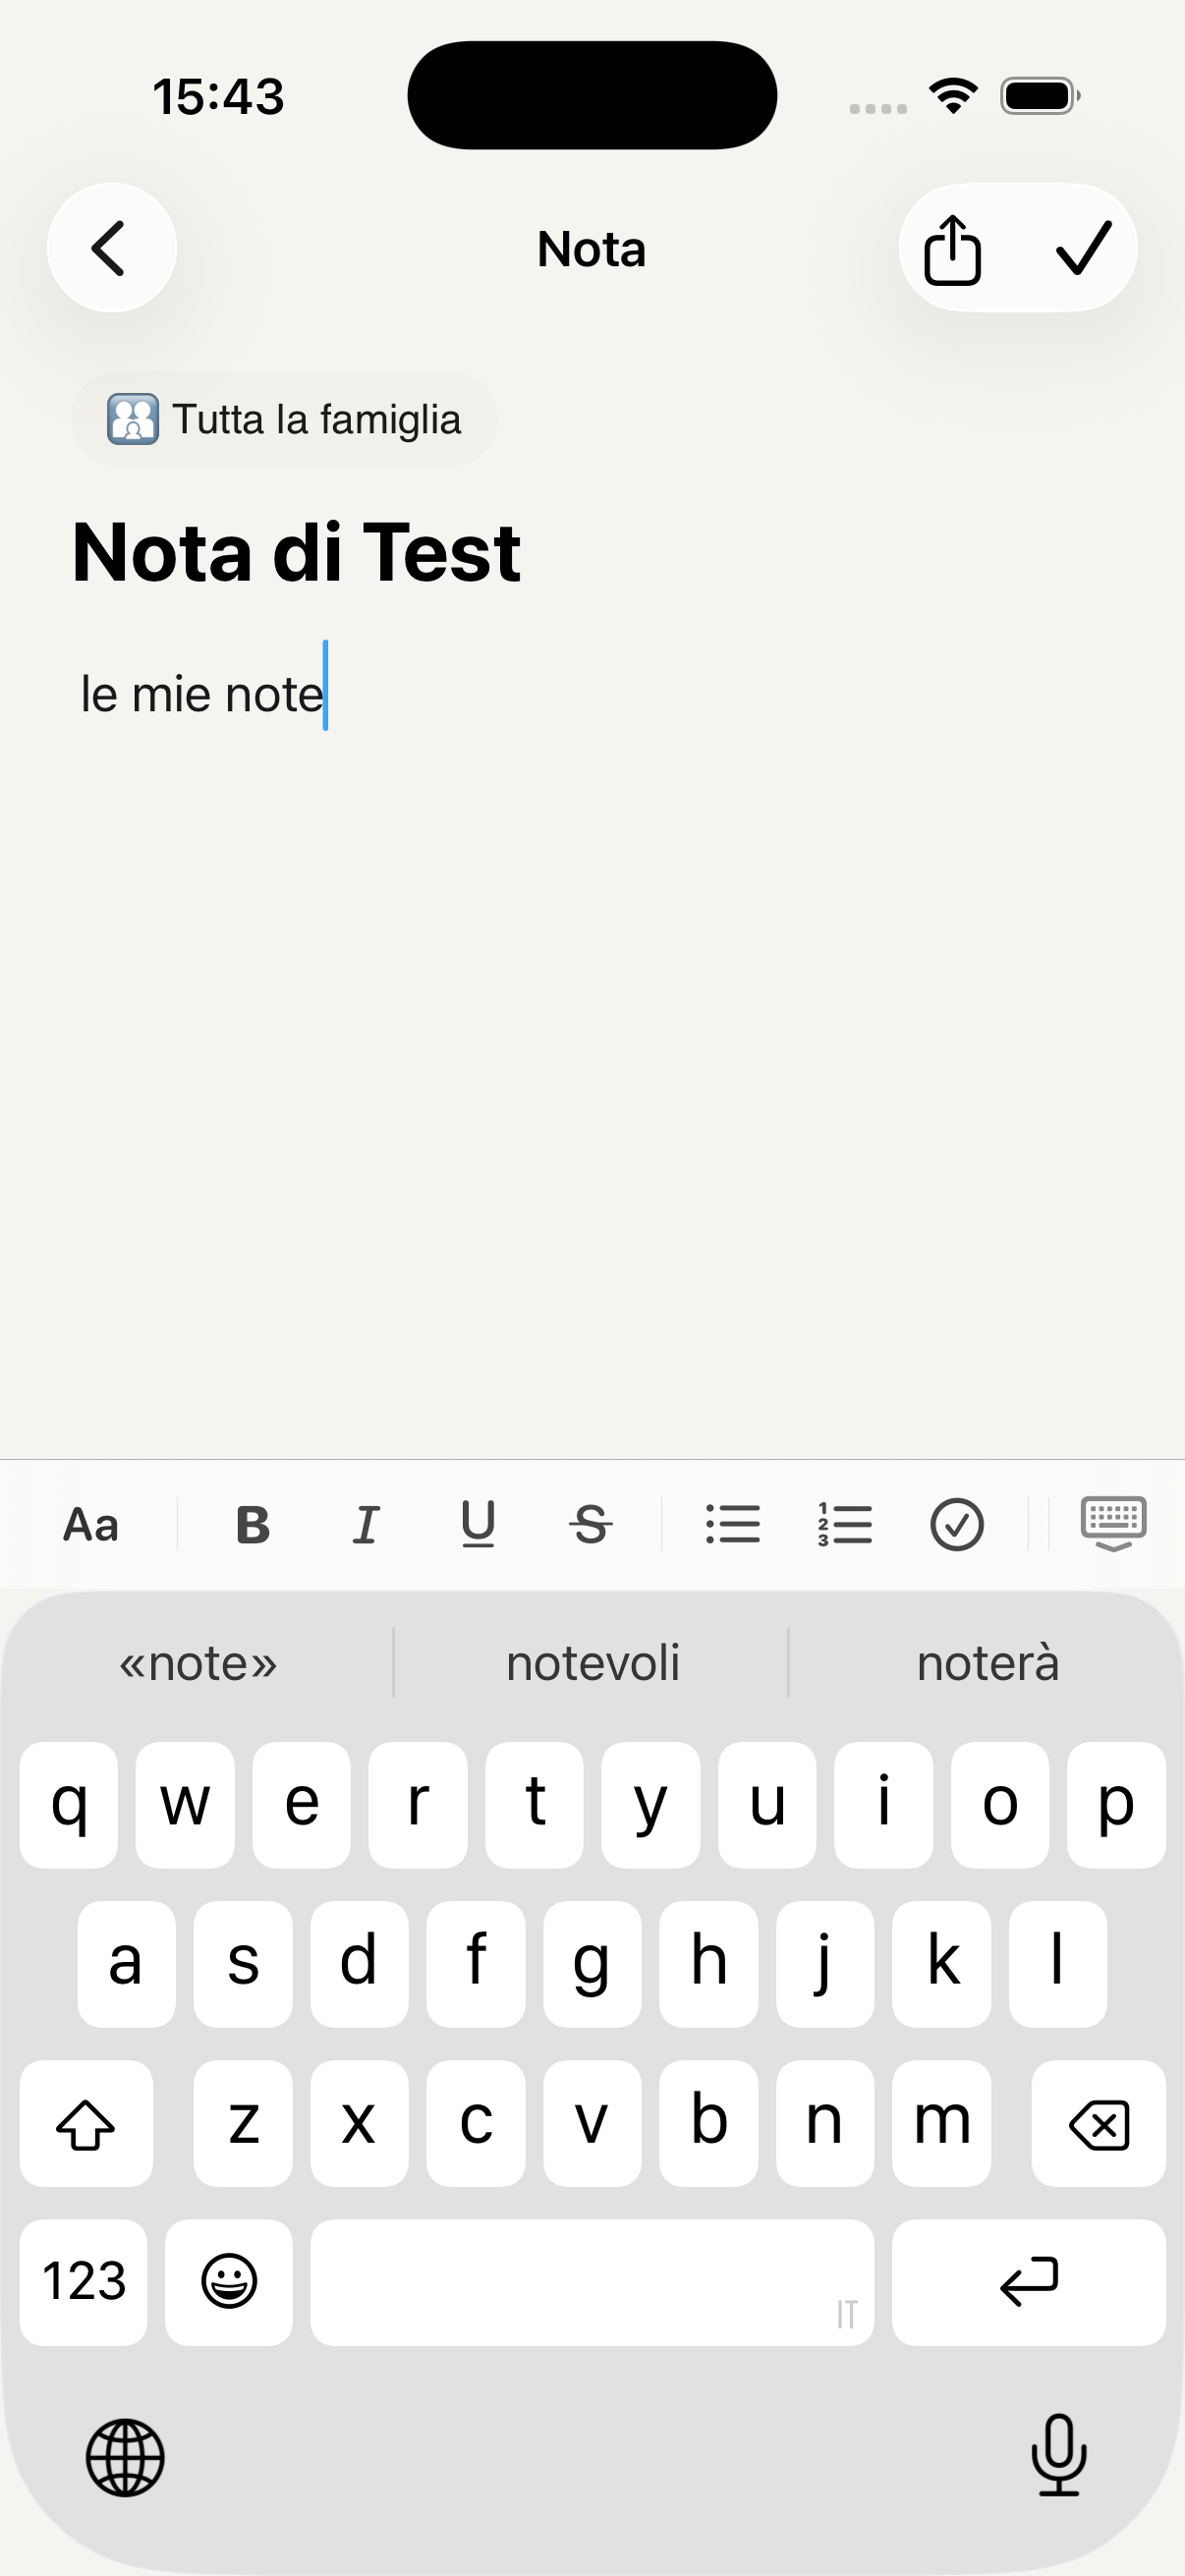
View and edit note

Create new note
Home
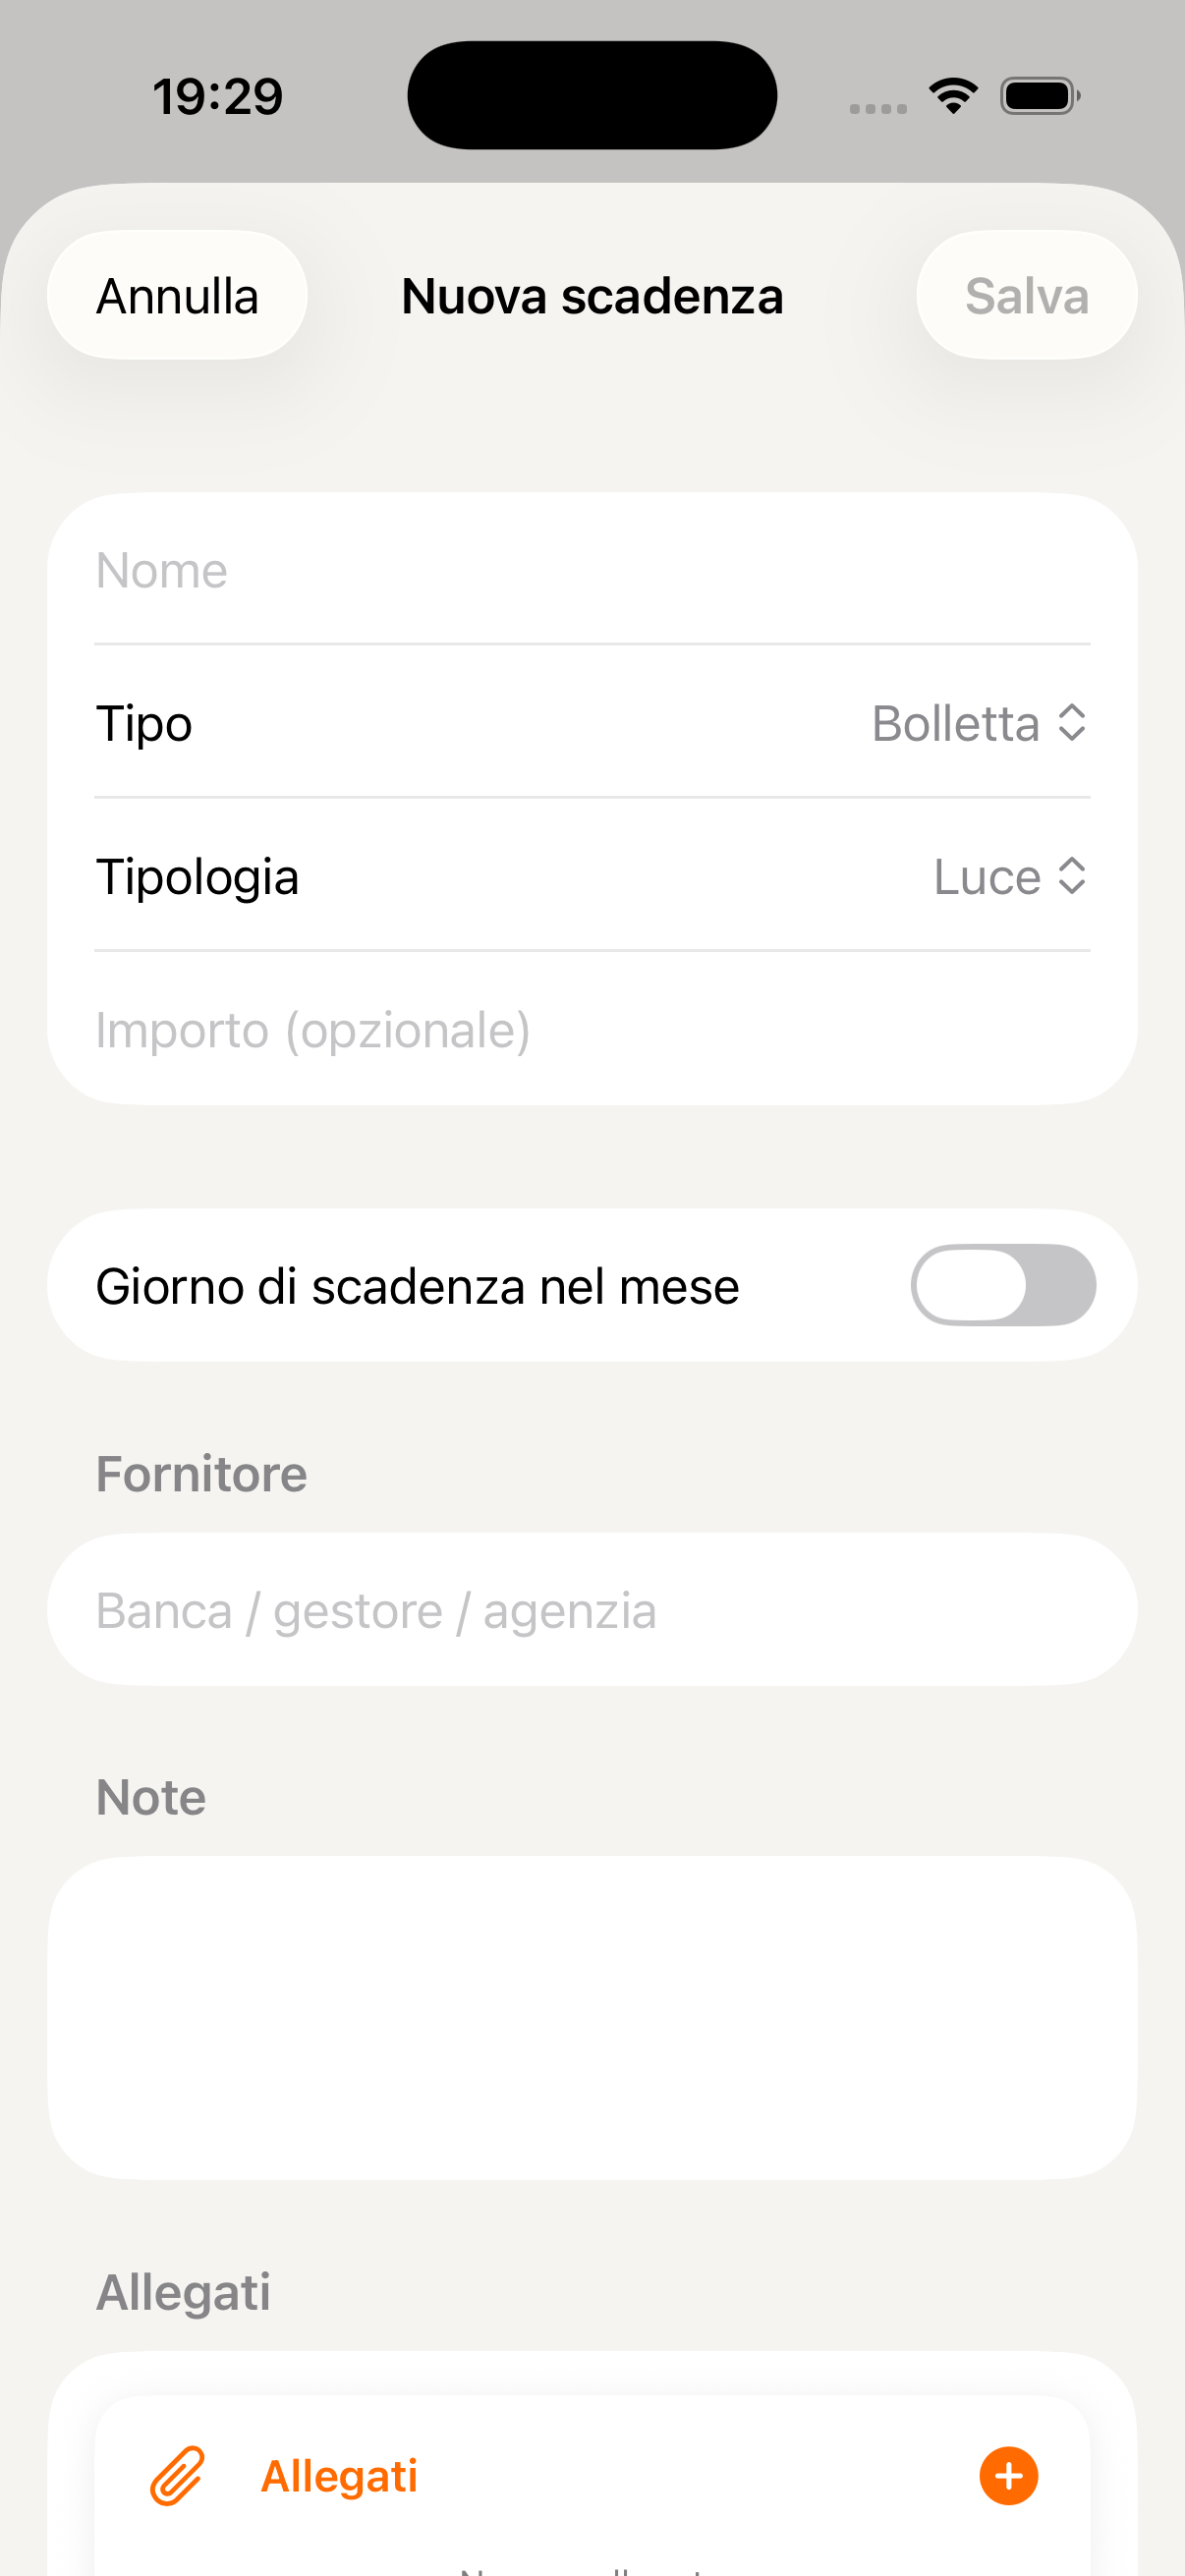
Keep track of appliances, systems and bills in your home. Monitor warranties, deadlines and recurring payments — all in one place with automatic reminders.
Access the Home section from the navigation. If it's your first time, you'll find two buttons: Add item to register an appliance or system, and Add deadline or payment for bills and recurring subscriptions.
Enter the name (e.g. Boiler), category (Appliance, System…), brand, model and serial number. Enable Purchase date and Warranty expiry to receive a warning before the warranty runs out. You can also set the date of the next scheduled maintenance.
For bills and subscriptions choose the type (Bill, Subscription, Rent…), the category (Electricity, Gas, Internet…), the amount, the due day of the month and the provider. You can attach invoices directly — also visible in Documents → Home. KidBox alerts you before each deadline.
The main list shows items divided by category: Appliances, Systems, Deadlines & Payments. A red badge immediately highlights upcoming or overdue deadlines so nothing slips through.
Ask the AI: "When does the boiler warranty expire?" or "When was the last time I had the air conditioner serviced?" — it answers by consulting your data in real time.
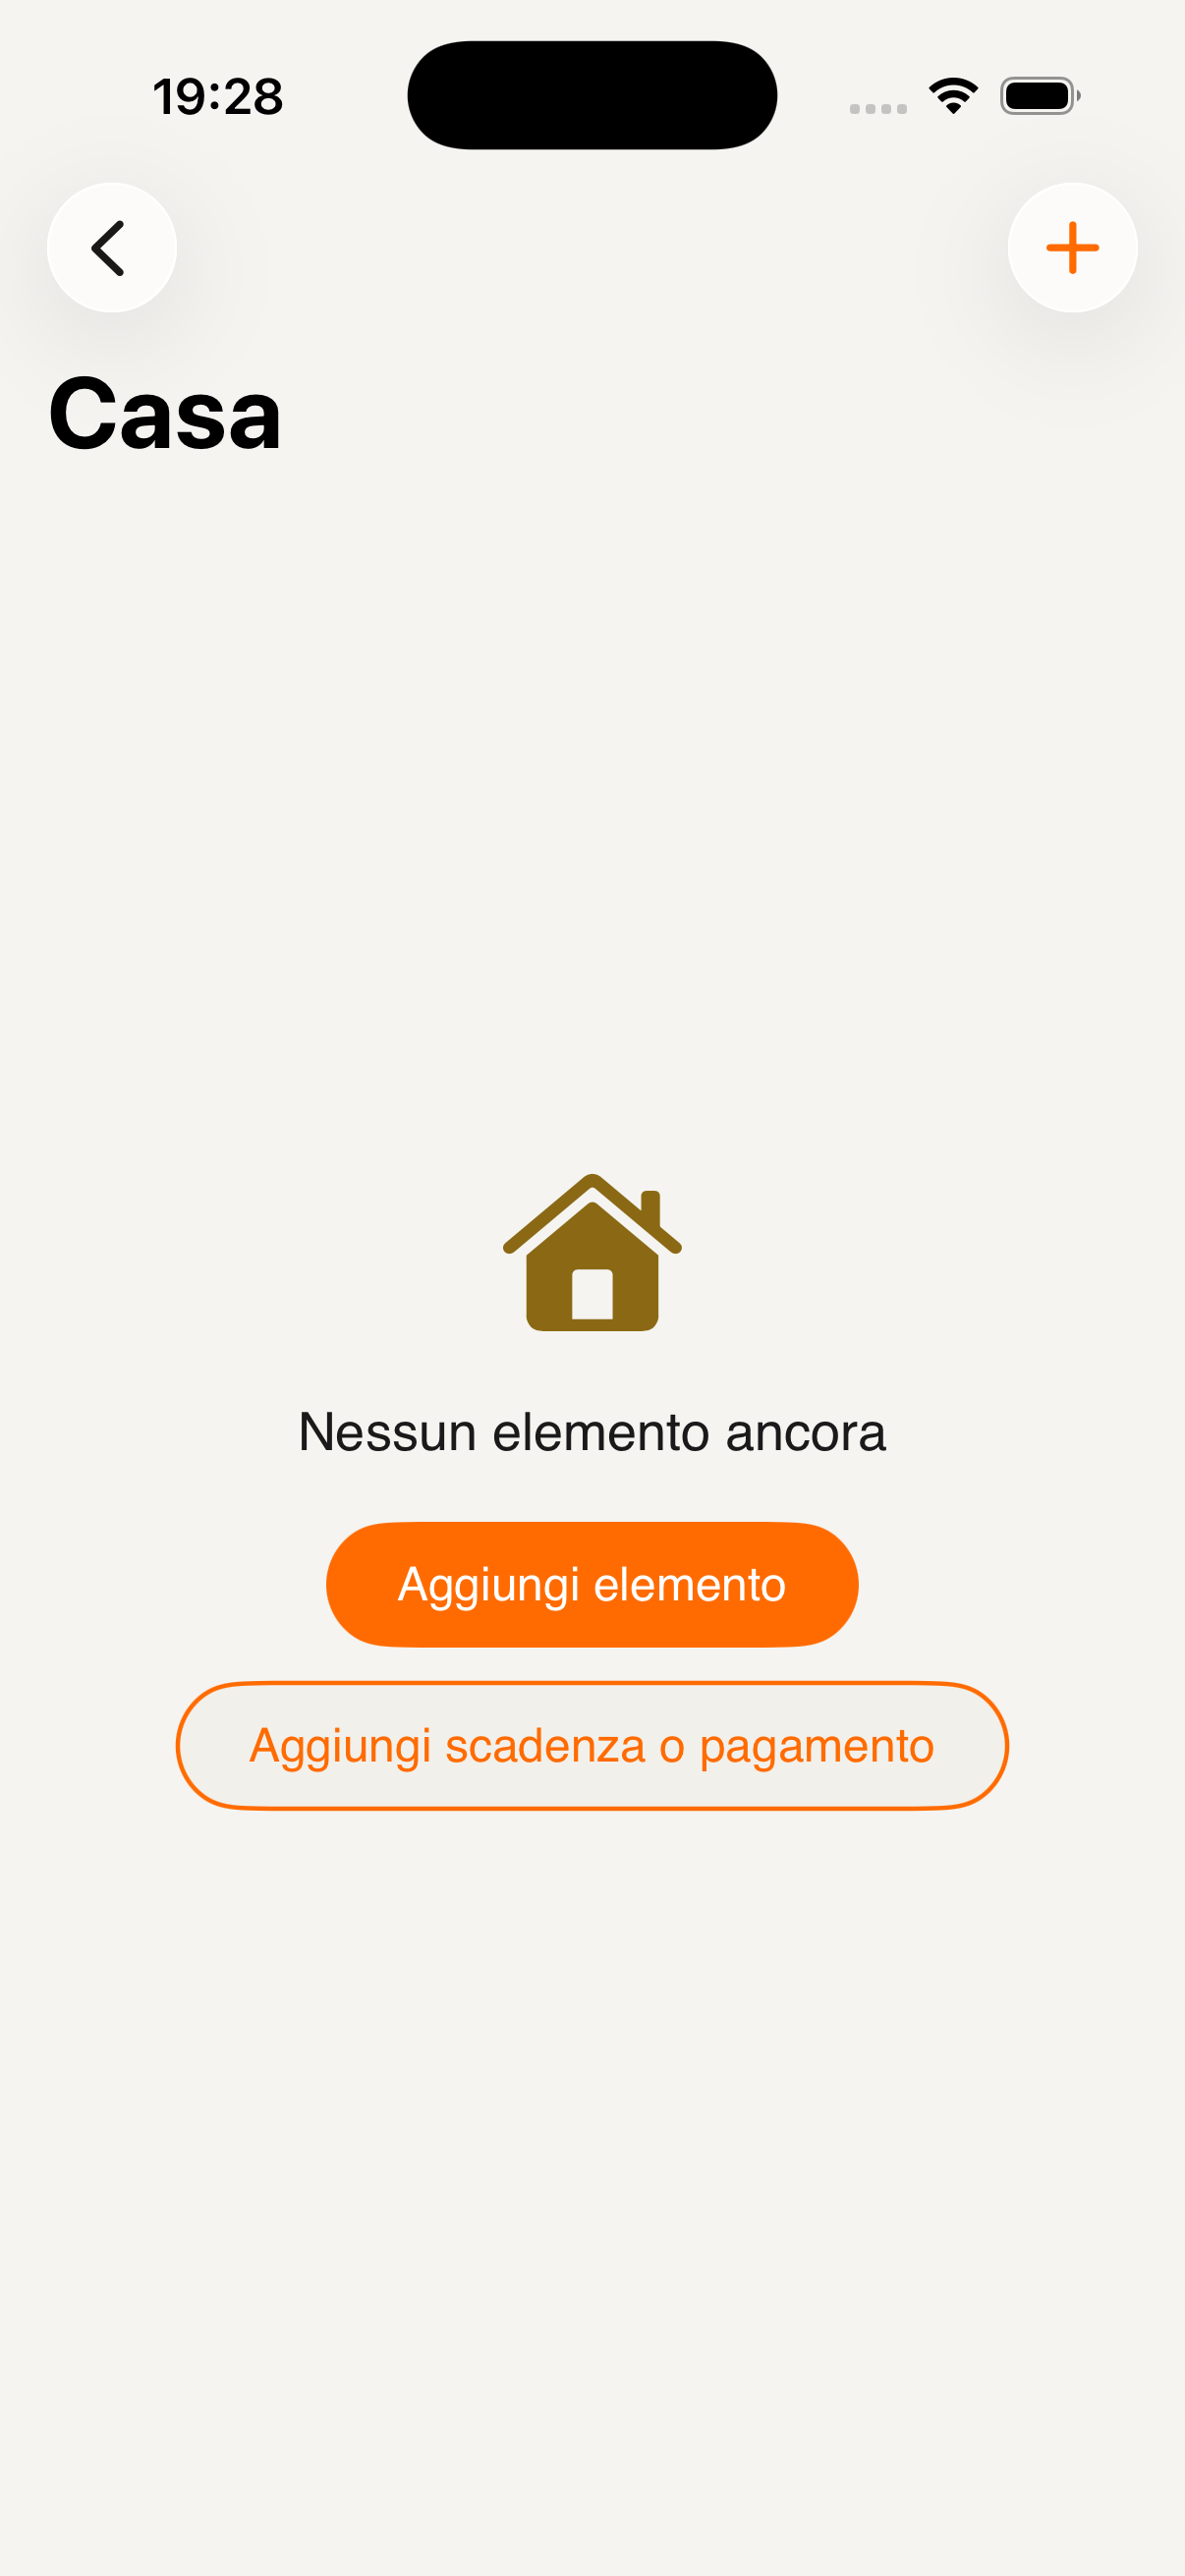
Home section
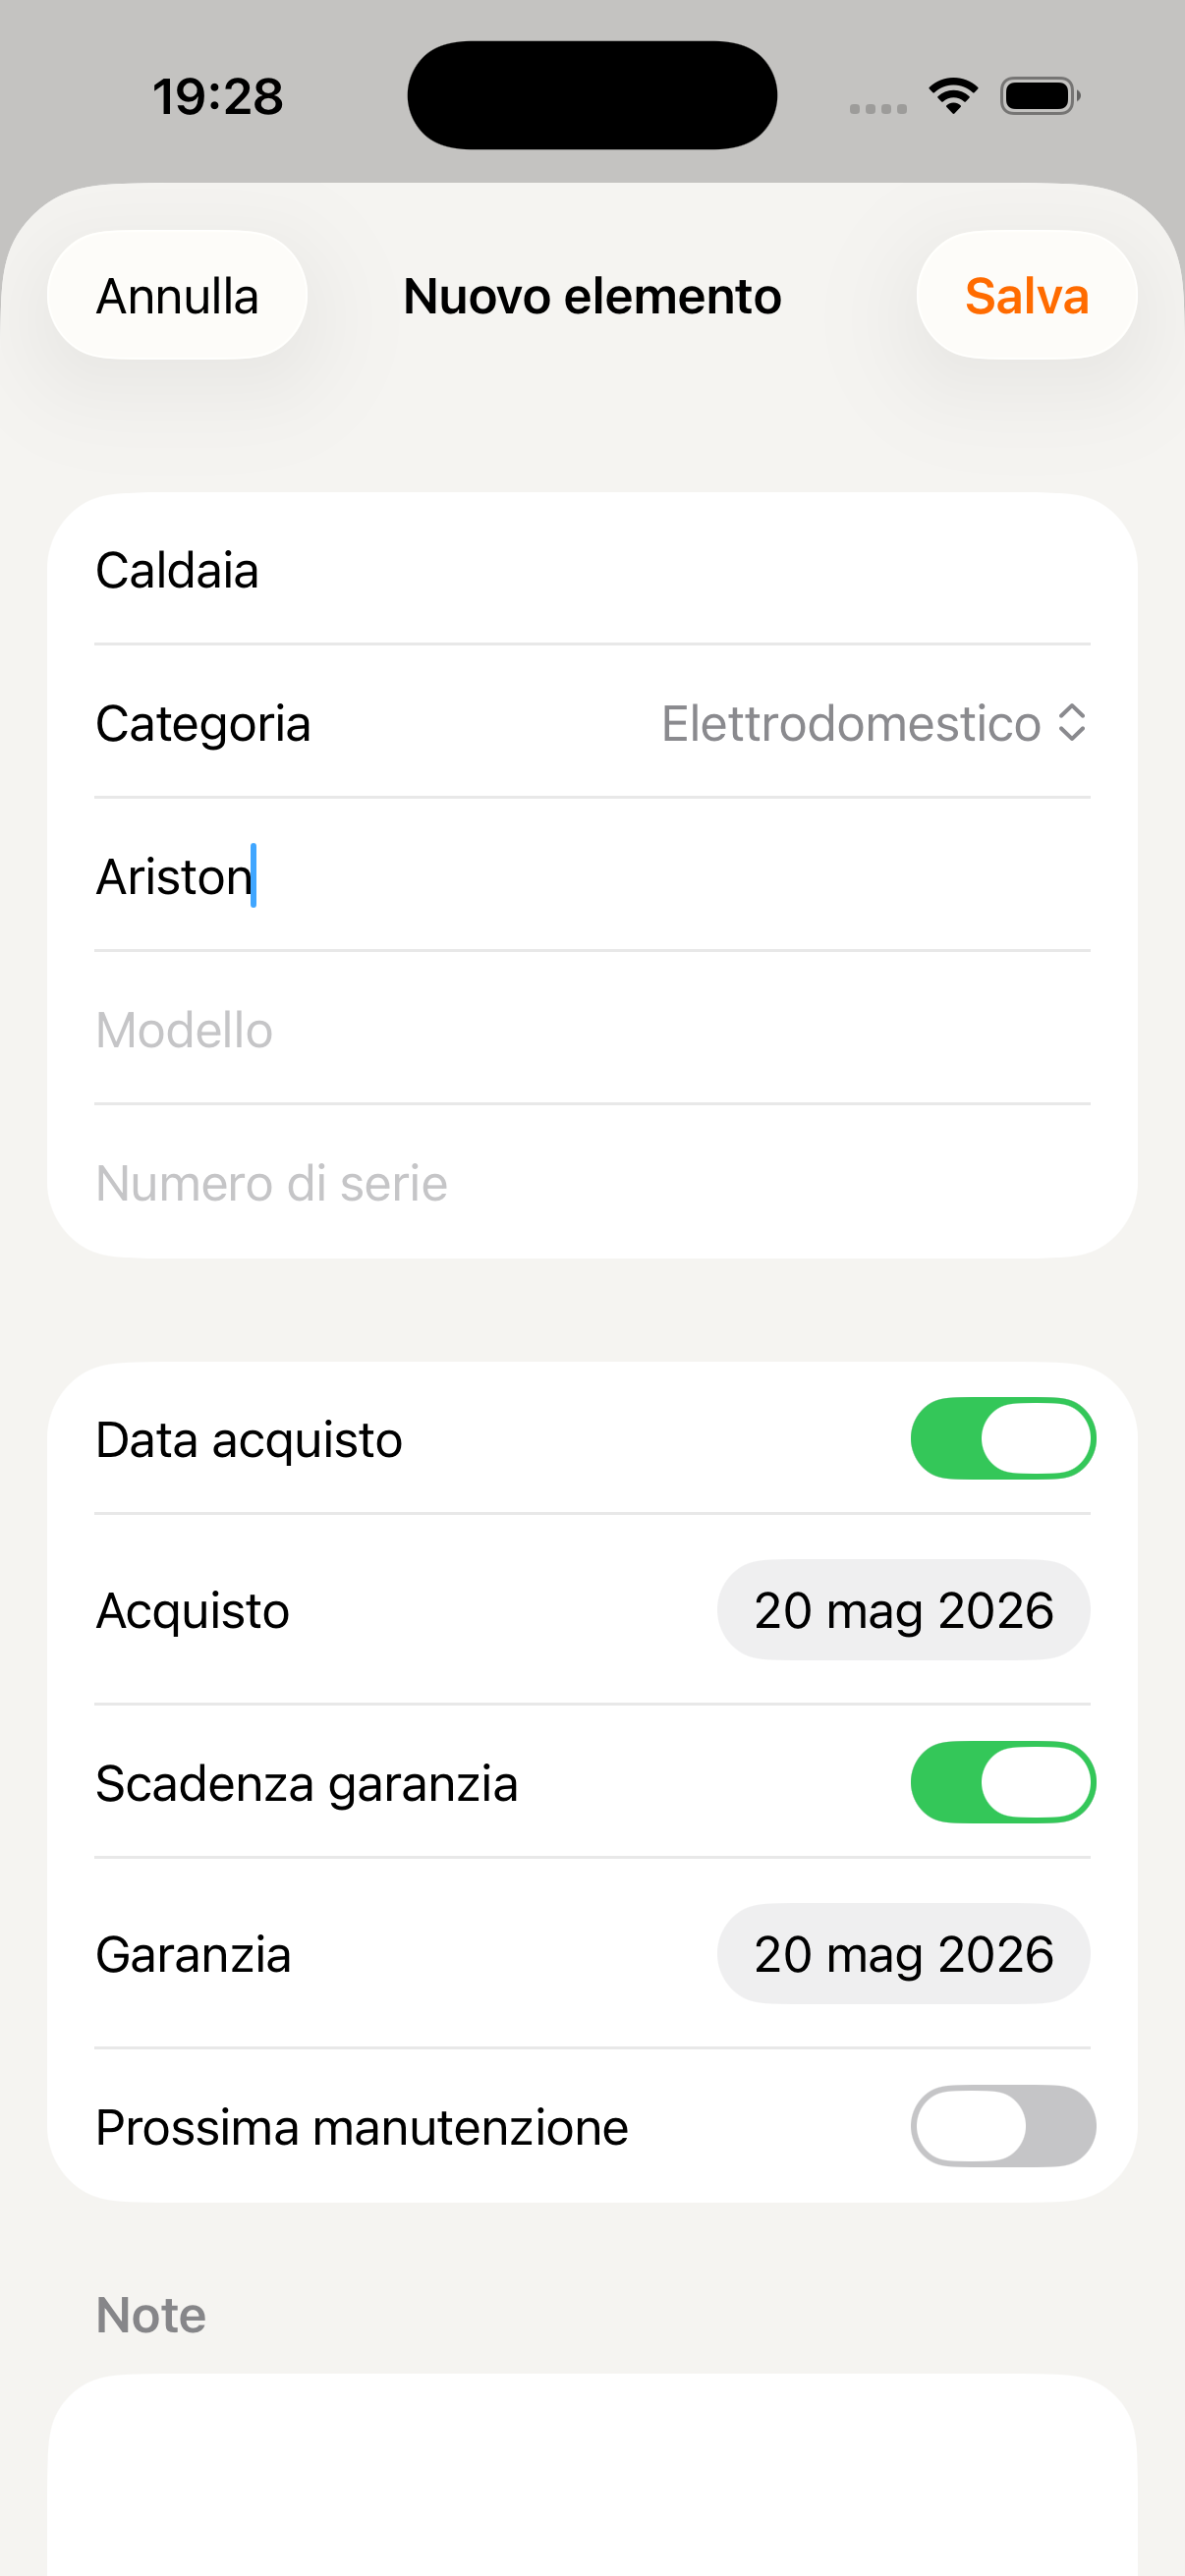
Add item

Item or deadline
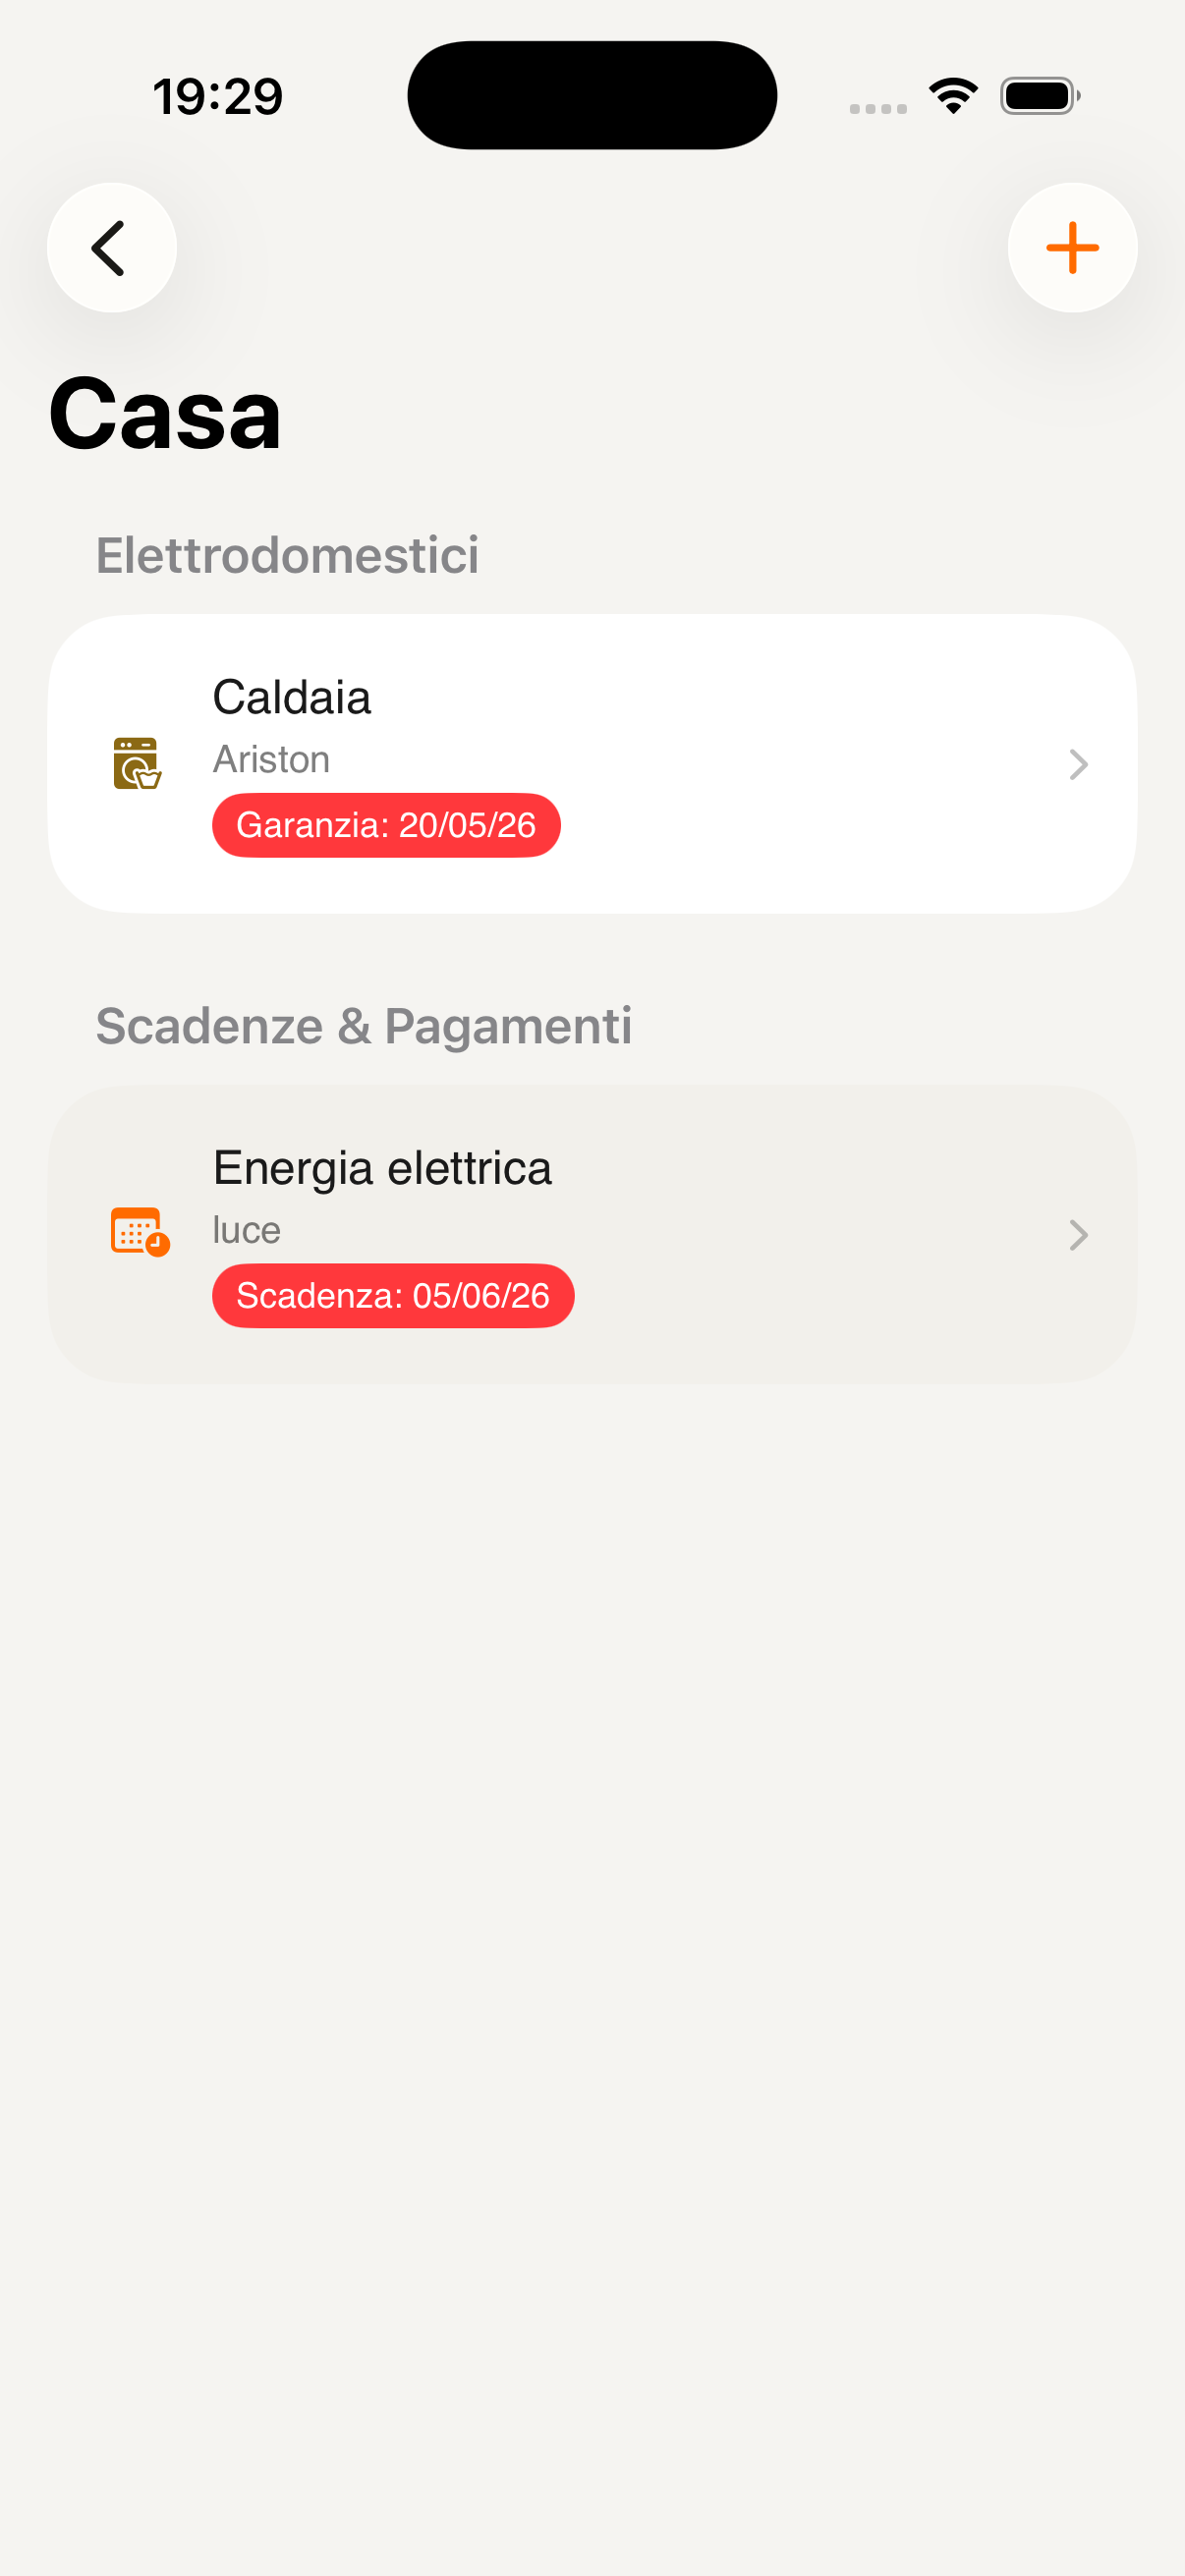
List with deadlines
New deadline
Garage
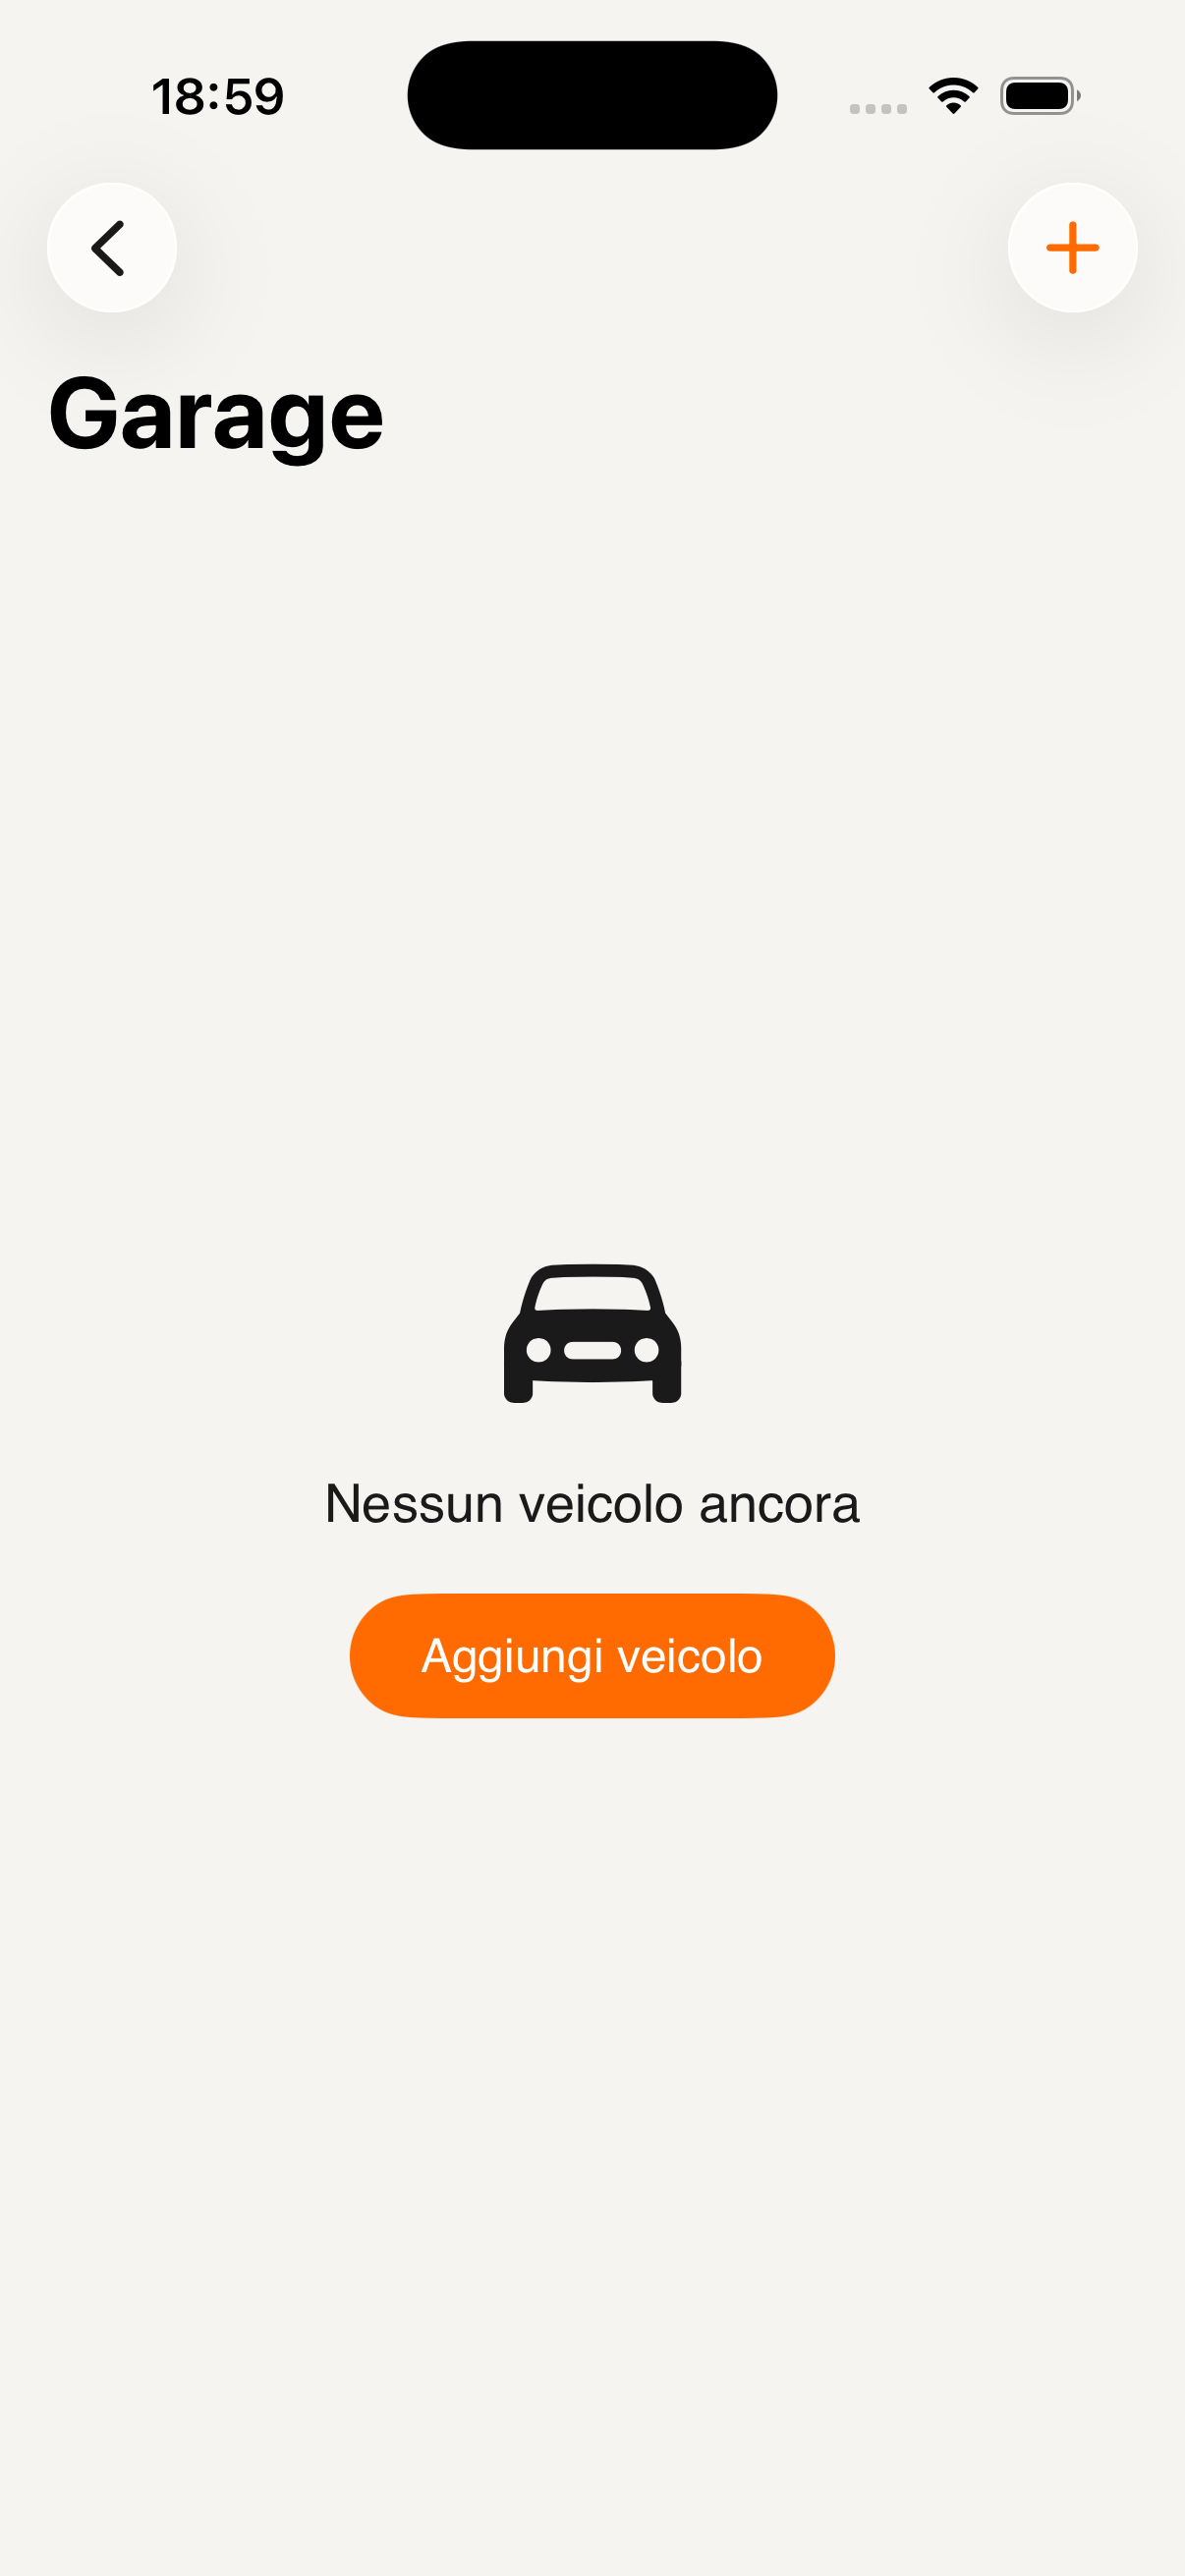
Keep all your vehicles under control: insurance, MOT, road tax and service deadlines — with automatic reminders and a service history always at hand.
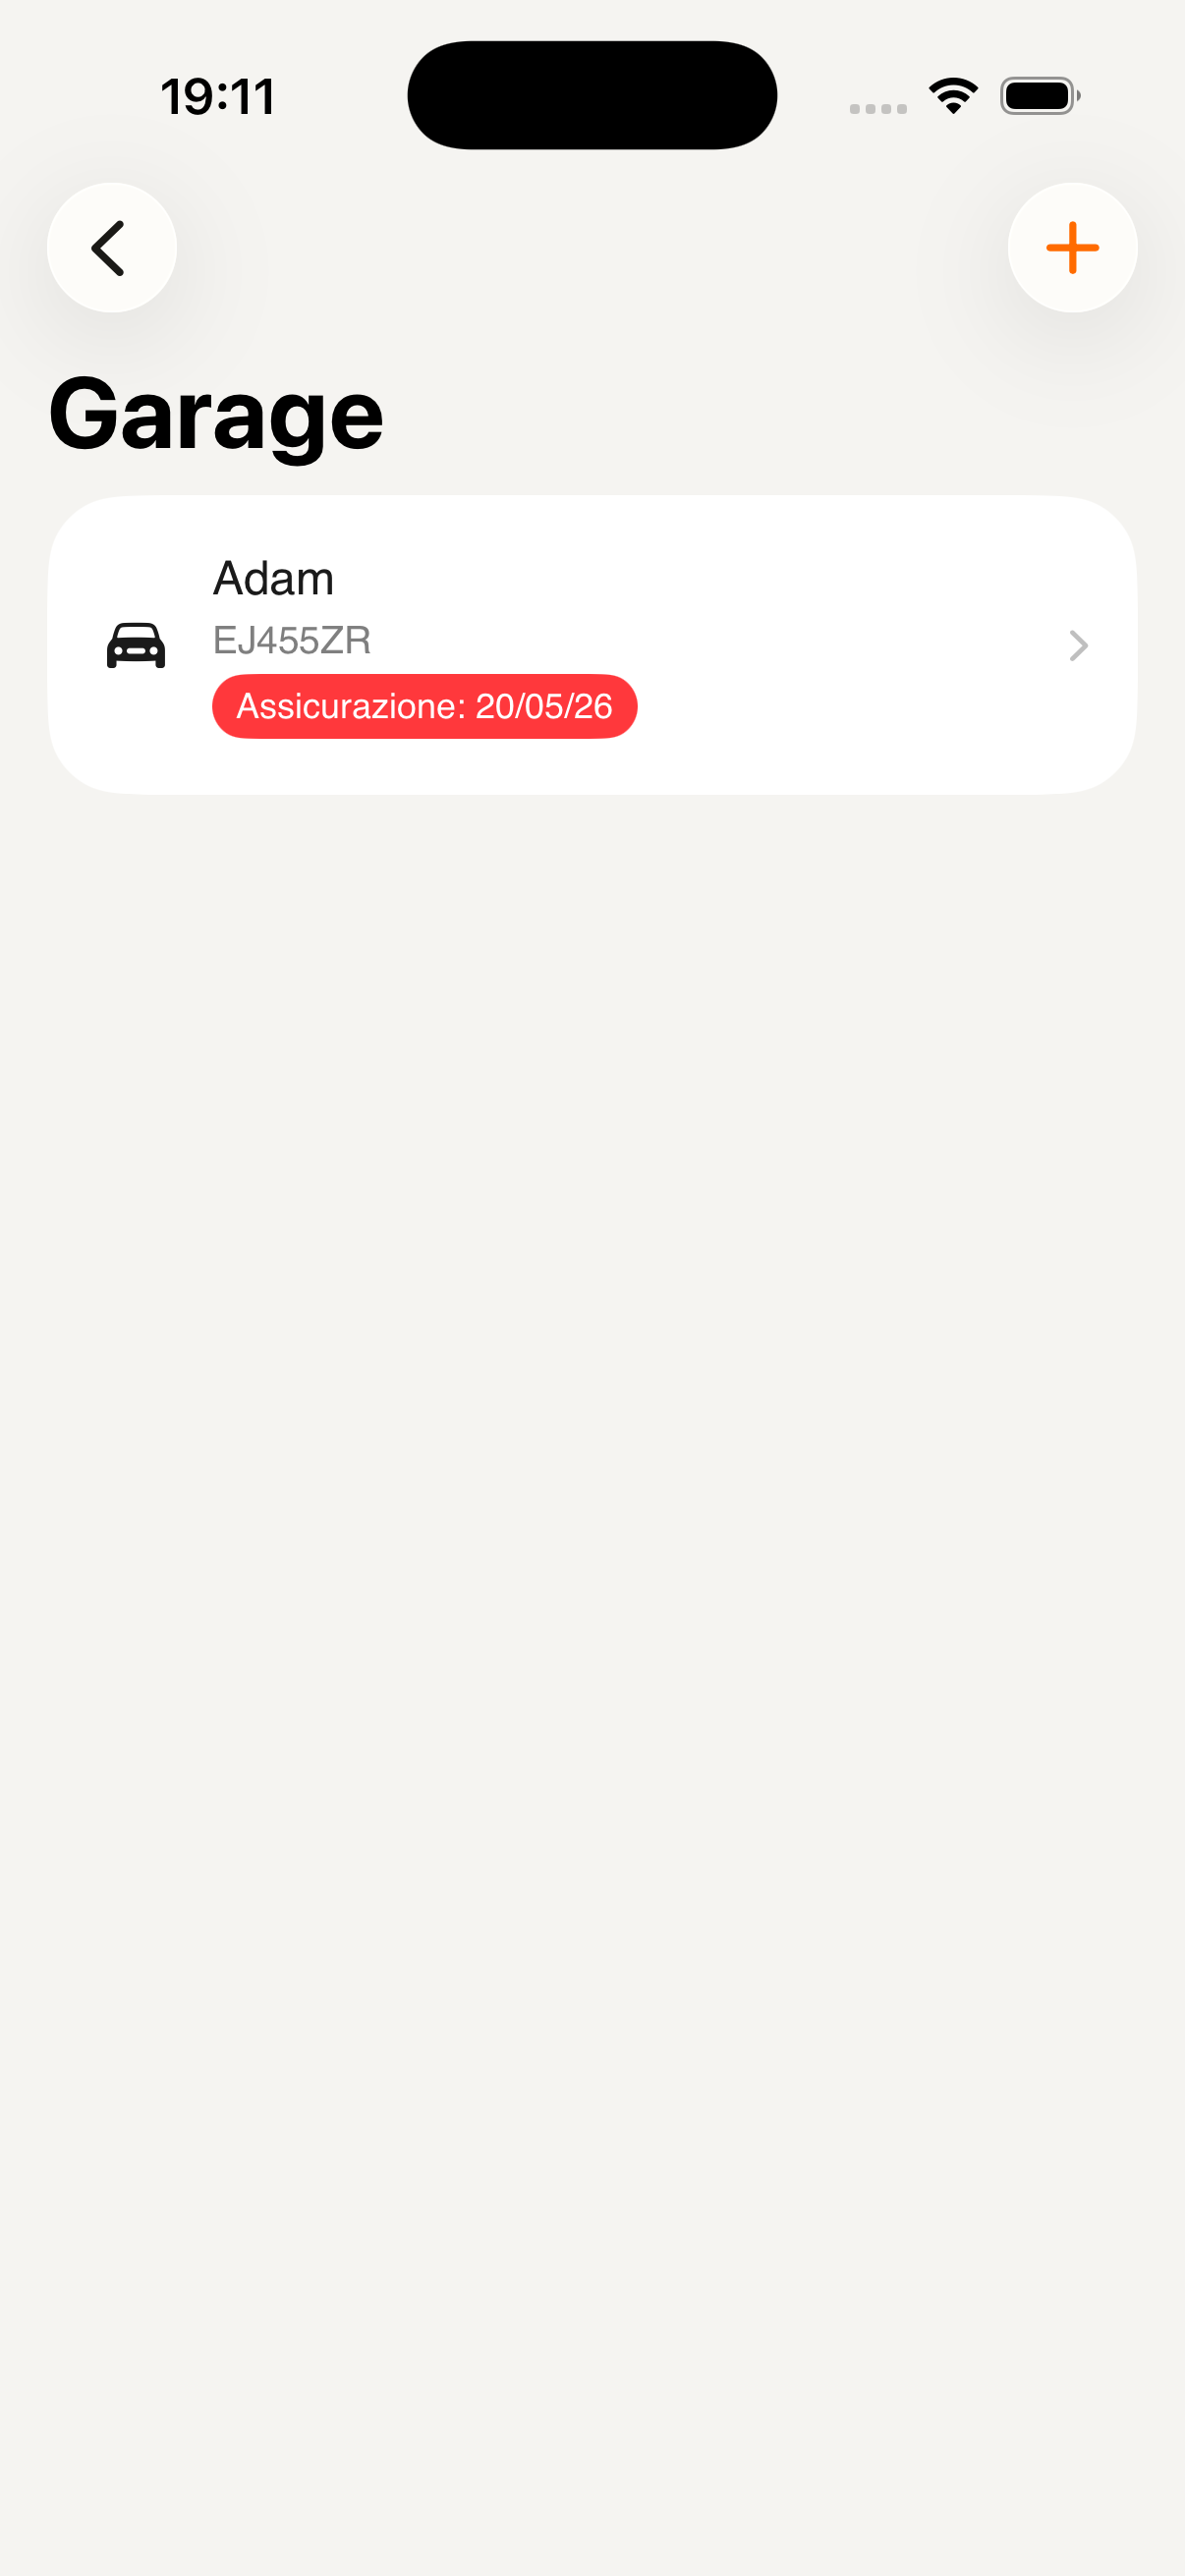
Access the Garage section from the navigation. If you don't have any vehicles yet, tap Add vehicle to get started. The list shows all vehicles with their plate and a red badge if there are upcoming deadlines.
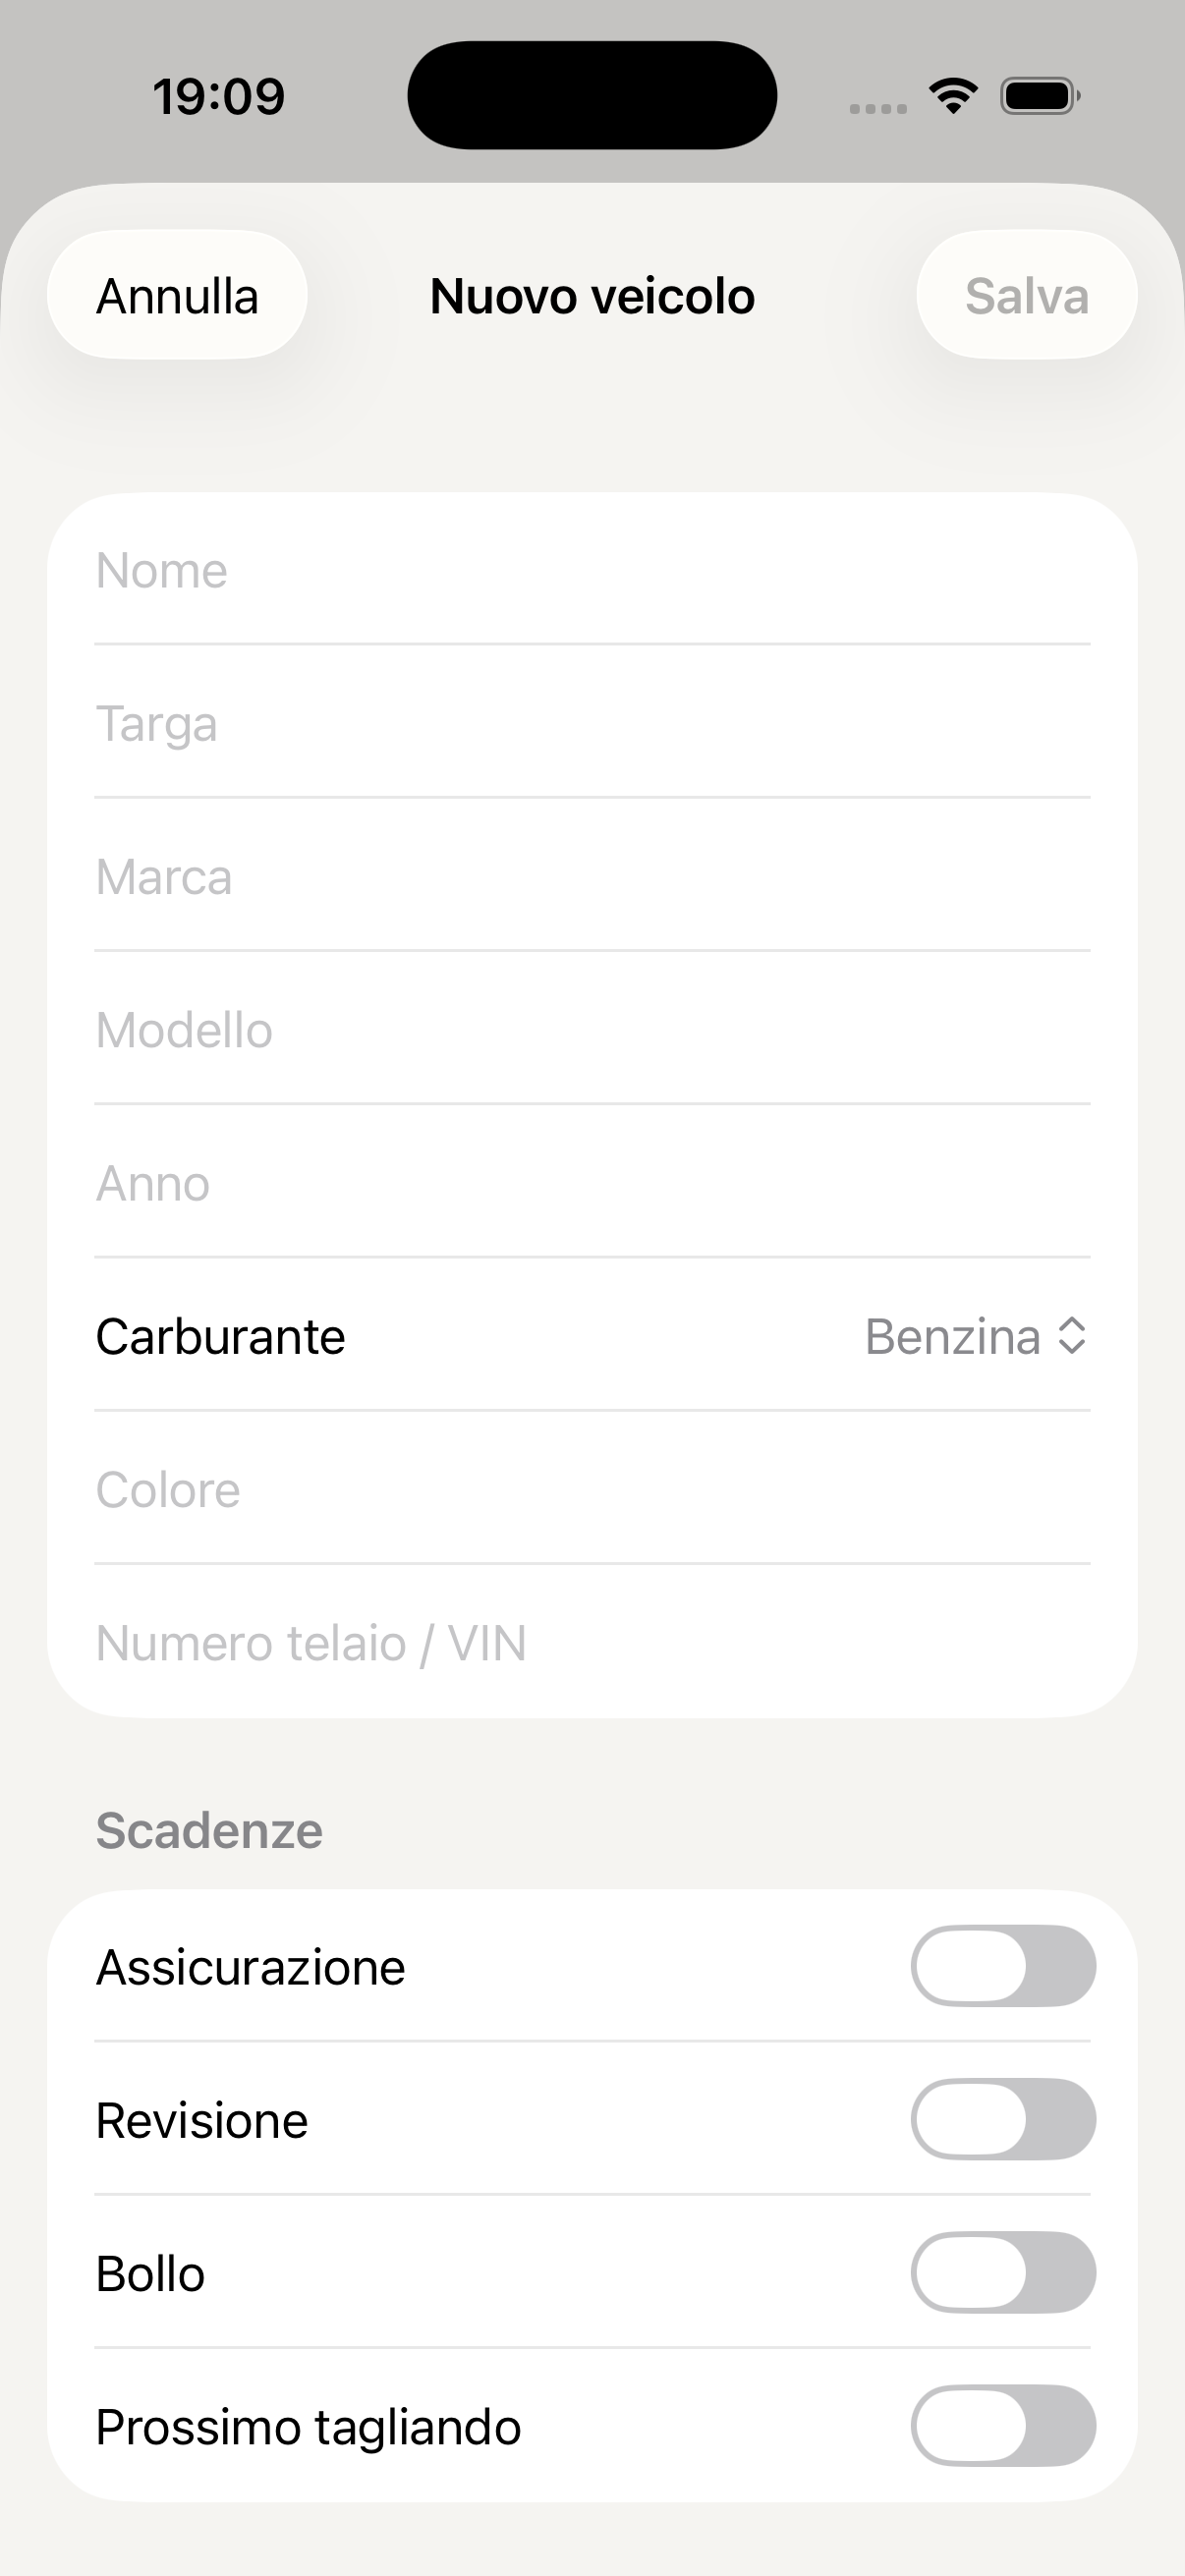
Enter the name, plate, make, model, year, fuel type, colour and chassis/VIN number. Then activate the Deadlines you want to monitor: Insurance, MOT, Road tax and Next service — KidBox will alert you before they arrive.
The profile shows all vehicle data, deadlines with dates and a red indicator for those coming up. Below you'll find the Service history and the Attachments section to archive insurance contracts, logbooks and receipts.
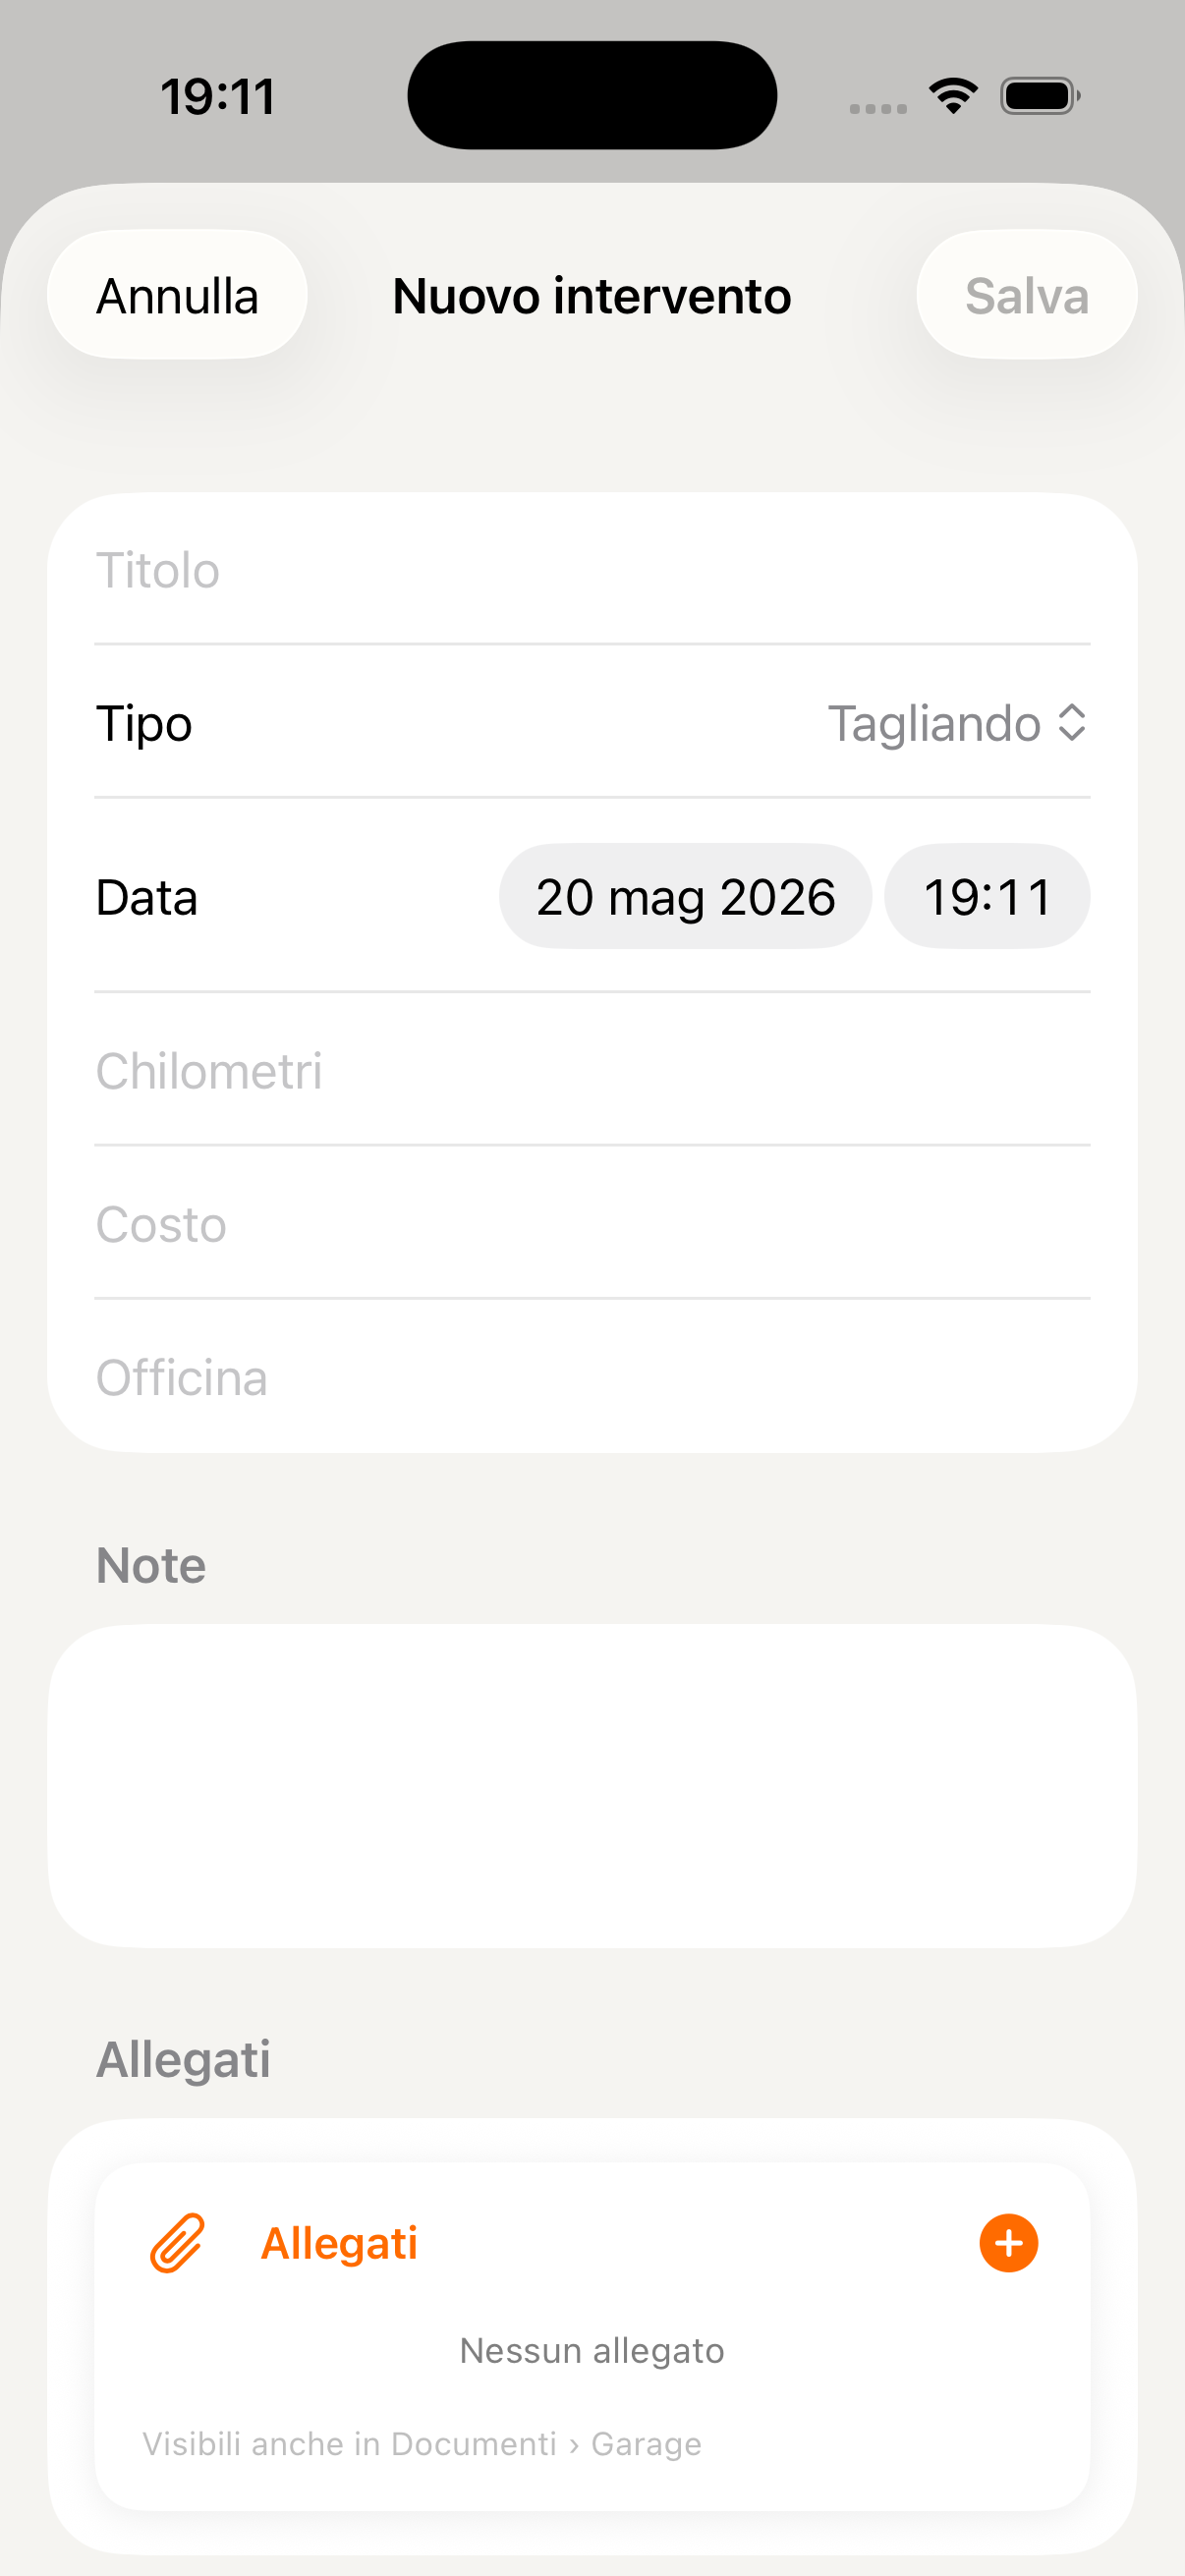
Tap + to add a new service: choose the type (Service, MOT, Repair…), enter date, mileage, cost and garage. You can attach the invoice directly from the app — it will also be visible in Documents → Garage.
Ask the AI: "When does Adam's insurance expire?" or "How many km did I have at the last service?" — it answers in a second by consulting your vehicle history.
Garage section
Add vehicle
Vehicle with deadline
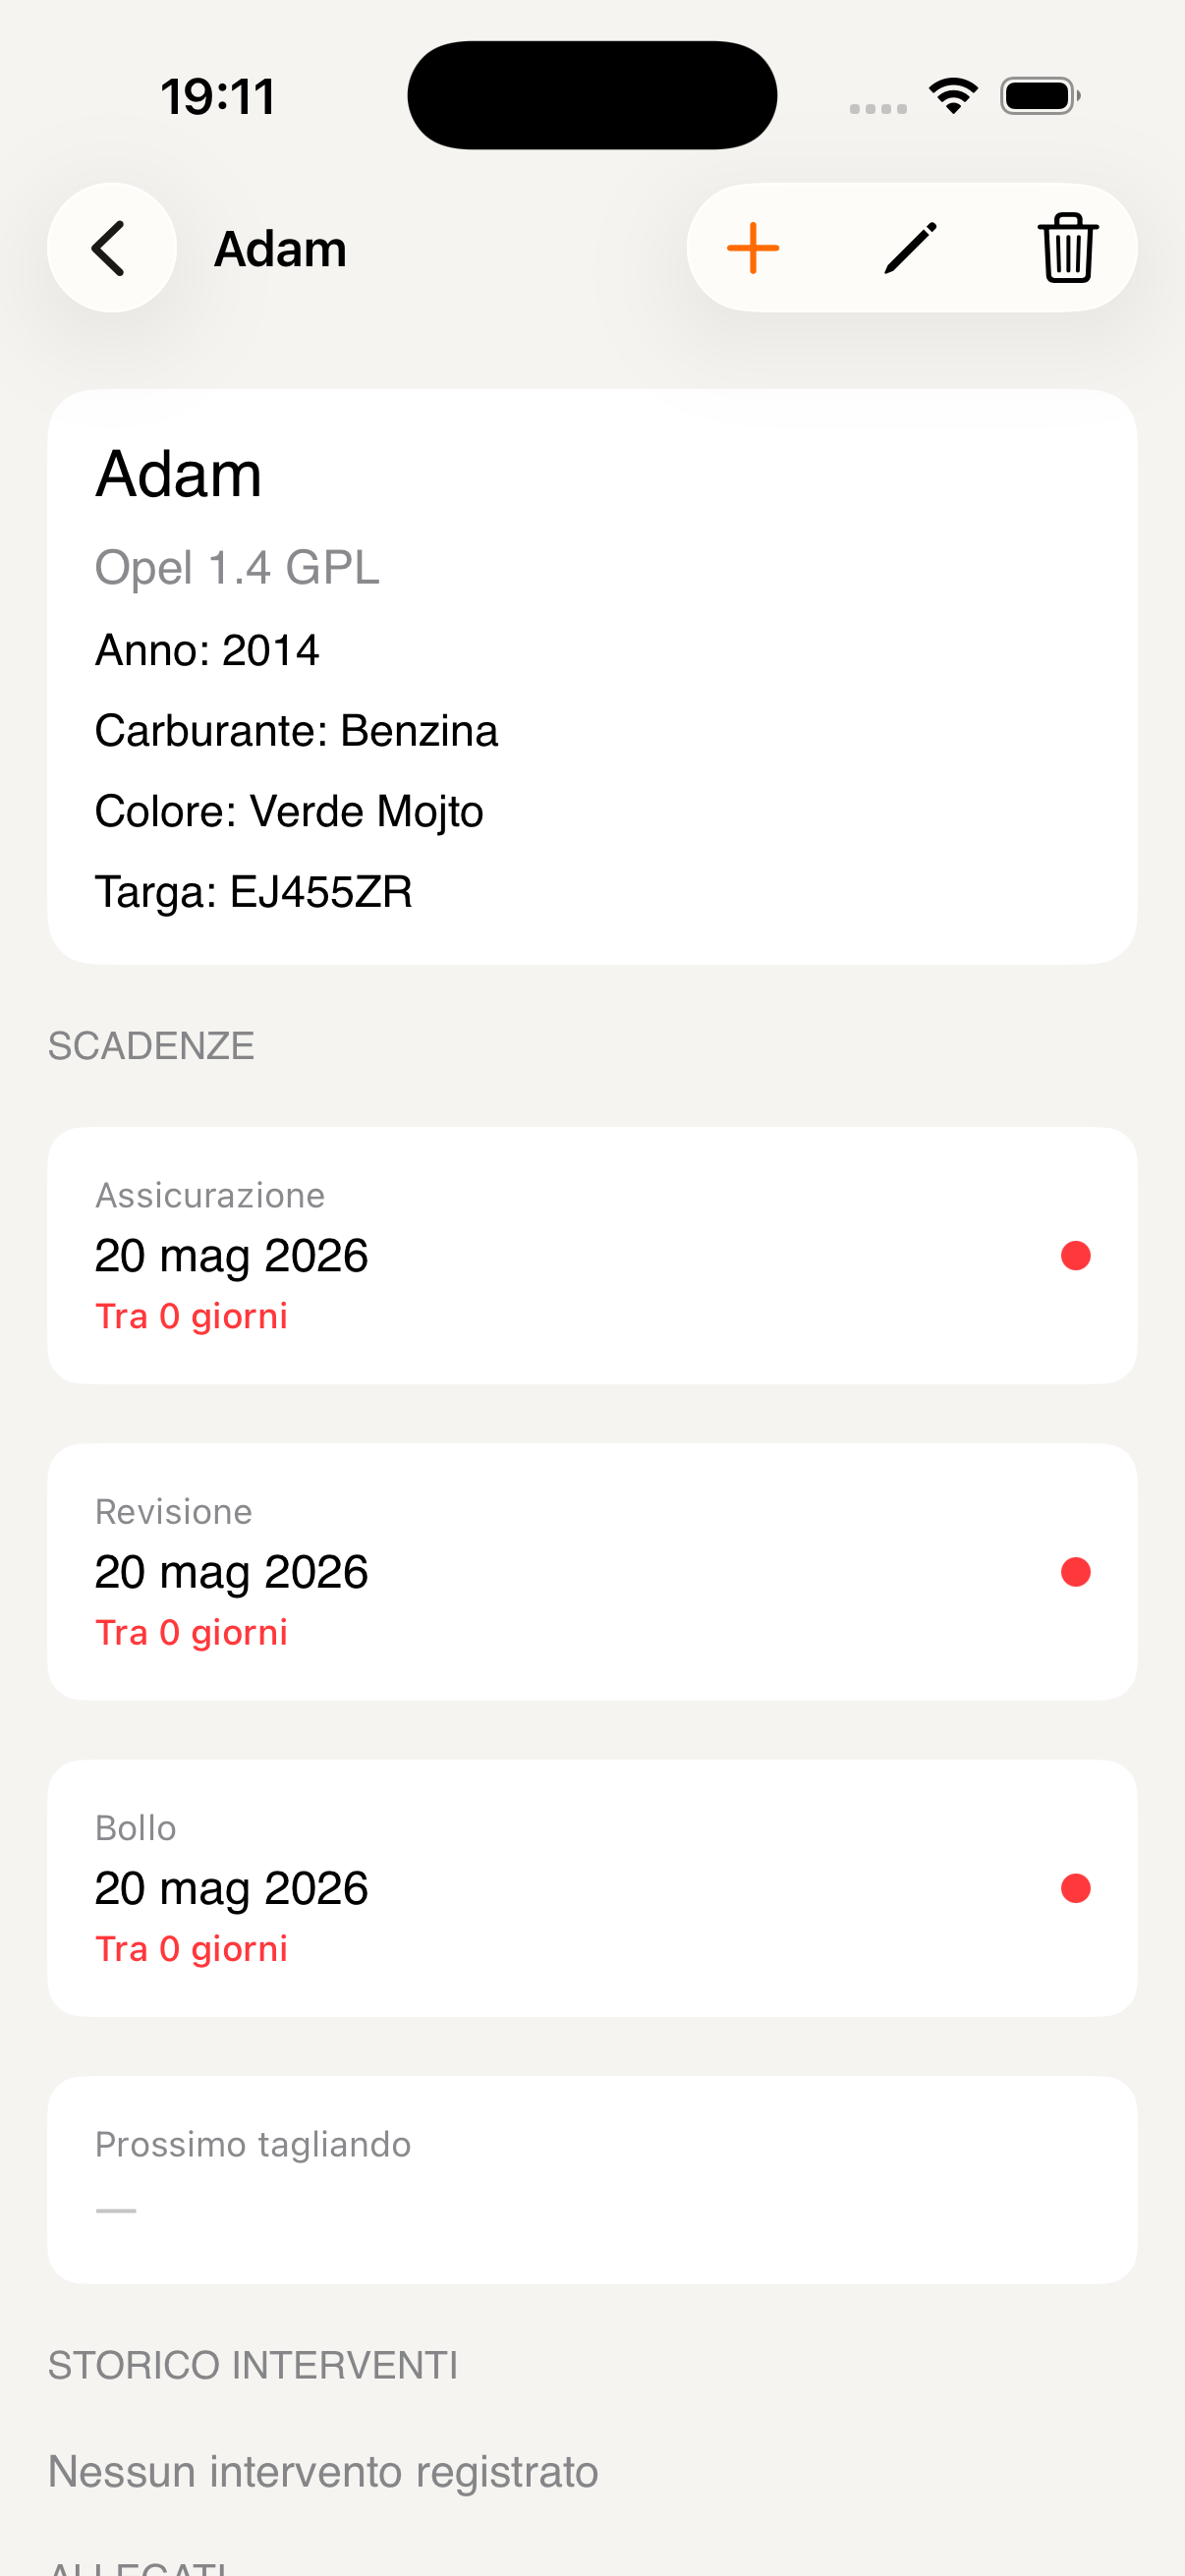
Profile and deadlines
Record service
Pets
Create a complete profile for every family pet: vaccines, vet visits, medications with dosages and reminders — all organised just like your children's health records.
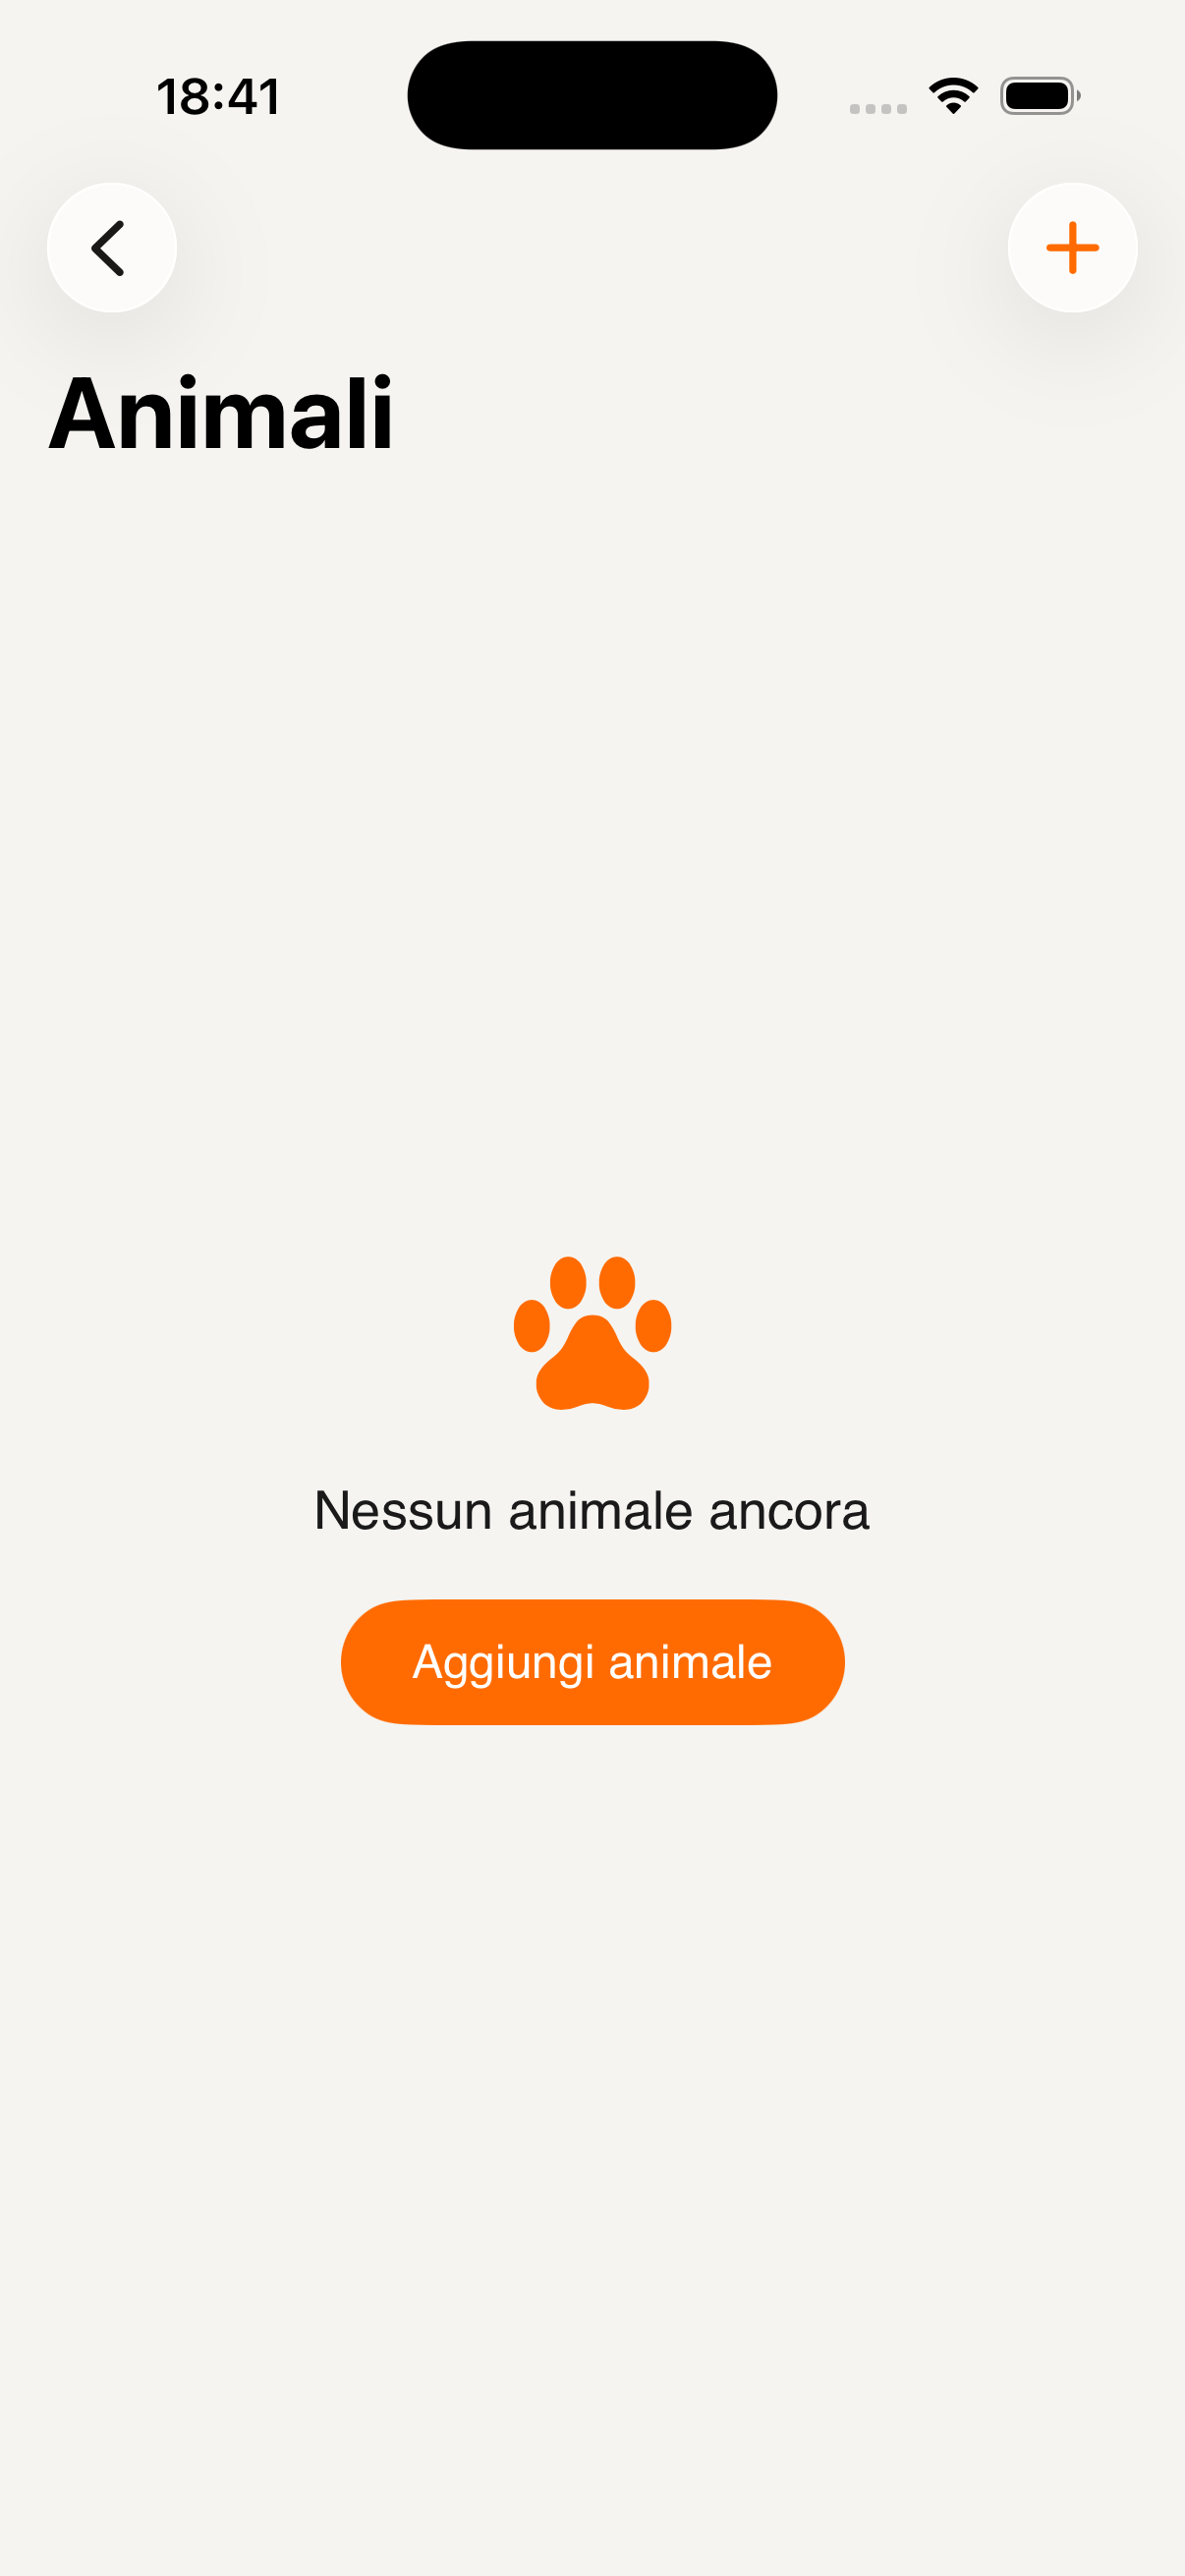
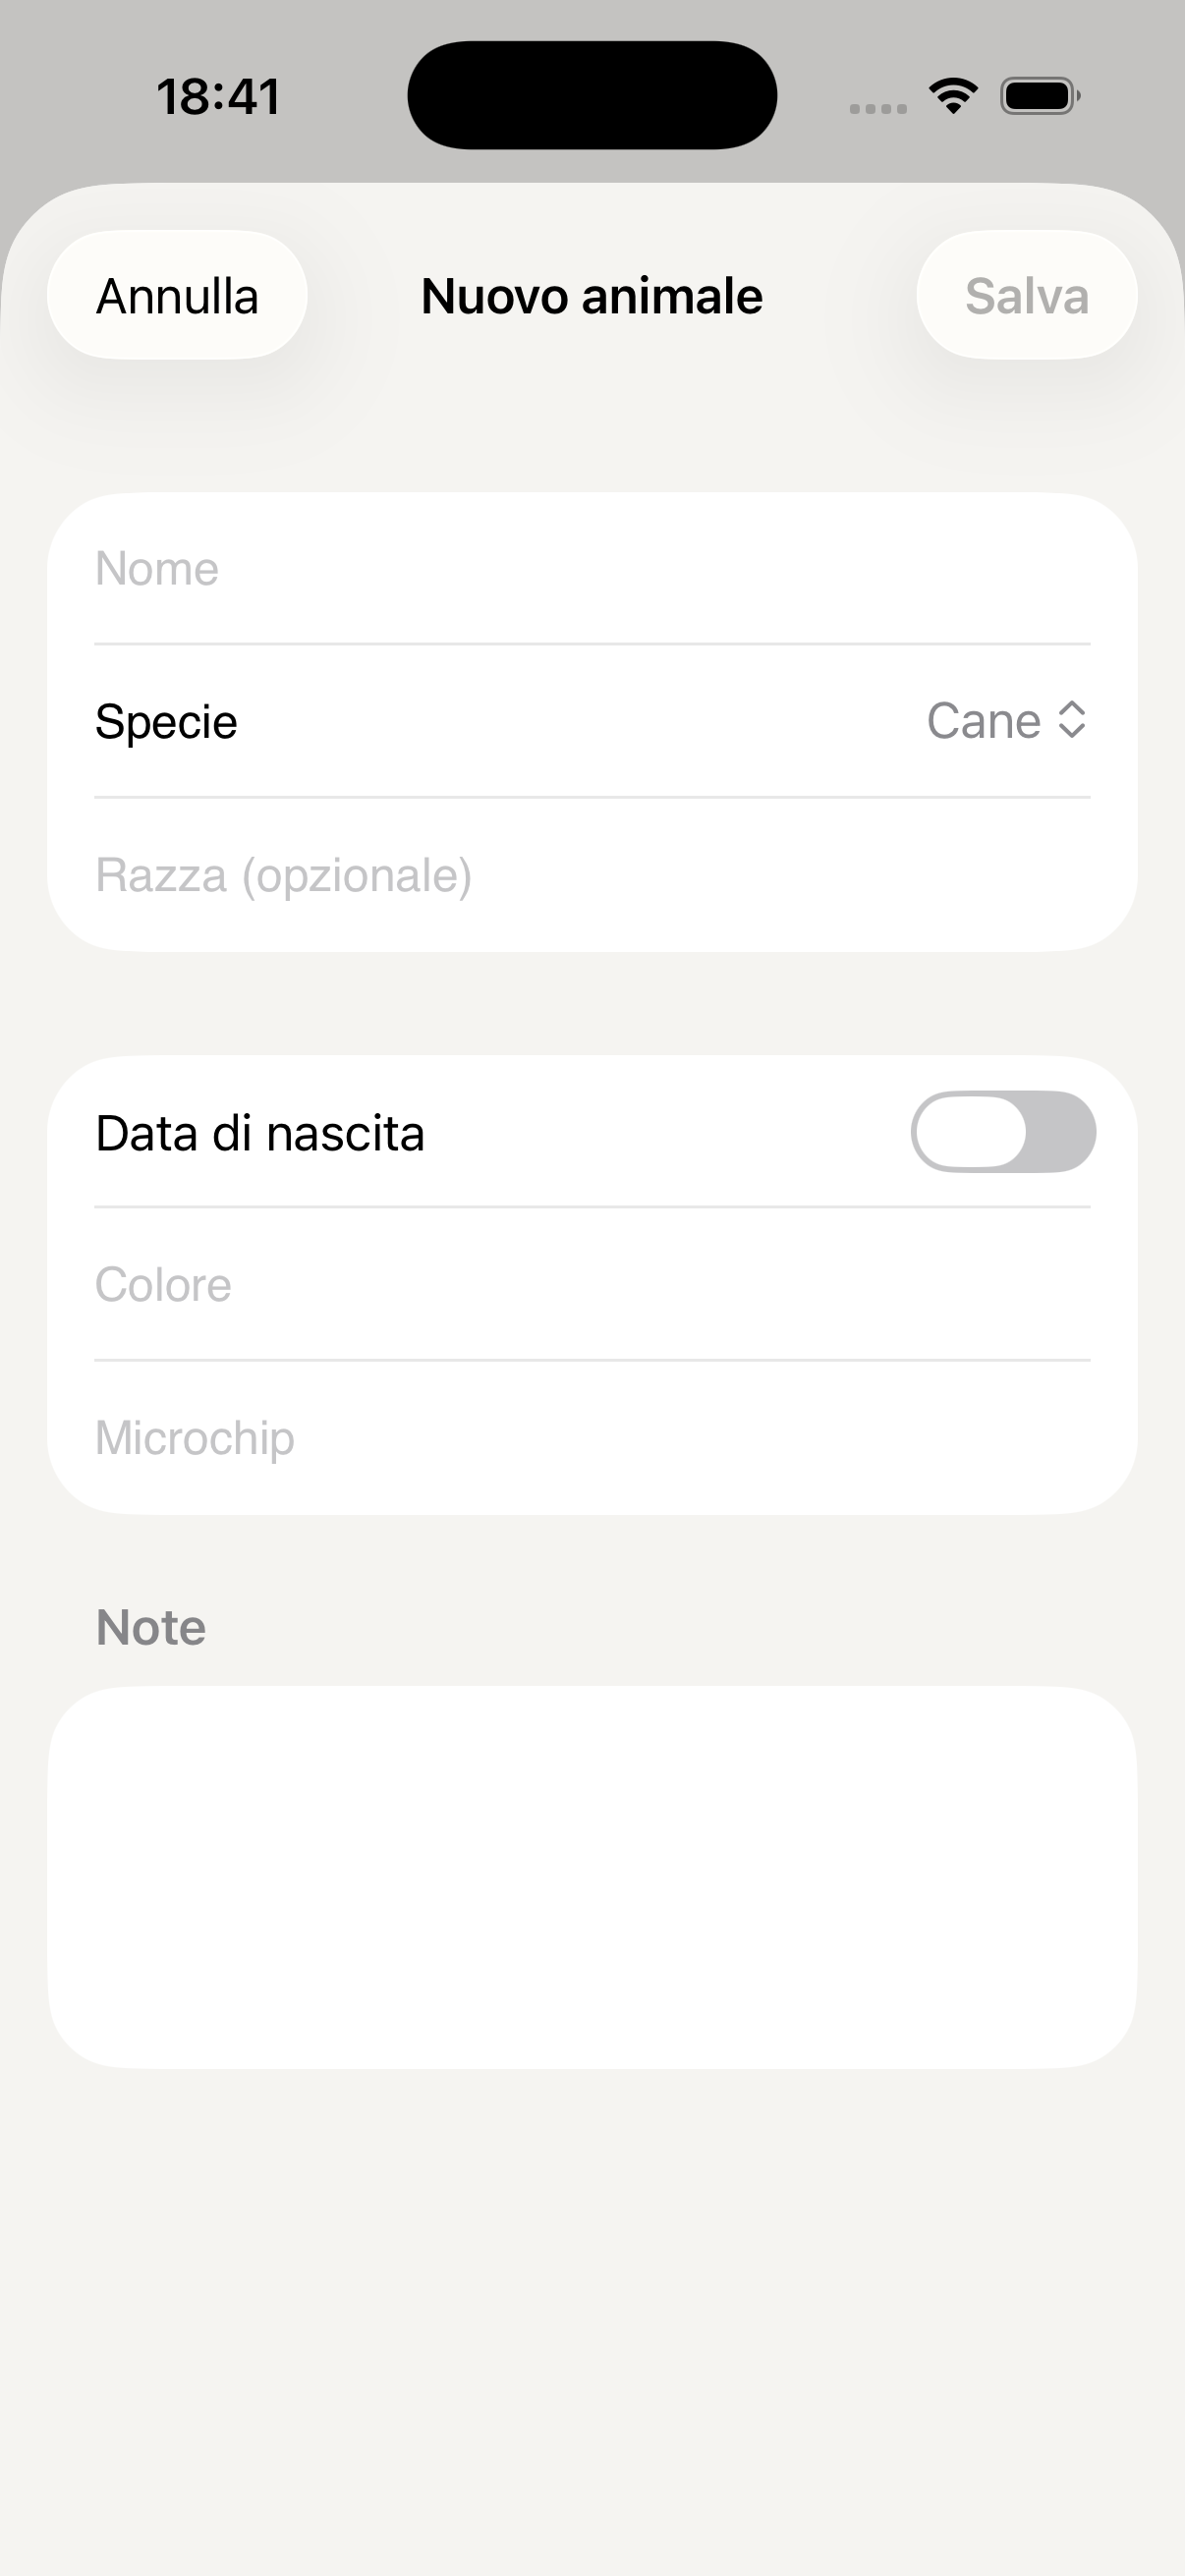
Tap Add pet on the main screen. Enter name, species (dog, cat…), breed, date of birth, colour and microchip number. A complete profile helps the AI give you accurate information about the breed and age.
The list shows all family pets with name, breed and icon. Tap a pet to access its full profile with Treatments and Event history.
From the pet's profile tap + to choose between New treatment (medications with dosage and reminders) and New event (vaccines, visits, procedures). Each event can have attachments such as vet reports, also visible in the Documents section.
For each event choose the type (Vaccine, Visit, Procedure…), date, vet name, cost and the next due date for the booster. KidBox automatically adds the reminder to the family calendar.
Select the medication from a catalogue of common veterinary medicines (Frontline, Advantix, NexGard, Bravecto, Milbemax and others), then set dosage, treatment duration and daily frequency (1×, 2×, 3×). KidBox automatically calculates total doses and start and end dates.
Set administration times (morning, evening) and activate notifications so you don't miss any dose. The final summary shows start date, end date and total number of doses before you confirm.
Ask the AI: "Has Alì had the rabies vaccine?" or "When does Mia's Frontline expire?" — the assistant checks the event history and active treatments in real time.
Pets section
Add pet
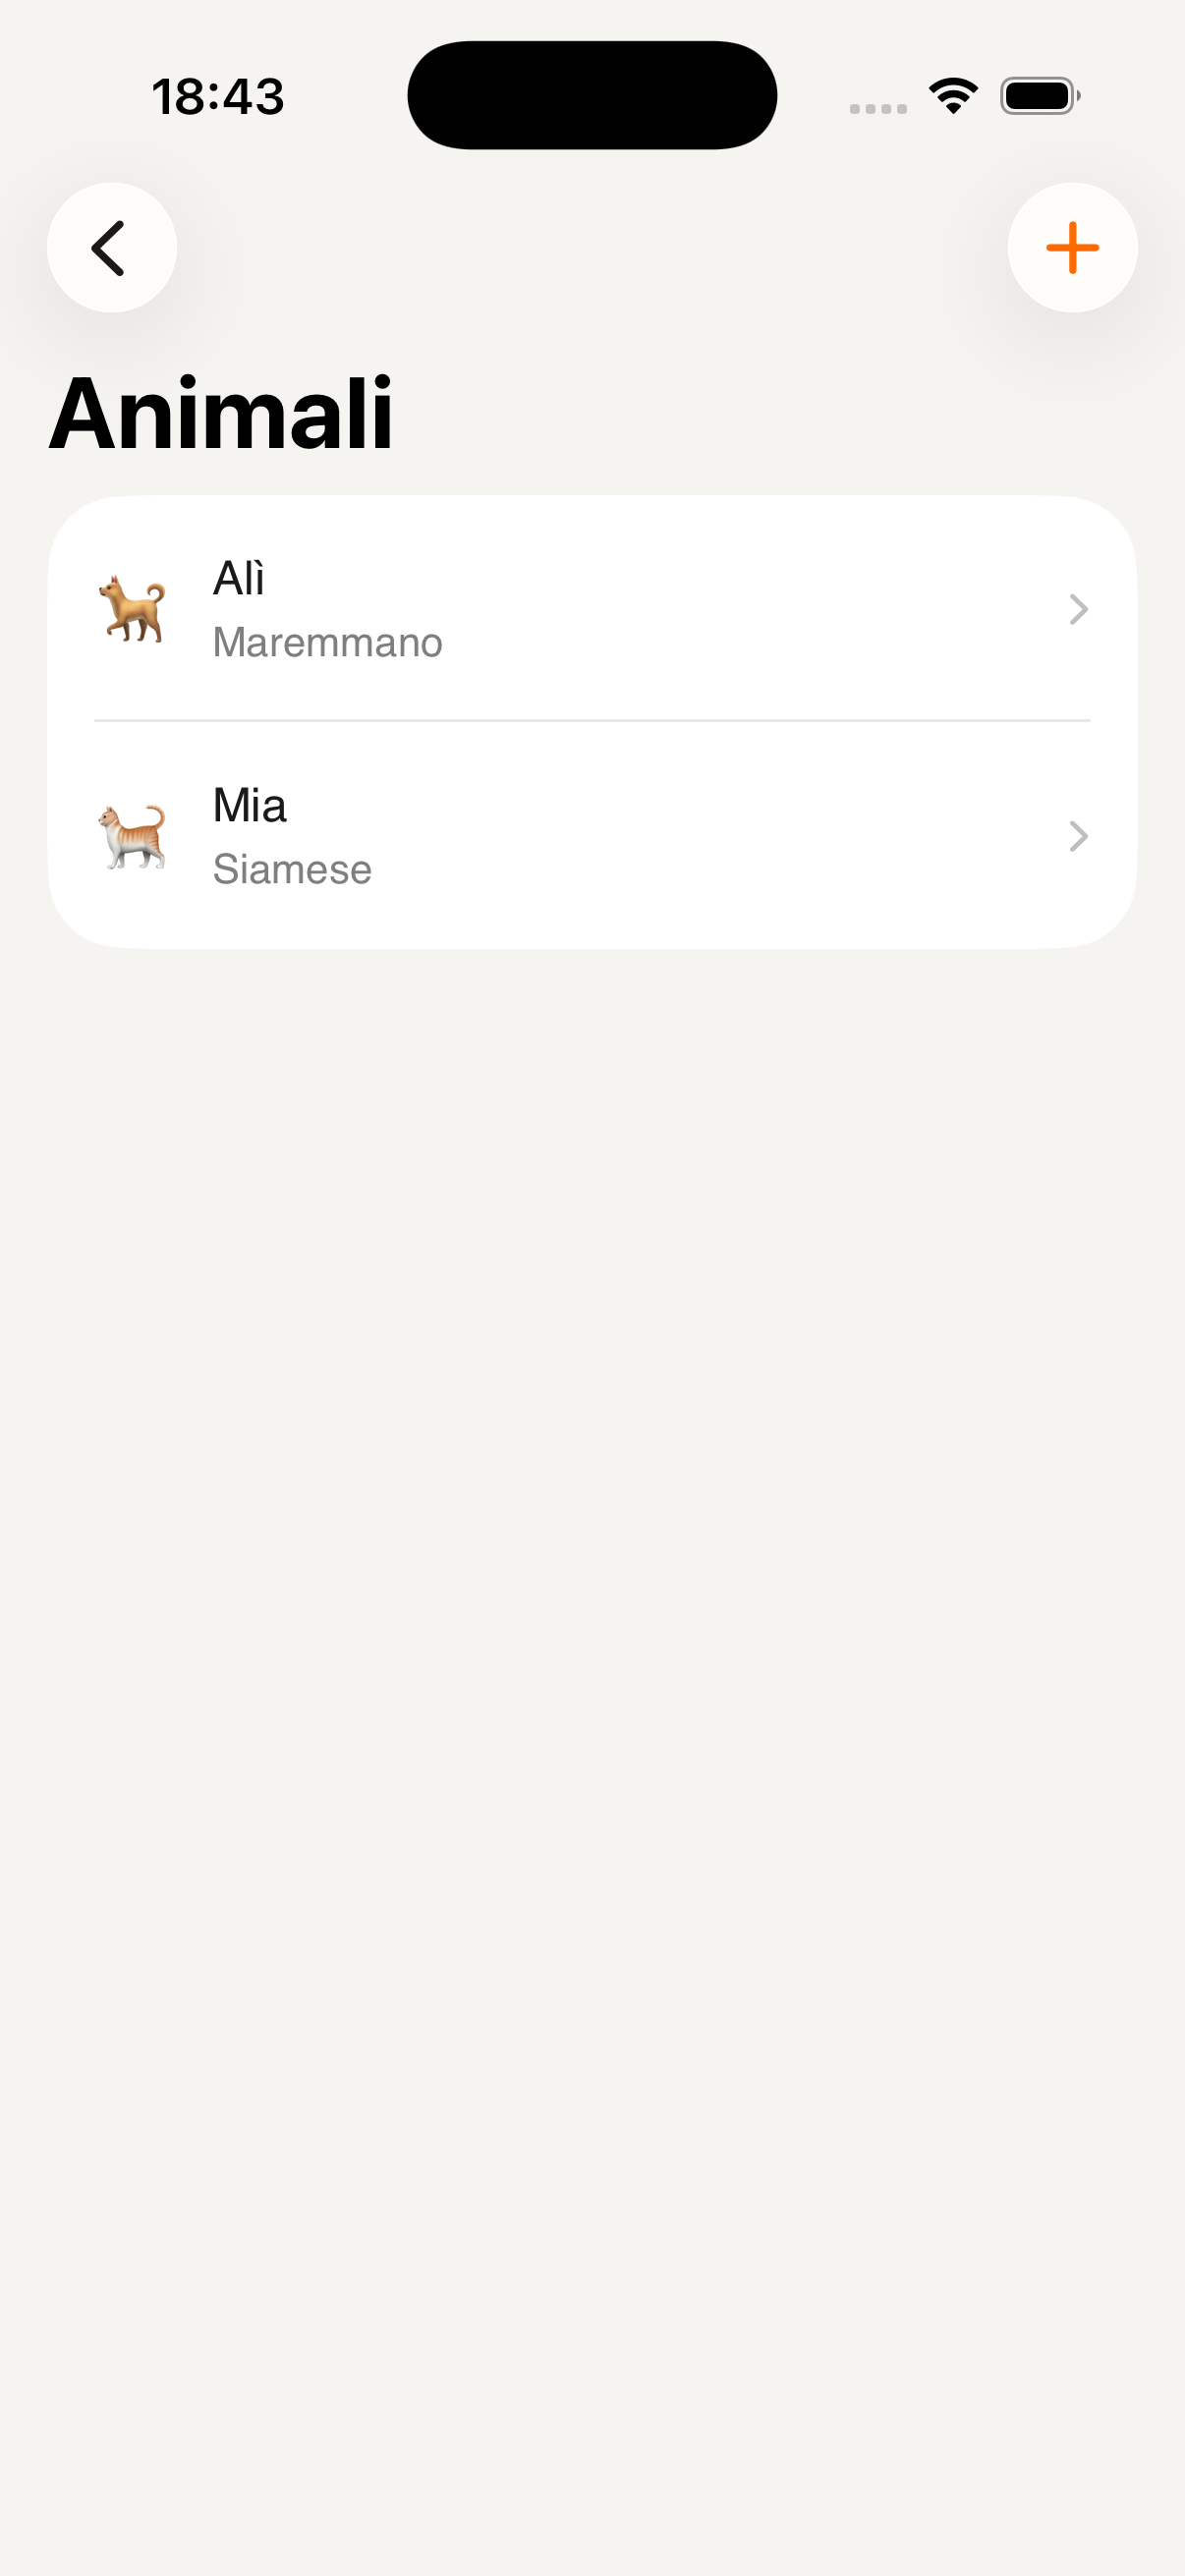
Your pets
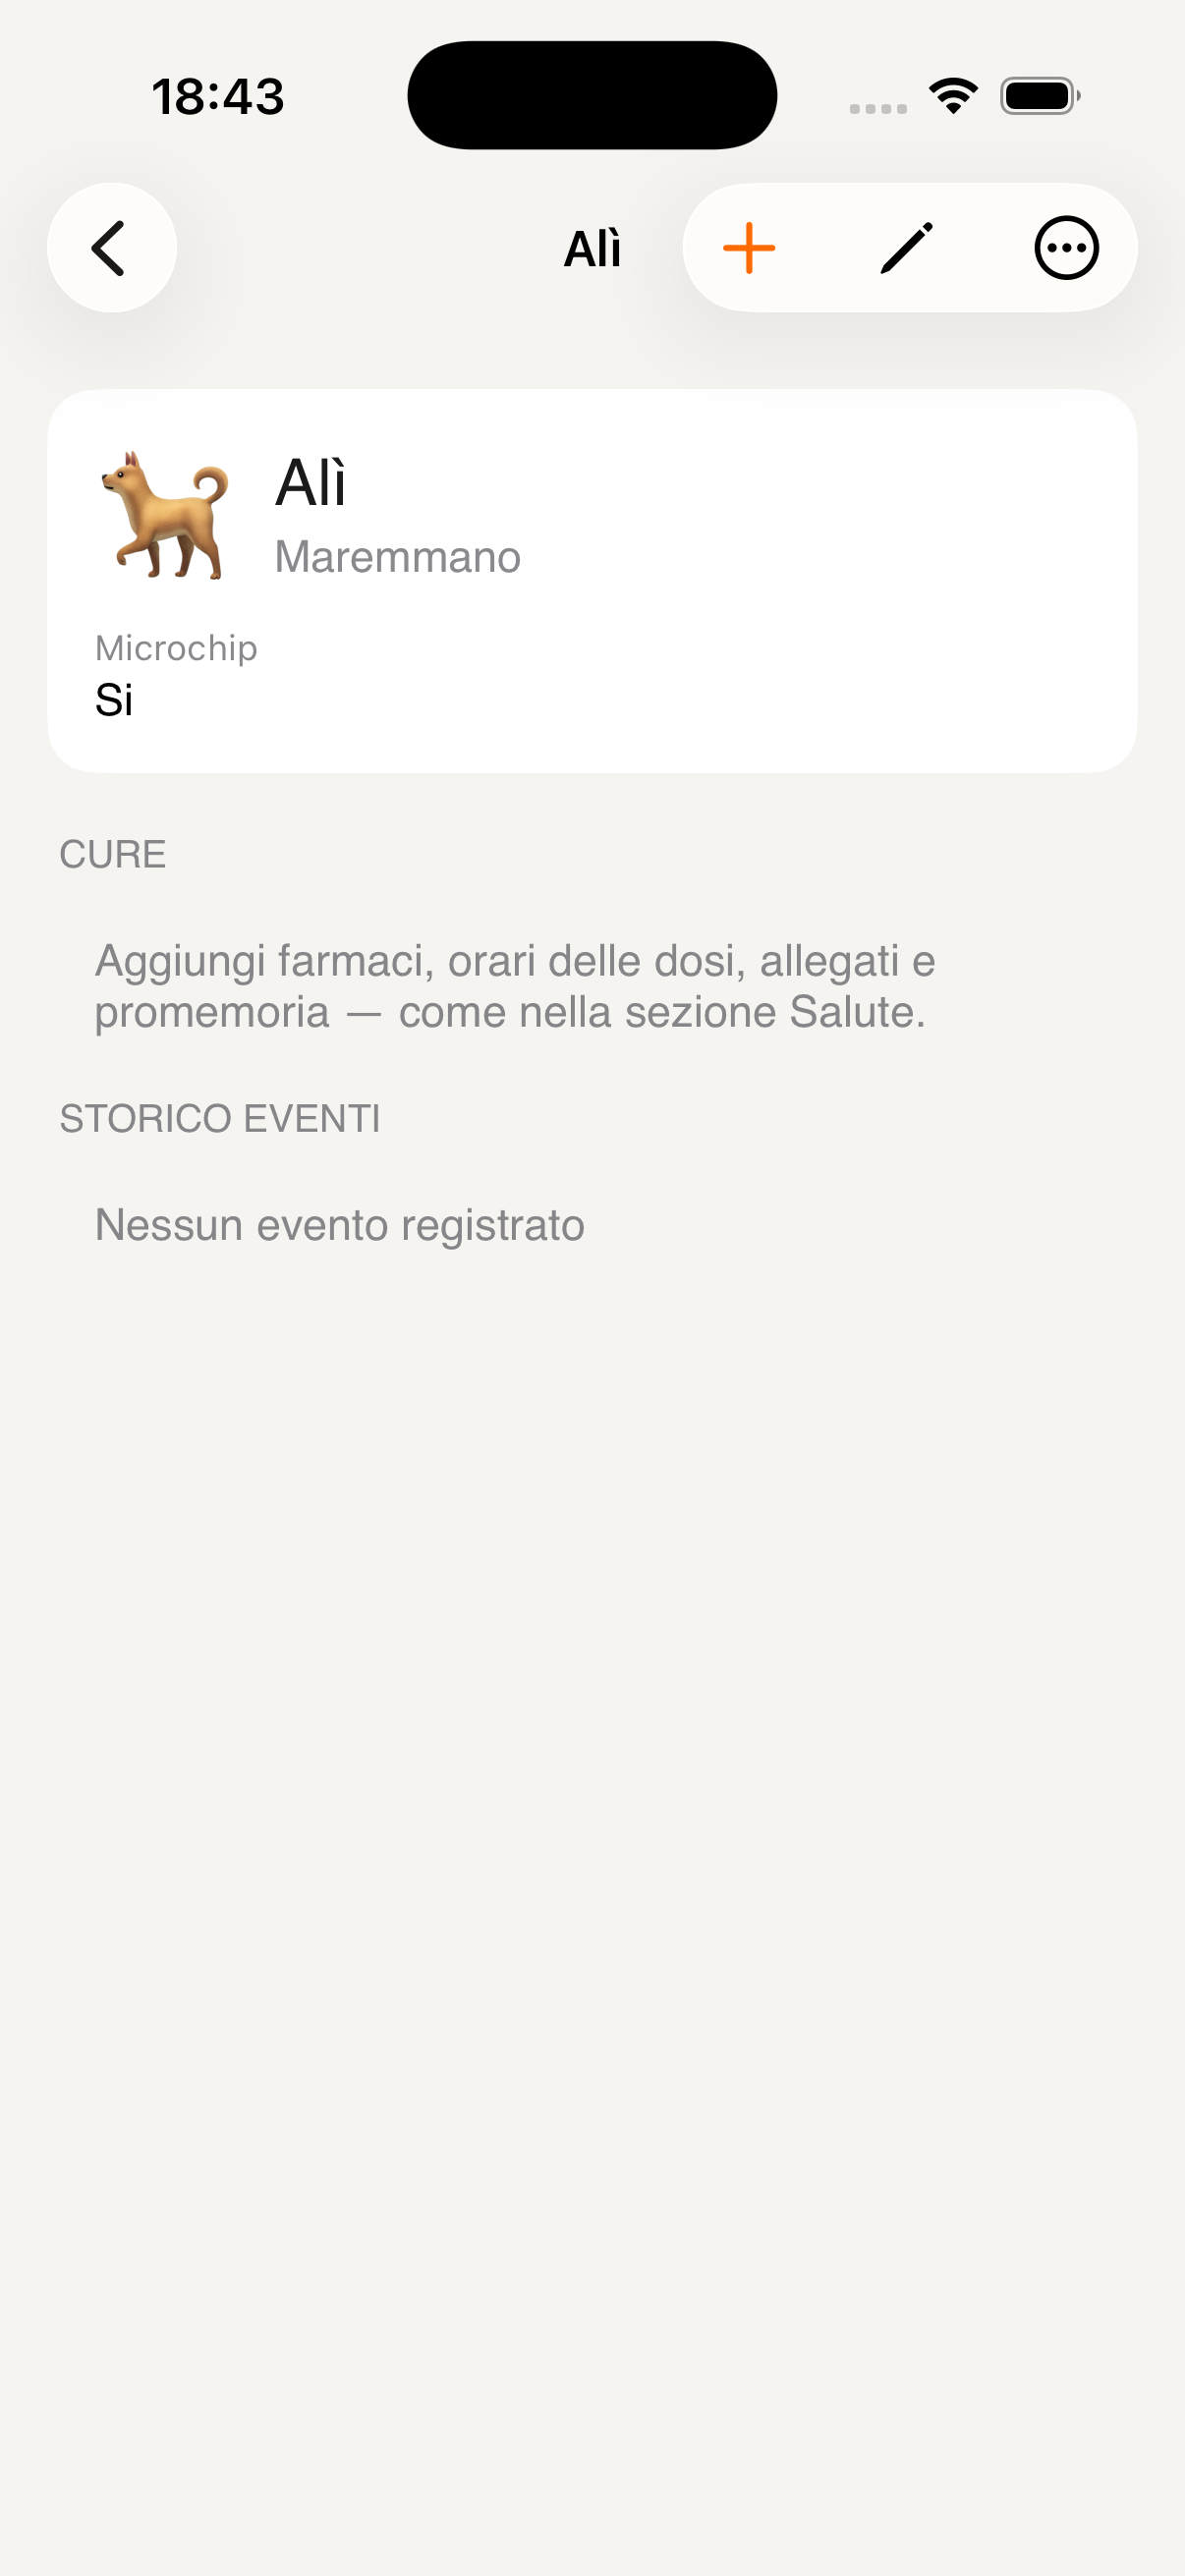
Alì's profile
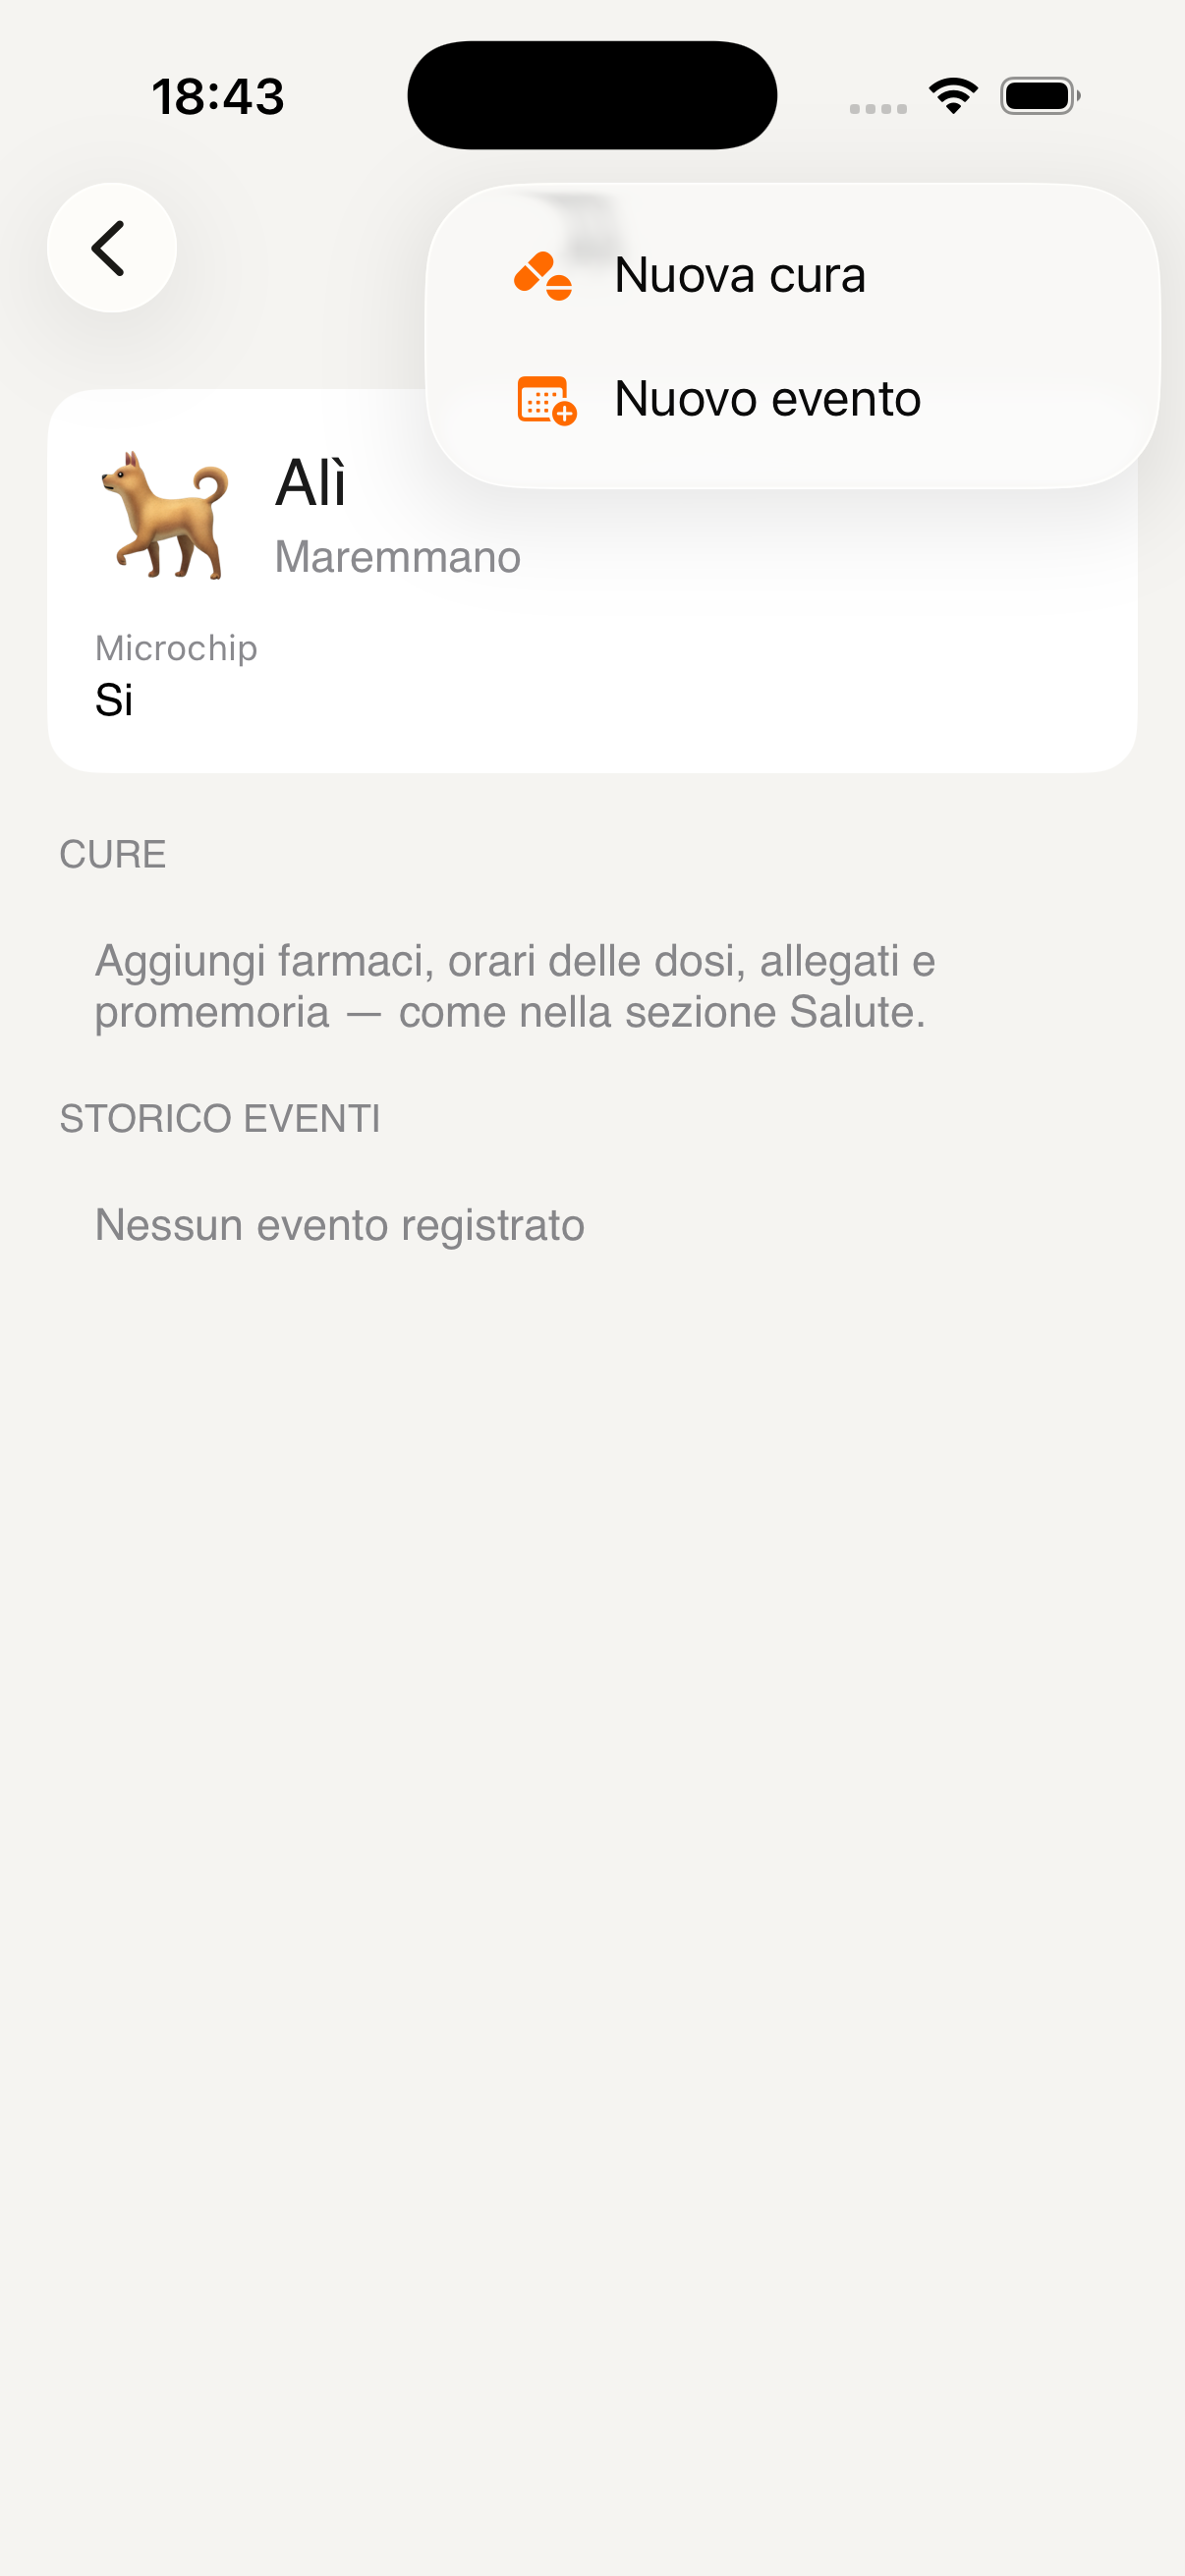
Add treatment or event
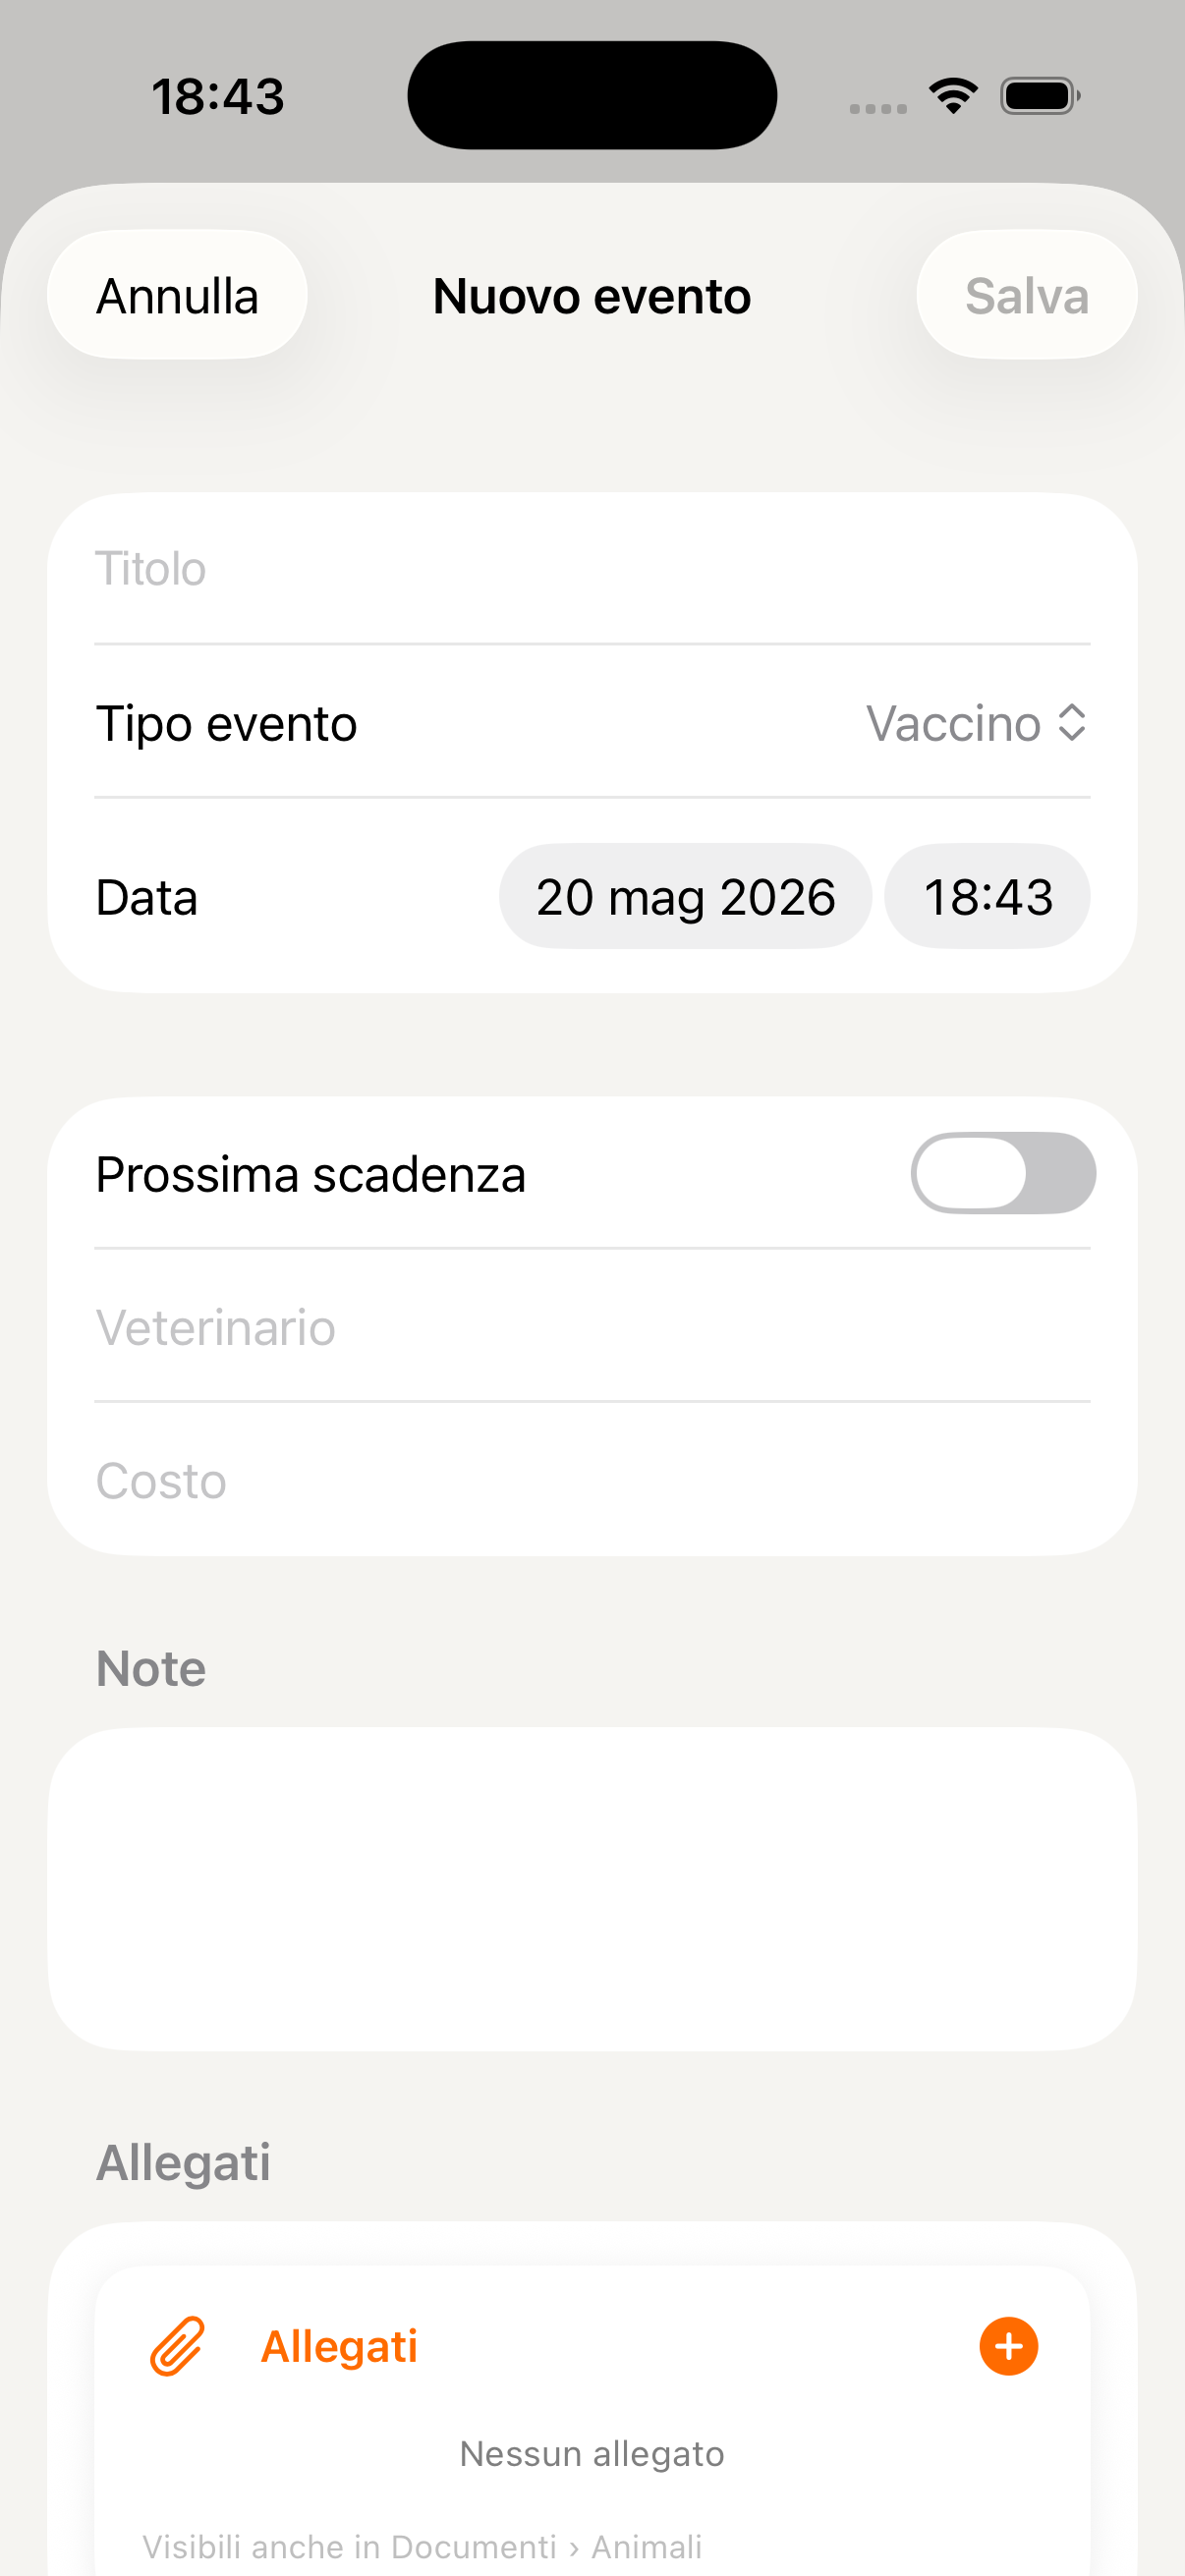
New vet event
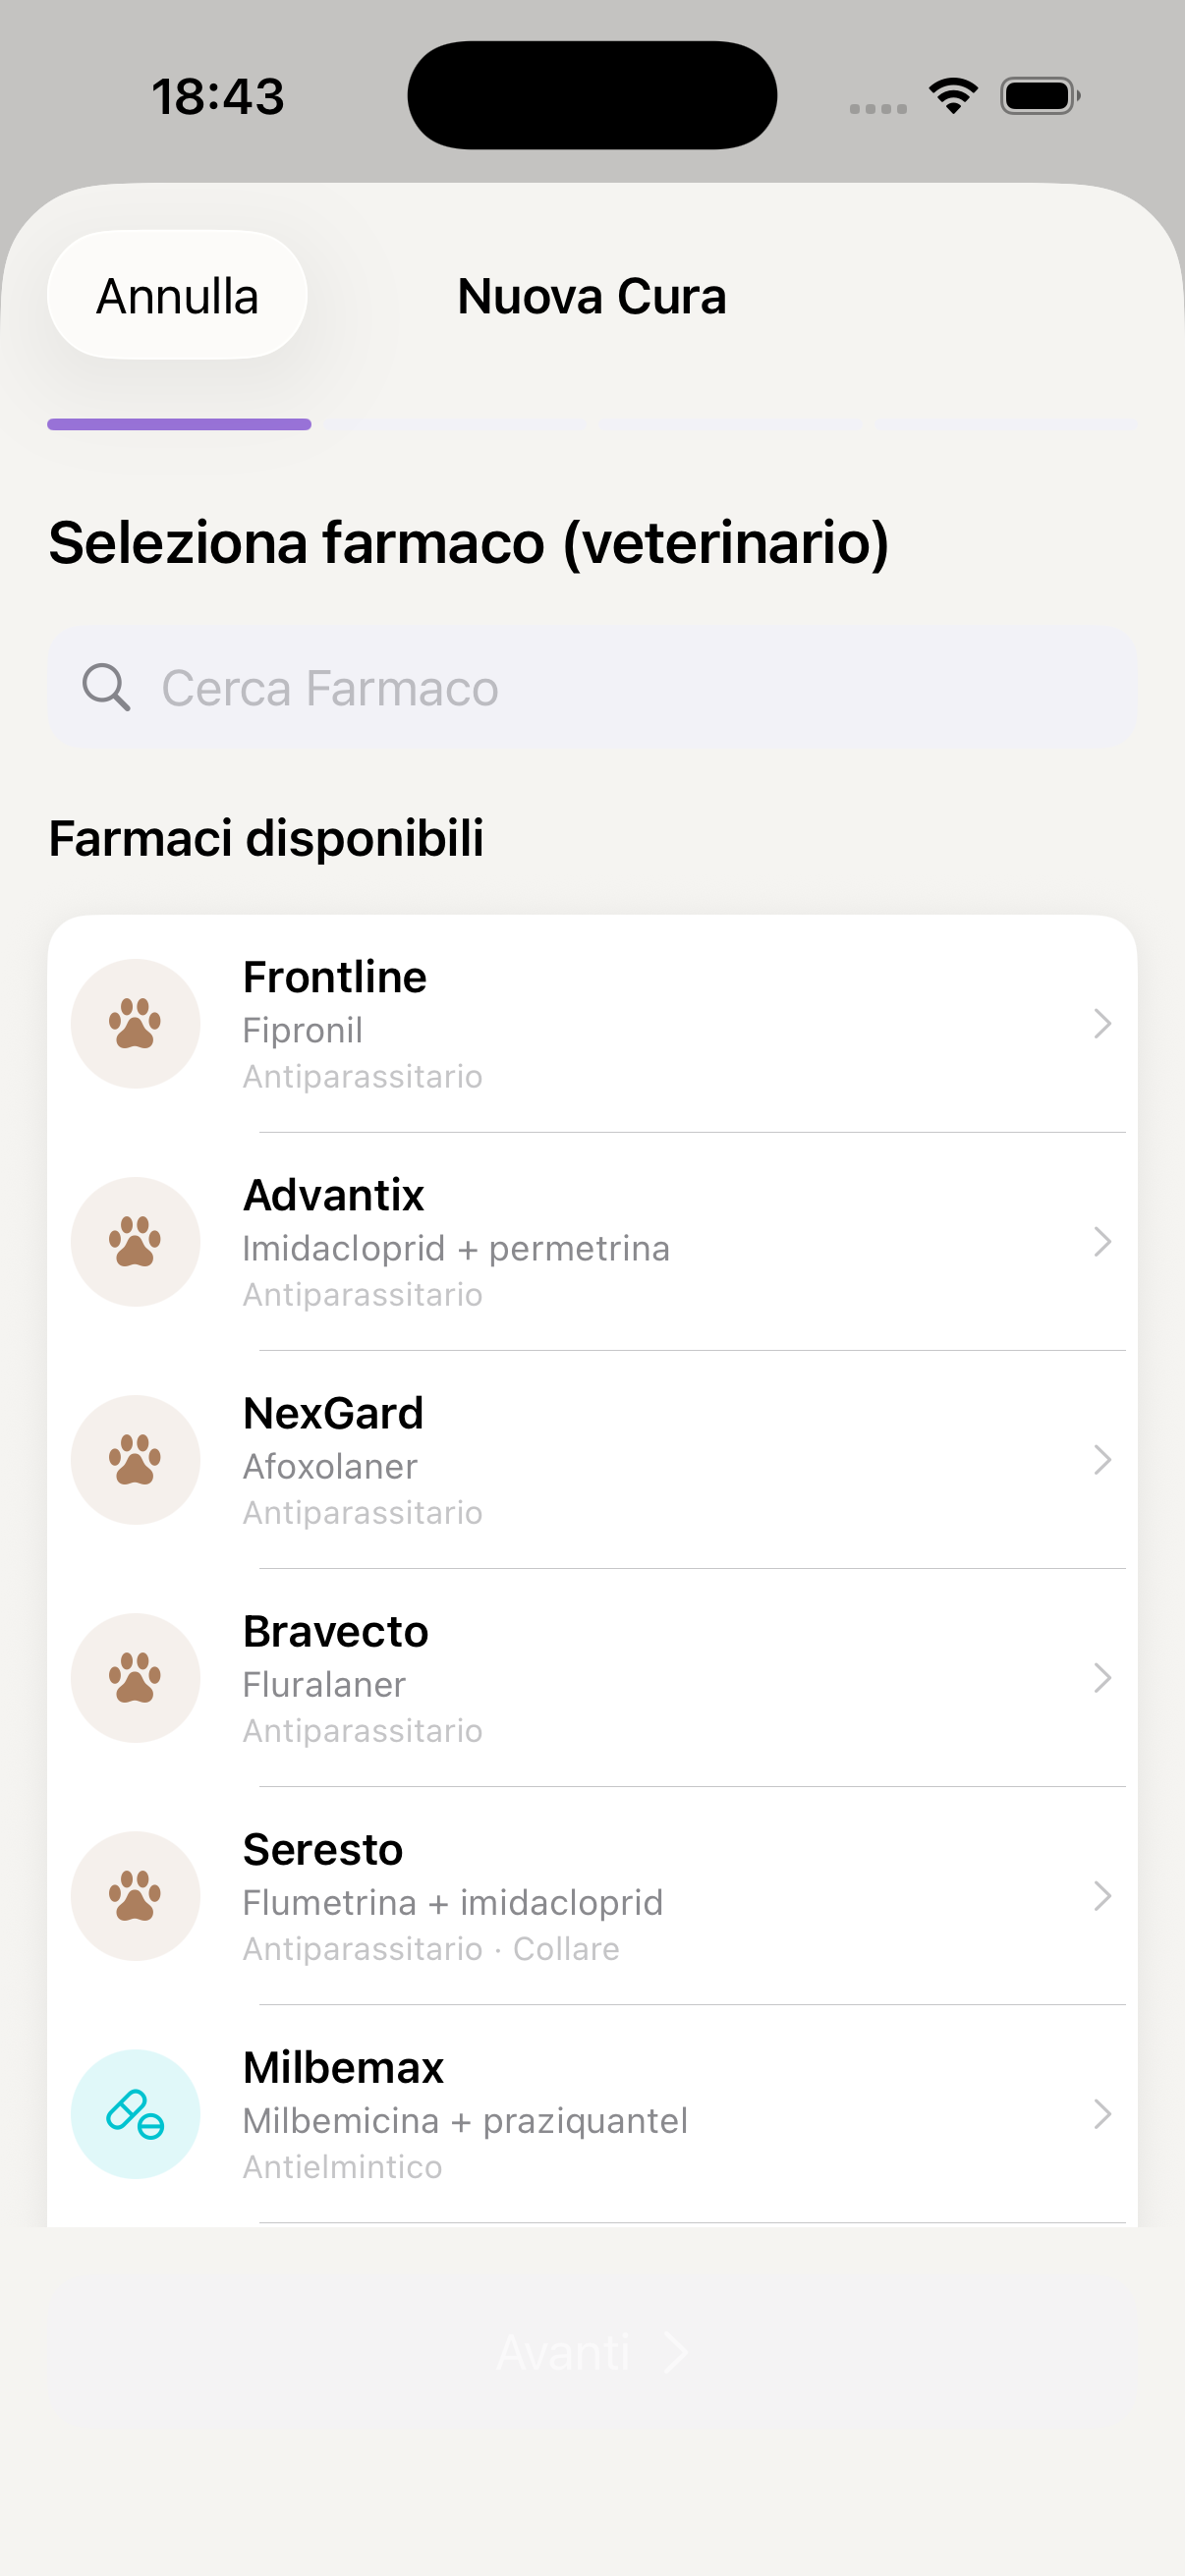
Veterinary medication catalogue
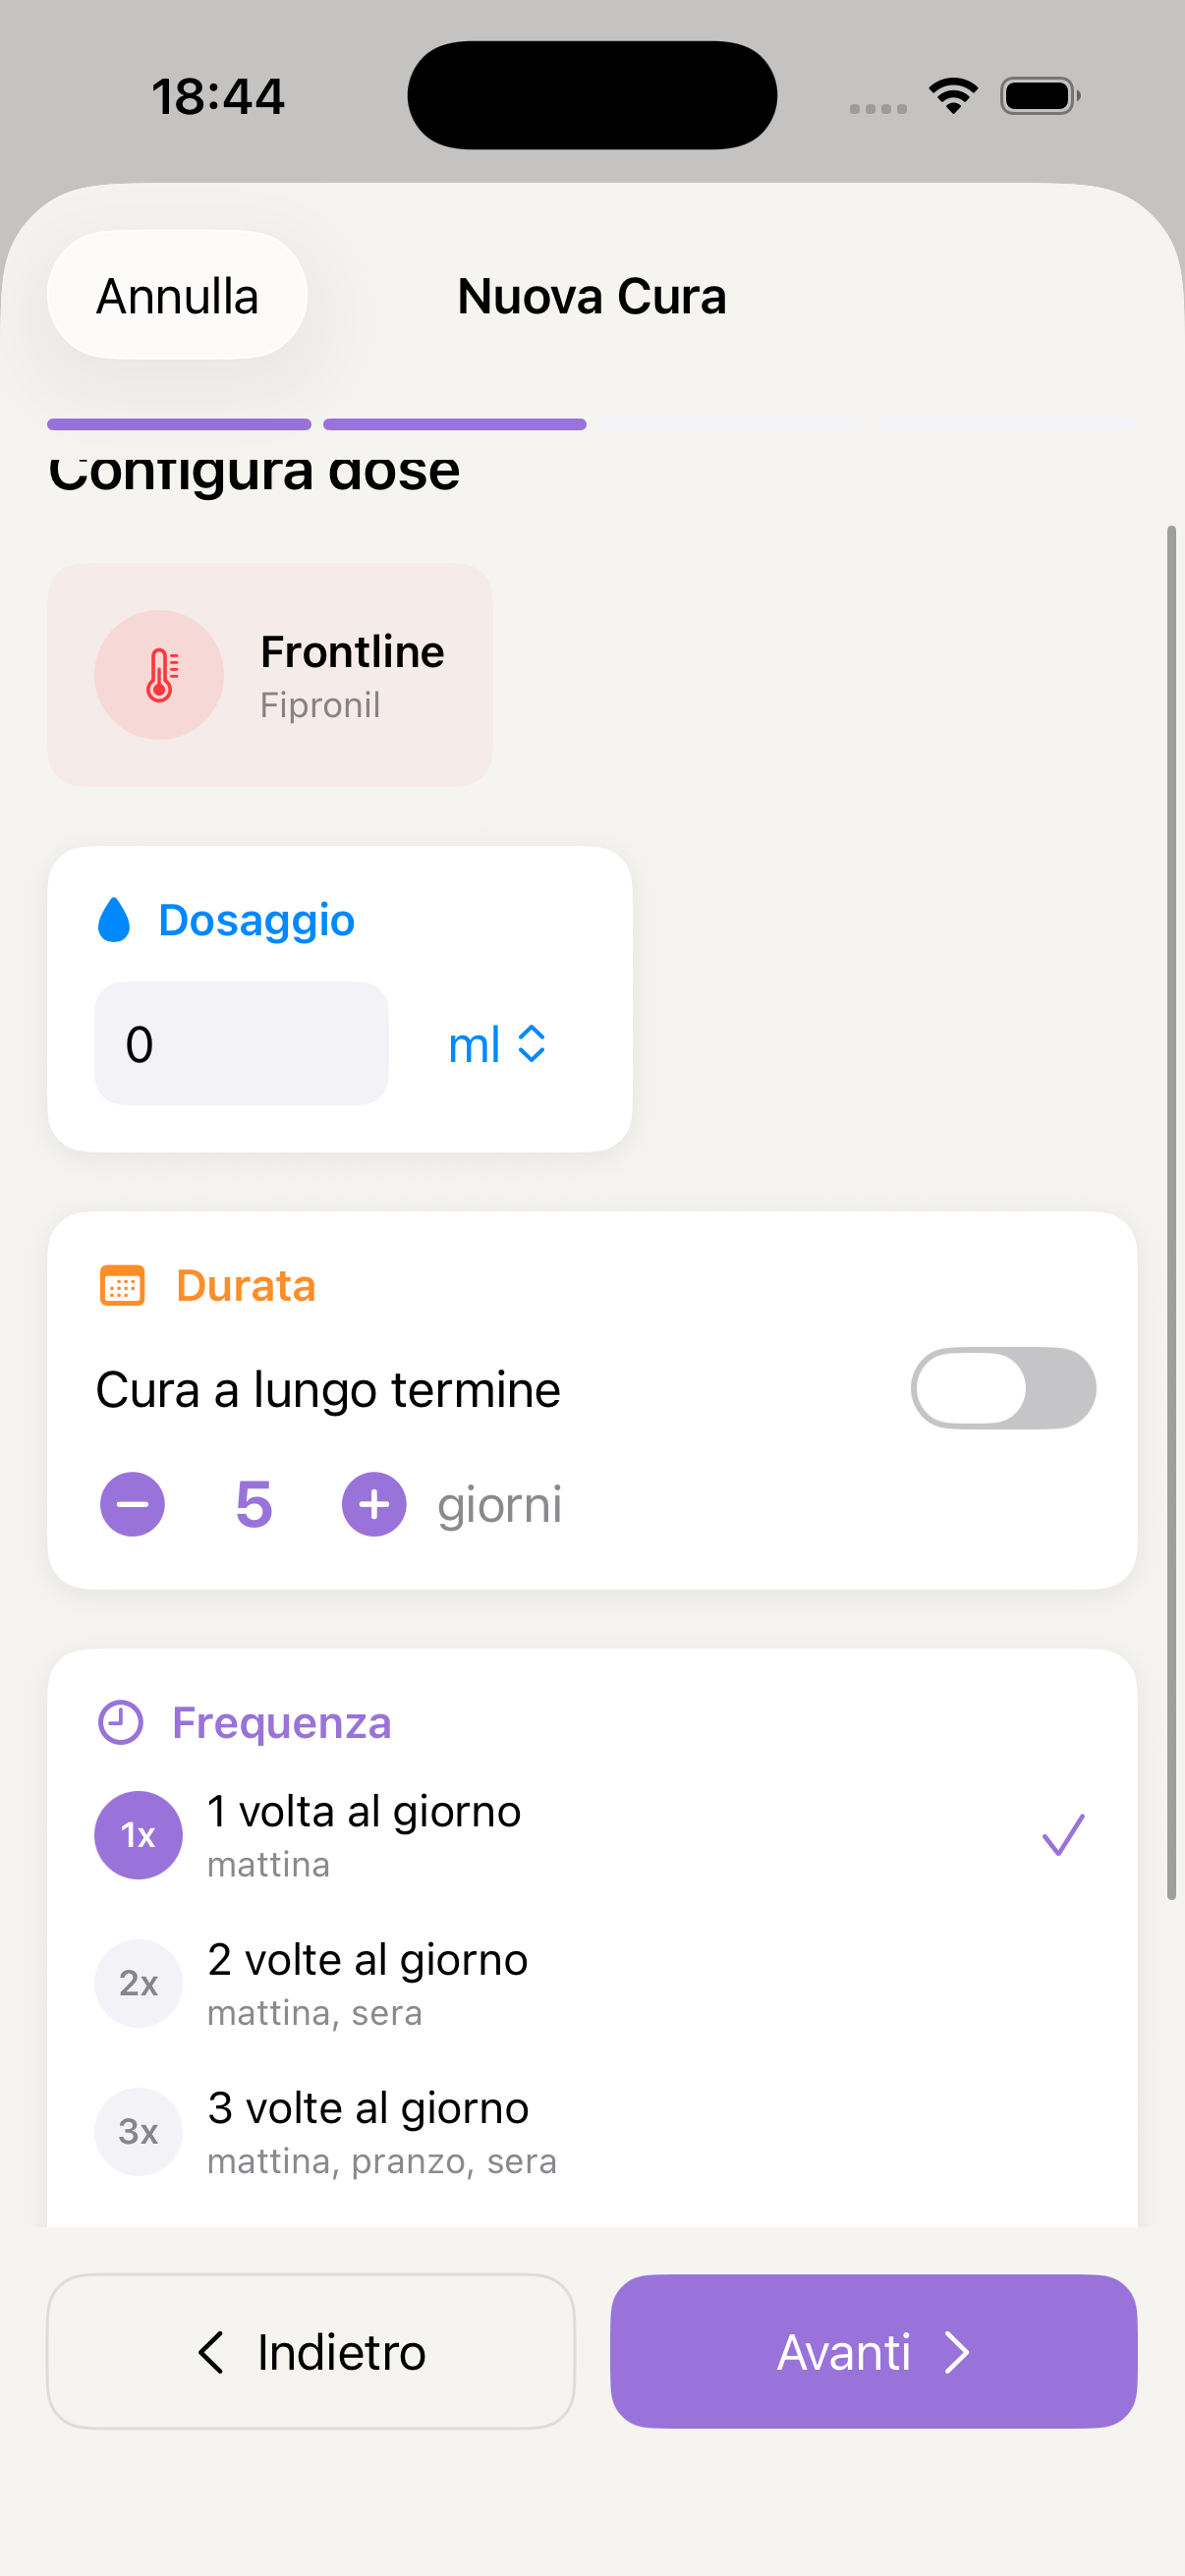
Dosage and frequency
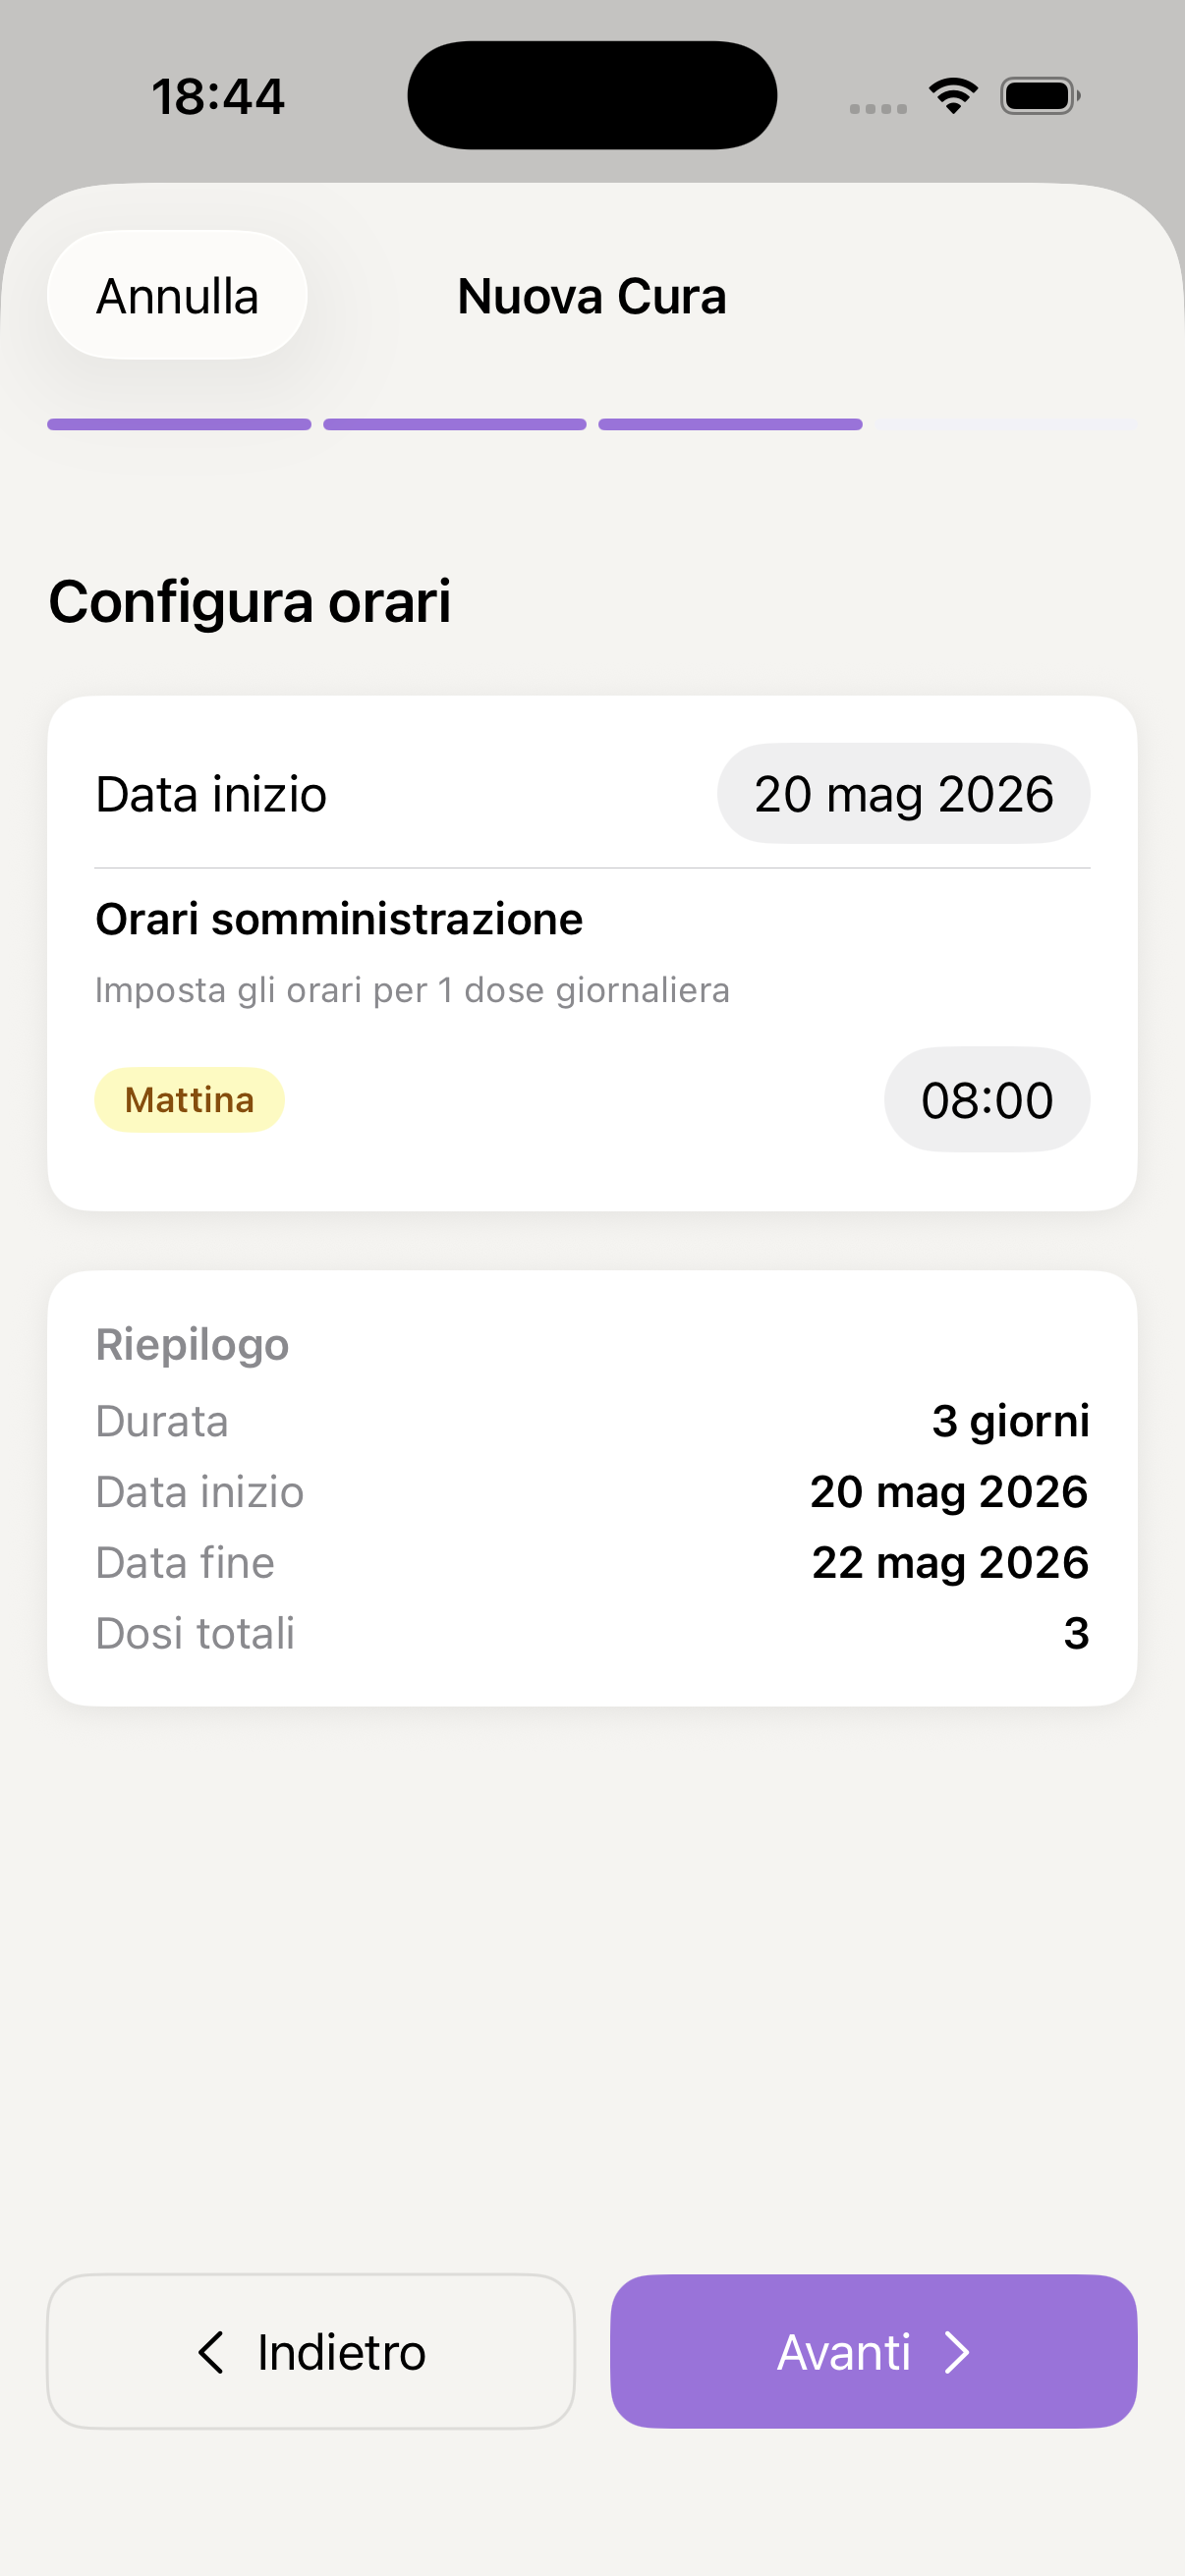
Administration times
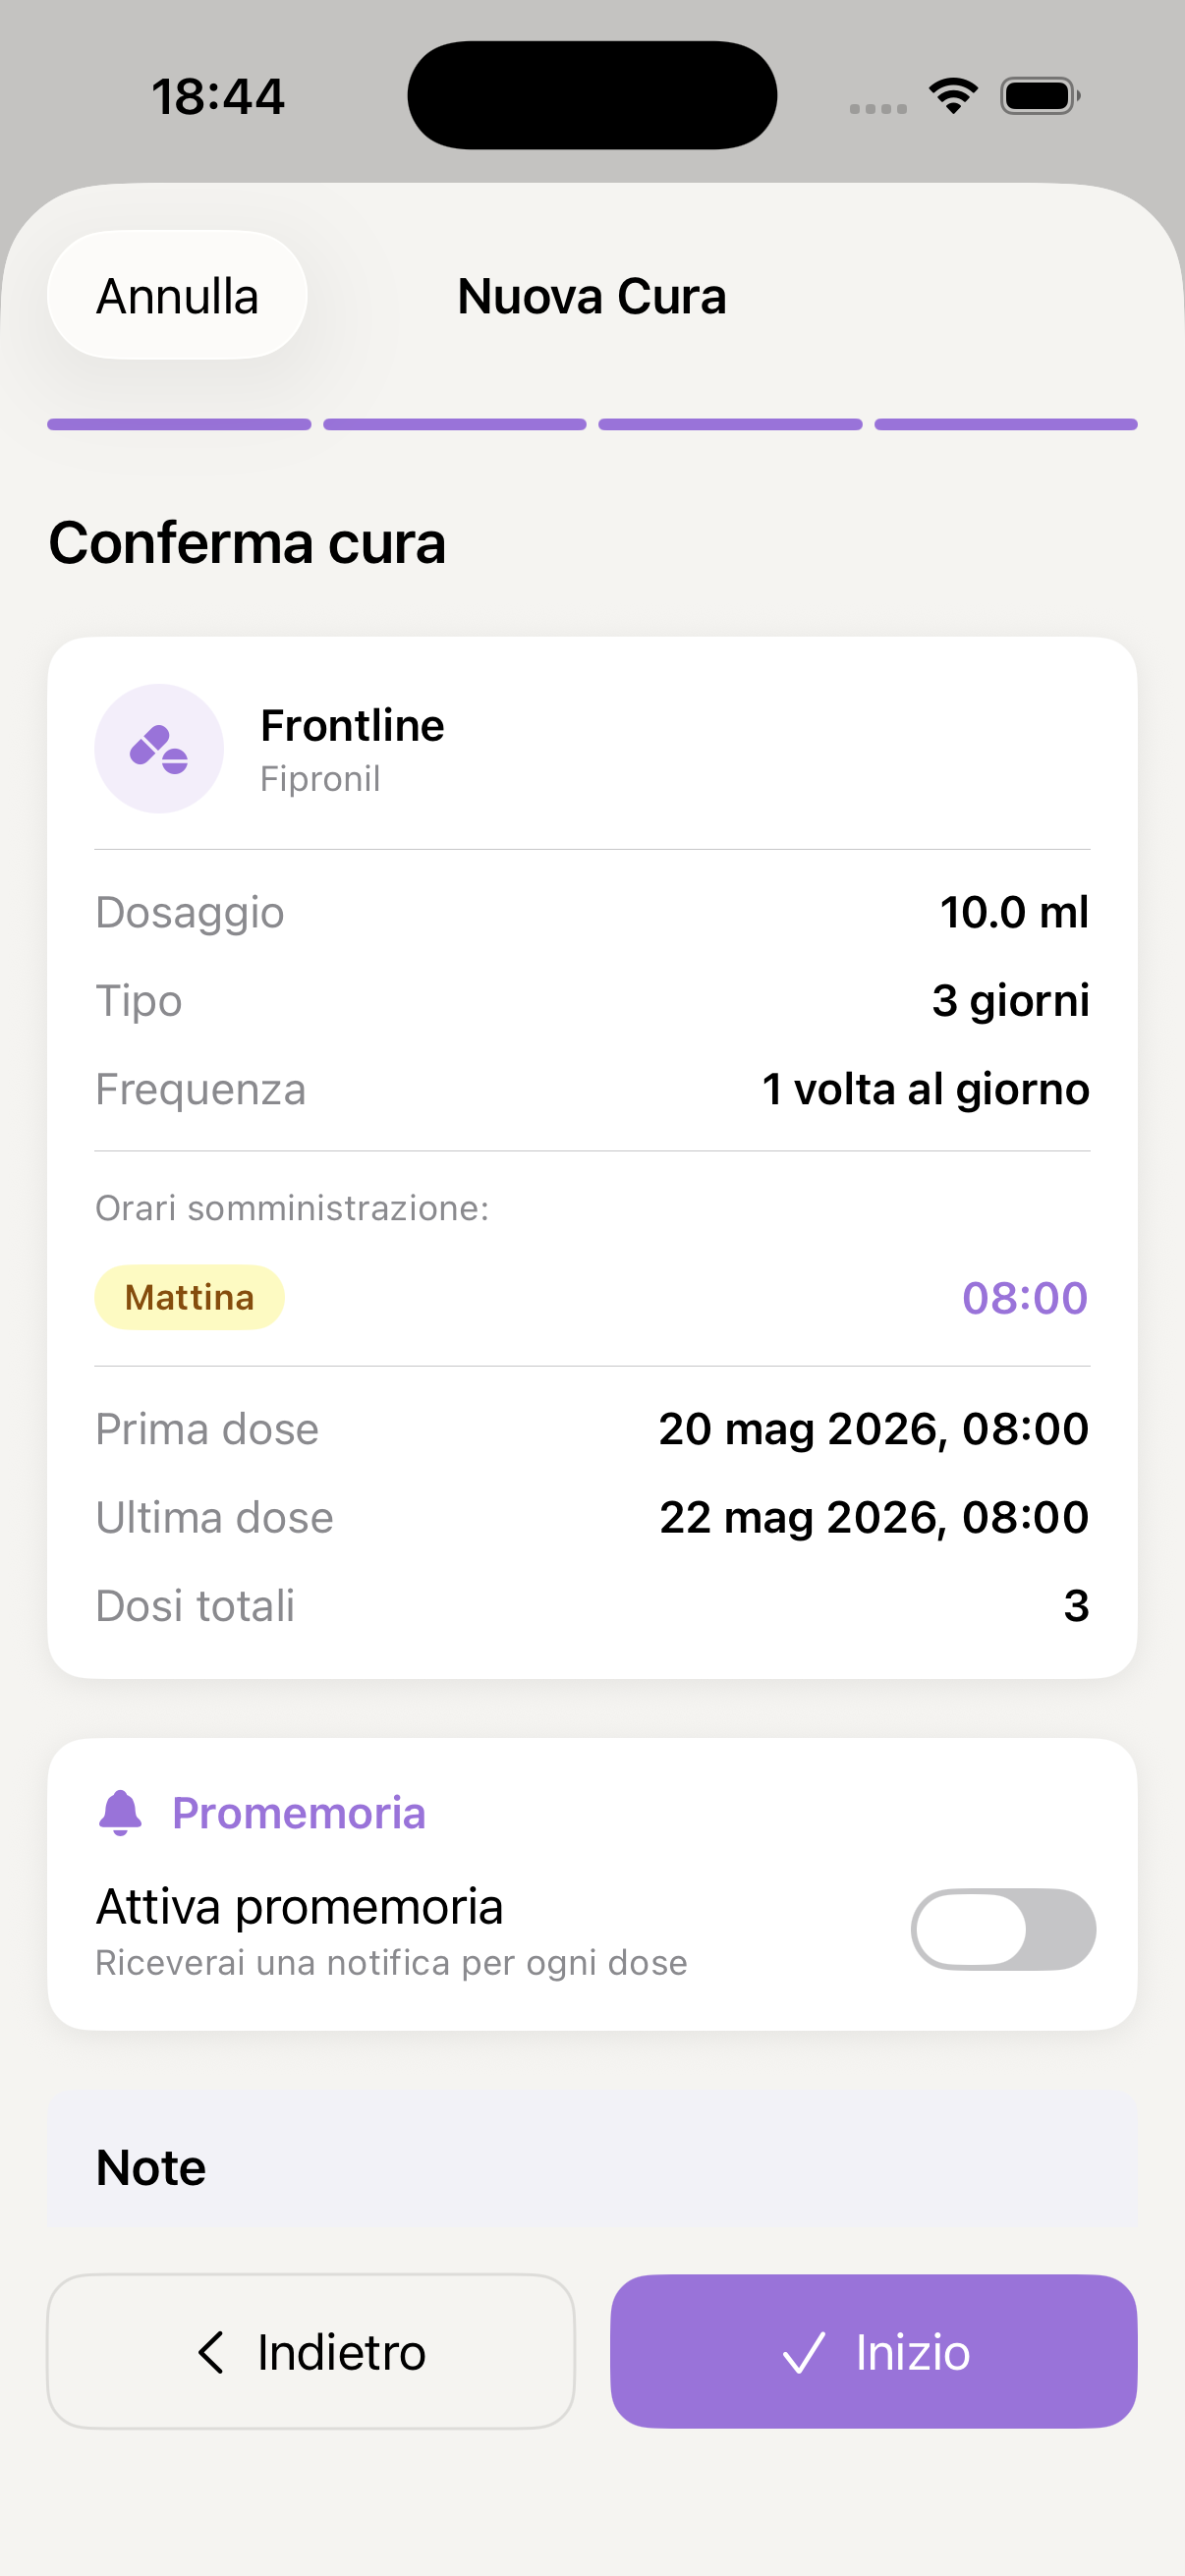
Summary and confirm treatment
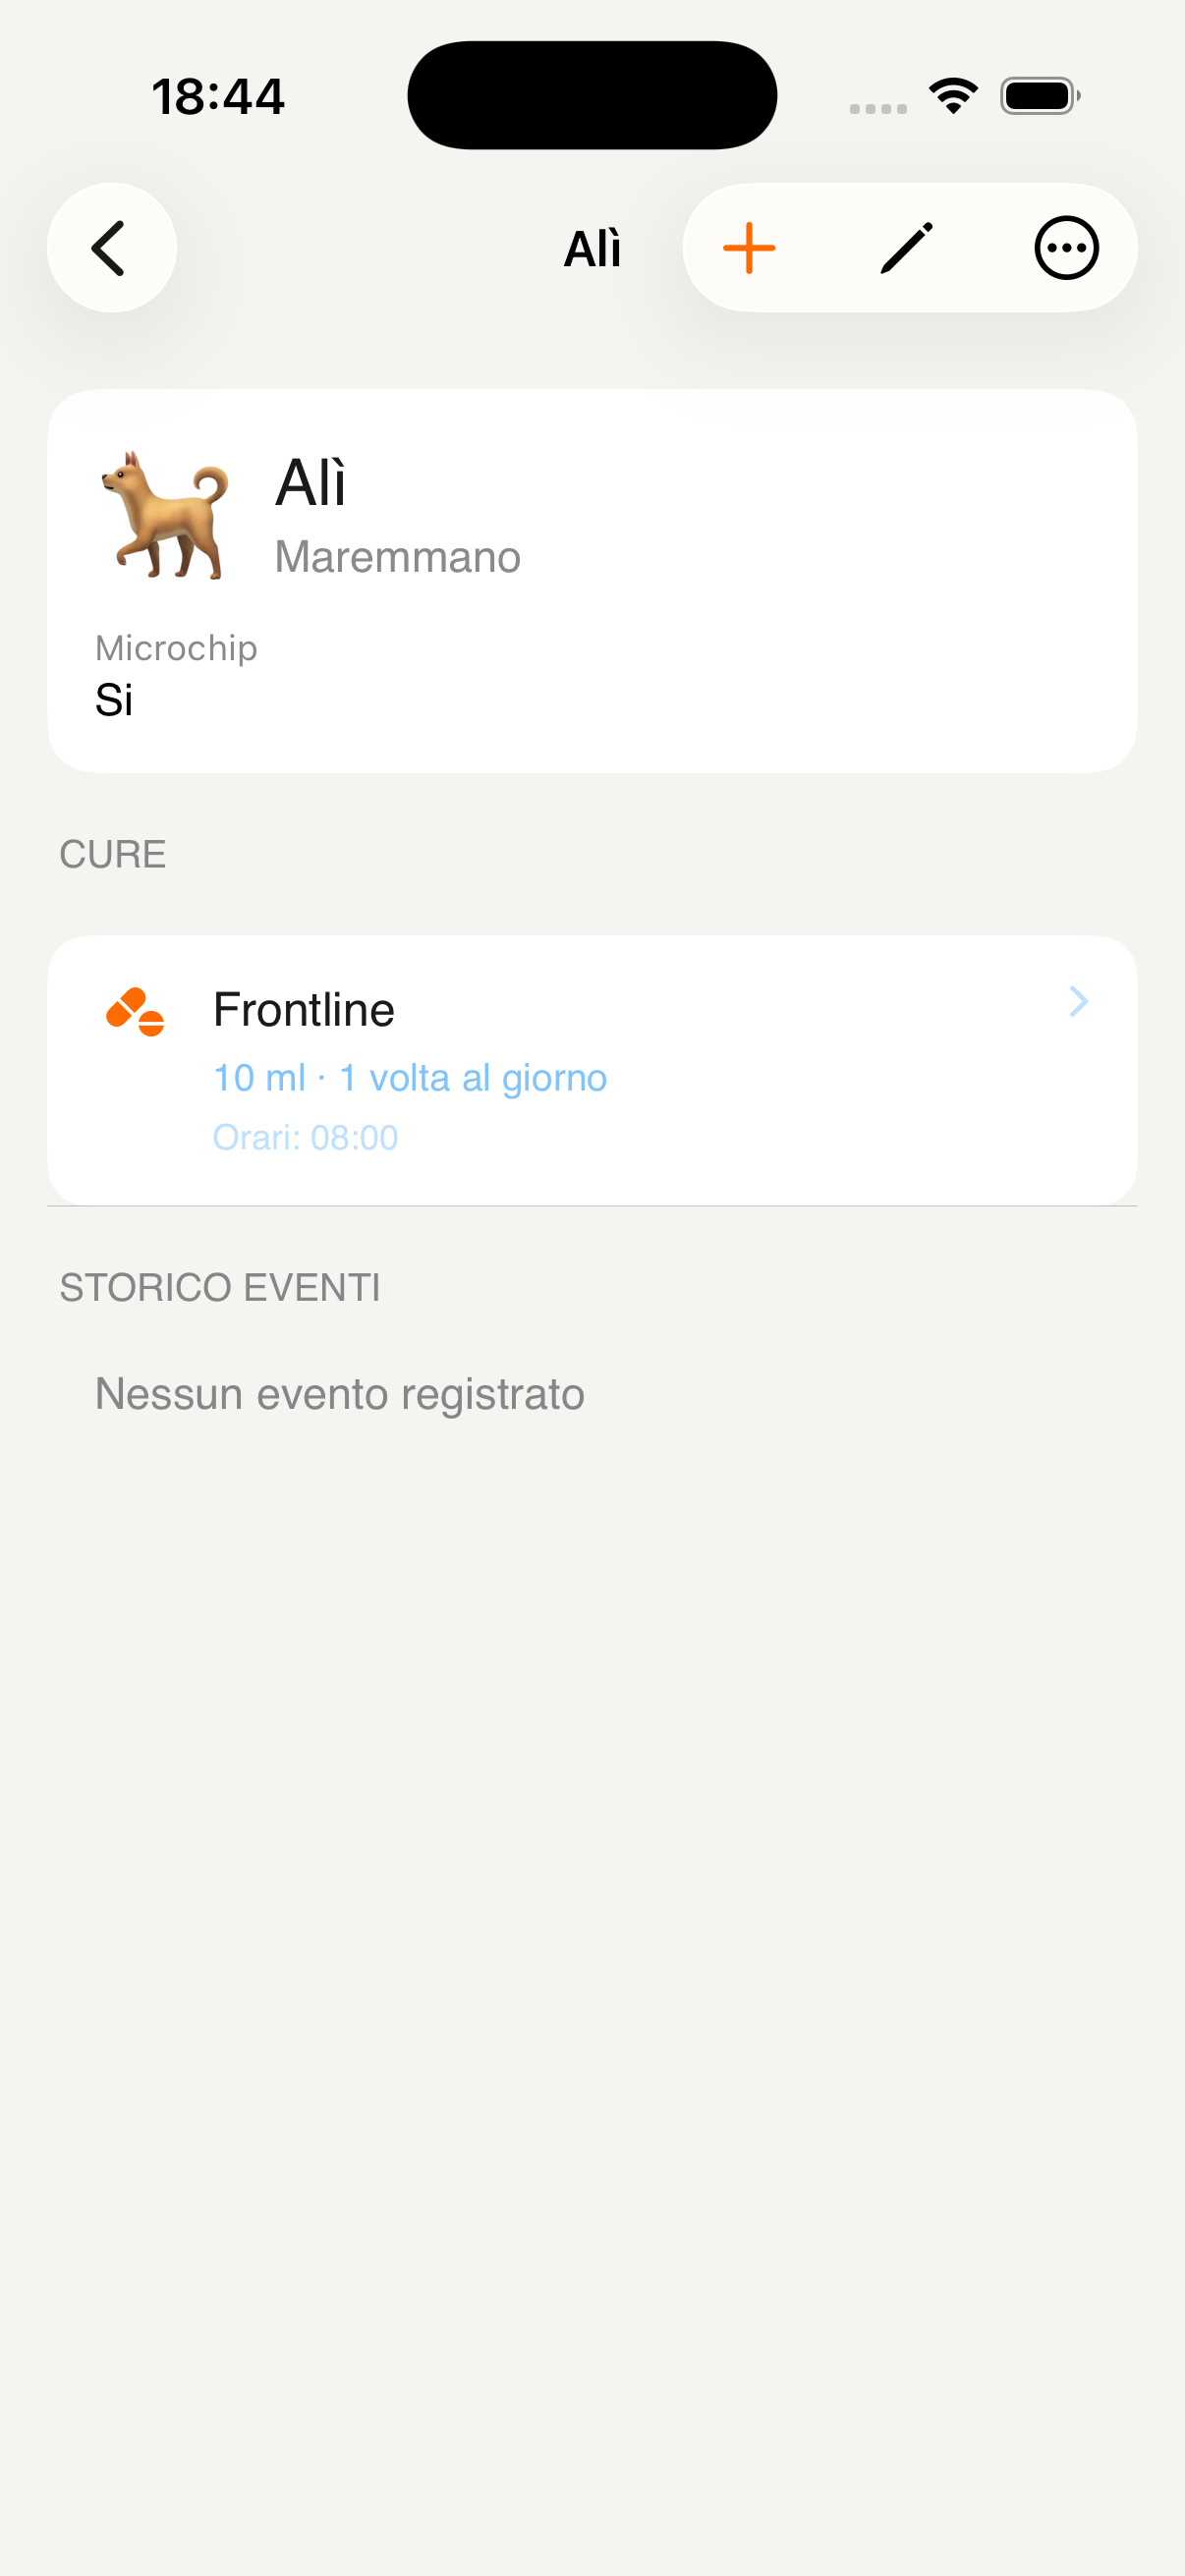
Active treatment in profile
Shared location
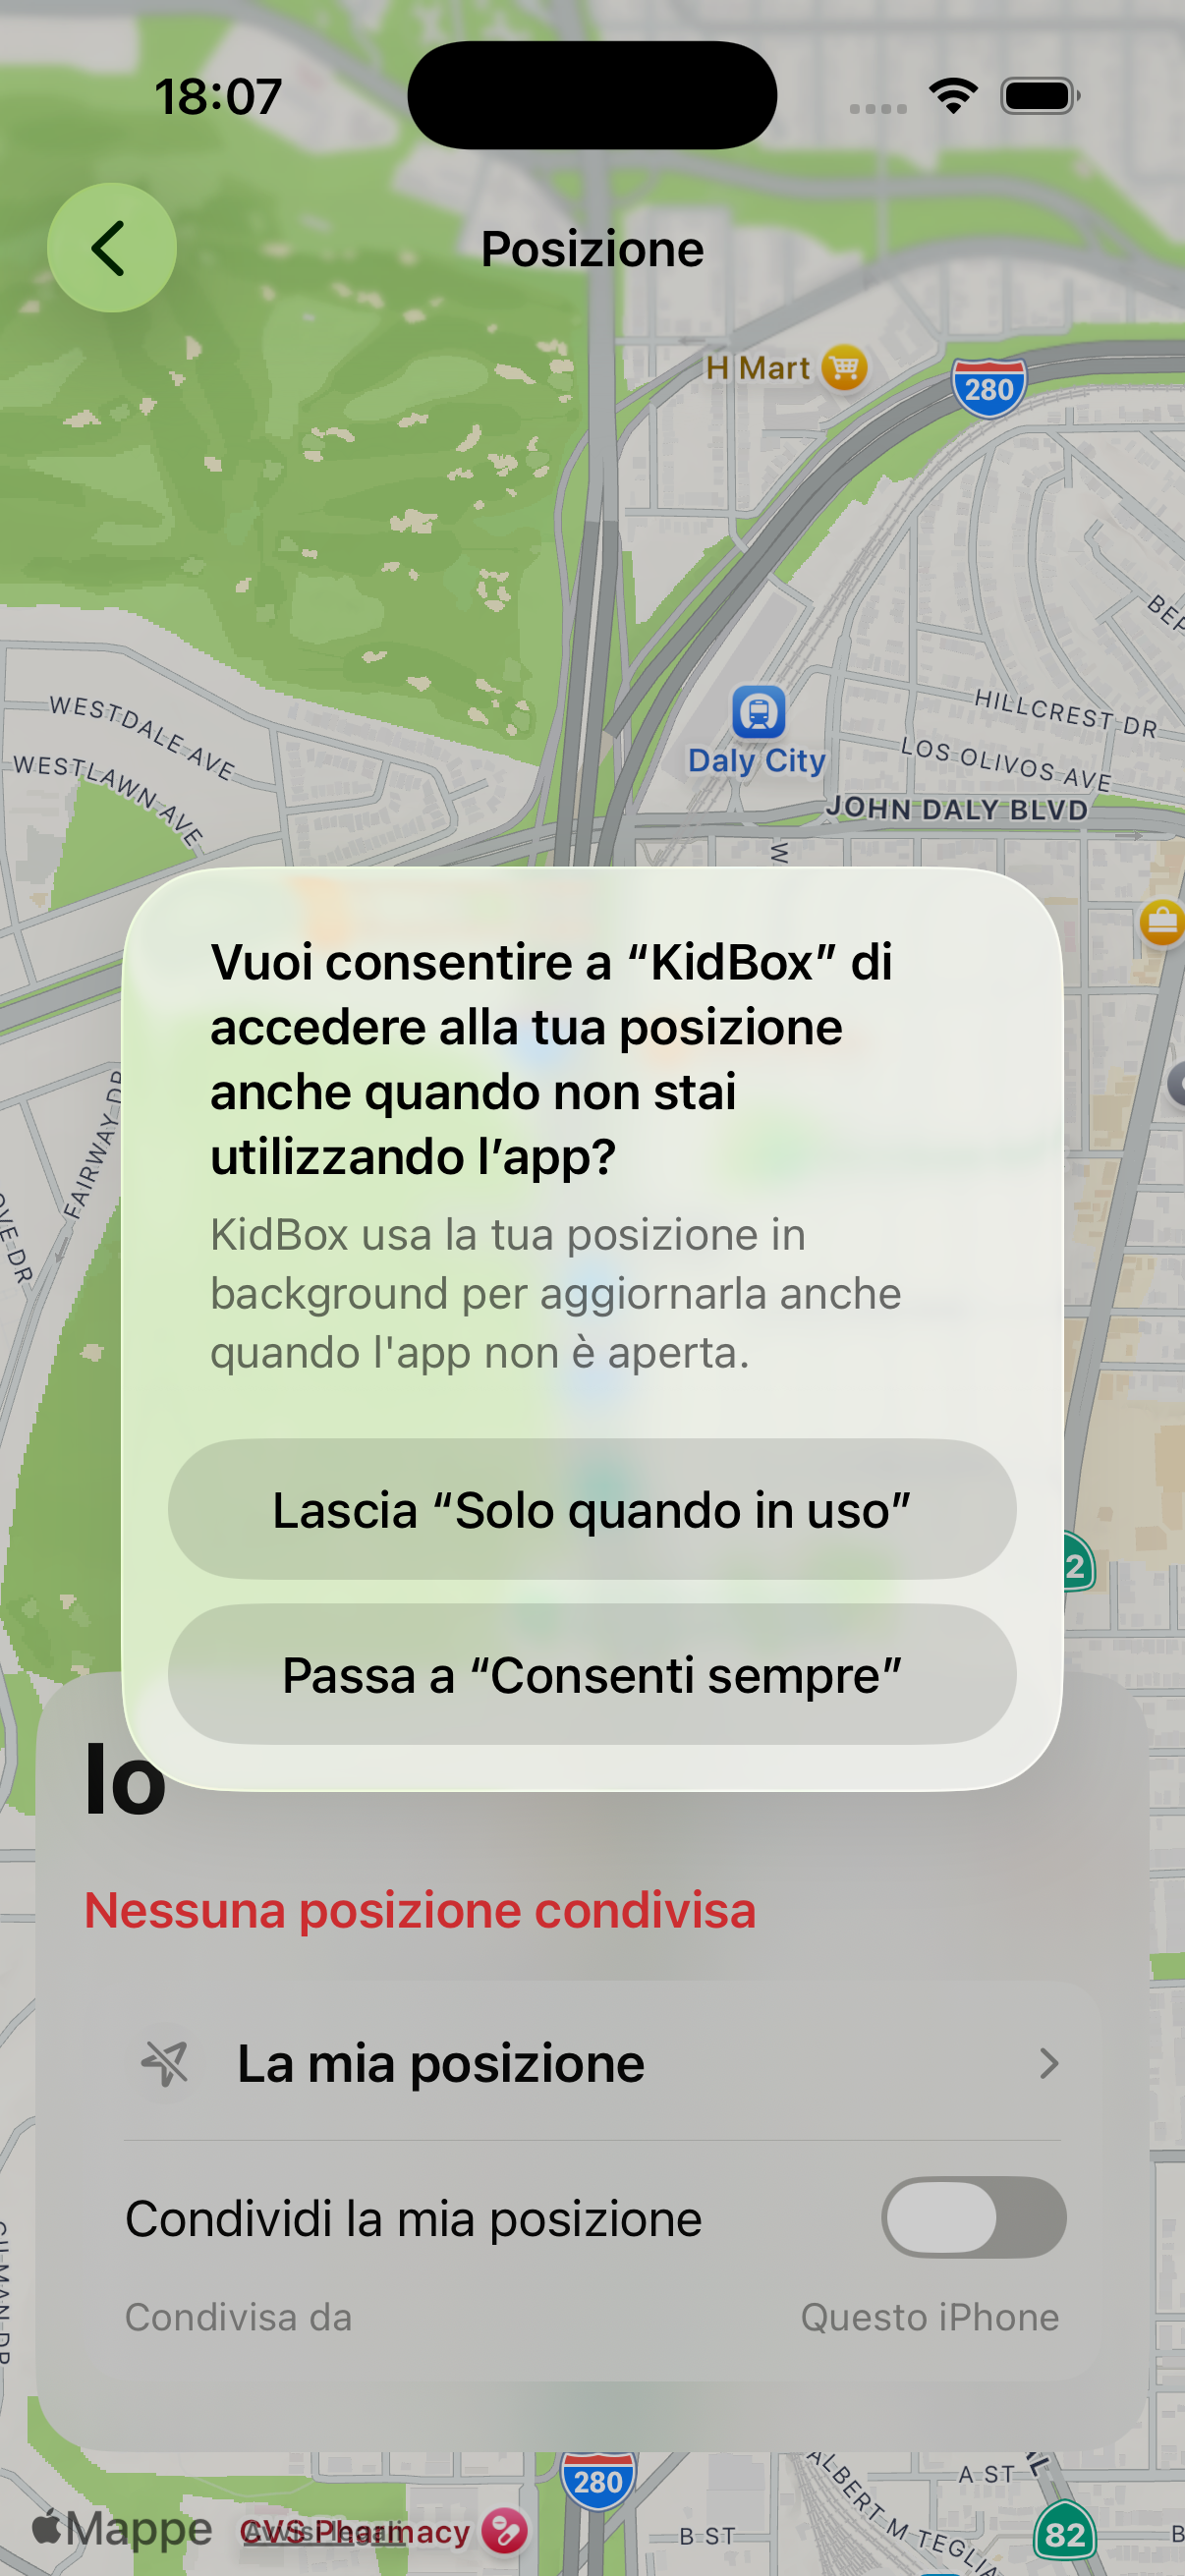
Always know where your family members are in real time — directly on a map. Sharing is voluntary, transparent and controllable by everyone at any time.
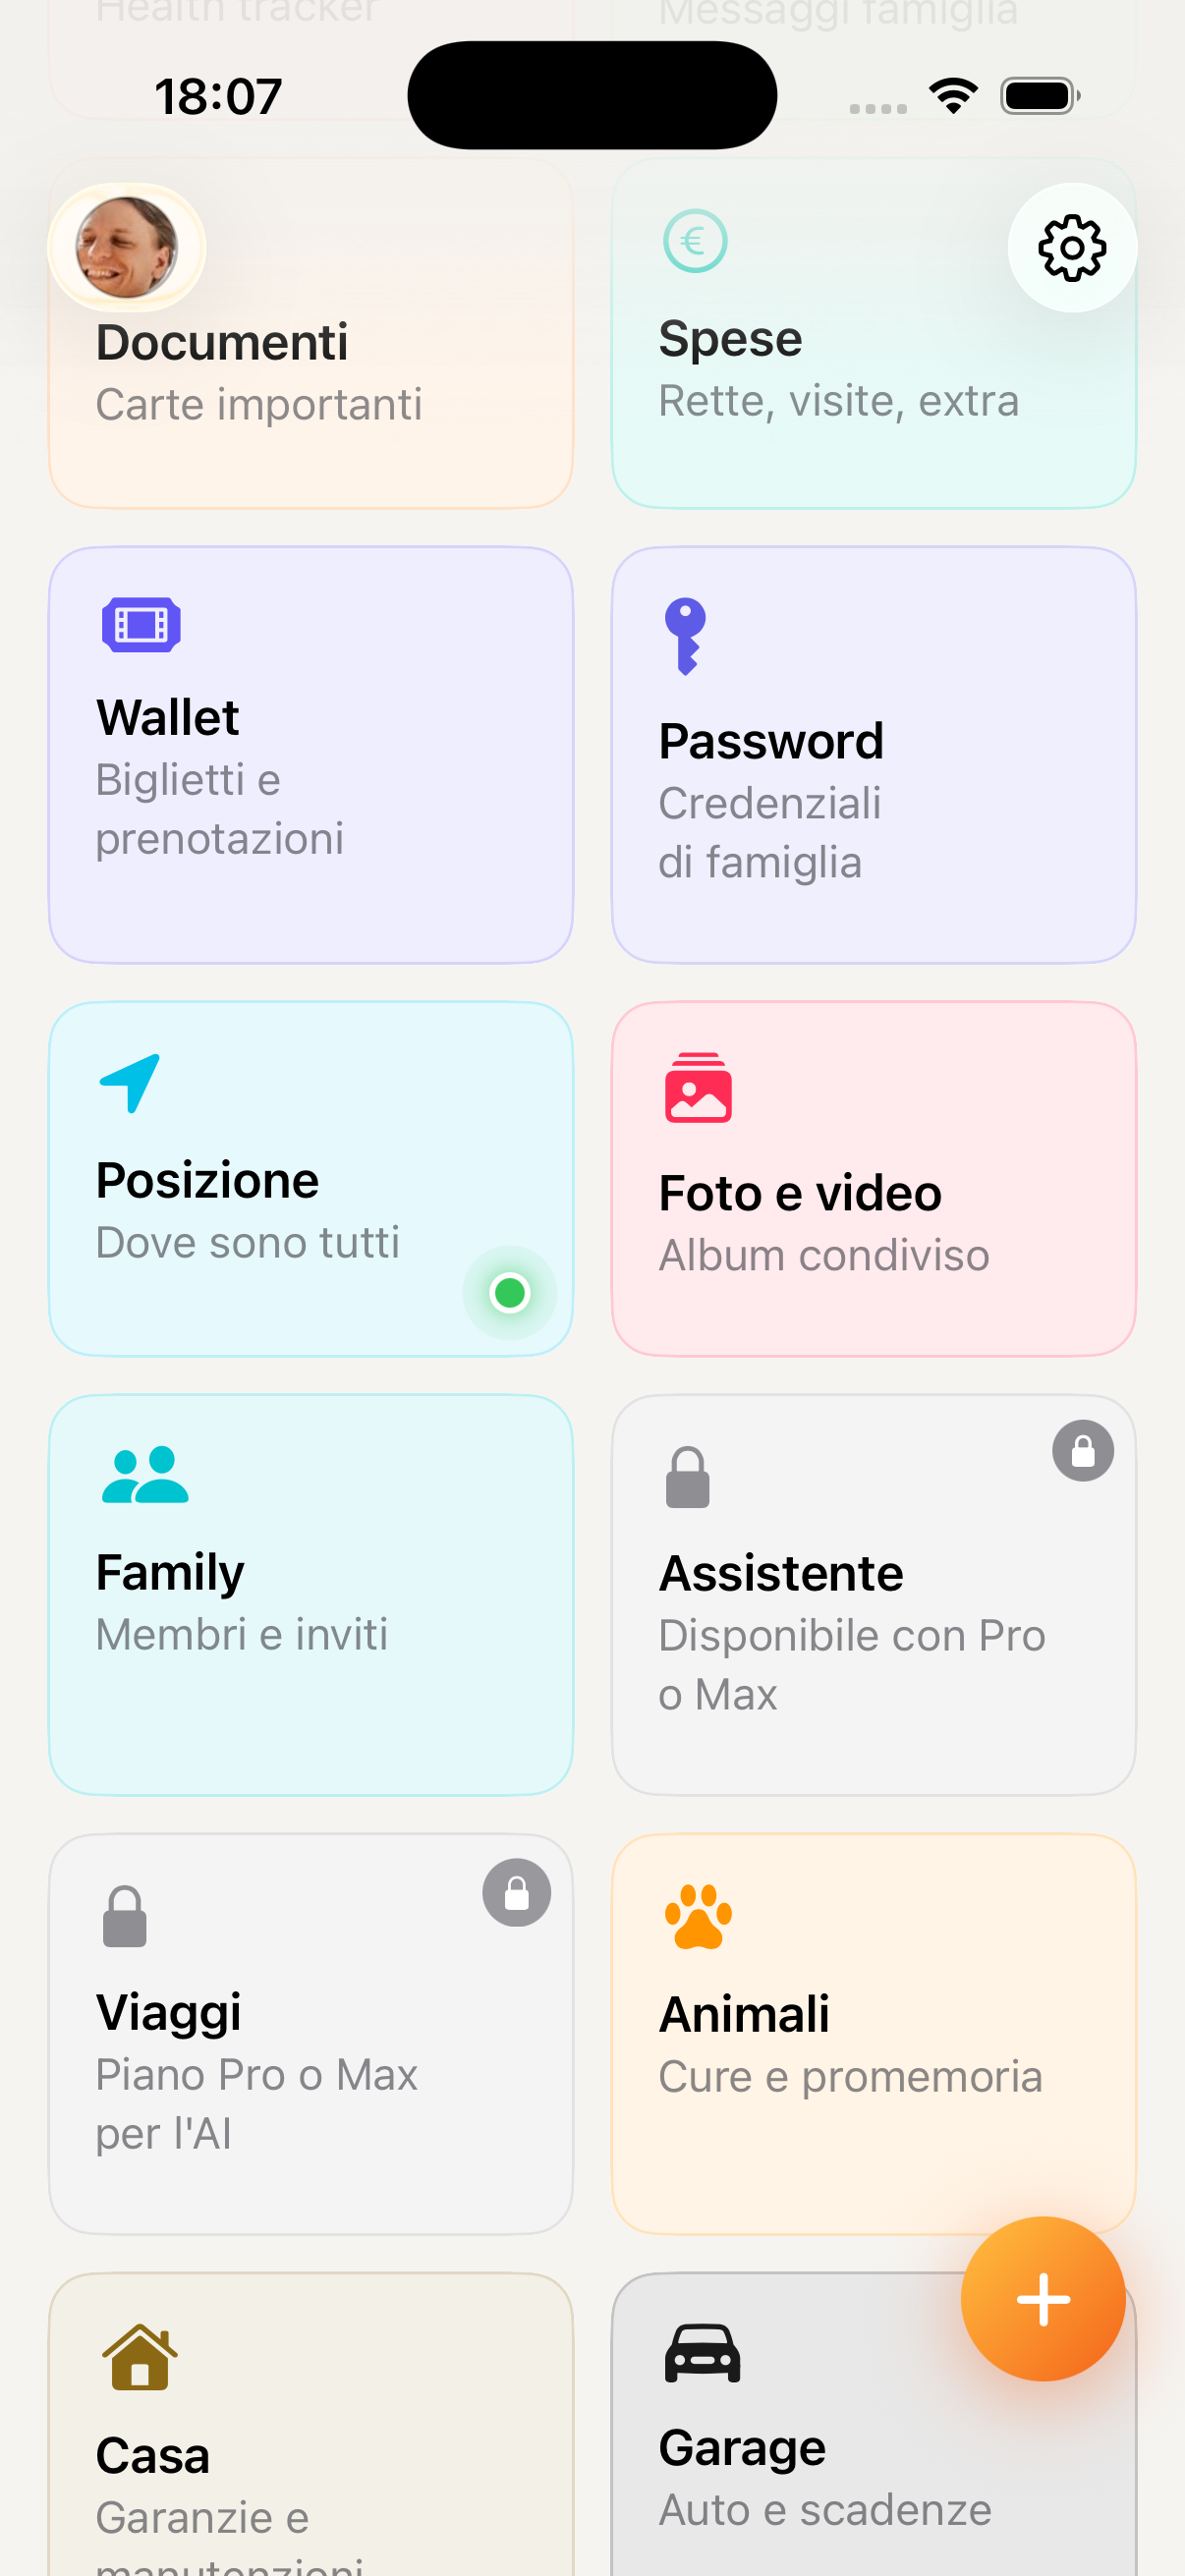
Access Location from the "More" menu in the bottom bar. You'll find the map with pins for family members who have activated sharing, updated in real time.
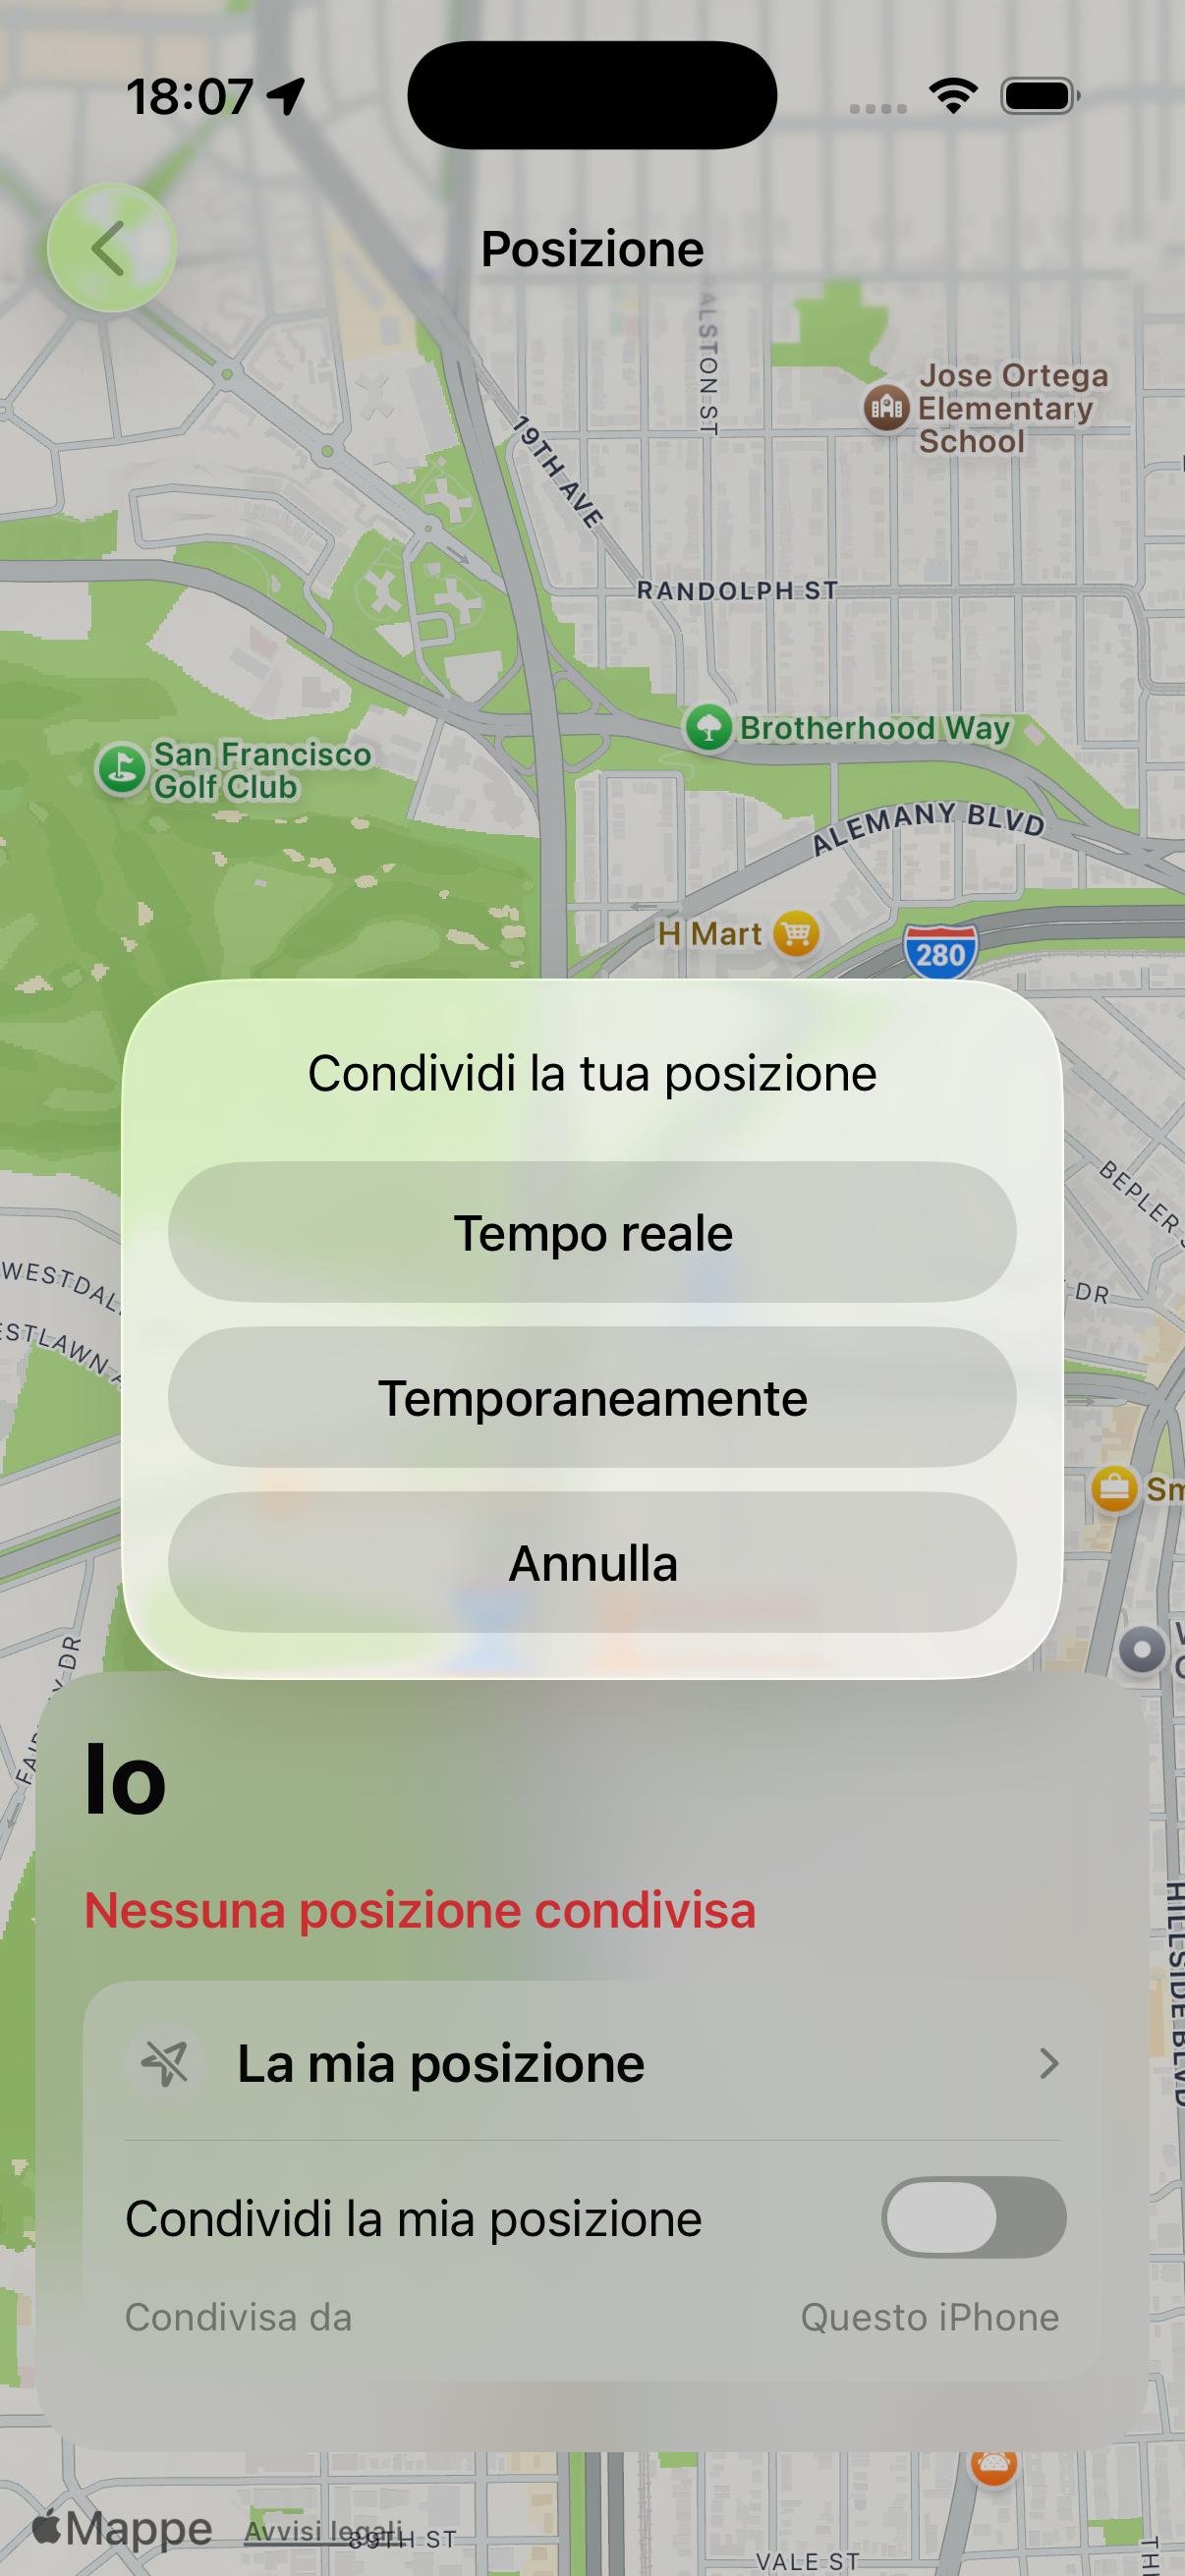
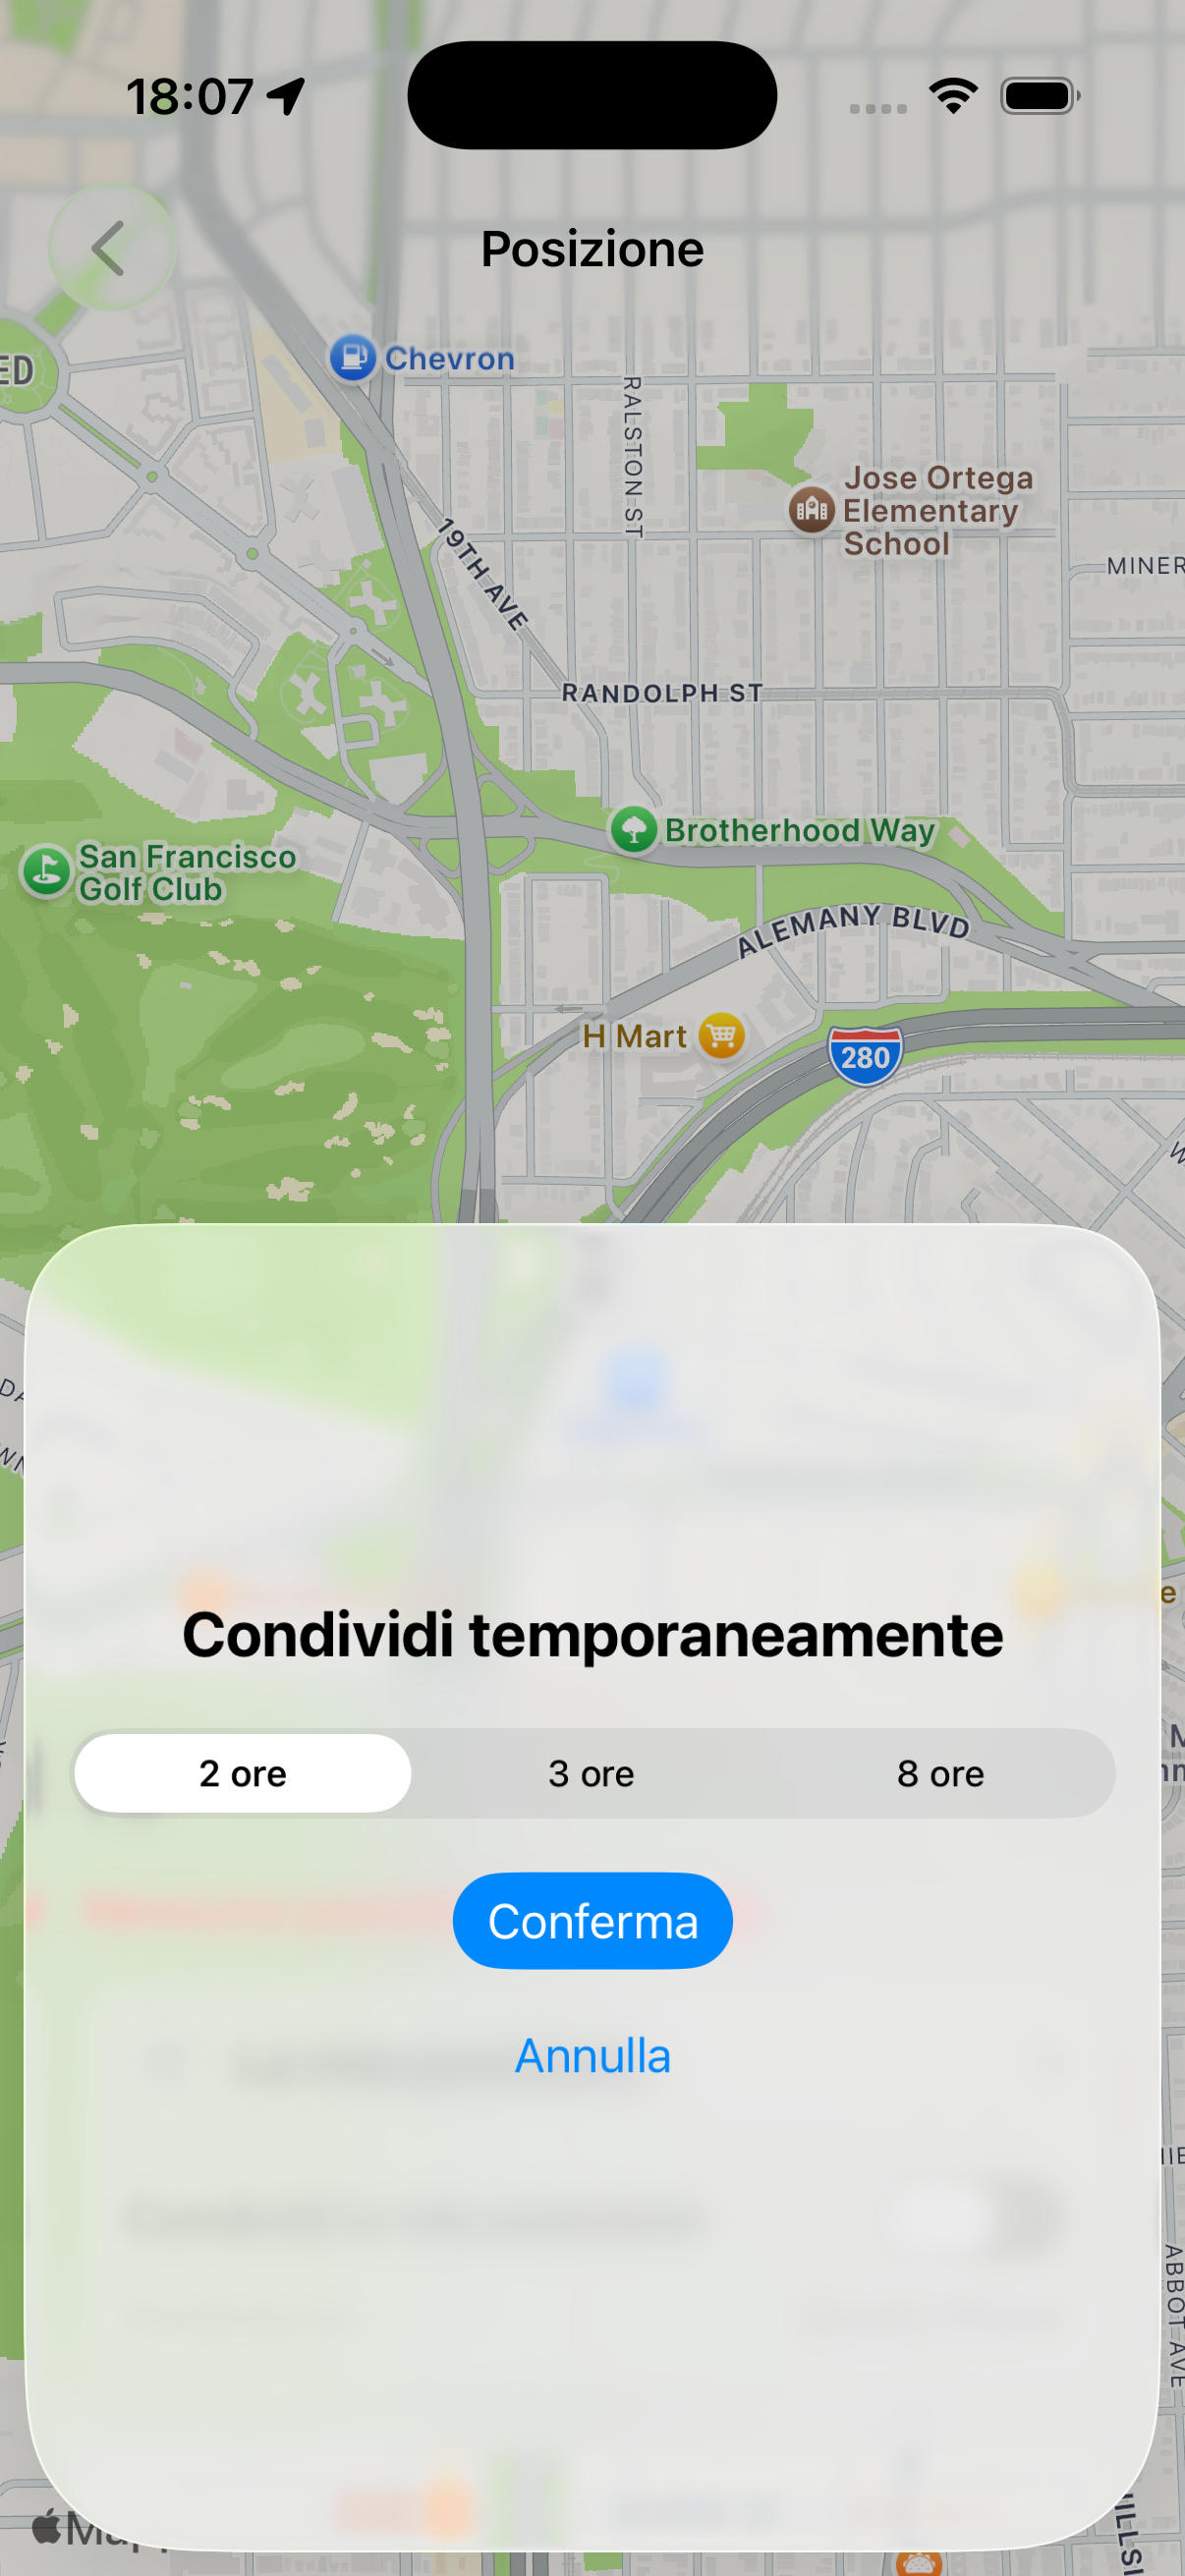
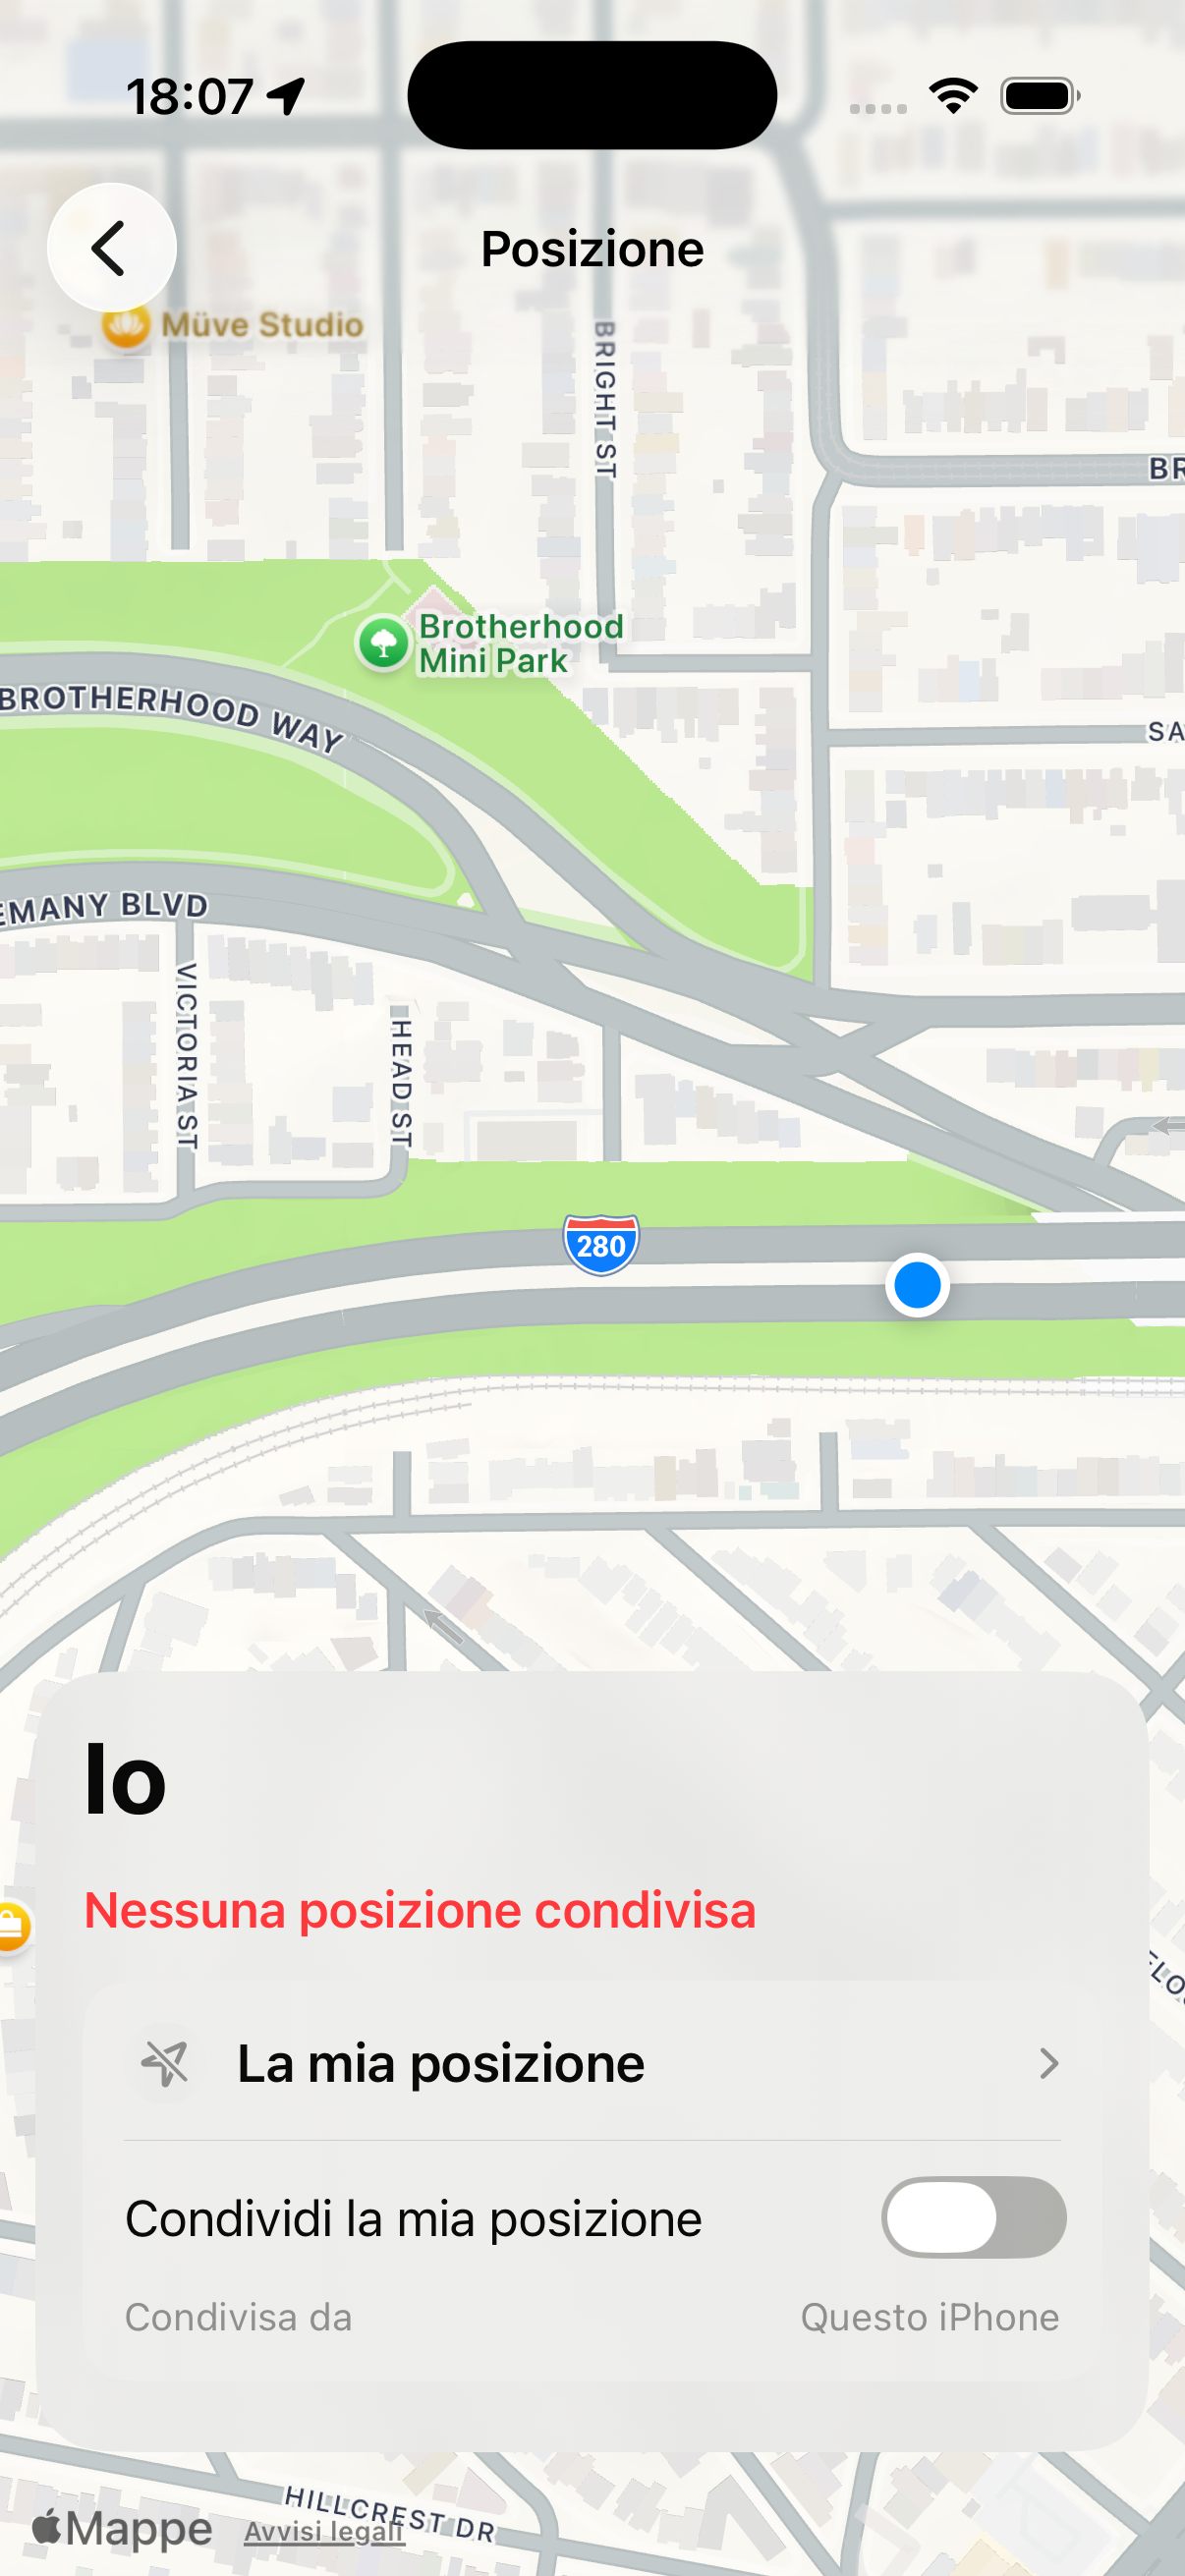
Tap your name in the member list and select Share location. You can choose to share it always (even with the app in the background) or only when the app is open. Other members will see your pin on the map.
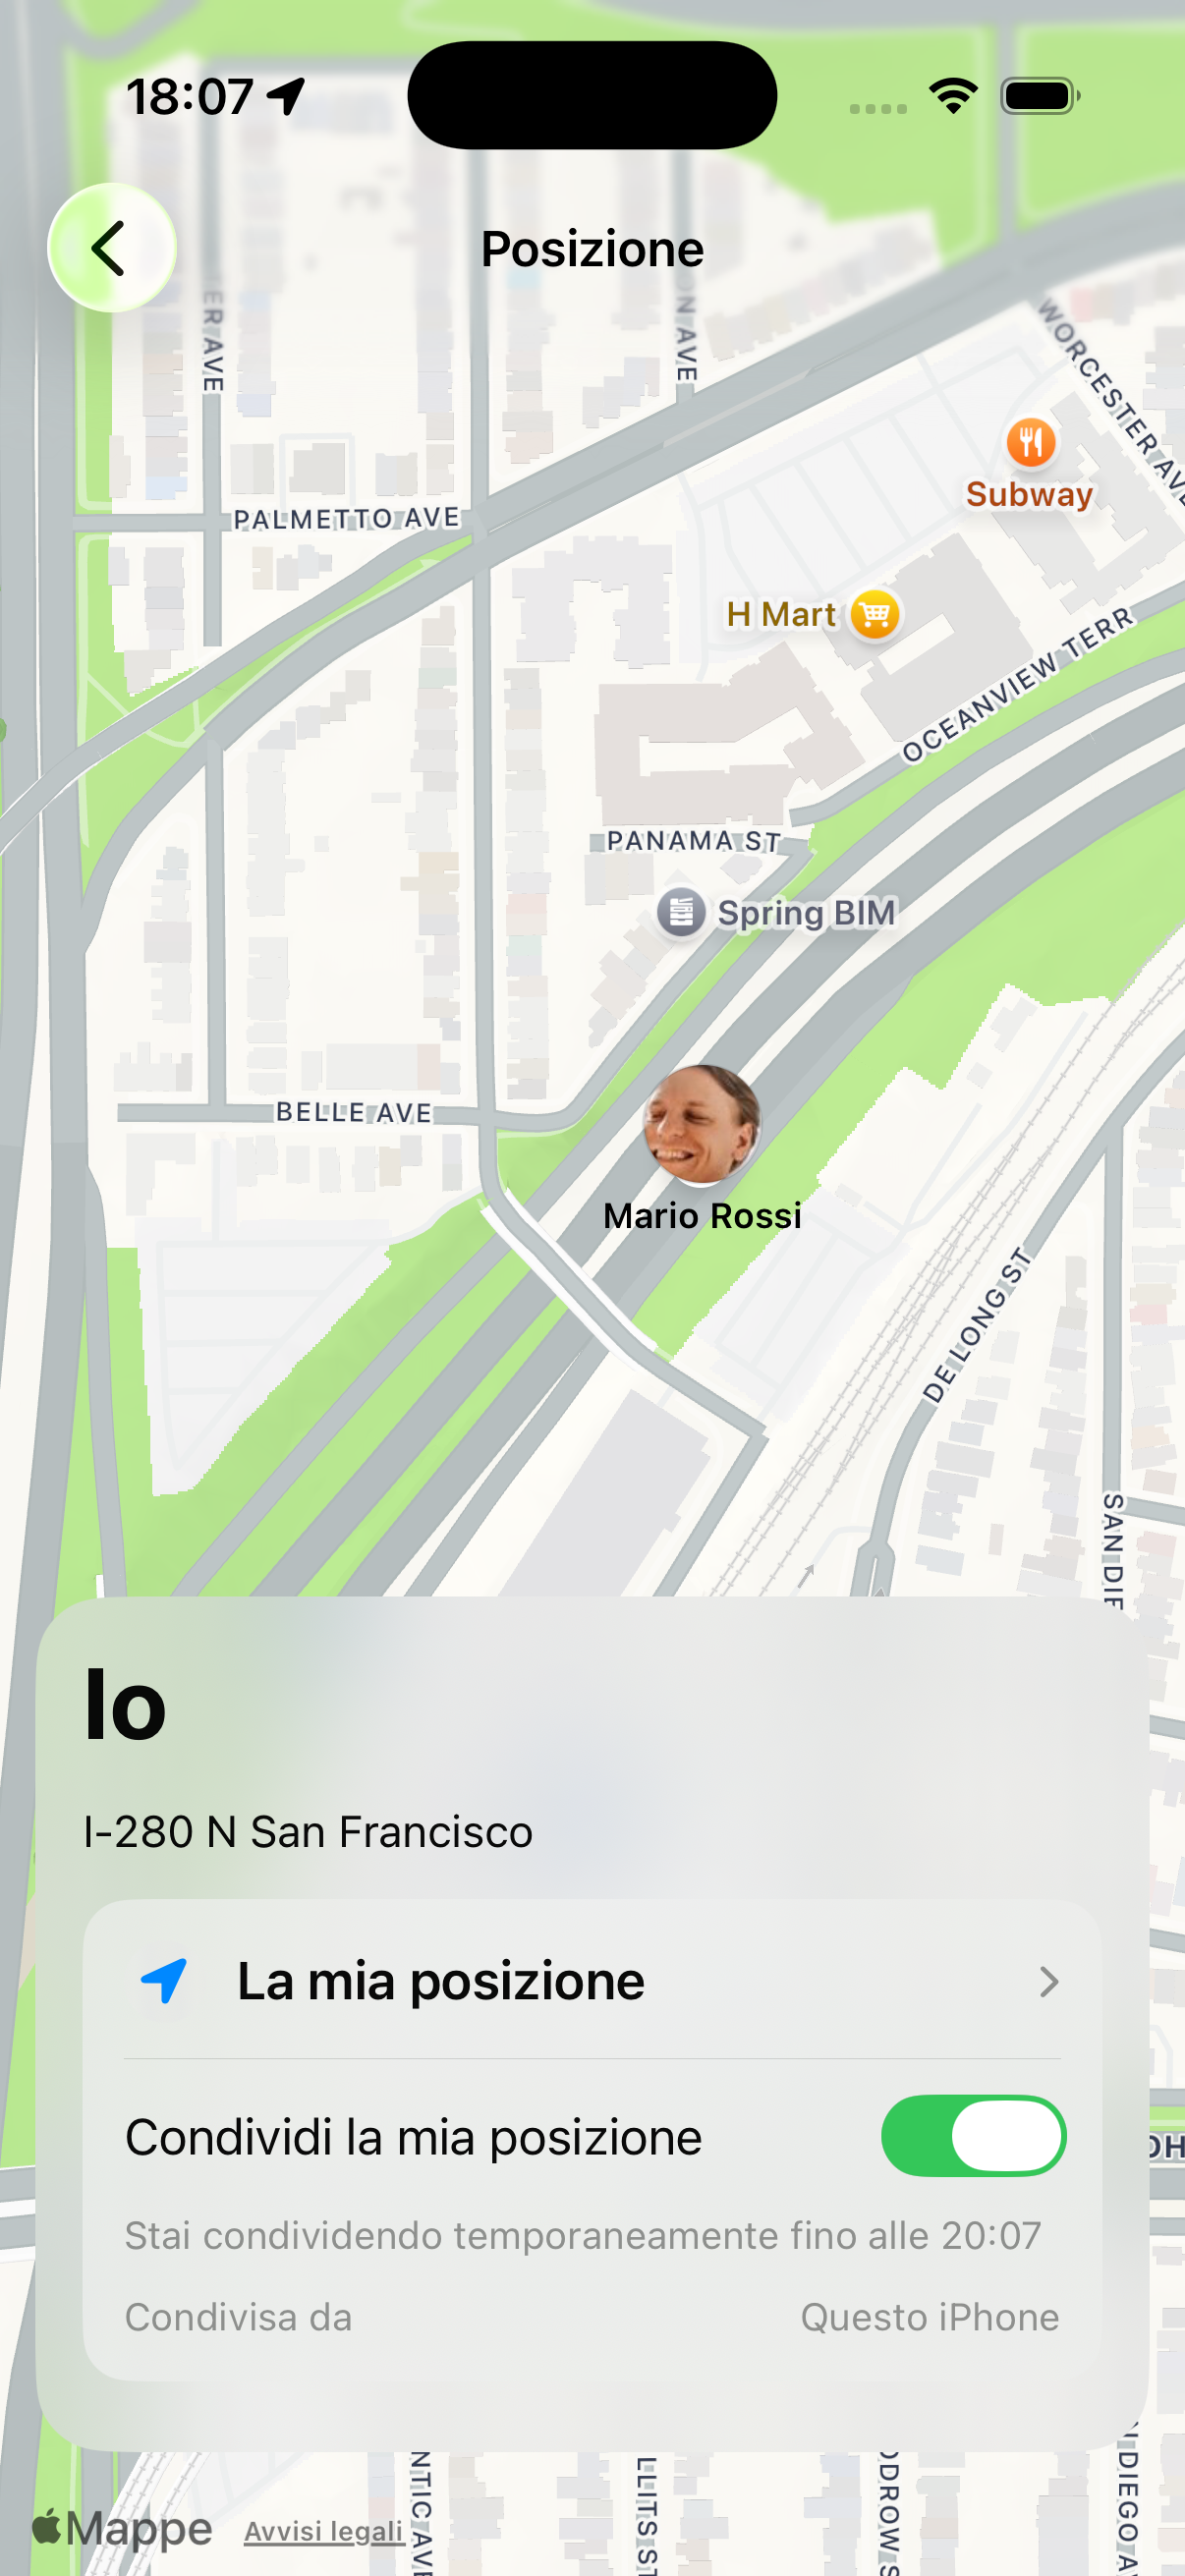
Each member who has activated sharing appears on the map with their avatar. Tap the pin to see their name, approximate address and how long they've been there. You can also switch to the list view to see everyone in order.
You can create custom zones (e.g. "School", "Grandparents' house", "Gym") and receive an automatic notification when a family member arrives at or leaves that zone — without having to check the map every time.
You can stop sharing your location at any time by going to Location → Your profile → Stop sharing. As soon as you deactivate it, your pin disappears from everyone else's map.
Location is shared only with your KidBox family members — nobody else can see it. Every member has full control over when and how to share their location.
Map with family members' location
Member list with location
Member location detail
Location sharing settings
Zones with arrival notifications
Automatic arrival notification
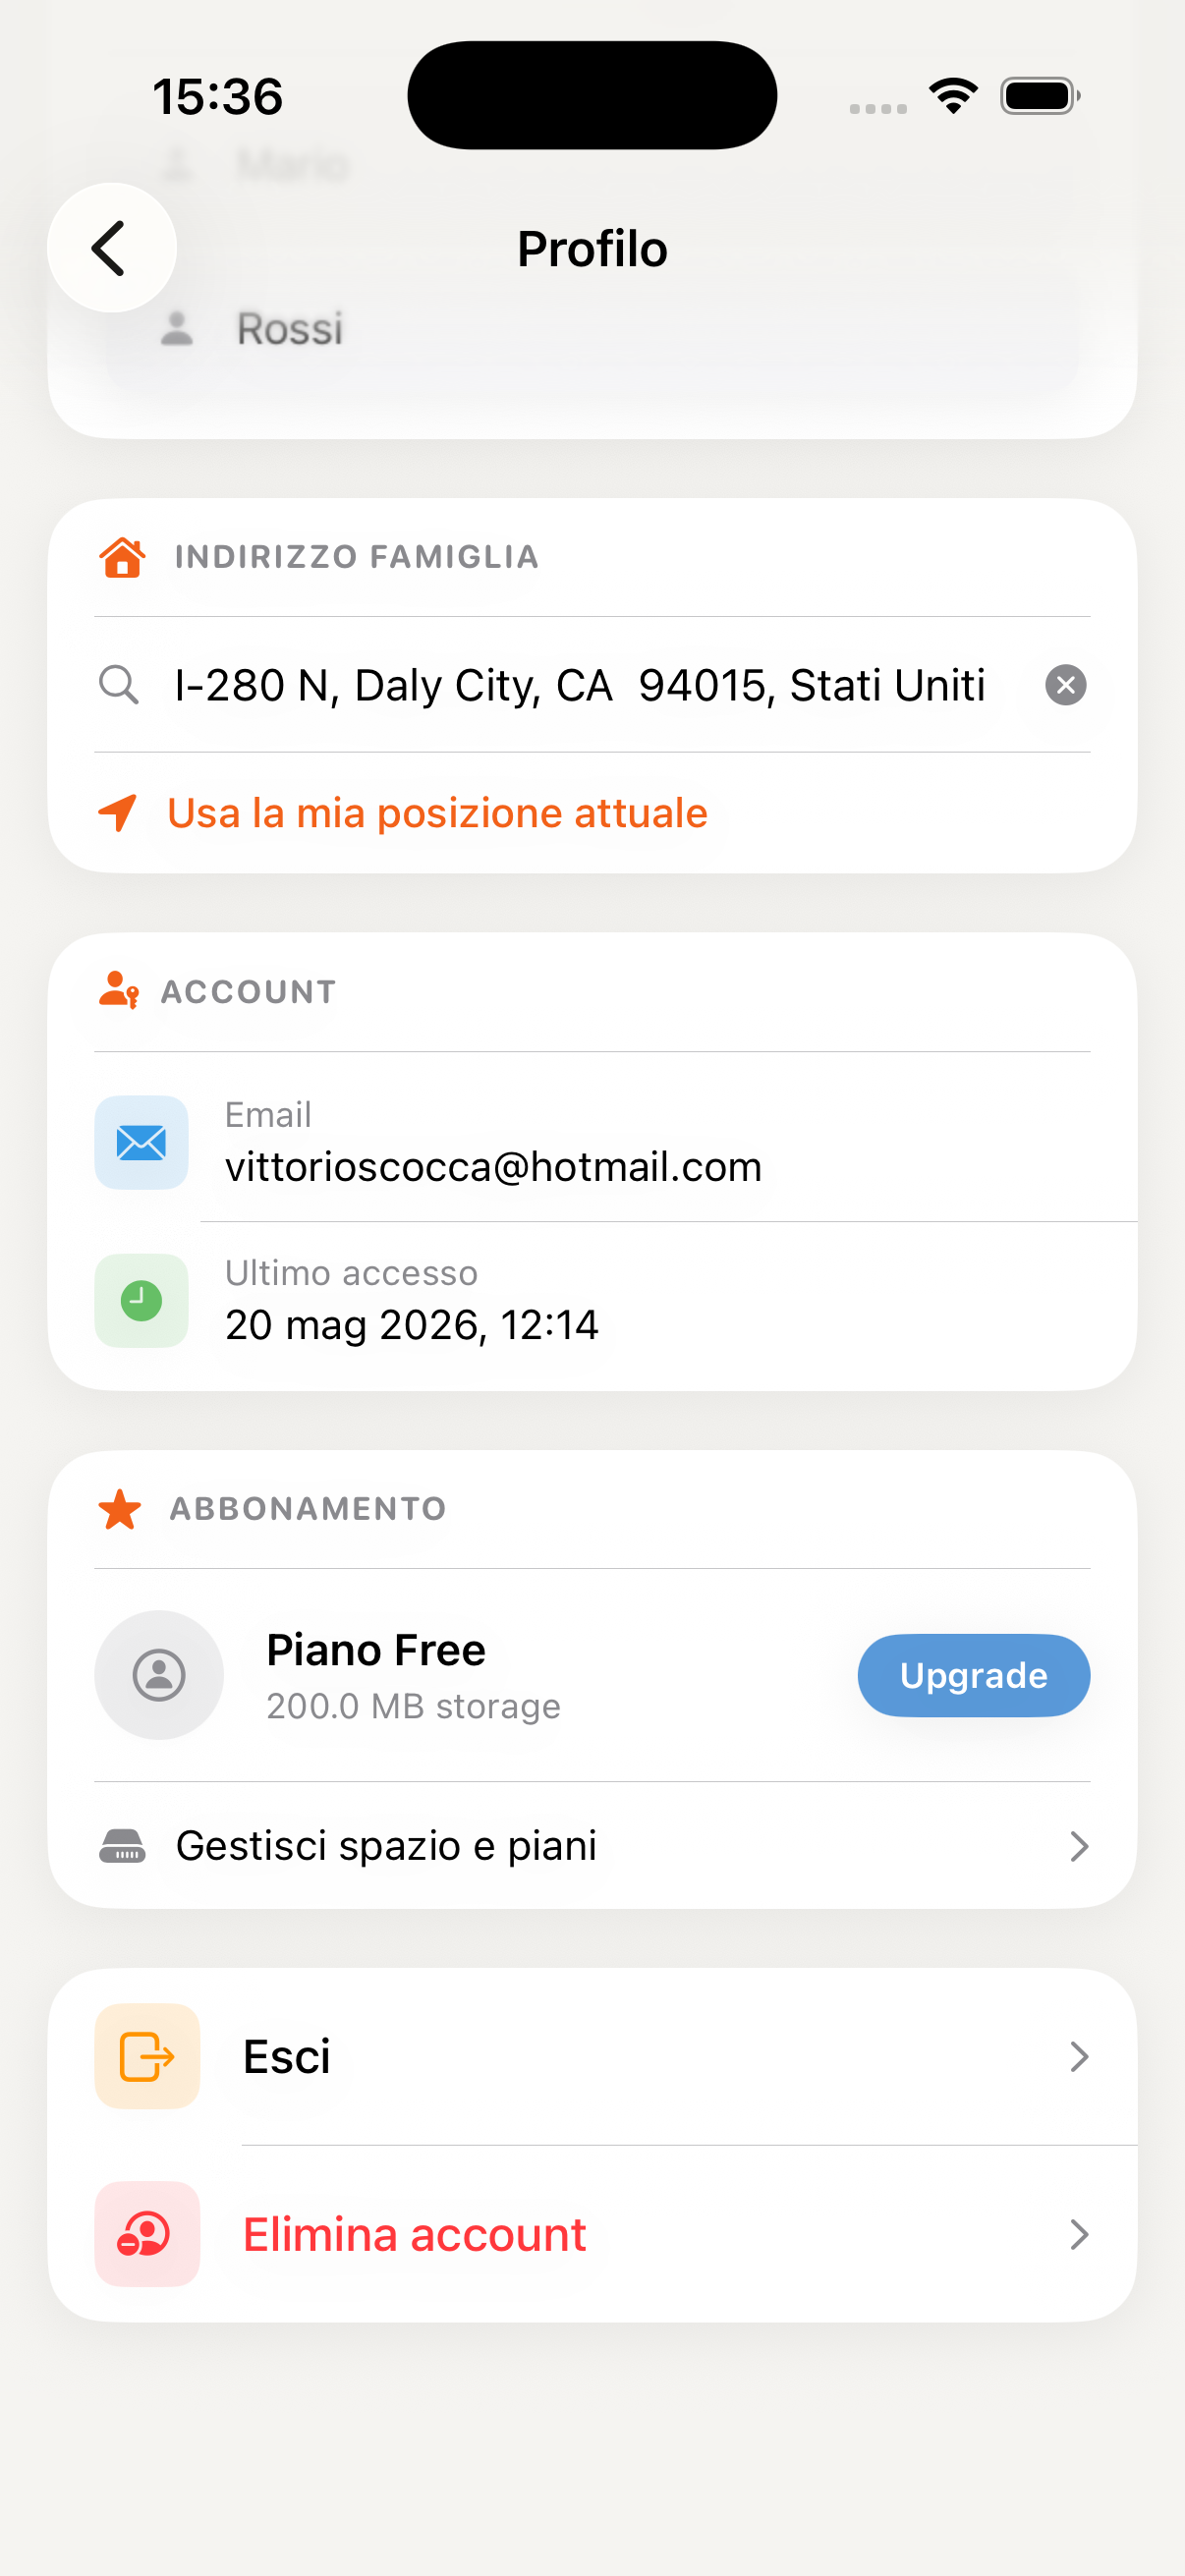
Profile & Settings
Manage your personal profile, family members, notifications, subscription and all app preferences from one place.
Tap the 👤 icon at the bottom right in the navigation bar. You'll find your photo, name and a summary of your active plan (Free, Pro or Max).
In the Family section you can see all members with their roles. From here you can invite new members via link or code, and remove anyone who is no longer part of the household.
Choose which notifications to receive and how often: AI reminders, chat messages, calendar events or health updates. You can customise them for each type of alert.
View your active plan and upgrade to Pro or Max directly from the app. Subscriptions are managed by the App Store — to cancel go to iPhone Settings → Your Name → Subscriptions → KidBox.
Scroll to the bottom of the profile and tap Delete account to remove all your data permanently. The operation is irreversible.
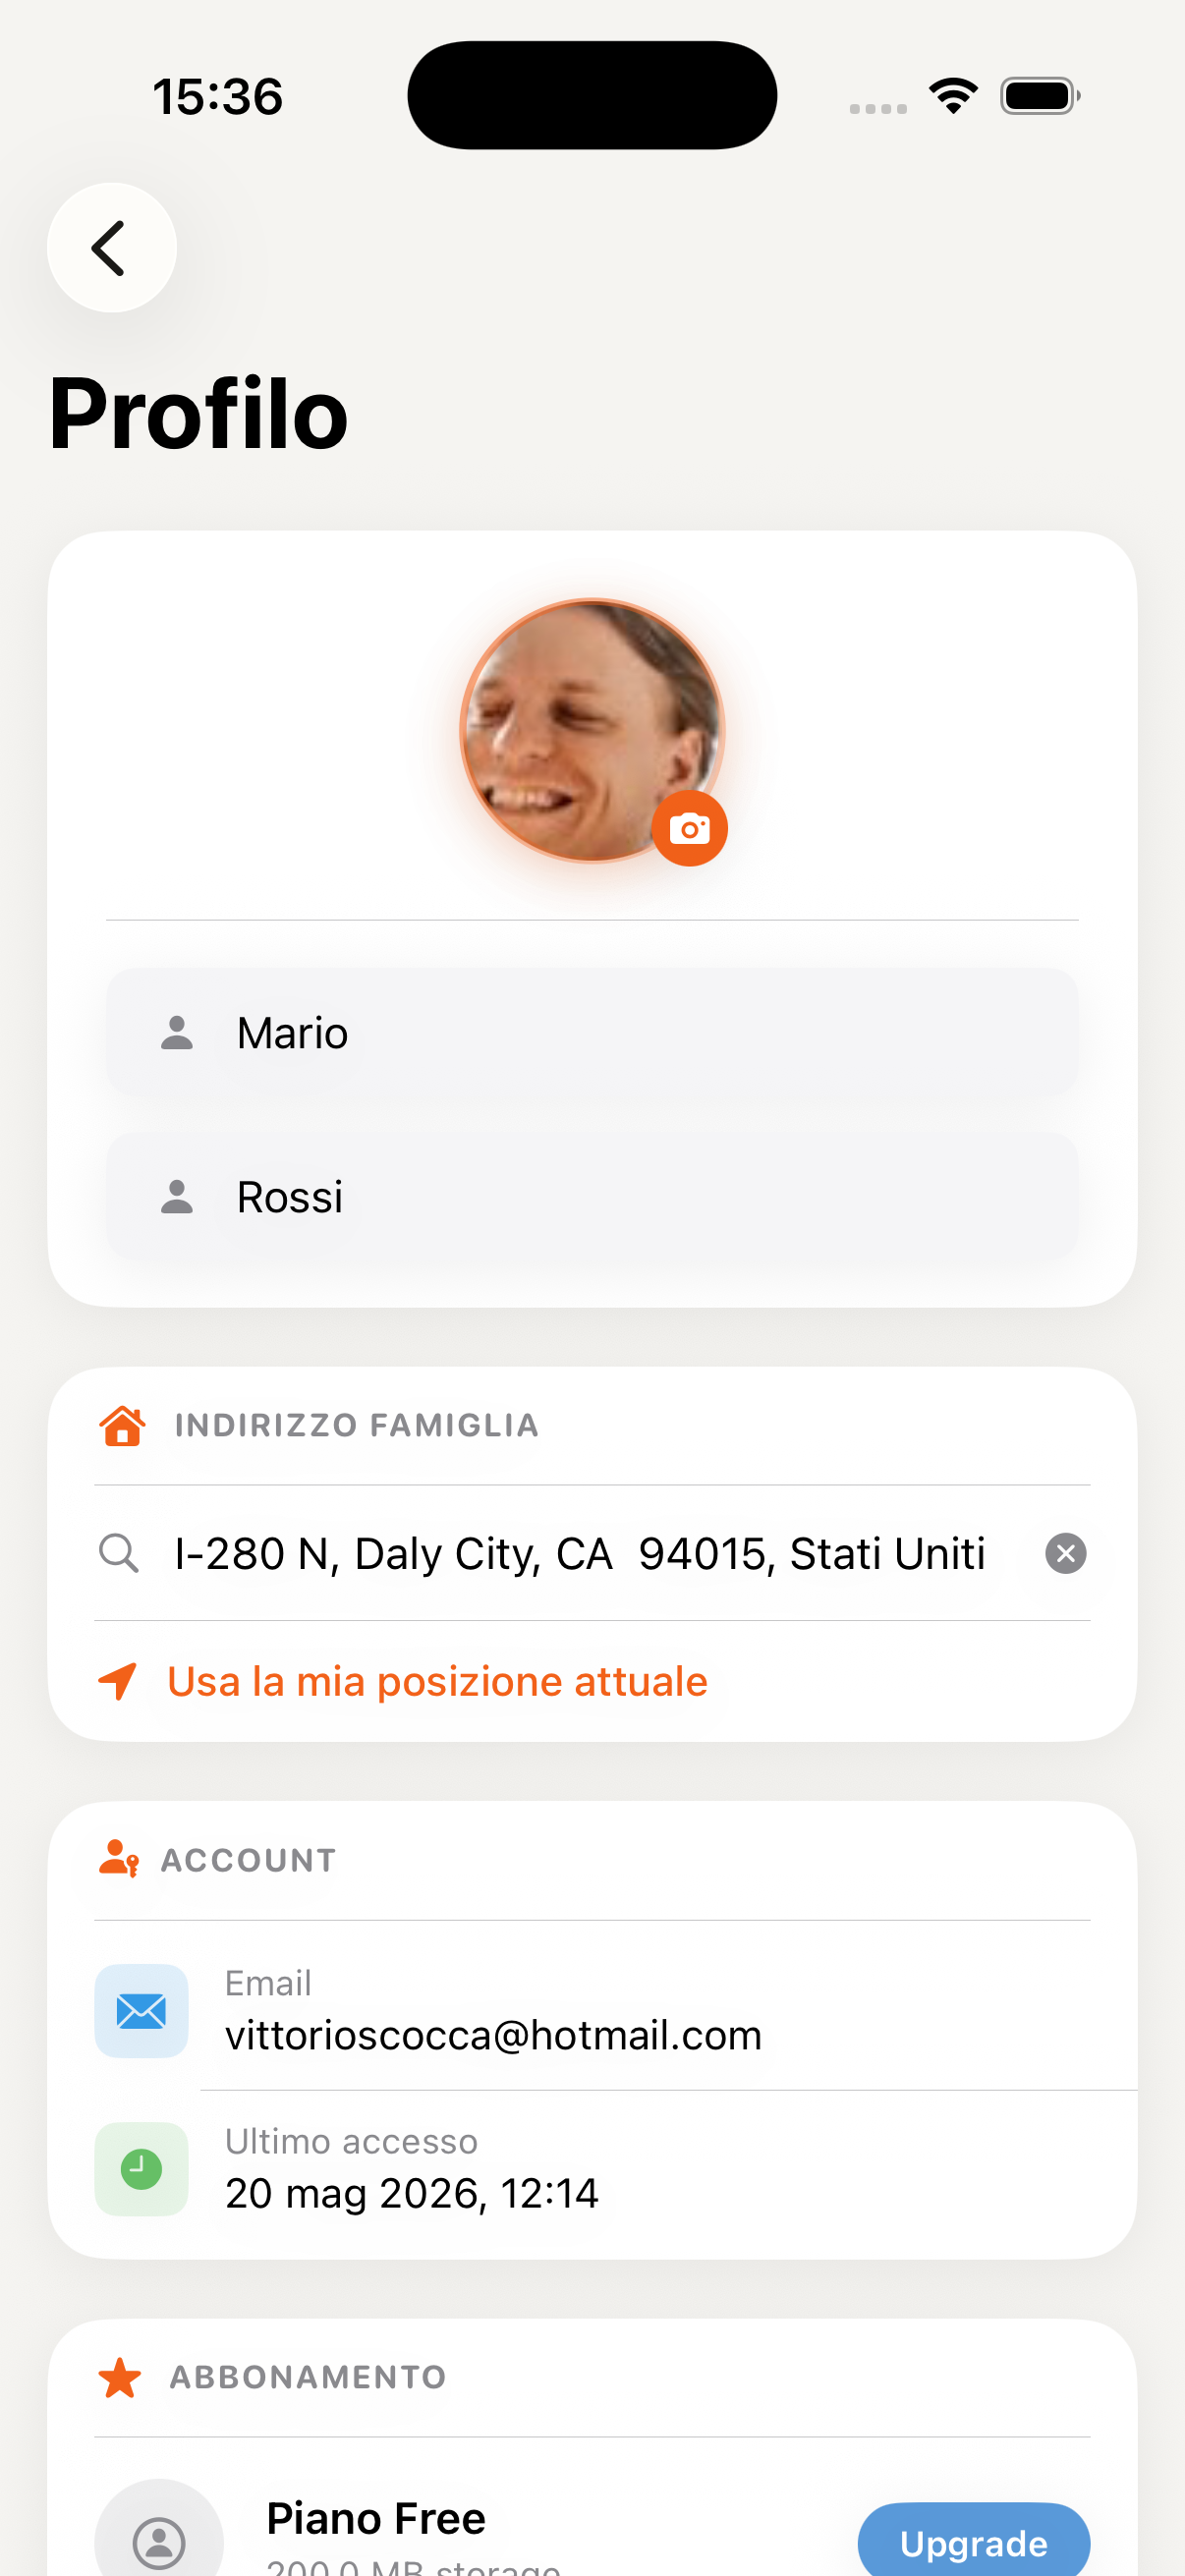
Personal profile screen
Settings and family management